1. Introduction
Thank you for choosing the Pawfly Automatic Fish Feeder. This device is designed to provide precise and timely feeding for your aquarium fish, ensuring they are well-fed even during your absence. Please read this manual carefully before use to ensure proper operation and longevity of your feeder.
2. Product Overview
The Pawfly Automatic Fish Feeder features a detachable food container with 15 compartments, allowing for precise portion control. It supports various dry food types and offers flexible scheduling options. The device is battery-operated with an LCD display for easy monitoring.

Figure 1: Control Panel Overview. This image highlights the various buttons and the LCD display for operating the feeder.

Figure 2: LCD Display Icons. This image illustrates the feeding icon, feeding interval display, and feeding portion icon on the LCD screen.
3. Setup
3.1 Battery Installation
- Open the battery compartment cover.
- Insert 3 AA batteries (not included), ensuring correct polarity.
- Close the battery compartment cover securely.

Figure 3: Battery Installation. This image provides a visual guide for inserting the AA batteries into the feeder.
3.2 Filling the Food Container
- Remove the top cover of the feeder.
- Pull out the food container.
- Fill the container with appropriate dry fish food (powder, pellets, strips). NOTE: Do not use dry shrimp or flakes to avoid clogging. Never add food to the outlet compartment.
- Cap and restore the container to the feeder.

Figure 4: Filling the Food Container. This image demonstrates the types of food suitable for the feeder and highlights the outlet compartment.
3.3 Installation Methods
The feeder offers two installation options:
- Tank Wall Mounting: Use the adjustable support and fixation clamp to mount the feeder securely on the tank wall.
- Tank Lid Fixing: Use the provided suction cups to fix the feeder directly onto the tank lid.

Figure 5: Installation Methods. This image illustrates both the tank wall mounting and tank lid fixing options.
4. Operating Instructions
4.1 Clock Time Calibration
- Press the 'Clock' button, then the 'Setting' button.
- Use '+' or '-' to adjust the hour.
- Press the 'Timing' button to adjust the minute.
- Press the 'Manual Feeding/Saving' button to save settings.

Figure 6: Clock Time Calibration. This image provides a visual guide for setting the current time on the feeder.
4.2 Auto-Feeding Hour Setting
- Press the 'Timing' button, then the 'Setting' button.
- Use '+' or '-' to set the desired feeding hour.
- Press 'Setting' and 'Timing' to set the next feeding hour (up to 12 times daily).
- Press the 'Manual Feeding/Saving' button to save settings.
Figure 7: Auto-Feeding Hour Setting. This image guides you through programming the automatic feeding times.
4.3 Feeding Portion Setting
- Press the 'Feeding Portion' button, then the 'Setting' button.
- Use '+' or '-' to adjust the portion size (up to 9 portions each time).
- Press 'Setting' and 'Feeding Portion' to adjust the next portion.
- Press the 'Manual Feeding/Saving' button to save settings.
4.4 Feeding Interval Setting
The feeder can be set to dispense food every day or at intervals up to 7 days. Refer to the display icons (Figure 2) for setting the feeding interval.
4.5 Manual Feeding
To dispense food manually at any time, simply press the 'Manual Feeding/Saving' button.
5. Maintenance
5.1 Cleaning the Food Container
The food container is detachable for easy cleaning. Regularly rinse it with clean water to prevent food buildup and ensure smooth operation. Ensure the container is completely dry before refilling with food.

Figure 8: Detachable Food Container. This image shows the feeder's components, emphasizing the detachable food container for cleaning.
6. Troubleshooting
- Feeder not dispensing food: Check battery level on the LCD. Ensure the food container is correctly installed and not clogged. Verify that the food type is suitable (avoid flakes/dry shrimp).
- Food dumping all at once: This can occur if the food type is too fine or if the portion setting is too high for the food consistency. Adjust portion size or use larger granules. Ensure the food outlet is not obstructed.
- Difficulty with programming: Refer to sections 4.1-4.4 for detailed step-by-step instructions. If issues persist, reset the device by removing and reinserting batteries, then re-program.
- Inconsistent feeding: Ensure the feeder is securely mounted and stable. Check for any obstructions in the food dispensing mechanism.
- Short battery life: The feeder is designed for 2-3 months of use with 3 AA batteries. If battery life is significantly shorter, ensure quality batteries are used and check for any unusual motor sounds indicating a potential issue.
7. Specifications
- Product Dimensions: 13.3 x 6.7 x 15.3 cm; 322 g
- Material: Plastic
- Capacity: 108 ml
- Operation Mode: Automatic
- Power Source: 3 AA Batteries (Not Included)
- Model Number: Pawfly-2865
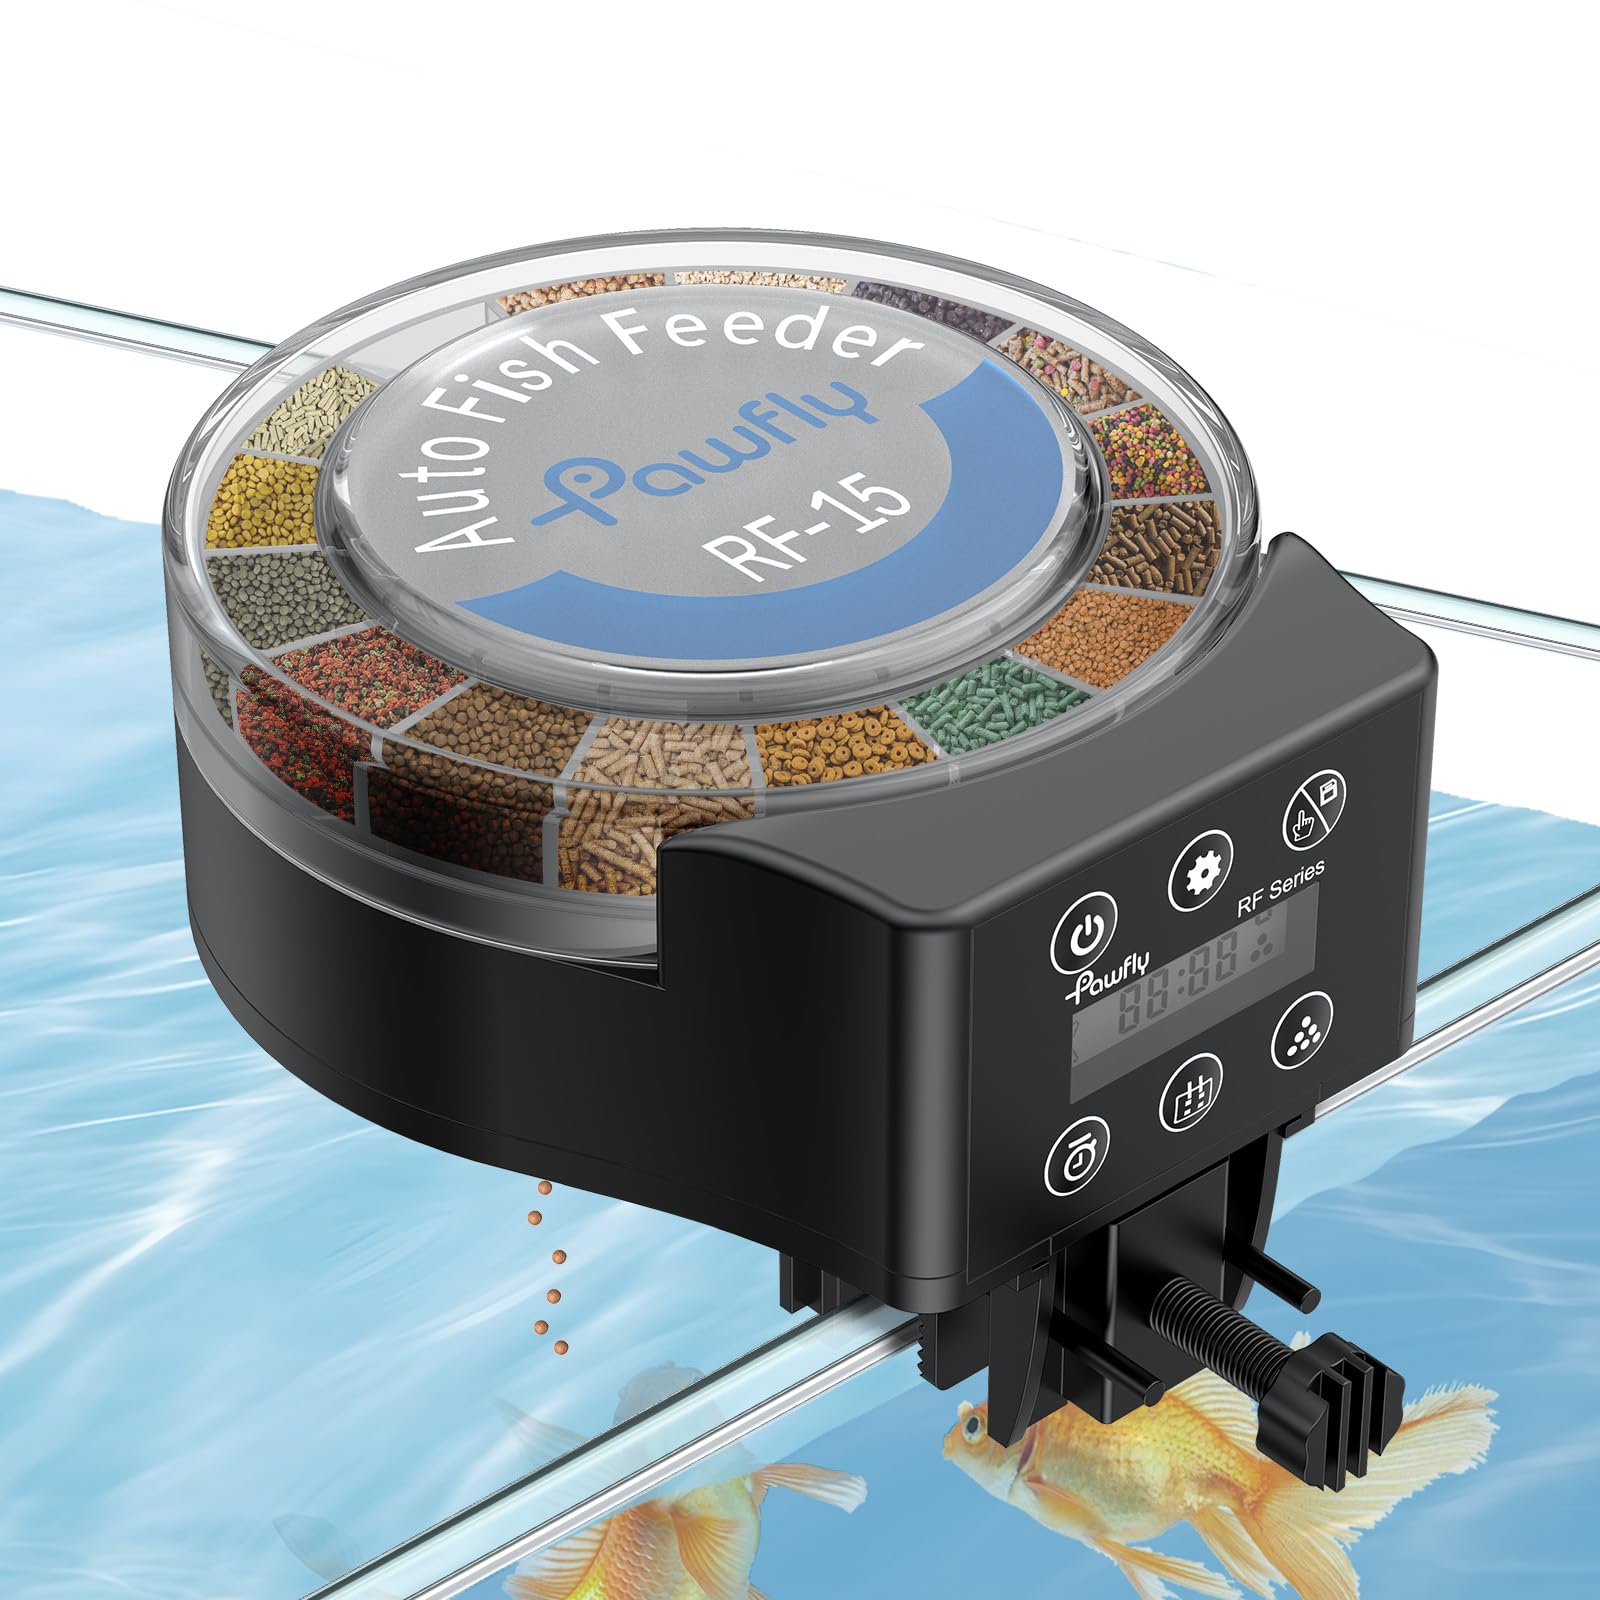
Figure 9: Product Dimensions. This image provides a visual representation of the feeder's size and capacity.
8. Official Product Videos
Pawfly Automatic Fish Feeder for Aquarium
This video provides a comprehensive overview of the Pawfly Automatic Fish Feeder, demonstrating its features, installation, and basic operation.
Pawfly Aquarium Auto Vacation Timer Fish Feeder
This video showcases the automatic vacation timer functionality of the Pawfly Fish Feeder, highlighting its convenience for extended absences.
9. Warranty & Support
The Pawfly Automatic Fish Feeder comes with a 1 Year Warranty. For technical support, troubleshooting assistance, or warranty claims, please contact Pawfly customer service through the retailer's platform or the official Pawfly website.


