1. Introduction
Thank you for choosing the AINAVI 6.9-Inch Single Din Touchscreen Car Stereo. This device integrates advanced features such as wired/wireless CarPlay, Android Auto, GPS navigation, Bluetooth 5.1, and a high-definition touchscreen display to enhance your driving experience. This manual provides essential information for proper installation, operation, and maintenance to ensure optimal performance and longevity of your car stereo.

Image 1.1: AINAVI 6.9-Inch Single Din Touchscreen Car Stereo with included backup camera.
2. What's Included
Please verify that all components listed below are present in your package:
- 1x AINAVI 6.9-Inch Single Din Touchscreen Car Stereo (1280*480 resolution)
- 1x AHD 1080P Rear View Camera
- 1x Microphone
- 1x Frame Removal Tool
- 1x GPS Antenna
- 1x USB 6Pin Cable
- 1x User Manual
- 1x Power Cable
- Reversing Control Cable
- RCA Cable

Image 2.1: Diagram of included components.
3. Specifications
| Feature | Description |
|---|---|
| Model Name | RM |
| Display Size | 6.9 Inches |
| Resolution | 1280x480 |
| Operating System | Android 13 |
| Memory | 2GB RAM + 64GB ROM |
| Connectivity | Bluetooth 5.1, USB (Type-C & Standard), Wi-Fi, Wired, Wireless |
| Special Features | CarPlay, Android Auto, Mirror Link, GPS Navigation, DSP, 48-EQ, Steering Wheel Control, 1080P Video Playback, Split Screen Function |
| Audio Output Mode | Surround Stereo |
| Mounting Type | Dashboard Mount (Single Din) |
| Item Weight | 3.58 pounds |
| Package Dimensions | 13.82 x 9.96 x 5.16 inches |
4. Setup and Installation
Proper installation is crucial for the functionality and safety of your car stereo. If you are unsure about any steps, it is recommended to seek professional assistance.
4.1. General Installation Steps
- Step 1: Separate the Short Sleeve
Carefully separate the metal mounting sleeve from the main radio body. - Step 2: Insert Short Sleeve
Insert the short sleeve into your car's radio mounting window. Ensure it fits securely. - Step 3: Fasten the Sleeve
Using the provided mounting tools, press the iron pieces on the short sleeve to fasten it securely to the car's dashboard. - Step 4: Push Radio Body
Gently push the main radio body into the secured short sleeve until it snaps into place.

Image 4.1: Car stereo installation steps.
4.2. Rear Camera Connection
Connect the AHD 1080P Rear View Camera according to the wiring diagram provided. Ensure the trigger wire is correctly connected to the reversing light power for automatic display when reversing.

Image 4.2: Rear camera connection diagram.
4.3. Installation Effect

Image 4.3: Before and after installation view.
5. Operating Instructions
5.1. CarPlay and Android Auto
This car stereo supports both wired and wireless CarPlay and Android Auto. Connect your smartphone to access navigation, phone contacts, email, notifications, and music through the stereo's display. Utilize voice control via Siri or Google Assistant for hands-free operation.

Image 5.1: CarPlay, Android Auto, and MirrorLink functionality.

Image 5.2: Apple CarPlay and Android Auto compatibility.
5.2. HD Touch Screen and Display
The 6.9-inch HD capacitive touchscreen offers a responsive and clear viewing experience with 1280x480 resolution, 178-degree viewing angles, and support for 1080P video playback.

Image 5.3: Display features and capabilities.
5.3. Bluetooth Functionality
The upgraded Bluetooth 5.1 module allows for hands-free calling and audio streaming. Easily pair your device to make calls and play music wirelessly.

Image 5.4: Bluetooth features for calls and music.
5.4. GPS Navigation
The built-in GPS navigation supports various map types including Europe, North America, South America, and Worldwide. Access popular navigation apps directly from the stereo.
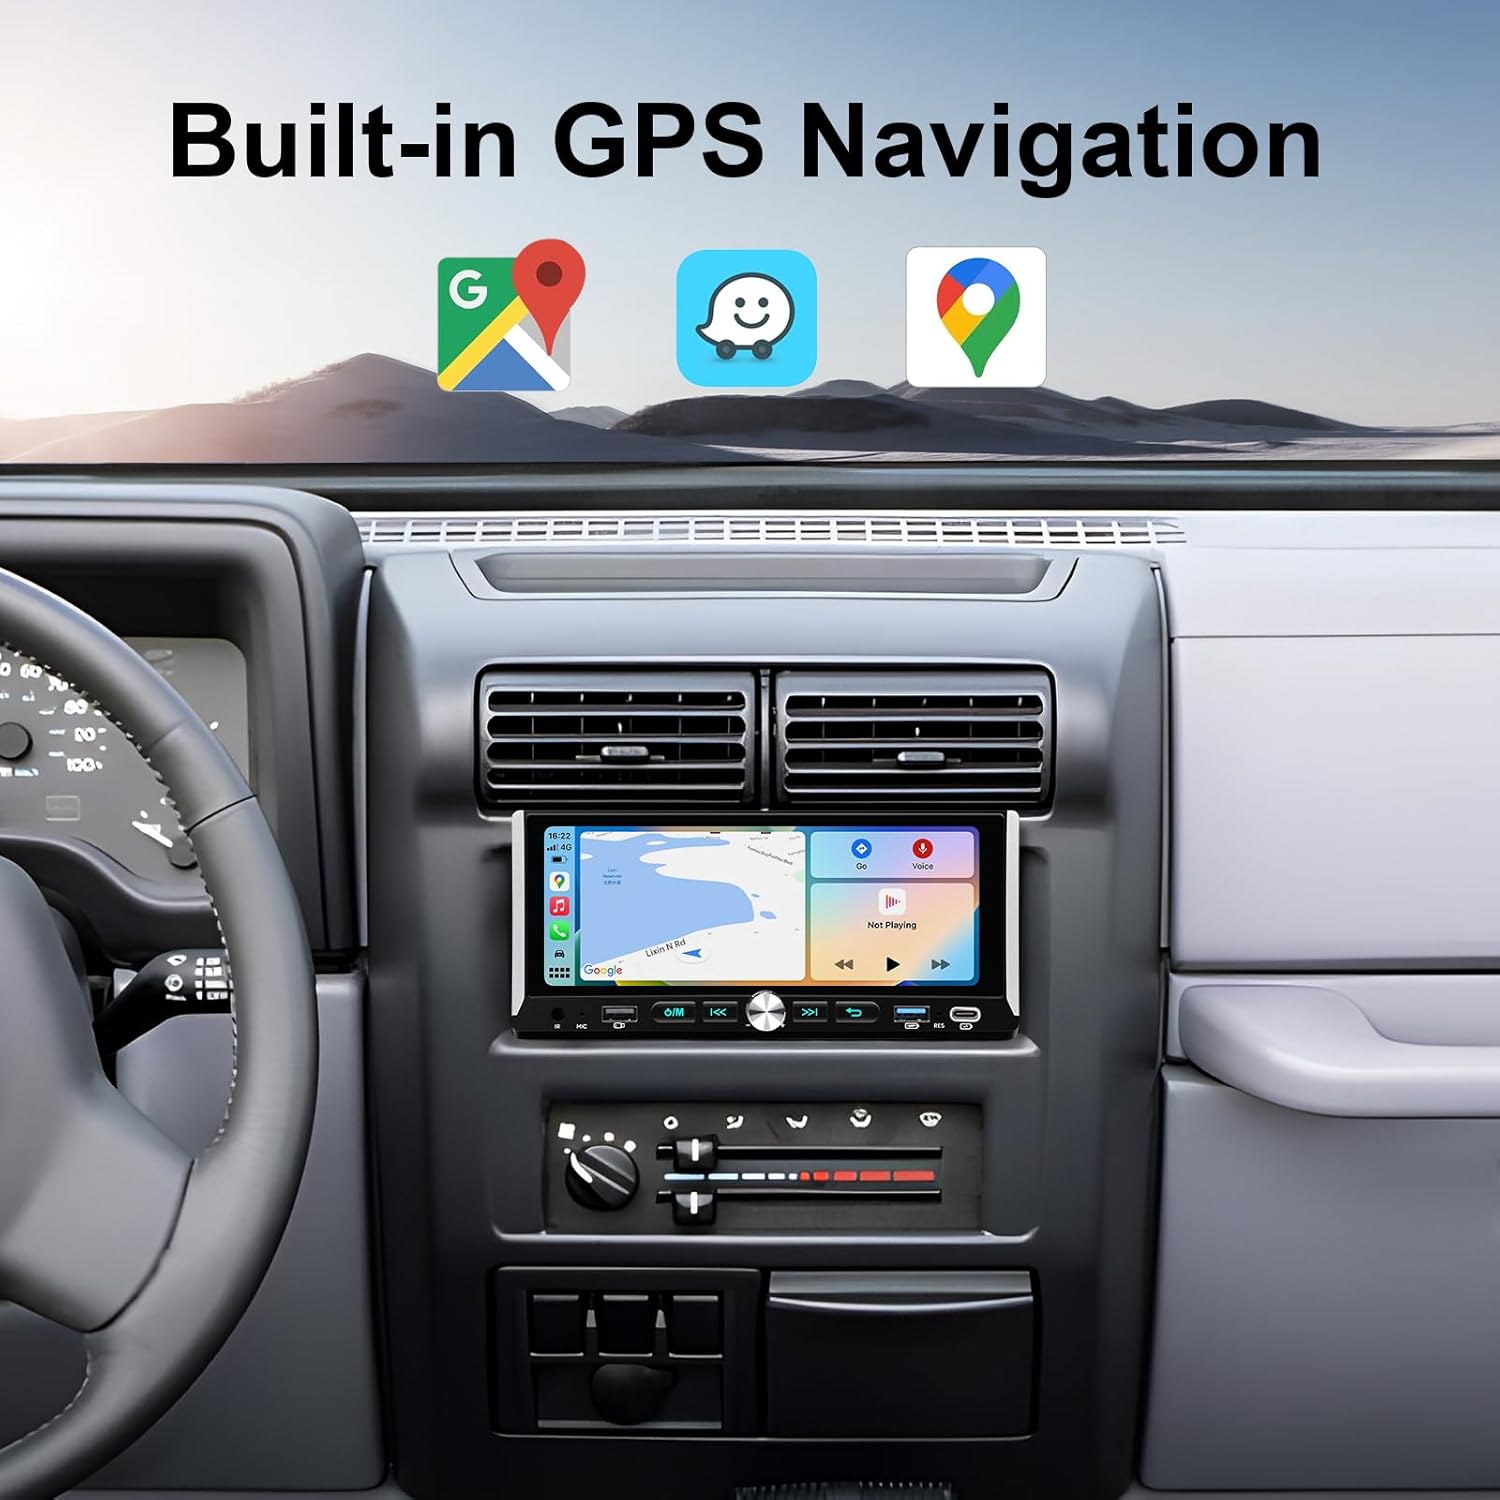
Image 5.5: Built-in GPS navigation.
5.5. USB and Type-C Connectivity
The unit features one Type-C port and two USB ports for data transfer, charging, and media playback. Connect USB drives for music and video files.
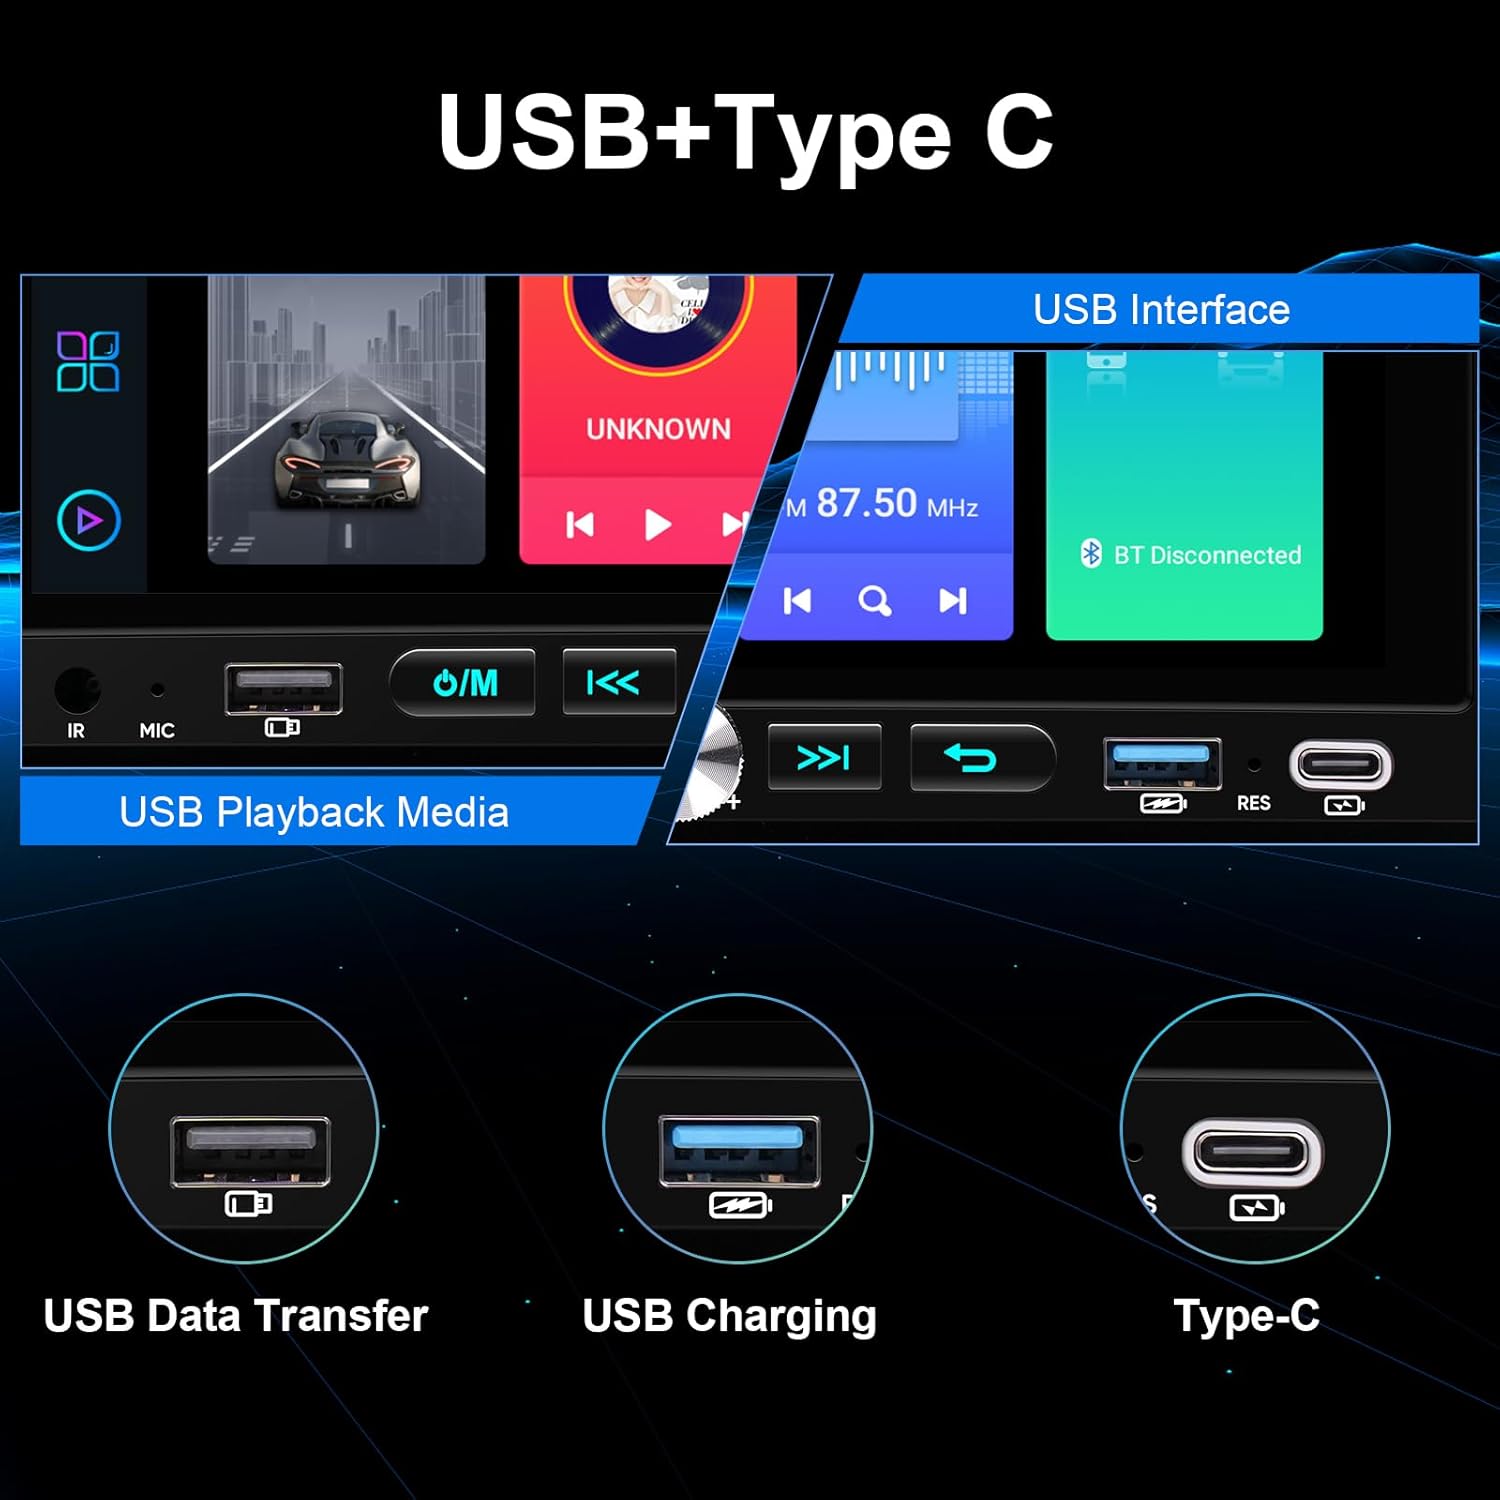
Image 5.6: USB and Type-C ports.
5.6. Audio Features (DSP & EQ)
Benefit from the professional DSP and 48-band equalizer with voice point touch control. Adjust sound settings including Normal, Jazz, Pop, Classical, Heavy Metal, Vocal, and Soft modes, along with 6 surround sound patterns and bass boost, for a customized audio experience.
5.7. Steering Wheel Control (SWC)
The stereo supports existing steering wheel controls, allowing you to manage music playback, volume, and calls without taking your hands off the wheel. The system includes a learning function for custom button assignments.

Image 5.7: Steering Wheel Control interface.
5.8. General Media Playback
Enjoy various media options including music, video, FM radio, and phone calls directly from the unit.
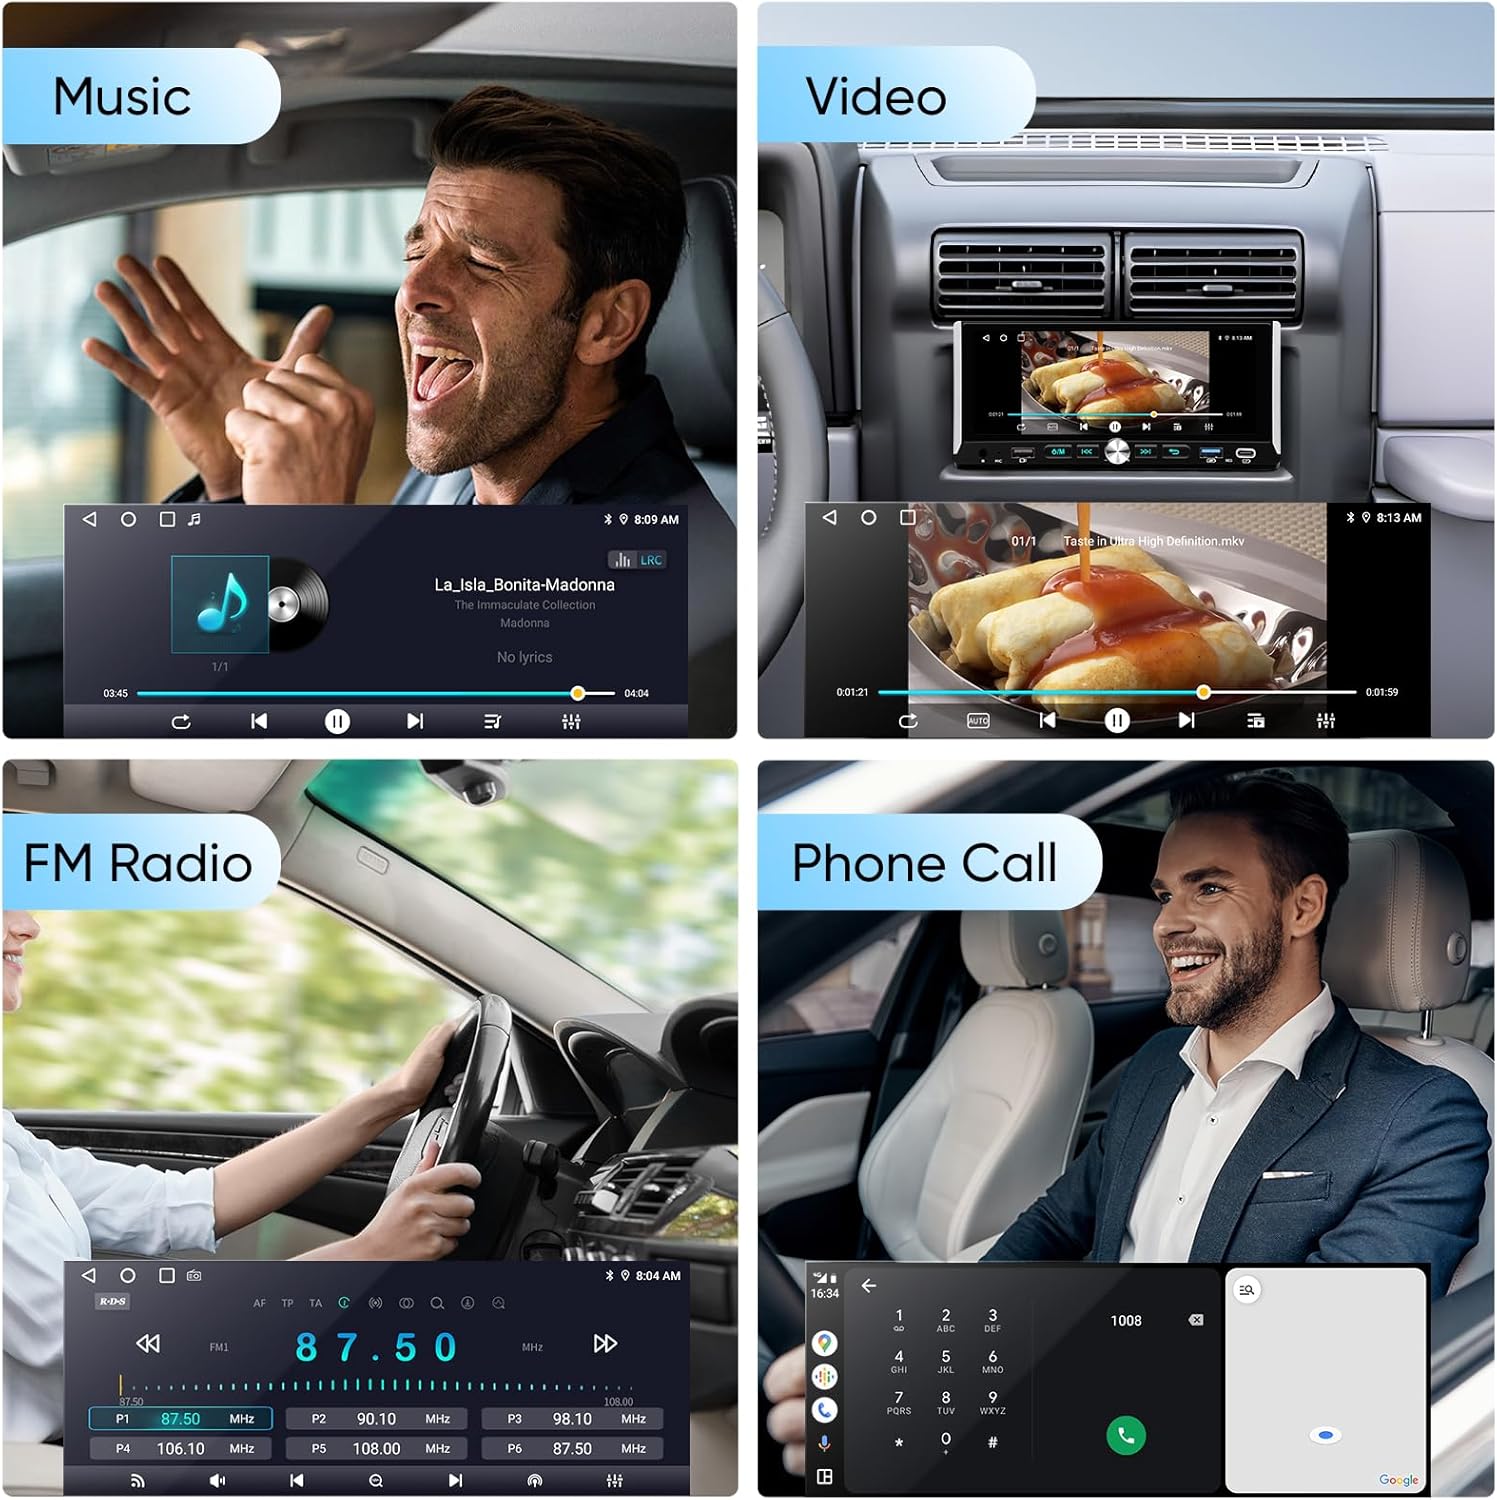
Image 5.8: Music, Video, FM Radio, and Phone Call functions.
6. Maintenance
To ensure the longevity and optimal performance of your AINAVI car stereo, follow these maintenance guidelines:
- Cleaning the Screen: Use a soft, lint-free cloth to gently wipe the touchscreen. For stubborn smudges, slightly dampen the cloth with water or a screen-safe cleaner. Avoid harsh chemicals or abrasive materials.
- Temperature Control: Avoid exposing the unit to extreme temperatures. Prolonged exposure to direct sunlight or very cold conditions can affect performance and lifespan.
- Software Updates: Periodically check for available software updates to ensure you have the latest features and bug fixes. Refer to the manufacturer's website or support section for update instructions.
- Cable Connections: Ensure all cables are securely connected. Loose connections can lead to intermittent issues.
7. Troubleshooting
If you encounter issues with your car stereo, refer to the following common troubleshooting steps:
- No Power:
- Check all power connections to ensure they are secure.
- Verify the car's fuse for the stereo is intact and not blown.
- Ensure the car battery has sufficient charge.
- No Sound:
- Check speaker wire connections.
- Ensure the volume is not muted or set to minimum.
- Verify audio output settings in the stereo menu.
- Touchscreen Unresponsive:
- Restart the unit by turning off the car ignition and restarting.
- Perform a factory reset if the issue persists (refer to the settings menu).
- CarPlay/Android Auto Not Connecting:
- Ensure your phone's operating system is up to date.
- Try a different USB cable (for wired connection).
- Check phone settings for CarPlay/Android Auto permissions.
- Restart both the stereo and your smartphone.
- GPS Signal Issues:
- Ensure the GPS antenna is properly installed and has a clear view of the sky.
- Check GPS settings in the stereo menu.
If these steps do not resolve the issue, please contact customer support.
8. Warranty
The AINAVI 6.9-Inch Single Din Touchscreen Car Stereo comes with a 12 Months Manufacturer Guarantee from the date of purchase. This warranty covers defects in materials and workmanship under normal use. Please retain your proof of purchase for warranty claims. The warranty does not cover damage caused by improper installation, misuse, accidents, or unauthorized modifications.
9. Support
For technical assistance, installation support, or any other inquiries, please contact our customer service team:
- Phone: +1 (833) 858-5016
- Email: info@ainavi.com
- Working Hours: 01:00 PM to 00:00 AM PST
Our professional technical support team is available to assist you with pre-sale and after-sale services.

Image 9.1: Customer Installation Support access.

Image 9.2: Superior Customer Care information.

Image 9.3: Customer service contact details.


