
1. Introduction and Safety Information
Welcome to the Olakids Kids Bike instruction manual. This guide provides essential information for the safe assembly, operation, and maintenance of your new Olakids Kids Bike. Please read all instructions carefully before use to ensure the safety of the rider and the longevity of the product.
Important Safety Guidelines:
- Always ensure the rider wears a helmet that meets safety standards.
- Supervise young riders at all times.
- Regularly check all bolts, nuts, and quick-release mechanisms to ensure they are securely fastened.
- Ensure brakes are functioning correctly before each ride.
- Do not ride in traffic or on uneven terrain without proper supervision and training.
- The bike is designed for children within the specified age and weight ranges. Refer to the specifications section for details.
- This product complies with US. CPSIA and ASTM Requirements, made from safe materials free from BPA, PVC, Phthalates, Lead, Latex, and Formaldehyde.
2. Assembly Instructions
Your Olakids Kids Bike is approximately 85% pre-assembled to facilitate quick and easy setup. The following steps will guide you through the final assembly process. Required tools are included in the box.

Image: All components of the Olakids Kids Bike laid out for assembly.
Assembly Steps:
- Install the Front Wheel: Carefully attach the front wheel to the fork, ensuring the axle nuts are securely tightened. The brake pads should align correctly with the wheel rim.
- Adjust Front Brake: Use the provided wrench to adjust the front caliper brake, ensuring both pads make even contact with the rim when the brake lever is squeezed.
- Attach Training Wheels: If desired, attach the training wheels to the rear axle. Ensure they are securely fastened and provide stable support.
- Install Doll Seat: Assemble the doll seat by attaching its metal support bracket. Securely fasten the doll seat to the rear of the bicycle frame, ensuring it is stable for carrying toys.
- Install Pedals: Note that pedals are marked 'L' for left and 'R' for right. The left pedal assembly rotates to the left, and the right pedal assembly rotates to the right. Ensure they are threaded correctly and tightened firmly.
- Install Handlebars: Insert the handlebar stem into the head tube of the bike frame. Adjust the height and angle for comfortable riding, then tighten the handlebar clamp securely.
- Attach Streamers and Basket: Insert the colorful streamers into the ends of the handlebars. Attach the front basket to the handlebars using the provided clips, ensuring it is stable.
- Install Reflectors: Attach the front reflector to the handlebars and the rear reflector to the seat post or rear fender for increased visibility.
Video: Detailed guide on how to install the Olakids Kids Bike, including the doll seat.

Image: Visual guide to the main assembly steps.
3. Operating Instructions
Braking System:
The Olakids Kids Bike is equipped with a dual braking system for enhanced safety:
- Hand Brake: Located on the handlebars, this brake controls the front wheel. Squeeze the lever gently to slow down or stop.
- Coaster Brake: This is a rear brake activated by pedaling backward. Push the pedals backward to engage the coaster brake and stop the bike.
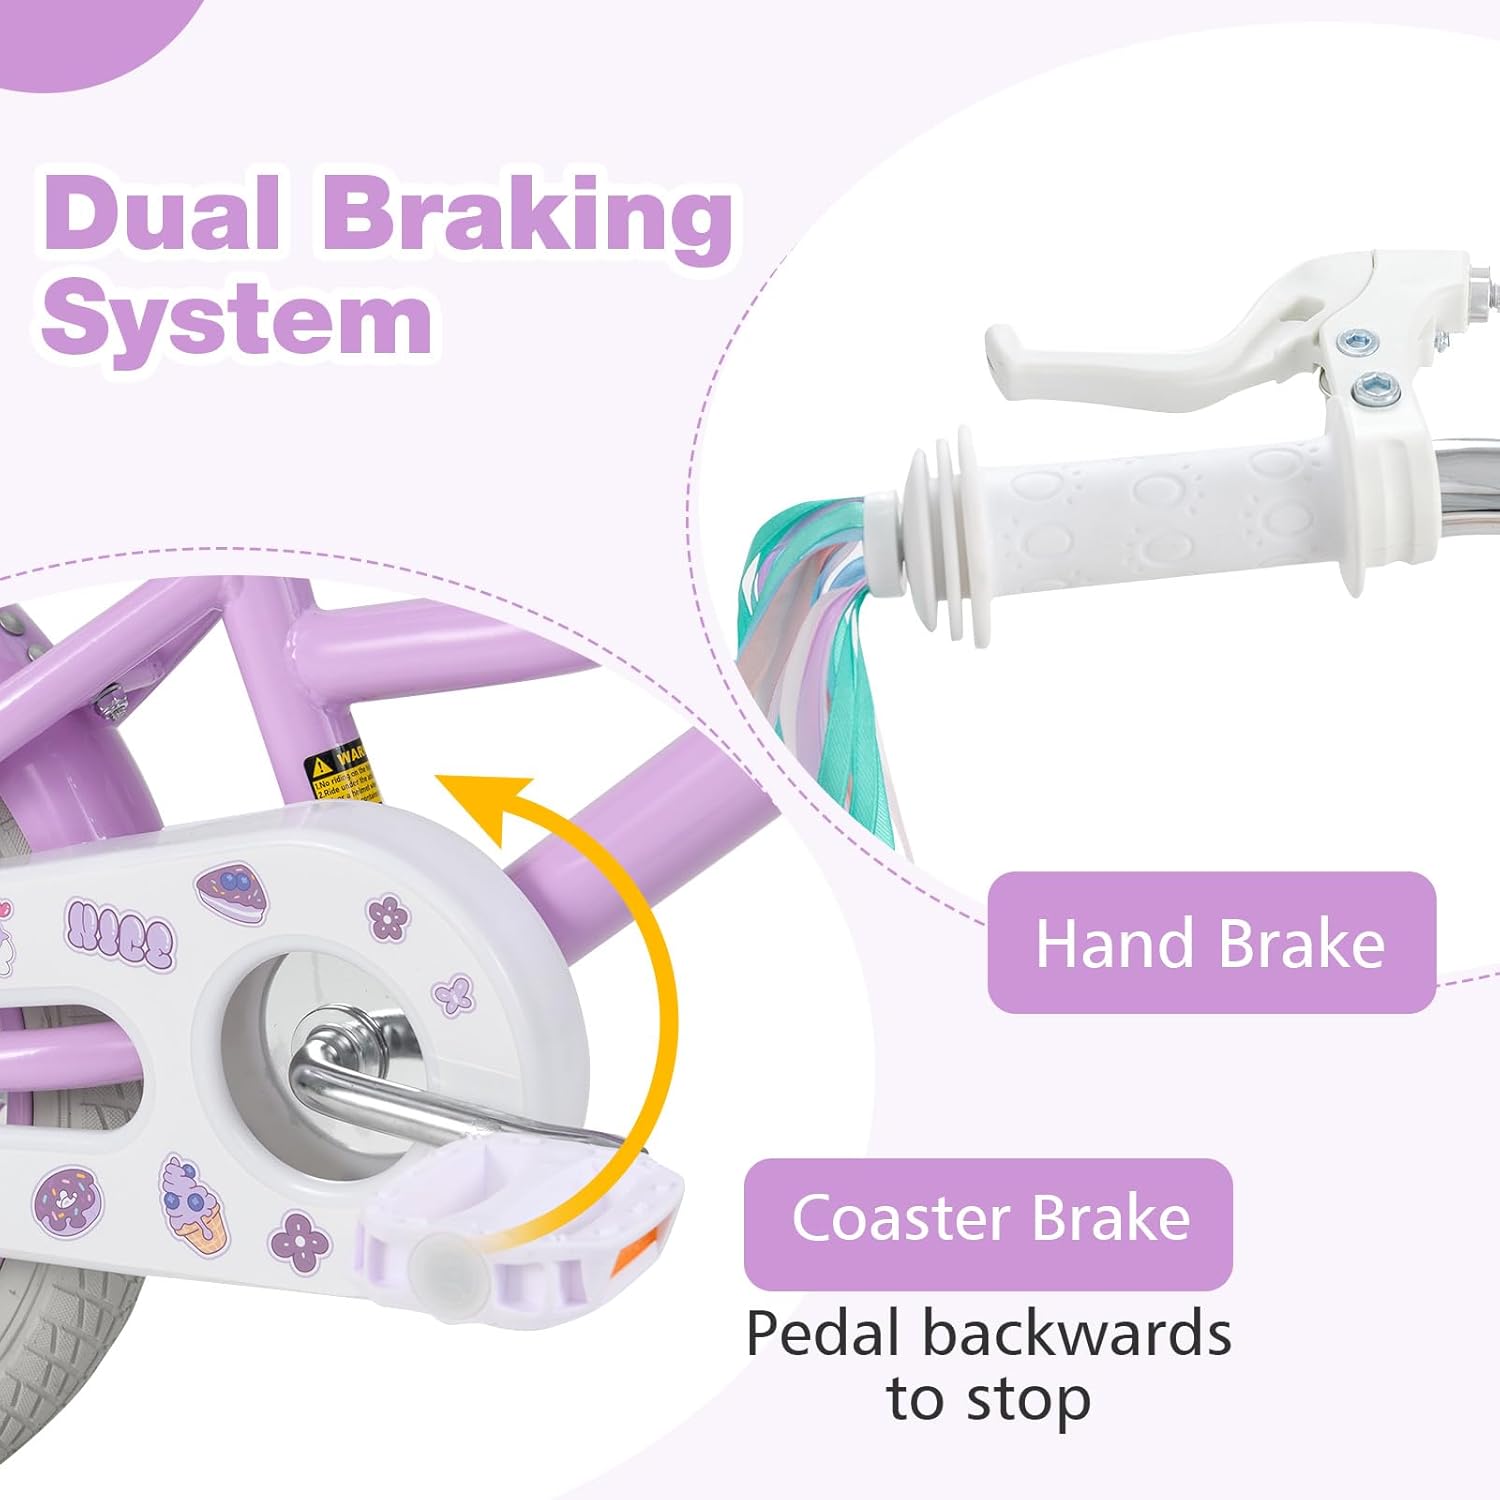
Image: Dual Braking System (Hand Brake and Coaster Brake).
Adjusting Seat and Handlebar:
The seat and handlebar heights are adjustable to accommodate your child's growth and ensure a comfortable riding position.
- Seat Adjustment: Use the quick-release lever on the seat post to adjust the seat height. Ensure the child's feet can touch the ground comfortably when seated. Tighten the quick-release securely after adjustment.
- Handlebar Adjustment: Loosen the bolt on the handlebar stem to adjust the handlebar height. Ensure the handlebars are at a comfortable height for the child to maintain control. Tighten the bolt securely after adjustment.

Image: Adjustable Handlebar and Seat for growing riders.
Using Training Wheels:
The detachable training wheels provide stability for beginning riders. Once your child gains confidence and balance, the training wheels can be easily removed.
4. Maintenance
Regular maintenance ensures the safety and extends the lifespan of your Olakids Kids Bike.
Routine Checks:
- Tires: Check tire pressure regularly. Ensure tires are inflated to the recommended PSI (usually found on the tire sidewall). Inspect for wear, punctures, or damage.
- Brakes: Test both hand and coaster brakes before each ride. Ensure brake levers are easy to squeeze and brake pads make firm contact with the wheel rim. Adjust as needed.
- Chain: Keep the chain clean and lubricated. The bike features a fully enclosed chain guard to prevent dirt and protect the rider.
- Bolts and Nuts: Periodically check all bolts, nuts, and fasteners for tightness. Loose components can affect safety and performance.
- Frame and Fork: Inspect the frame and fork for any signs of damage, cracks, or bends.

Image: Fully enclosed chain guard for safety.
Cleaning and Lubrication:
- Clean the bike with a damp cloth and mild soap. Avoid harsh chemicals.
- Lubricate the chain periodically with bicycle-specific chain lubricant to ensure smooth operation and prevent rust.
5. Troubleshooting
This section addresses common issues you might encounter with your Olakids Kids Bike.
| Problem | Possible Cause | Solution |
|---|---|---|
| Brakes are not effective. | Loose brake cable, worn brake pads, misaligned pads. | Tighten brake cable, replace worn pads, adjust pad alignment. |
| Pedals are stiff or noisy. | Lack of lubrication, dirt in the pedal mechanism. | Lubricate pedal bearings, clean the pedal area. |
| Training wheels are wobbly. | Loose attachment bolts. | Ensure training wheel bolts are securely tightened to the rear axle. |
| Handlebars or seat slip. | Loose quick-release or clamp bolt. | Tighten the quick-release lever or clamp bolt firmly. |
6. Specifications
| Feature | Detail |
|---|---|
| Bike Type | Kids Bike |
| Age Range (Description) | Toddler |
| Brand | Olakids |
| Number of Speeds | 1 |
| Color | Lilac (Note: Other colors available) |
| Wheel Size | 12, 14, 16, 18 Inches (This model is 12 Inch) |
| Frame Material | Carbon Steel |
| Suspension Type | Dual |
| Special Feature | Adjustable Handlebars |
| Included Components | 1 x Kids Bike, 1 x User Guide, 1 x Wrench |
| Brake Style | Caliper (Handbrake and Coaster Brake) |
| Maximum Weight Recommendation | 143 Pounds |
| Assembly Required | Yes (85% pre-assembled) |
| Model Name | Kids Bike |
| Part Number | ts10240 |

Image: Kids' Bike Size Guide for various wheel sizes.
7. Warranty and Support
Warranty Information:
The Olakids Kids Bike comes with a 6-month warranty from the date of purchase. This warranty covers manufacturing defects and material flaws under normal use. Please retain your proof of purchase for warranty claims.
Customer Support:
For any questions, concerns, or assistance with your Olakids Kids Bike, please contact Olakids customer support. Refer to the contact information provided with your purchase or visit the official Olakids website for support details.