Introduction
Thank you for choosing the SINORISE Mini Walkie Talkie SR-606. This manual provides essential information for the safe and effective operation of your device. Please read it thoroughly before use and retain it for future reference.
Safety Information
- Do not operate the device in explosive atmospheres (e.g., flammable gases, dust particles, metallic powders).
- Do not disassemble or modify the device. Repairs should only be performed by authorized personnel.
- Keep the device away from water and moisture to prevent damage.
- Use only the provided or approved charging accessories.
- Avoid prolonged exposure to direct sunlight or extreme temperatures.
Package Contents
Verify that all items are present in your package:
- Mini Walkie Talkies (3 units)
- USB Charging Cable
- G-Shape Ear Hook Earpieces (3 units)
- Power Adapter
- User Manual (this document)
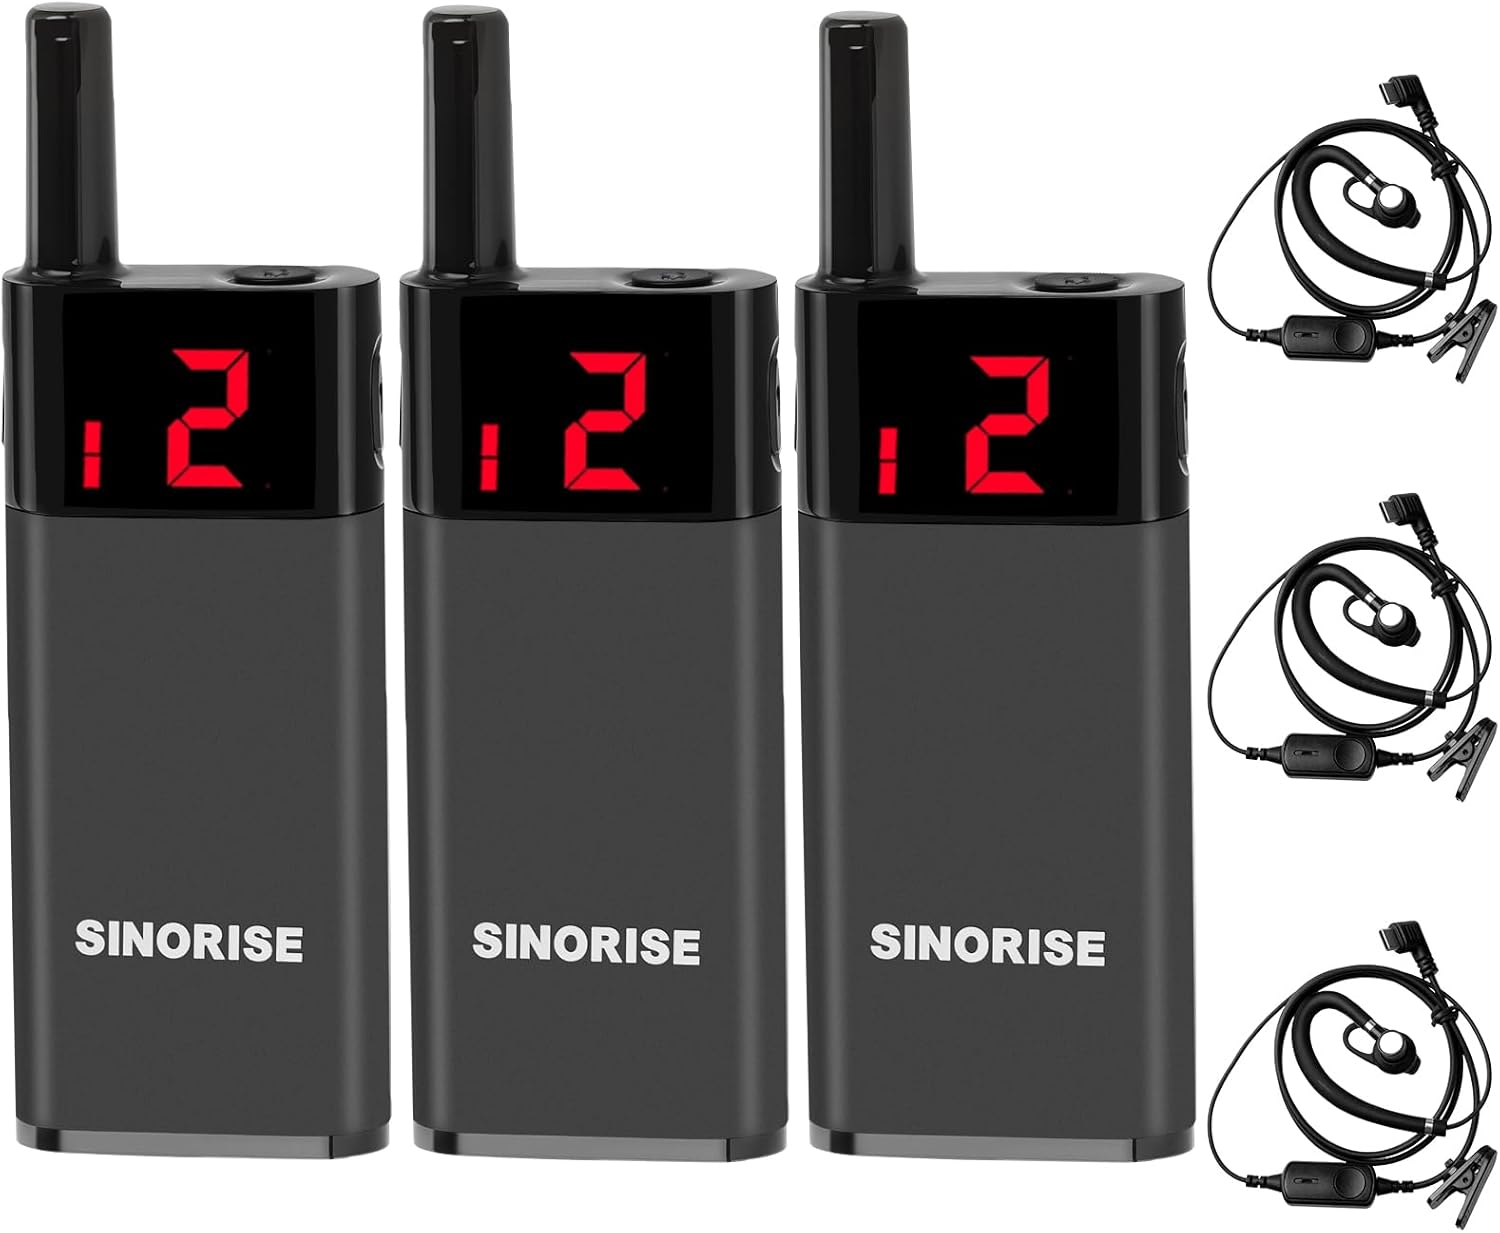
Image: Contents of the SINORISE Mini Walkie Talkie 3-pack, including the radios and earpieces.
Product Overview
Familiarize yourself with the components of your SINORISE Mini Walkie Talkie:

Image: Detailed diagram showing the various parts of the SINORISE Mini Walkie Talkie.
- Antenna: Transmits and receives radio signals.
- Power/Menu Key: Used to power the device on/off and access menu settings.
- Display Screen: Shows current channel, sub-tone code, volume level, and power status.
- Upturn Key: Adjusts channel, sub-tone code, and volume upwards. Press and hold for 3 seconds to lock/unlock keys.
- Flip-down Key: Adjusts channel, sub-tone code, and volume downwards. Press and hold for 3 seconds to lock/unlock keys.
- Headphone/Charging Port: Connects the earpiece and the USB charging cable.

Image: A user demonstrating the comfortable fit of the G-shape ear hook earpiece.
Setup
1. Charging the Battery
- Connect the USB charging cable to the Headphone/Charging Port (6) on the walkie talkie.
- Plug the other end of the USB cable into the provided power adapter, then into a standard wall outlet.
- The display screen will indicate charging status. A full charge typically takes approximately 2-3 hours.
- Ensure the device is fully charged before first use for optimal battery life.
2. Attaching the Earpiece
- Insert the earpiece jack firmly into the Headphone/Charging Port (6).
- Adjust the G-shape ear hook for a comfortable and secure fit over your ear.
3. Powering On/Off
- To power on, press and hold the Power/Menu Key (2) until the display screen illuminates.
- To power off, press and hold the Power/Menu Key (2) until the display screen turns off.
Operating Instructions
1. Channel Selection
- After powering on, the display screen (3) will show the current channel.
- Press the Upturn Key (4) or Flip-down Key (5) to cycle through available channels (1-22).
- Ensure all walkie talkies intended for communication are set to the same channel.
2. Volume Adjustment
- While in standby mode, press the Power/Menu Key (2) briefly to enter volume adjustment mode.
- Use the Upturn Key (4) or Flip-down Key (5) to increase or decrease the volume level.
- Press the Power/Menu Key (2) again to exit volume adjustment mode.
3. Transmitting and Receiving
- To transmit, press and hold the Push-to-Talk (PTT) button (typically located on the side of the device or earpiece). Speak clearly into the microphone.
- Release the PTT button to stop transmitting and return to receiving mode.
- When another walkie talkie on the same channel transmits, you will hear their communication through the earpiece.
4. Smart Noise Cancellation
- The device features built-in smart noise cancellation to filter out background noise for clearer communication. This feature operates automatically.
5. Key Lock/Unlock
- To lock the keys, press and hold either the Upturn Key (4) or Flip-down Key (5) for approximately 3 seconds. A lock icon may appear on the display.
- To unlock the keys, repeat the process by pressing and holding either the Upturn Key (4) or Flip-down Key (5) for approximately 3 seconds.
Maintenance
- Cleaning: Use a soft, damp cloth to clean the exterior of the walkie talkie. Do not use harsh chemicals or abrasive cleaners.
- Battery Care: To prolong battery life, avoid fully discharging the battery frequently. Recharge the device regularly, even if not in use for extended periods.
- Storage: Store the walkie talkie in a cool, dry place away from direct sunlight and extreme temperatures when not in use.
- Earpiece: Clean the earpiece regularly with a soft, dry cloth. Avoid getting moisture into the speaker or microphone.
Troubleshooting
| Problem | Possible Cause | Solution |
|---|---|---|
| Device does not power on. | Battery is depleted. | Charge the battery using the provided USB cable and power adapter. |
| No sound or low volume. | Volume is set too low; Earpiece not connected properly; Incorrect channel. | Increase volume; Re-insert earpiece; Verify both devices are on the same channel. |
| Cannot transmit or receive. | Incorrect channel; Out of range; PTT button not pressed/released correctly. | Ensure both devices are on the same channel; Move closer to the other device; Press and hold PTT to transmit, release to receive. |
| Keys are unresponsive. | Key lock feature is activated. | Press and hold either the Upturn Key (4) or Flip-down Key (5) for 3 seconds to unlock. |
Specifications
| Feature | Detail |
|---|---|
| Model Number | SR-606 |
| Brand | SINORISE |
| Item Weight | 1.2 ounces (per device) |
| Product Dimensions | 0.6 x 1.2 x 3.4 inches |
| Battery Type | 1 Lithium Polymer battery (included) |
| Standby Time | Up to 72 hours |
| Continuous Talk Time | Up to 12 hours |
| Number of Channels | 22 |
| Frequency Range | 462.56-467.71 MHz |
| Talking Range Maximum | 2 Miles (line of sight, actual range varies) |
| Voltage | 3.7 Volts |
| Water Resistance Level | Water Repellent |
| Special Feature | Digital Display, Smart Noise Cancellation |

Image: Dimensions of the SINORISE Mini Walkie Talkie, highlighting its compact size.
Warranty and Support
Warranty Information
The SINORISE Mini Walkie Talkie SR-606 comes with a 2-year warranty from the date of purchase. This warranty covers manufacturing defects under normal use. It does not cover damage caused by misuse, accidents, unauthorized modifications, or improper maintenance.
Customer Support
For technical assistance, warranty claims, or general inquiries, please contact SINORISE customer support through the retailer's platform or visit the official SINORISE website for contact details.


