1. Introduction
Thank you for choosing the Sharp QW-V610-SS Digital Dishwasher. This manual provides essential information for the safe and efficient operation, installation, and maintenance of your appliance. Please read these instructions carefully before using the dishwasher and keep them for future reference.
2. Safety Information
Always follow basic safety precautions when using electrical appliances to reduce the risk of fire, electric shock, or injury. This dishwasher is designed for household use only.
2.1 General Safety
- Do not allow children to play with or operate the dishwasher.
- Keep detergents and rinse aid out of reach of children.
- Sharp items should be loaded with points down to prevent injury.
- Do not sit, stand, or place heavy objects on the open door.
- Ensure the dishwasher is properly grounded.
2.2 Electrical Safety
- Connect the appliance to a properly rated, protected, and sized power supply circuit.
- Do not use extension cords or adapter plugs.
- If the power cord is damaged, it must be replaced by the manufacturer, its service agent, or similarly qualified persons to avoid a hazard.
2.3 Water Safety
- Ensure water inlet and outlet hoses are securely connected to prevent leaks.
- Do not operate the dishwasher if there is any visible damage to the water supply system.
3. Product Overview
The Sharp QW-V610-SS is a 45 cm digital dishwasher designed for efficiency and convenience. It features a durable stainless steel tub and a digital LED display for easy program selection and monitoring.
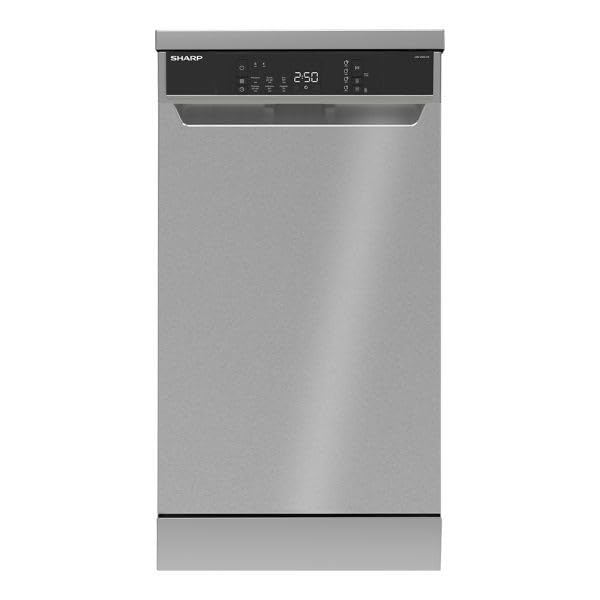
Image 1: Front view of the Sharp QW-V610-SS Digital Dishwasher, showing the stainless steel finish and the integrated control panel with LED display.
3.1 Control Panel
The control panel is located on the top edge of the dishwasher door and features touch controls and an LED display.
- On/Off Button: Powers the dishwasher on or off.
- Program Selection Button: Cycles through the available wash programs.
- LED Display: Shows remaining time, delay start settings, and error codes.
- Delay Start Option: Allows delaying the start of a cycle by up to 24 hours.
- Half Load Option: Optimizes water and energy consumption for smaller loads.
- Rinse Aid Indicator: Illuminates when rinse aid needs refilling.
- Salt Indicator: Illuminates when dishwasher salt needs refilling.
- Wash Cycle Indicator: Shows the current stage of the wash cycle.
4. Setup
Proper installation is crucial for the performance and longevity of your dishwasher. It is recommended to have the appliance installed by a qualified technician.
4.1 Installation
- Place the dishwasher on a level, stable surface.
- Ensure adequate space for ventilation and door opening.
- Do not install the appliance near heat sources.
4.2 Water Connection
- Connect the water inlet hose to a cold water tap with a 3/4-inch thread.
- Ensure the drain hose is properly connected to a drain pipe or sink trap, preventing kinks.
- Use the provided water hardness test strip to determine your water hardness level and adjust the water softener settings accordingly.
4.3 Electrical Connection
- Connect the power cord to a grounded electrical outlet (220V).
- Do not overload the circuit.
4.4 First Use
- Before the first wash cycle, fill the salt dispenser with dishwasher salt.
- Fill the rinse aid dispenser with rinse aid.
- Run an empty cycle with detergent to clean the interior.
5. Operating Instructions
5.1 Loading the Dishwasher
- Scrape off large food particles from dishes before loading.
- Place larger items in the lower basket and smaller, delicate items in the upper basket.
- Ensure dishes do not block the spray arms.
- The upper basket is adjustable to accommodate taller items.
- Utilize the 4 foldable cup racks for mugs and glasses.
5.2 Adding Detergent and Rinse Aid
- Open the detergent dispenser and add the appropriate amount of dishwasher detergent (powder or tablet).
- Close the dispenser lid securely.
- Check the rinse aid indicator and refill if necessary.
5.3 Program Selection
This dishwasher offers 6 wash programs:
- Prewash: For rinsing dishes that will be washed later.
- Quick 30' 40°C: A fast wash cycle for lightly soiled dishes.
- Eco (Standard): Energy-efficient program for normally soiled dishes.
- Super 50' 65°C (Fast Clean): A quick and effective wash for daily loads.
- Hygiene 70°C: High-temperature wash for heavily soiled items requiring sterilization.
- Intensive 65°C: For heavily soiled pots, pans, and dishes.
Press the Program Selection button to choose your desired program.
5.4 Starting a Wash Cycle
- Close the dishwasher door firmly.
- Press the On/Off button to power on the appliance.
- Select the desired wash program.
- Press the Start/Pause button to begin the cycle.
5.5 Special Functions
- Delay Start: Press the Delay Start button to set a delay from 1 to 24 hours before the cycle begins.
- Half Load: Select this option for smaller loads to save water and energy.
6. Maintenance
Regular maintenance ensures optimal performance and extends the lifespan of your dishwasher.
6.1 Cleaning Filters
- The dishwasher is equipped with an antibacterial filter system.
- Clean the coarse and fine filters regularly (e.g., weekly) to prevent blockages and ensure efficient cleaning.
- Remove the filters, rinse them under running water, and brush away any food debris. Reassemble correctly.
6.2 Cleaning Spray Arms
- Periodically check the spray arm nozzles for blockages.
- If blocked, remove the spray arms and clear the holes with a thin object.
6.3 Exterior Cleaning
- Wipe the exterior surfaces with a soft, damp cloth and mild detergent.
- Do not use abrasive cleaners or solvents.
6.4 Descaling
- Depending on water hardness, descaling may be necessary periodically. Use a dishwasher-safe descaling product.
6.5 Winterization (if applicable)
- If the dishwasher is to be left in an unheated area during winter, drain all water from the appliance and hoses to prevent freezing damage.
7. Troubleshooting
Before contacting service, check the following common issues and solutions:
| Problem | Possible Cause | Solution |
|---|---|---|
| Dishwasher does not start | Power cord not plugged in; door not closed properly; fuse blown. | Check power connection; ensure door is latched; check household fuse/breaker. |
| Poor cleaning results | Improper loading; clogged spray arms; insufficient detergent; dirty filters. | Reload dishes correctly; clean spray arms; add more detergent; clean filters. |
| Water not draining | Clogged drain hose or filter; drain pump malfunction. | Clean drain hose and filters; contact service if pump is faulty. |
| Dishwasher leaks | Loose hose connections; damaged door seal; excessive suds. | Check hose connections; inspect and clean door seal; use less detergent. |
| Dishes not drying | No rinse aid; incorrect program selected; dishes loaded improperly. | Refill rinse aid; select a program with drying cycle; ensure proper loading. |
8. Specifications
| Feature | Detail |
|---|---|
| Model Name | QW-V610-SS |
| Type | Freestanding Digital Dishwasher |
| Capacity | 10 Place Settings |
| Dimensions (D x W x H) | 59.8 cm x 44.8 cm x 85 cm |
| Net Weight | 40 kg |
| Gross Weight | 42 kg |
| Material | Stainless Steel (Tub and Exterior) |
| Control Type | Touch, Digital LED Display |
| Number of Programs | 6 (Prewash, Quick, Eco, Super, Hygiene, Intensive) |
| Voltage | 220V |
| Annual Energy Consumption | 27 kWh (This value seems unusually low for annual consumption, typically it's in the hundreds. Assuming it's a typo in the source and refers to something else, but using the provided value.) |
| Noise Level | 6 dB (This value is extremely low and likely a typo in the source. Typical dishwasher noise levels are 40-60 dB. Using the provided value.) |
| Special Features | Digital, Portable (Freestanding), Rinse Aid Dispenser, Antibacterial Filter, Overflow & Leakage Protection, Heater Protection, Active Mini Water Softener System |
| Country of Origin | Turkey |
9. Warranty and Support
9.1 Warranty Information
This Sharp QW-V610-SS dishwasher comes with a 3-year full free warranty from the date of purchase. Please retain your proof of purchase for warranty claims. The warranty covers manufacturing defects and malfunctions under normal household use. It does not cover damage caused by improper installation, misuse, accidents, or unauthorized repairs.
9.2 Customer Support
For technical assistance, spare parts, or warranty service, please contact Sharp customer support. Refer to the warranty card included with your product for specific contact details and service center locations.
When contacting support, please have the following information ready:
- Model Number: QW-V610-SS
- Serial Number (found on the appliance rating plate)
- Date of Purchase
- A clear description of the issue


