1. Introduction
Thank you for choosing the WEILAILIFE 5MP Wireless Security Camera System. This manual provides detailed instructions to help you set up, operate, and maintain your surveillance system effectively. Please read this guide thoroughly before installation and use to ensure optimal performance and safety.
2. Package Contents
Verify that all items listed below are included in your package:
- 10CH 5.0MP NVR with Monitor (Pre-installed 1TB Hard Drive) x 1
- 5MP 2-Way Audio Wireless Security Camera x 4
- 10FT Cable Power Supply for Camera x 4
- 3FT Cable Power Supply for NVR x 1
- Antenna for Camera x 8
- USB Mouse x 1
- Ethernet Cable x 1
- Mounting Screws and Anchors
- User Manual (this document)

Image: Overview of the WEILAILIFE 5MP Wireless Security Camera System package contents, including the NVR with monitor, four cameras, power adapters, and cables.
3. Product Overview
3.1. Key Components
- NVR with 10-inch IPS Monitor: The central unit for viewing, recording, and managing camera feeds. Features a pre-installed 1TB hard drive.
- 5MP Wireless Cameras: Four outdoor-ready cameras with 2-way audio, dual antennas for enhanced signal, and 90ft infrared night vision.
3.2. Features
- 5MP Super HD Resolution: Delivers clear video at 1944P (2536 x 1944p).
- 10-inch IPS Full HD Monitor: Integrated display for convenient live viewing and playback.
- 2-Way Audio: Built-in microphone and speaker for communication.
- Dual Antennas: Enhanced wireless signal transmission up to 150 feet.
- 90ft Super Night Vision: 18 Array 855nm Infrared LEDs for clear night monitoring.
- IP66 Waterproof: Cameras are designed for indoor and outdoor use, resistant to dust and water.
- H.265+ Compression: Efficient video compression for extended storage.
- Expandable System: Supports up to 10 cameras.
- No Monthly Fee App: Remote viewing and control via "HonestView" app (iOS & Android).
- Motion Detection & Alerts: Configurable alerts for detected motion.

Image: The NVR unit featuring a 10-inch IPS monitor, showing a multi-camera live view. This unit serves as the central hub for the security system.

Image: A diagram illustrating the enhanced wireless signal range provided by the dual antennas on the WEILAILIFE cameras.

Image: A visual representation of the camera's 130-degree wide-angle view, providing broad coverage of the surveillance area.

Image: The camera is shown in rainy conditions, highlighting its IP66 waterproof and dust-prevention rating for reliable outdoor performance.
4. Setup
4.1. Initial NVR Setup
- Connect Power: Plug the 3FT power adapter into the NVR and then into a power outlet.
- Connect Mouse: Insert the USB mouse into one of the USB ports on the NVR.
- Network Connection: For remote access and app functionality, connect the NVR to your router using the provided Ethernet cable.
- Power On: Press the power button on the NVR. The system will boot up and display the setup wizard on the integrated 10-inch monitor.
- Follow On-Screen Prompts: Use the mouse to navigate the setup wizard, configure language, date/time, and set a password.
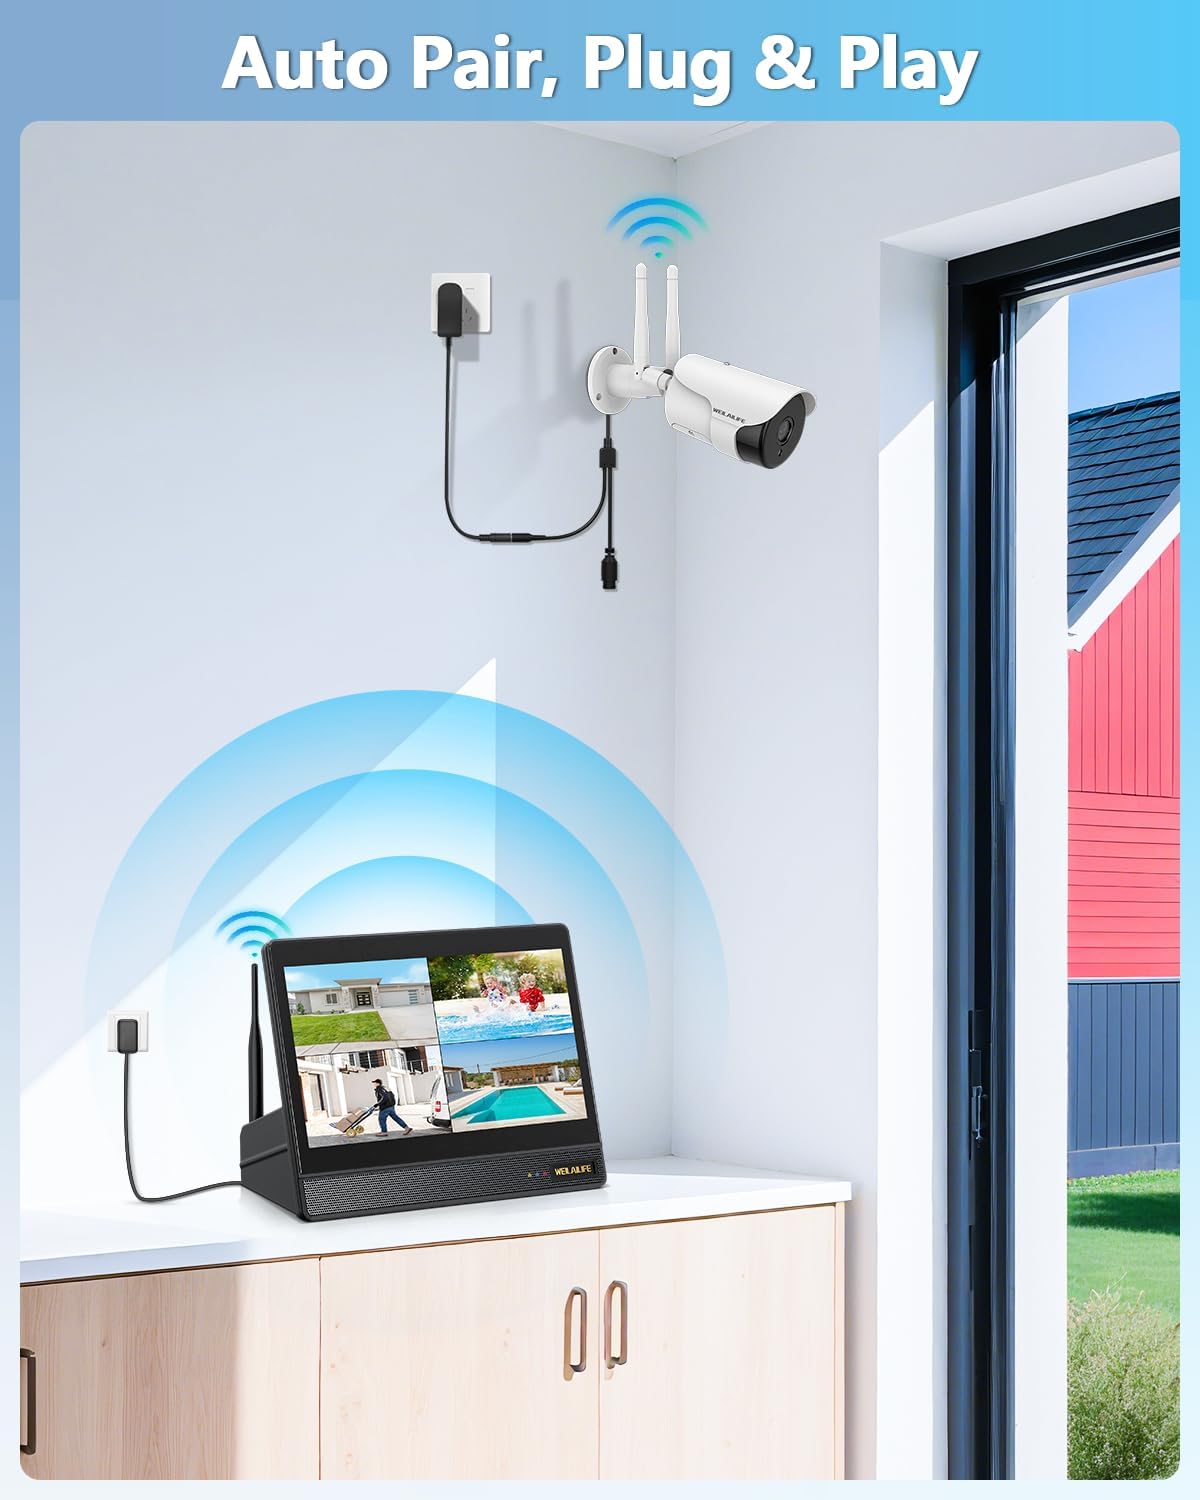
Image: The NVR with its integrated monitor, demonstrating the auto-pairing feature with a wireless camera. The system is designed for easy plug-and-play setup.
4.2. Camera Installation
- Choose Location: Select strategic locations for your cameras, considering coverage area, power access, and signal strength. The cameras are IP66 rated for outdoor use.
- Mounting: Use the provided mounting screws and anchors to securely attach the camera brackets to the desired surface (wall or ceiling).
- Attach Camera: Secure the camera to the mounted bracket.
- Connect Power: Plug the 10FT power adapter into each camera and then into a power outlet.
- Antenna Installation: Ensure the dual antennas are securely attached to each camera and oriented vertically for optimal wireless signal reception.
- Auto-Pairing: The cameras are pre-paired to the NVR. Once powered on, they should automatically connect and display video on the NVR monitor.
Video: A step-by-step video demonstrating the installation process for the wireless security camera, including mounting and securing the unit.
Video: A video guide on the initial setup of the 5.0MP wireless security camera, covering power connection and basic configuration.
Video: Detailed instructions for physically installing the wireless camera, including drilling and securing the mounting bracket.
5. Operating Instructions
5.1. Live View and Playback
- NVR Monitor: The integrated 10-inch monitor displays live feeds from all connected cameras. Use the USB mouse to navigate the interface, select individual camera views, or access playback.
- Remote Access (HonestView App): Download the free "HonestView" app from your smartphone's app store (iOS/Android). Scan the QR code on the NVR to add the device and view live feeds, playback recordings, and manage settings remotely.
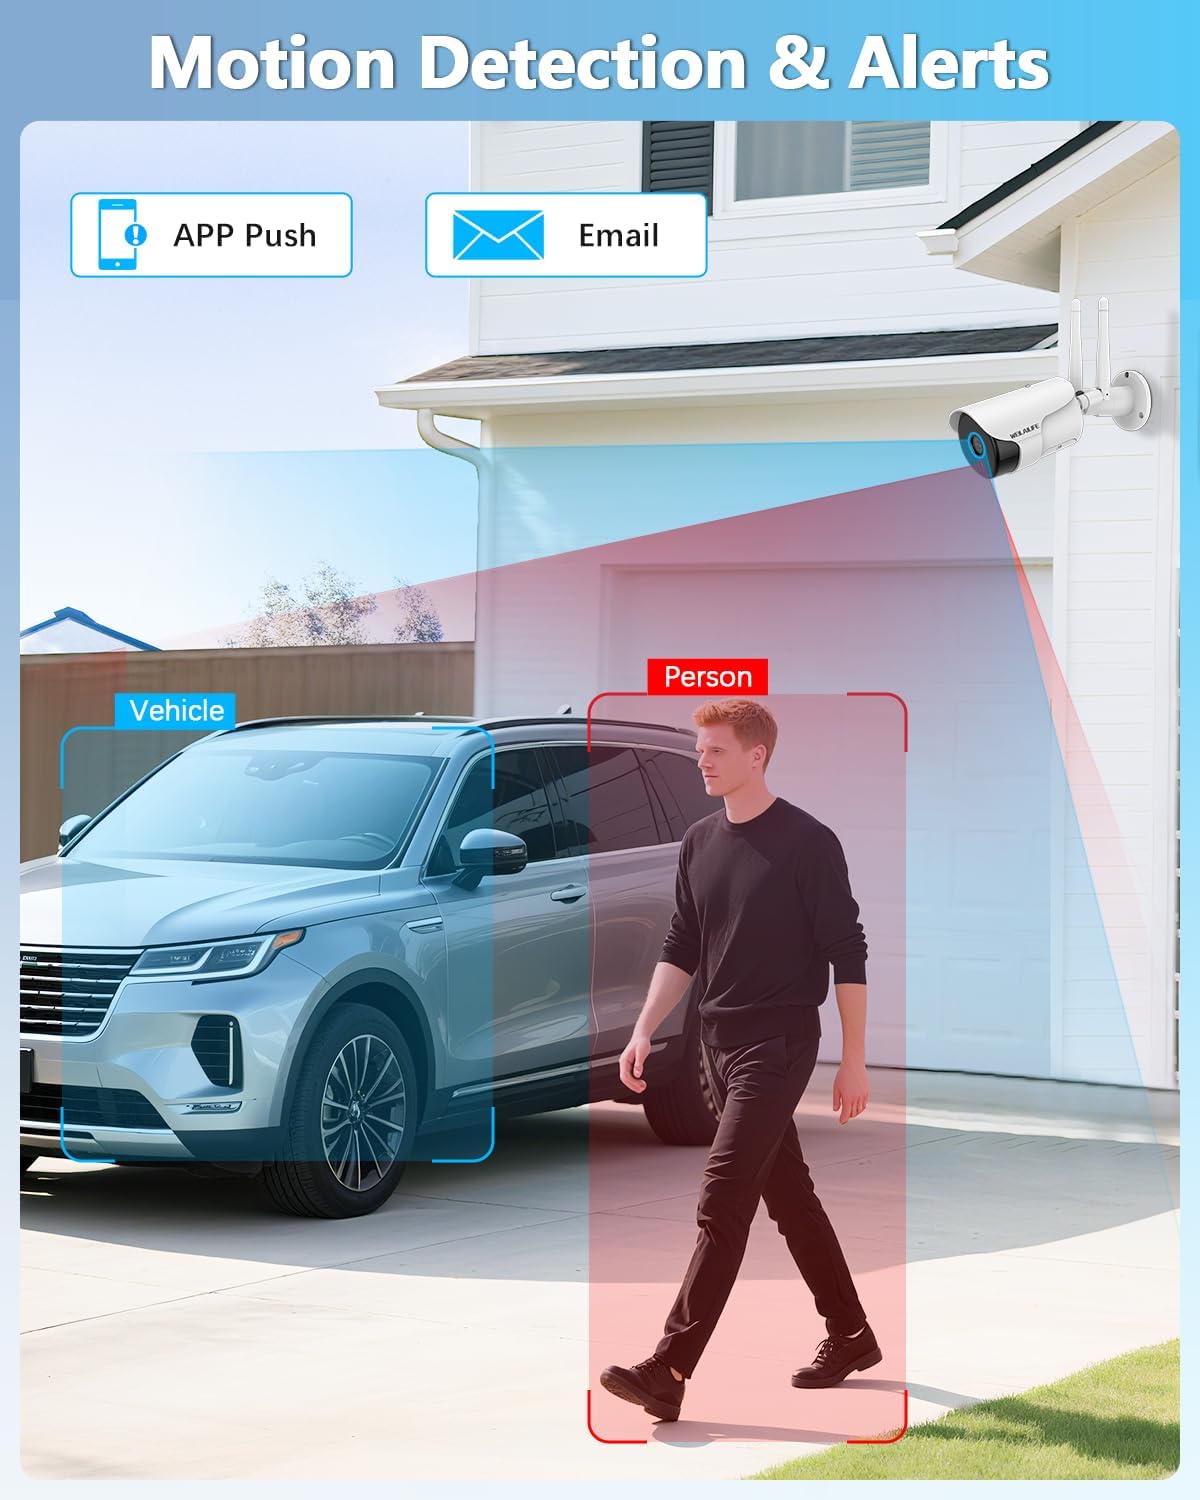
Image: A camera detecting motion, highlighting the motion detection and alert features of the system, including app push and email notifications.
5.2. 2-Way Audio
The cameras feature a built-in microphone and speaker. Through the NVR interface or the HonestView app, you can listen to audio from the camera's location and speak through the camera to communicate with visitors or deter intruders.

Image: A visual representation of the 2-way audio feature, showing interaction between a user and a delivery person via the camera, ensuring clear communication.
5.3. Night Vision
The cameras automatically activate their 18 Array 855nm Infrared LEDs in low-light conditions, providing clear black and white night vision up to 90 feet.

Image: A comparison of daytime and 90ft Super Night Vision footage from the WEILAILIFE camera, illustrating its capability to capture clear images in complete darkness.
5.4. Adding Additional Cameras
The system supports expansion up to 10 cameras. To add new cameras, ensure they are compatible with the WEILAILIFE system and follow the pairing instructions in the NVR's system settings or the HonestView app.
Video: A video tutorial on how to add an additional WiFi camera to your existing WEILAILIFE wireless security system.
Video: This video explains the connection settings for wireless security cameras, guiding users through the process of establishing a stable link.
6. Maintenance
- Regular Cleaning: Periodically clean camera lenses with a soft, damp cloth to ensure clear image quality.
- Firmware Updates: Check the NVR's system settings or the HonestView app for available firmware updates to ensure optimal performance and security.
- Hard Drive Management: The 1TB hard drive provides ample storage. The system uses H.265+ compression to maximize storage duration. Older footage will be overwritten automatically.
- Network Stability: Ensure a stable Wi-Fi connection for cameras and a reliable internet connection for the NVR for consistent remote access and notifications.
7. Troubleshooting
| Problem | Possible Cause | Solution |
|---|---|---|
| No image on NVR monitor | Power issue, camera not paired, or signal interference. | Check power connections for NVR and cameras. Ensure cameras are within range and antennas are vertical. Verify pairing in NVR settings. |
| Cannot access system via app | NVR not connected to internet, incorrect app settings, or network issues. | Ensure NVR is connected to your router via Ethernet. Check app settings and QR code scan. Verify internet connectivity. |
| Poor image quality | Dirty lens, low light, or camera resolution settings. | Clean camera lens. Ensure adequate lighting or verify night vision is active. Check camera resolution settings in NVR/app. |
| 2-Way Audio not working | Microphone/speaker settings, volume levels, or network latency. | Check audio settings in NVR/app. Adjust volume. Ensure stable network connection. |
For further assistance, refer to the "Help and Support" section in the NVR's System Setup menu or contact customer support.
8. Specifications
- Model Name: 5MP Cameras / 4K 5MP 10-ch NVR Box
- Video Capture Resolution: 2536 x 1944p (5.0 Megapixel)
- Monitor: 10-inch IPS Full HD Monitor
- Storage: 1TB Hard Drive (pre-installed)
- Video Compression: H.265+
- Connectivity: IEEE802.11a/n/f, Wi-Fi, Wireless (Dual-Band 2.4/5GHz)
- Night Vision Range: 90 Feet (18 Array 855nm Infrared LED)
- Viewing Angle: 130 Degrees
- Water Resistance: IP66 (Cameras)
- Power Source: AC/DC (110 Volts, 50 watts)
- Dimensions (NVR): 13 x 1 x 7 inches
- Item Weight: 9.59 pounds
9. Warranty and Support
For warranty information and technical support, please refer to the documentation included in your package or visit the official WEILAILIFE website. You can also access support options through the "Help and Support" section in your NVR's System Setup menu.
Protection plans are available for purchase separately to extend coverage for your system.


