
1. Important Safety Information
Please read this entire instruction manual before installation. If you have any questions regarding the installation or use of this product, please contact USX MOUNT customer service.
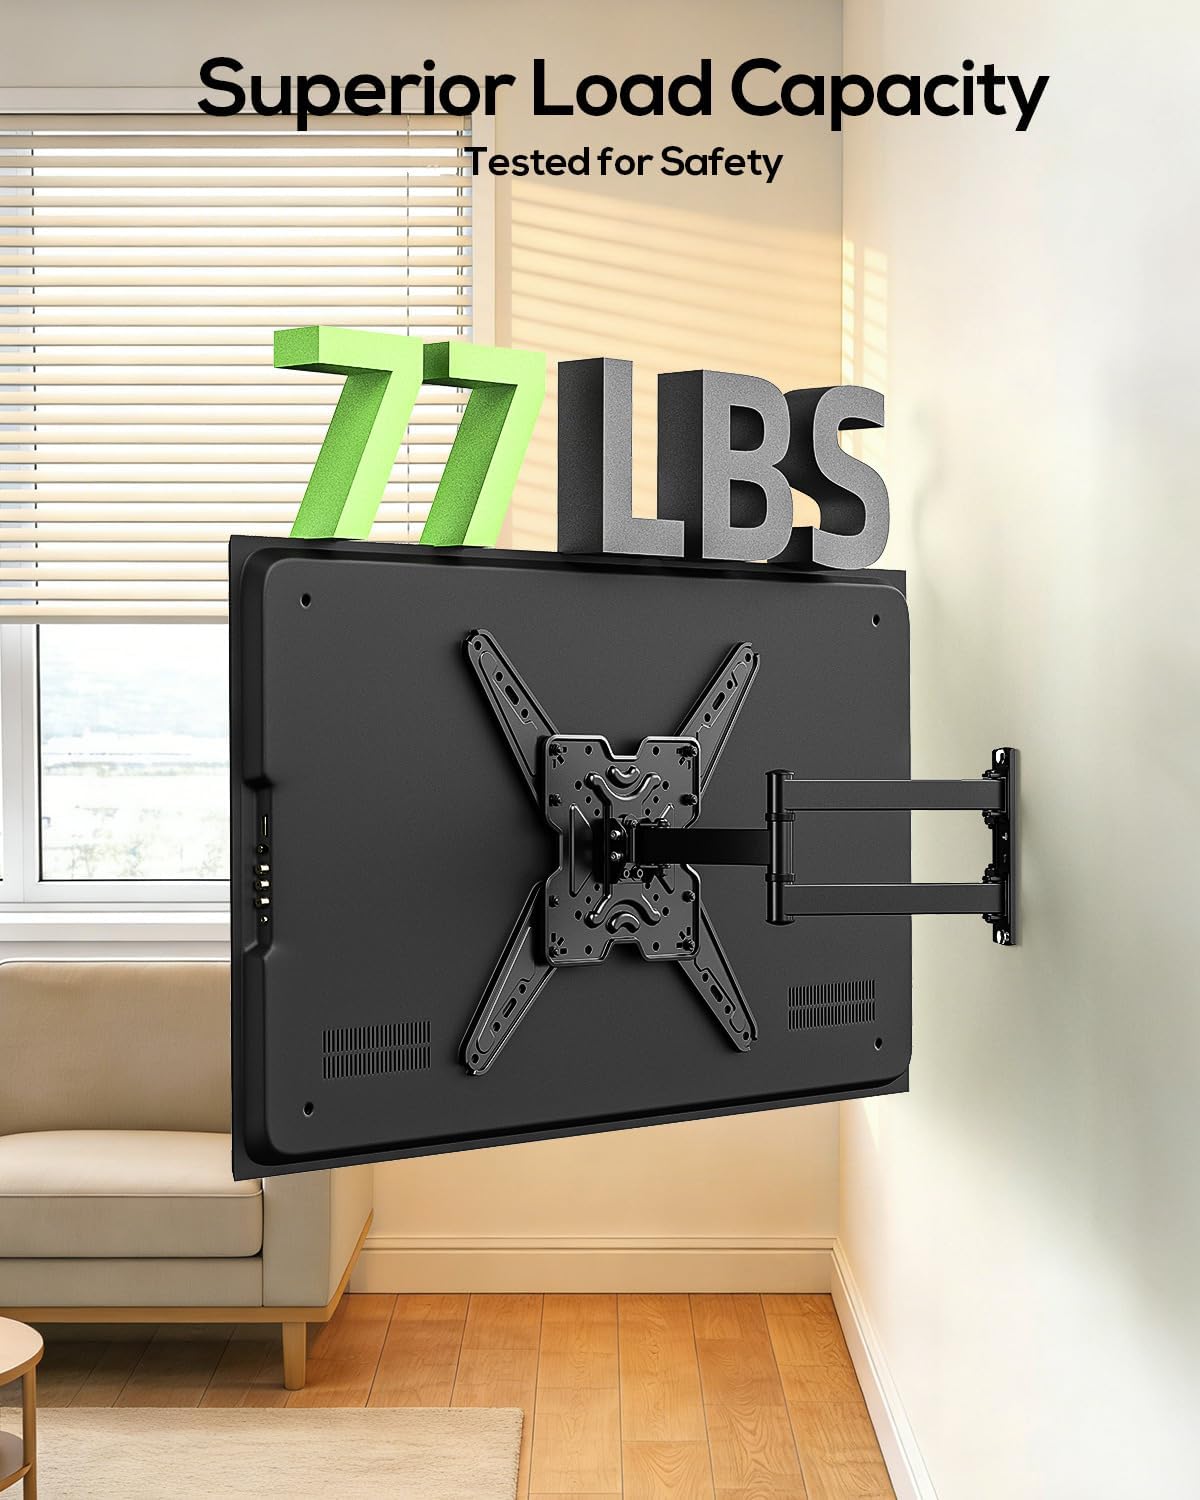
- Weight Capacity: Do not exceed the maximum weight capacity of 77 lbs (35 kg). This mount is intended for use only with the maximum weights indicated. Use with products heavier than the maximum weights indicated may result in instability causing possible injury.
- TV Size: Designed for TVs between 26 and 65 inches.
- Wall Type: This TV mount is designed for installation on wood studs, concrete walls, and brick walls. DO NOT mount on drywall alone. Concrete anchors are available upon request.
- VESA Compatibility: Ensure your TV's VESA pattern (mounting holes on the back of the TV) is between 75x75mm and 400x400mm.
- Professional Installation: If you do not understand these instructions or have doubts about the safety of the installation, please consult a qualified installer.
- Check Components: Carefully check to ensure there are no missing or defective parts. Do not use defective parts.
- Movement: Operate the mount carefully. Avoid sudden movements or excessive force when adjusting the TV position.
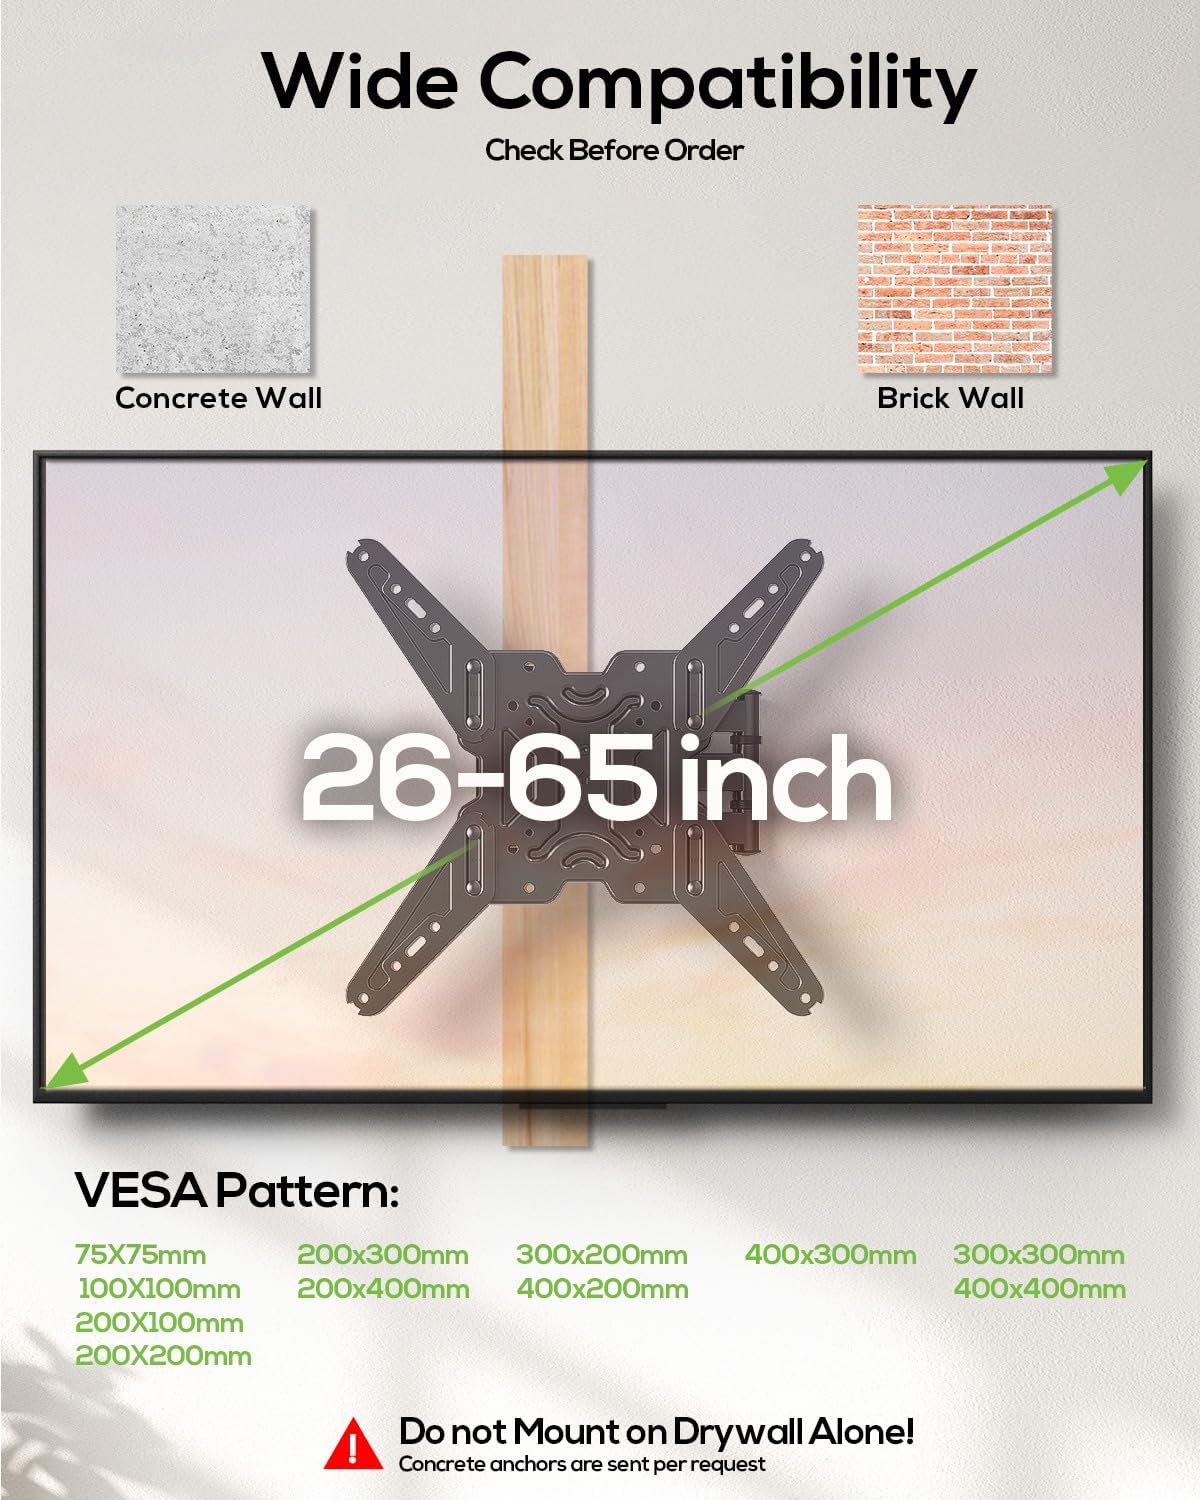
This image illustrates the wide compatibility of the mount, supporting TVs from 26 to 65 inches and various VESA patterns. It also highlights that the mount is suitable for concrete and brick walls, but not drywall alone.
2. What's Included
Verify that all components are present and undamaged before beginning installation. Refer to the parts list below:
This image displays the complete hardware kit, including the wall plate, TV brackets, various screws, washers, spacers, a small wrench, and a level.
The package includes the main mount assembly, TV attachment brackets, various bolts, washers, and spacers for TV attachment, lag bolts and anchors for wall mounting, a small wrench, and a bubble level. Labeled hardware packs simplify identification.
3. Setup and Installation
Follow these steps carefully to ensure a secure installation of your USX MOUNT TV wall mount.
3.1. Check VESA Pattern and Cable Outlet
Before mounting, confirm your TV's VESA pattern (the distance between the four mounting holes on the back of your TV) is compatible with the mount (75x75mm to 400x400mm). Also, check the location of your TV's cable outlets to avoid potential blockage by the mount.

This diagram illustrates how to measure the VESA pattern on the back of your television to ensure compatibility with the mount.

This image advises checking the TV's cable outlet location to prevent obstruction by the mount.
3.2. Mount Wall Plate to Wall
Locate a suitable mounting position on a wood stud, concrete, or brick wall. Use a stud finder for wood studs. Mark the drilling points and pre-drill holes. Secure the wall plate to the wall using the provided lag bolts. Ensure the wall plate is level using the included bubble level.

This image demonstrates securing the wall plate to a wall stud using a wrench, emphasizing the first step of installation.
3.3. Attach TV Brackets to TV
Attach the TV brackets to the back of your television using the appropriate screws, washers, and spacers from the hardware kit. Ensure the brackets are securely fastened and centered on the TV's VESA mounting holes.

This image shows the TV brackets being attached to the back of the television, a crucial step before hanging the TV.
3.4. Hang TV onto Wall Plate
Carefully lift the television with the attached brackets and hook them onto the wall plate. Ensure the TV is securely seated on the mount. Engage any safety locks or screws to prevent accidental dislodgement.

This image illustrates the final step of hanging the television onto the securely installed wall mount.
3.5. Cable Management
Utilize the integrated cable management features, such as cable ties or clips, to organize and secure TV cables along the mount arms. This helps maintain a tidy appearance and prevents cable damage.

This diagram highlights the cable management feature, showing how to route cables along the mount arm for a neat setup.
4. Operating Instructions
The USX MOUNT Full Motion TV Wall Mount offers flexible viewing options. Adjust your TV to the desired position using the following movements:
4.1. Extension and Retraction
The mount allows your TV to extend from the wall by 2.87 inches up to 17.17 inches. Gently pull or push the TV to achieve the desired distance from the wall.

This image illustrates the extension and retraction capabilities of the mount, showing the TV moving closer to or further from the wall.
4.2. Swivel Adjustment
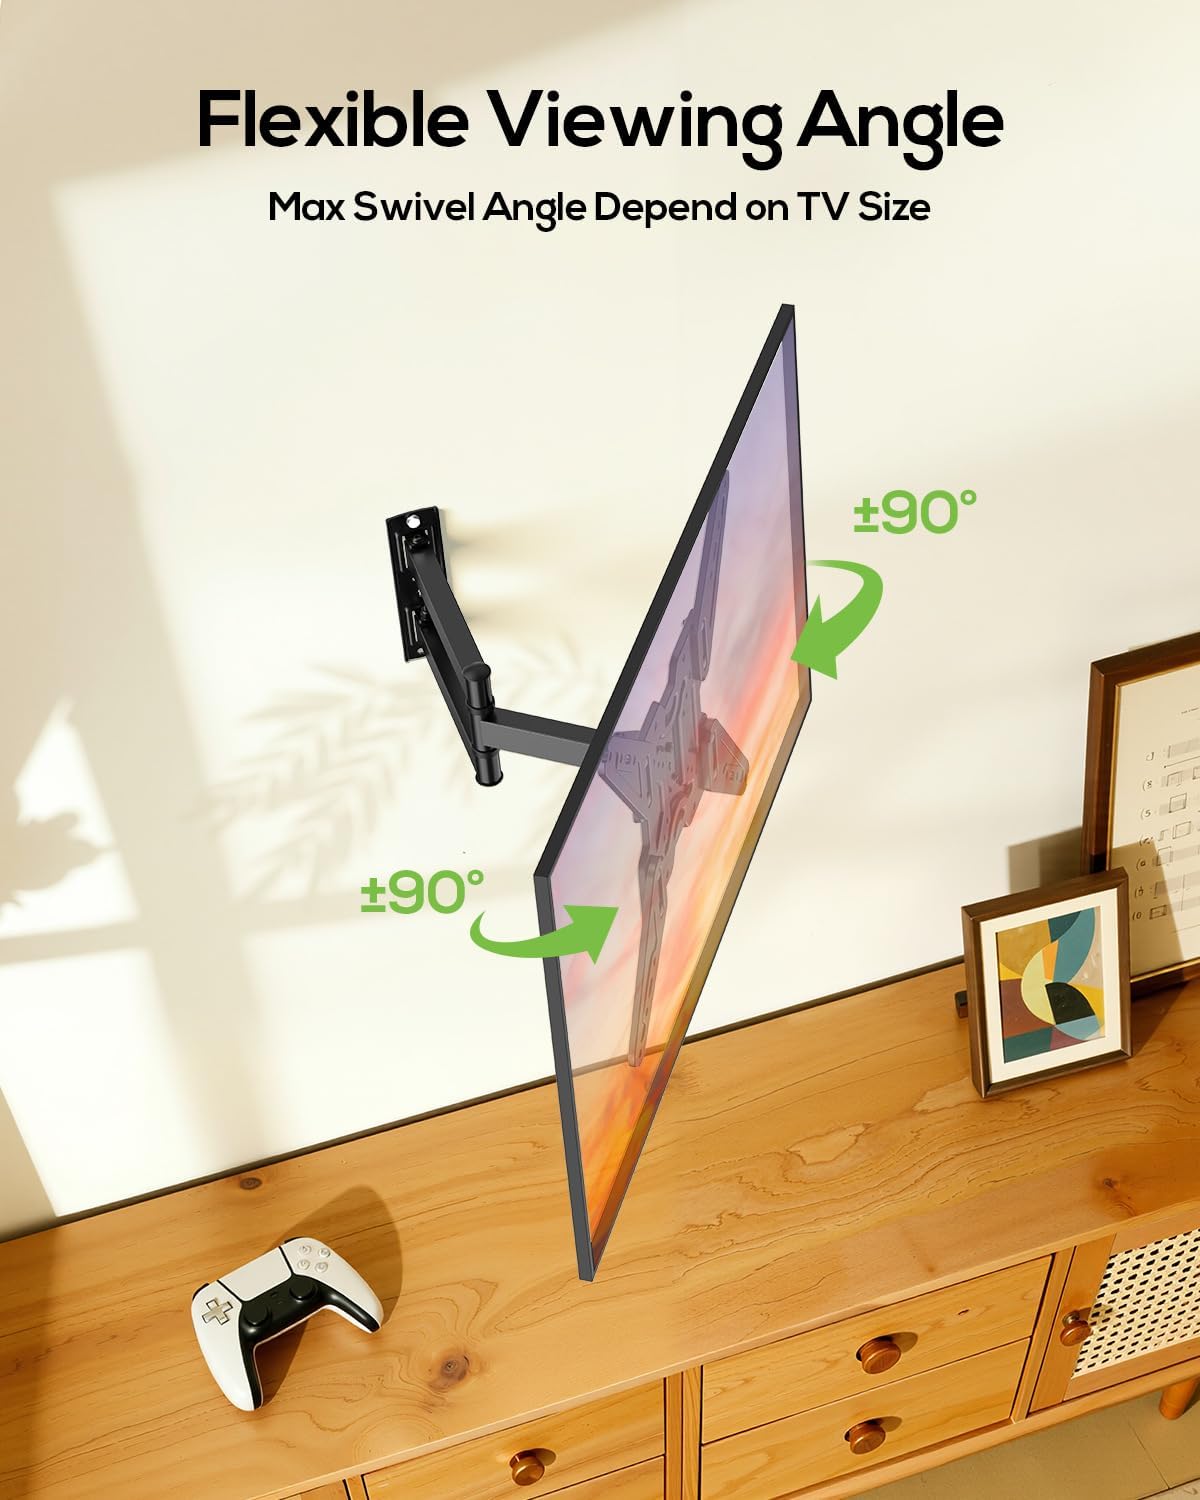
The TV can swivel up to ±90° left or right, depending on the TV size. This allows for optimal viewing from various angles in a room. Gently pivot the TV to the desired angle.

This image demonstrates the swivel function, allowing the TV to be angled left or right for flexible viewing.
4.3. Tilt Adjustment
Adjust the vertical tilt of your TV from +10° to -10° to reduce glare and achieve a comfortable viewing angle. Loosen the tilt adjustment screws, set the desired angle, and then re-tighten the screws.
This image illustrates the tilt adjustment feature, allowing the TV to be angled vertically to optimize viewing and reduce glare.
4.4. Post-Installation Level Adjustment
After installation, you can make minor level adjustments of up to ±4° to ensure your TV is perfectly horizontal. This feature allows for fine-tuning without re-drilling.

This image highlights the post-installation level adjustment, allowing for minor horizontal corrections after the TV is mounted.
5. Maintenance
Regular maintenance ensures the longevity and safe operation of your TV wall mount.
- Periodic Checks: Periodically check that all screws and connections are tight and secure. Re-tighten if necessary.
- Cleaning: Clean the mount with a soft, dry cloth. Avoid using abrasive cleaners or solvents.
- Lubrication: Moving parts may benefit from occasional lubrication with a silicone-based spray to maintain smooth operation.
- Damage Inspection: Inspect the mount for any signs of damage or wear. If any damage is observed, discontinue use and contact customer support.
6. Troubleshooting
If you encounter any issues during or after installation, refer to the following common problems and solutions:
- Problem: The TV appears crooked after installation.
Solution: Use the post-installation level adjustment feature (Section 4.4) to fine-tune the horizontal level of the TV. - Problem: The mount feels loose or unstable.
Solution: Re-check all wall mounting bolts and TV attachment screws to ensure they are securely tightened. Verify that the wall type is appropriate and the anchors are correctly installed. - Problem: Difficulty moving the TV (swivel, tilt, extension).
Solution: Ensure no cables are snagged. Check if any adjustment screws are overtightened. Apply a small amount of silicone lubricant to moving joints if resistance persists. - Problem: TV does not fit the mount.
Solution: Verify your TV's VESA pattern and weight against the mount's specifications (Section 7). Ensure the TV size is within the recommended range of 26-65 inches.
7. Specifications
| Feature | Detail |
|---|---|
| Model Number | XMM919 |
| Compatible TV Sizes | 26-65 inches |
| Weight Capacity | Up to 77 lbs (35 kg) |
| VESA Compatibility | 75x75mm to 400x400mm |
| Movement Type | Articulating, Swivel, Tilt |
| Tilt Angle | +10° / -10° |
| Swivel Angle | ±90° (Max, depends on TV size) |
| Extension from Wall | 2.87 inches to 17.17 inches |
| Post-Installation Level Adjustment | ±4° |
| Material | Metal |
| Color | Black |
| Mounting Type | Wall Mount (Single Stud) |
8. Warranty Information
This USX MOUNT product is backed by a 10-Year Warranty. This warranty covers defects in materials and workmanship under normal use. Please retain your proof of purchase for warranty claims. For full warranty terms and conditions, please contact USX MOUNT customer service.
9. Customer Support
For any questions regarding product installation, operation, or warranty, please contact our professional customer service team. We are ready to assist you.
Contact Information: Please refer to the contact details provided on the product packaging or the official USX MOUNT website.


