
Introduction
Thank you for choosing the IRONCK Farmhouse Kitchen Pantry Cabinet. This manual provides detailed instructions for assembly, operation, maintenance, and troubleshooting to ensure safe and efficient use of your new cabinet. Please read this manual thoroughly before beginning assembly and retain it for future reference.
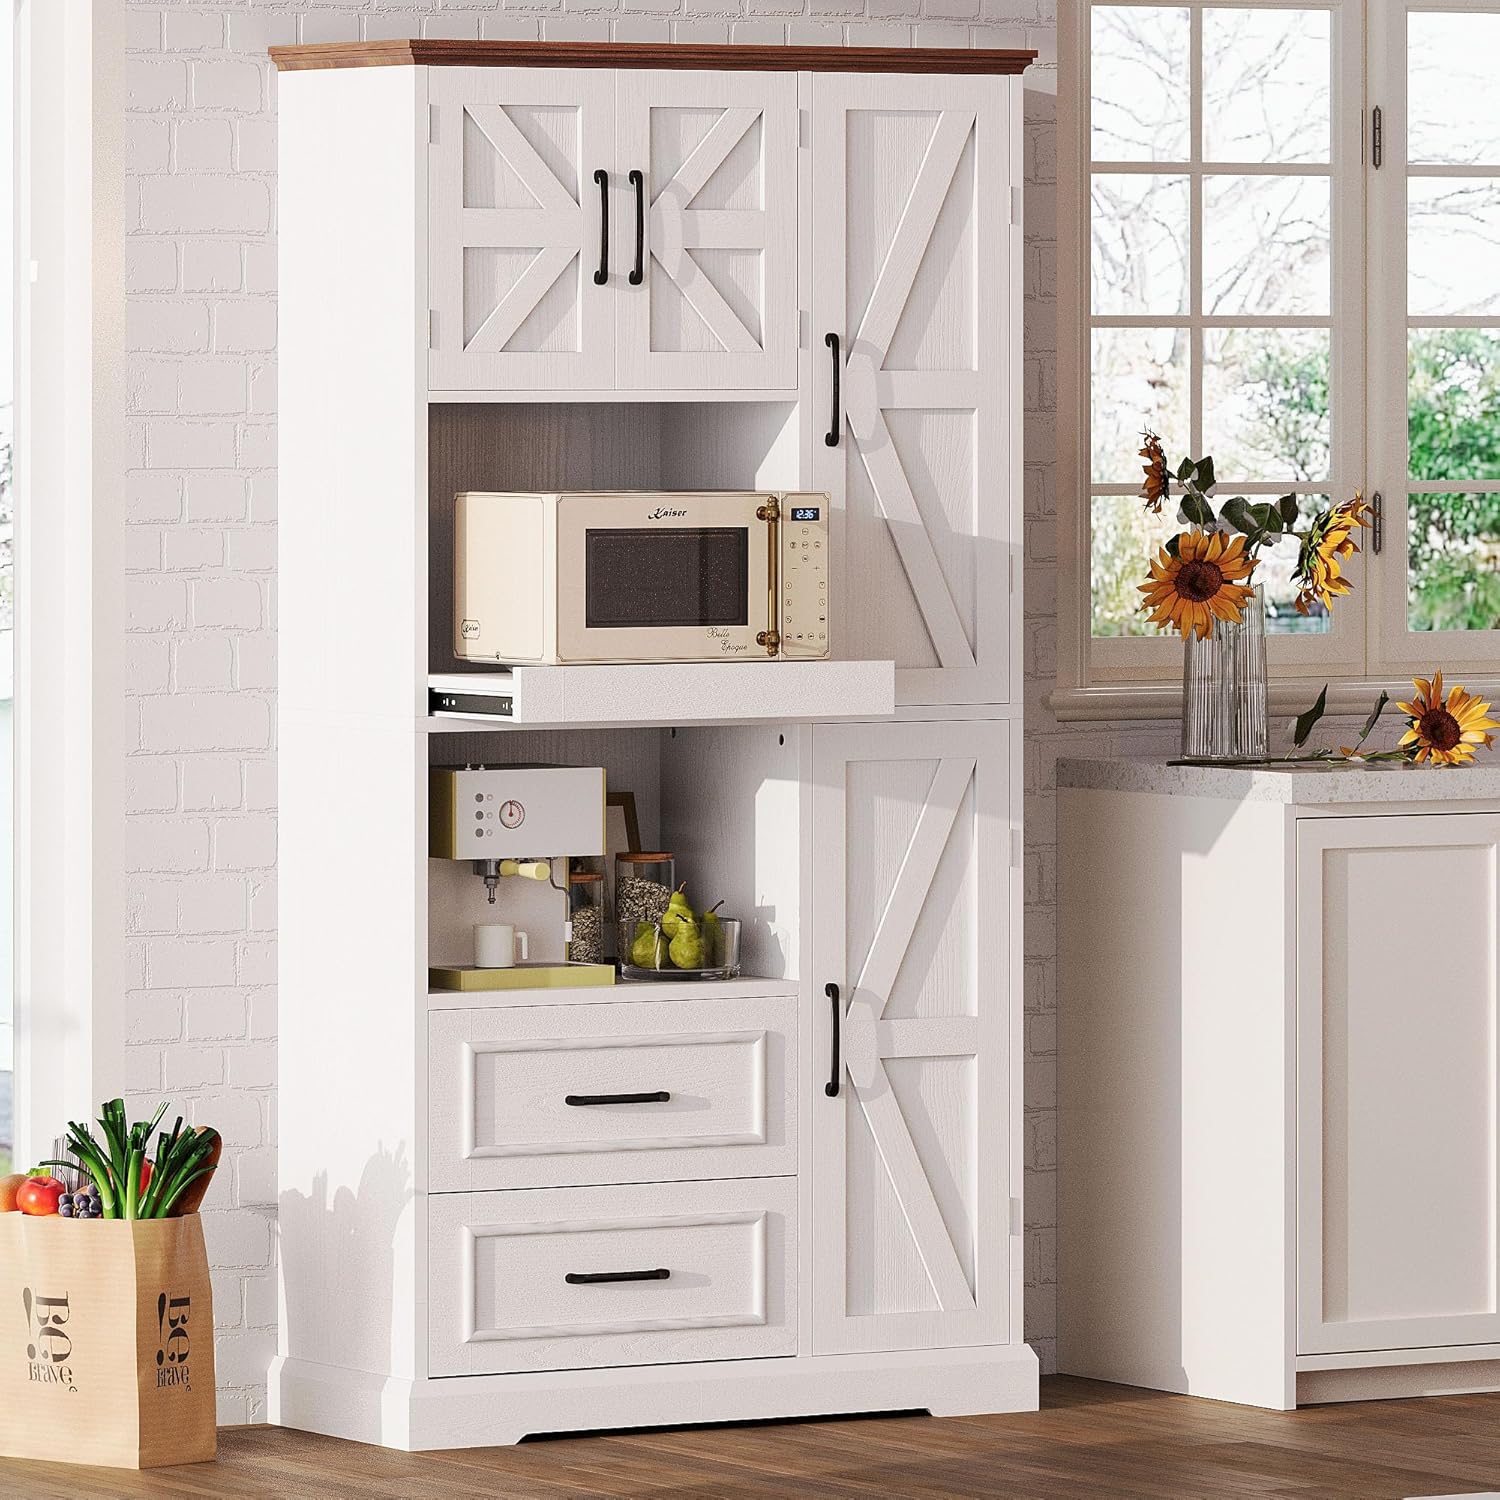
Image: Fully assembled IRONCK Farmhouse Kitchen Pantry Cabinet, showcasing its design and storage capabilities.
Important Safety Instructions
- Always assemble the cabinet on a soft, clean surface to prevent scratches.
- Ensure all parts and hardware are present before beginning assembly.
- Do not overtighten screws, as this may damage the material.
- Use the included anti-tip kit to secure the cabinet to a wall, preventing accidental tipping and potential injury.
- Keep small parts and packaging materials away from children and pets.
- If any parts are missing or damaged, do not proceed with assembly. Contact customer support for assistance.
Package Contents
Before assembly, carefully unpack all components and verify that you have received all the listed parts and hardware. If anything is missing or damaged, please contact customer support.
Parts List (Examples)
- Side Panels (Left & Right)
- Top Panel
- Bottom Panel
- Back Panels
- Fixed Shelves
- Adjustable Shelves
- Drawer Fronts, Sides, and Backs
- Cabinet Doors
- Pull-out Shelf
- Door Storage Rack
Hardware List (Examples)
- Screws (various sizes)
- Dowel Pins
- Cam Locks and Cam Bolts
- Drawer Slides
- Hinges
- Handles
- Anti-tip Kit (Wall Anchor, Strap, Screws)
- Shelf Pins
- Door Catches

Image: Detailed view of key hardware components such as the anti-tip kit, door catch, cable management opening, and cabinet handles.
Assembly Guide
Follow these steps carefully to assemble your IRONCK Farmhouse Kitchen Pantry Cabinet. It is recommended to have two people for assembly.
- Prepare the Workspace: Clear a spacious, clean, and soft area for assembly to prevent damage to the cabinet parts.
- Assemble the Base Frame: Attach the bottom panel to the side panels using dowel pins and cam locks/bolts as indicated in the diagram. Ensure all connections are secure.
- Install Fixed Shelves: Insert fixed shelves into the designated slots on the side panels. Secure them with the appropriate hardware.
- Assemble and Install Drawers: Construct the two sliding drawers by attaching the sides, back, and front panels. Install the drawer slides onto the drawer boxes and the corresponding cabinet sections. Carefully insert the assembled drawers into their respective slots.

Image: Close-up of the two sliding drawers, demonstrating their smooth operation and storage capacity.
- Install Pull-out Shelf: Attach the pull-out shelf mechanism to the designated compartment. Ensure it slides smoothly. Place the pull-out shelf onto the mechanism.

Image: Detailed view of the pull-out shelf's sliding mechanism, designed for easy access to appliances.
- Attach Back Panels: Secure the back panels to the rear of the cabinet using small nails or screws provided. Ensure they are flush and reinforce the structure.
- Install Cabinet Doors: Attach hinges to the cabinet doors and then to the main cabinet frame. Adjust hinges as needed to ensure doors align properly and close smoothly. Install door catches if provided.

Image: The interior of a cabinet door featuring a multi-tiered storage rack, ideal for spices and beverages.
- Attach Handles: Securely fasten the handles to the cabinet doors and drawer fronts.
- Install Anti-Tip Kit: For safety, attach the anti-tip kit to the top rear of the cabinet and secure it to a wall stud using the provided hardware. This step is crucial to prevent the cabinet from tipping over.
- Final Inspection: Check all connections to ensure they are tight and secure. Verify that doors and drawers operate smoothly.
Operating Instructions
Adjustable Shelves
The cabinet features multiple adjustable shelves. To change the shelf height, remove any items from the shelf, lift the shelf, and reposition the shelf pins to the desired height. Ensure all four pins are securely in place before placing items back on the shelf.
Pull-out Shelf
The dedicated pull-out shelf is designed for easy access to appliances like a microwave or coffee maker. Gently pull the shelf forward to extend it and push it back until it locks into place when not in use.
Image: The pull-out shelf extended, demonstrating its functionality for holding a microwave oven.
Storage Drawers
The two sliding drawers provide enclosed storage for various kitchen items. Pull the handles to open and push to close. Avoid overloading the drawers to ensure smooth operation.
Door Rack
The integrated door rack offers convenient storage for smaller items such as spices, bottles, or condiments, keeping them easily accessible when the door is open.
Maintenance and Care
- Cleaning: Wipe the cabinet surfaces with a soft, damp cloth. Avoid using harsh chemicals, abrasive cleaners, or polishes that may damage the finish.
- Spills: Clean up spills immediately to prevent staining or damage to the wood.
- Hardware: Periodically check all screws and fasteners to ensure they remain tight. Retighten if necessary.
- Environment: Avoid placing the cabinet in direct sunlight or near heat sources, as this can cause fading or warping. Maintain a stable humidity level in the room.
Troubleshooting
| Problem | Possible Cause | Solution |
|---|---|---|
| Cabinet is wobbly or unstable. | Loose fasteners; uneven floor. | Ensure all screws and cam locks are tightened. Use shims under the cabinet feet if the floor is uneven. Verify anti-tip kit is securely installed. |
| Drawers do not slide smoothly. | Drawer slides misaligned; overloaded drawer. | Check that drawer slides are correctly installed and aligned. Reduce the weight in the drawer. |
| Cabinet doors do not close properly. | Hinges misaligned; door catch not engaging. | Adjust the hinges to align the doors. Check if the door catch is properly installed and engaging. |
| Pull-out shelf is stiff. | Mechanism obstructed or misaligned. | Ensure no items are obstructing the mechanism. Check for proper alignment of the slides. |
Product Specifications
- Brand: IRONCK
- Model: B0DXNYM2MM
- Color: White with Brown Top
- Material: High-quality MDF Board
- Overall Dimensions (Approximate): 36.2" W x 15.8" D x 72" H
- Special Features: Retractable shelves, three cabinets, two easy-glide drawers, door rack, anti-tip kit.
- Mounting Type: Floor Mount (with wall anchor for safety)

Image: Technical drawing illustrating the precise dimensions of the cabinet and its internal compartments.
Warranty and Customer Support
IRONCK is committed to providing high-quality products. For information regarding warranty coverage, please refer to the product packaging or the retailer's website where the product was purchased. If you encounter any issues during assembly or use, or if you have questions about your product, please contact IRONCK customer support for assistance. Contact details can typically be found on the brand's official website or through your purchase platform.
