
Introduction
Welcome to your new SunnyFurn King Bed Frame. This manual provides detailed instructions for assembly, operation, maintenance, and troubleshooting to ensure safe and proper use of your bed frame. Please read this manual thoroughly before beginning assembly or use.
Safety Information
- Read all instructions carefully before assembly and use.
- Keep all small parts and packaging materials away from children.
- Ensure all connections are securely tightened before placing a mattress on the frame.
- Do not exceed the recommended weight capacity of the bed frame.
- Only use the integrated charging station for compatible electronic devices. Do not overload the outlets.
- Avoid standing or jumping on the bed frame.
Package Contents
Verify that all components are present and undamaged before beginning assembly. If any parts are missing or damaged, please contact customer support.
| Component | Quantity |
|---|---|
| Upholstered Headboard with Charging Station | 1 |
| Side Rails | 2 |
| Footboard with Drawer Mechanism | 1 |
| Metal Slats | Set |
| Under-bed Storage Drawers | 2 |
| Center Support Legs | Varies |
| Hardware Kit (bolts, screws, Allen wrench) | 1 |
Setup and Assembly
Follow these steps carefully for proper assembly. It is recommended to assemble with two people for ease and safety.
Step 1: Unpack and Identify Parts
Lay out all components on a clean, soft surface (like a carpet or blanket) to prevent scratches. Refer to the included parts list (if provided in packaging) to identify each component.
Step 2: Assemble the Headboard
Connect the headboard components as per the diagram in your specific assembly guide. Ensure the upholstered panels are correctly oriented.

An overview of the fully assembled King bed frame, showcasing its modern design, the upholstered headboard with charging capabilities, and the accessible under-bed storage drawers.
Step 3: Install Side Rails and Center Support
Attach the side rails to the assembled headboard and footboard. Secure the center support beam and its legs to the frame for added stability.

This composite image shows the comfortable, soft upholstered headboard, the durable metal frame providing strong support, and features that contribute to the bed frame's easy assembly.
Step 4: Attach Slats
Place and secure the metal slats across the bed frame. Ensure the noise-reducing mute bars are correctly positioned on the slats to minimize sound.

This composite image shows the robust construction of the metal slats, including the integrated mute bars designed to prevent noise, and demonstrates how easily the slats are installed into the frame.
Step 5: Install Storage Drawers
Insert the two storage drawers into the designated slots under the footboard. Ensure they glide smoothly on their tracks.
Image showing the bed frame with the two under-bed storage drawers pulled out, demonstrating their functionality.
Step 6: Connect Charging Station
Once the bed frame is fully assembled, plug the power cord from the integrated charging station into a functional wall outlet.
A detailed view of the headboard's built-in charging station, featuring two 110V/12A AC outlets and two 5V/2A USB ports for convenient device charging.
Operating Instructions
Using the Charging Station
The headboard features 2 AC outlets and 2 USB ports. Simply plug your electronic devices into the appropriate ports for convenient charging while in bed. Ensure the bed frame's power cord is connected to a wall outlet.
Using the Storage Drawers
The two fabric drawers located in the footboard provide accessible storage for clothes, bedding, or other items. Gently pull the drawers out to access their contents and push them back in when finished.
Maintenance
Cleaning
- Metal Frame: Wipe the metal frame with a soft, damp cloth. Avoid abrasive cleaners that may damage the finish.
- Upholstered Headboard & Drawers: Use a soft brush attachment on a vacuum cleaner to remove dust and debris. For spills, spot clean immediately with a mild fabric cleaner and a clean cloth. Test the cleaner on an inconspicuous area first.
General Care
- Periodically check all bolts and screws to ensure they remain tight. Re-tighten if necessary to maintain stability and prevent noise.
- Avoid dragging the bed frame when moving it; lift it to prevent damage to the frame and your flooring.
Troubleshooting
Noise/Squeaking
If the bed frame makes noise, check all bolts and connections for tightness. Ensure all metal slats are properly seated in their supports and that the mute bars are correctly installed.
Charging Station Not Working
Verify that the bed frame's power cord is securely plugged into a functional wall outlet. Check if your devices are properly connected to the charging ports. Test the outlet with another appliance to ensure it has power.
Drawers Sticking or Not Gliding Smoothly
Ensure the drawers are aligned correctly within their tracks. Check for any obstructions or items that might be preventing smooth operation. Empty the drawers to check if they are overloaded.
Specifications
| Feature | Detail |
|---|---|
| Model Number | PHO_0YMPU18T-zswvued |
| Size | King (U.S. Standard) |
| Material | Engineered Wood, Metal |
| Overall Dimensions (L x W x H) | 86.6" x 77.6" x 40.6" |
| Color | Grey |
| Charging Station | 2 AC Outlets (110V/12A), 2 USB Ports (5V/2A) |
| Power Cord Length | 6.5 FT |
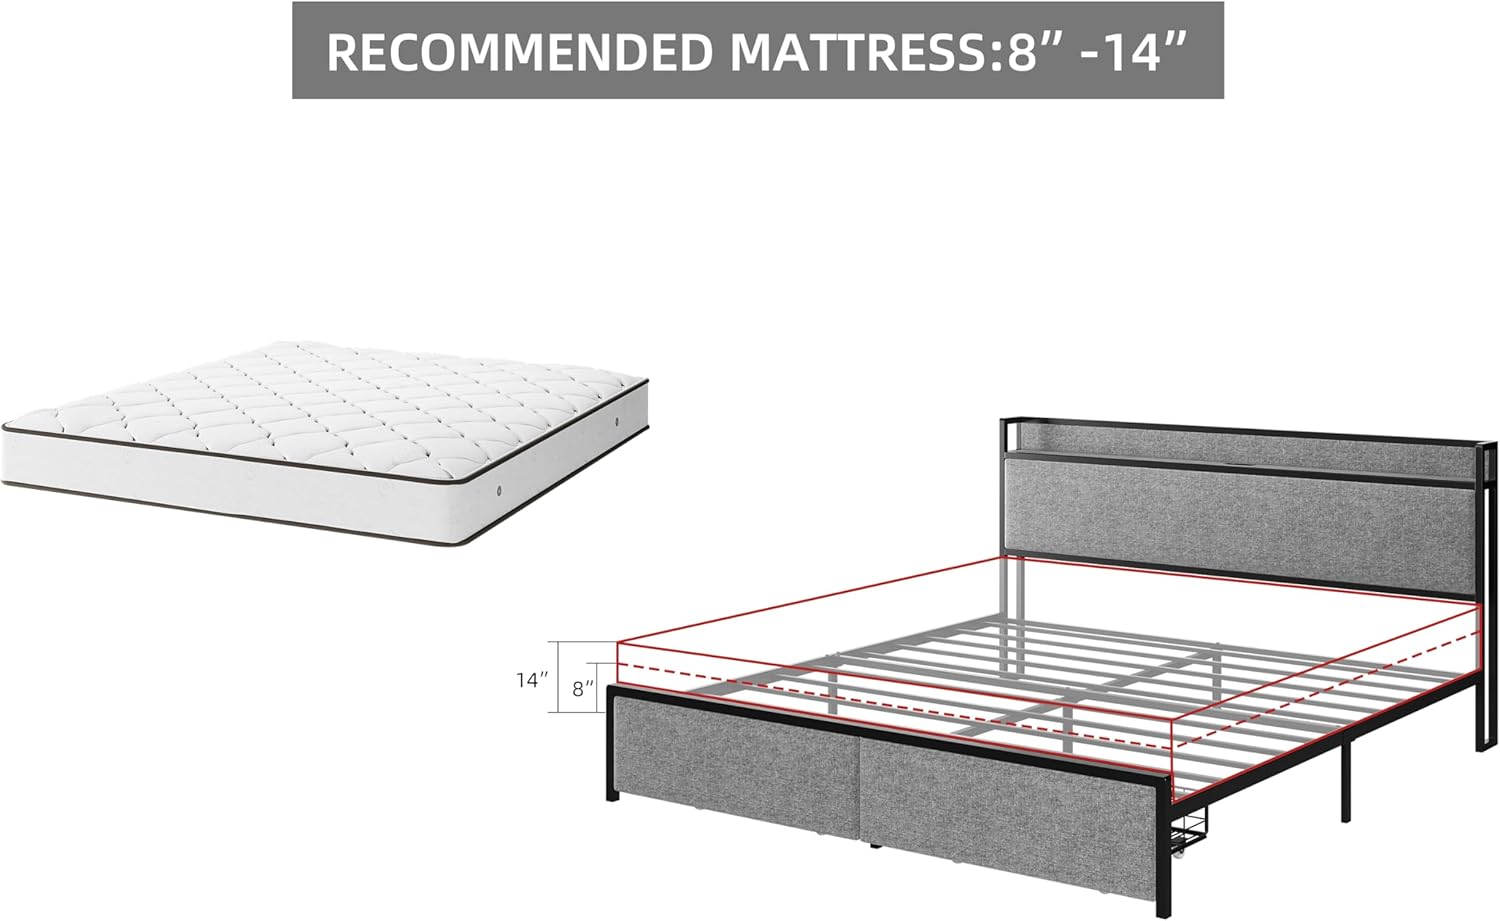
| Recommended Mattress Thickness | 8 - 14 inches |
| Under-bed Clearance | 10.24 inches |
| Storage Drawers | 2 (Integrated) |

A detailed diagram providing the overall dimensions of the King size bed frame, including its length (86.6"), width (77.6"), and headboard height (40.6").

This image illustrates the recommended mattress thickness range of 8 to 14 inches for optimal fit and comfort on the bed frame.

This image highlights the 10.24 inches of clearance beneath the bed frame, providing space for cleaning devices like robot vacuums or extra storage.
Warranty and Support
For warranty information, technical support, or to report missing/damaged parts, please contact SunnyFurn customer service through the retailer where the product was purchased. Please retain your purchase receipt as proof of purchase.