1. Product Overview
The STEREN PRO-260 Mini Multimedia HD Projector is designed for versatile entertainment and presentation purposes. It features LED technology, offering a projection of up to 100 inches with 110 ANSI lumens. This projector supports various input sources including HDMI and USB, and provides audio output via its integrated speaker or external Bluetooth/AUX connections. Its compact design and manual adjustments for focus and keystone make it suitable for various environments.
2. Important Safety Information
Please read and follow all safety instructions to prevent injury or damage to the projector.
- Power Supply: Use only the specified power adapter (110-240 Vac, 50-60 Hz, 650 mA).
- Ventilation: Ensure adequate ventilation around the projector. Do not block ventilation openings.
- Heat: The projector lamp generates heat. Avoid touching the lens or vents during operation.
- Eye Protection: Do not look directly into the projector lens when the lamp is on.
- Placement: Place the projector on a stable, level surface. Avoid placing it in direct sunlight, near heat sources, or in humid environments.
- Cleaning: Disconnect power before cleaning. Use a soft, dry cloth.
- Children: Keep out of reach of children.
3. Package Contents
Verify that all items are present in the package:
- STEREN PRO-260 Mini Multimedia HD Projector
- Remote Control (2 x AAA batteries required, not included)
- Power Cable
- User Manual (this document)
4. Product Components
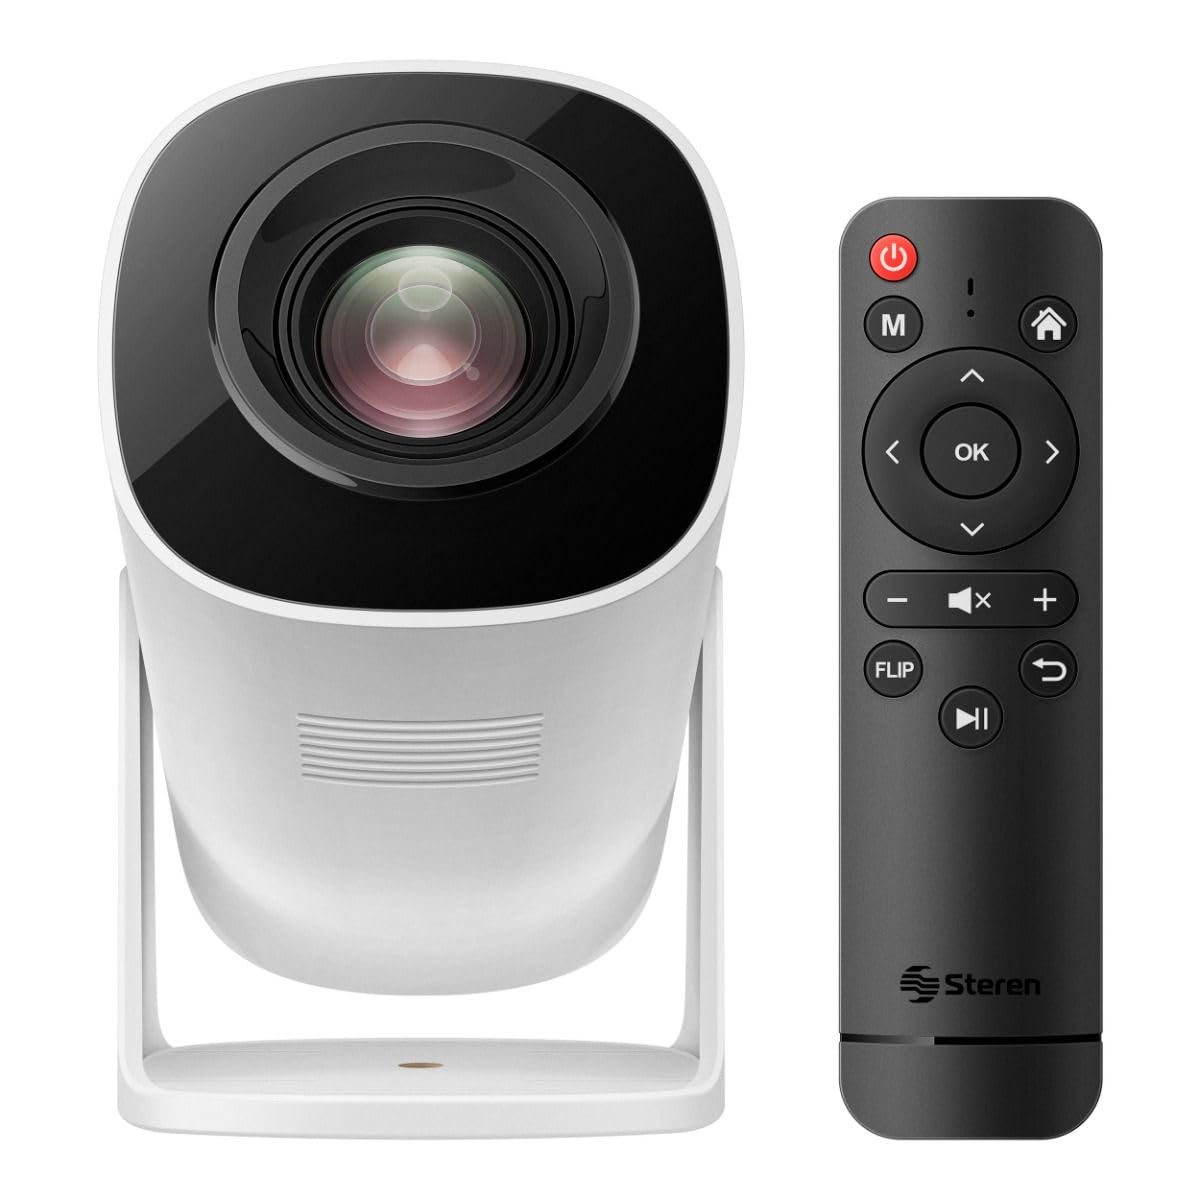
Figure 4.1: Rear View of Projector
This image shows the rear panel of the STEREN PRO-260 projector, highlighting the power input, HDMI port, USB port, and power button.

Figure 4.2: Front View of Projector
This image displays the front of the STEREN PRO-260 projector, featuring the projection lens and the manual focus adjustment knob located on the top.
Key Components:
- Projection Lens: Emits the image onto the screen.
- Focus Adjustment Knob: Manually adjusts image sharpness.
- Power Button: Turns the projector on or off.
- USB Input: Connects USB storage devices (up to 128GB) for media playback.
- HDMI Input: Connects to external video sources like laptops, game consoles, or TV boxes.
- 3.5mm AUX Audio Output: Connects to external speakers or headphones.
- Power Input: Connects the power cable.
- IR Receiver: Receives signals from the remote control.
5. Setup Guide
5.1 Initial Placement
- Place the projector on a stable, flat surface.
- Position the projector between 1 meter and 3 meters from the projection surface to achieve a screen size between 35 inches and 100 inches.
- For optimal image quality, ensure the projection environment is dark.
5.2 Power Connection
- Connect the power cable to the projector's power input port.
- Plug the other end of the power cable into a suitable electrical outlet (110-240 Vac, 50-60 Hz).
5.3 Remote Control Setup
- Open the battery compartment on the back of the remote control.
- Insert two AAA batteries, ensuring correct polarity.
- Close the battery compartment.
5.4 Connecting Input Sources
- HDMI: Connect an HDMI cable from your source device (e.g., laptop, game console, TV box) to the projector's HDMI input.
- USB: Insert a USB flash drive (up to 128GB) into the projector's USB input for media playback.
6. Operating Instructions
6.1 Powering On/Off
- To Power On: Press the power button on the projector or the remote control. The indicator light will illuminate.
- To Power Off: Press the power button again. The indicator light will turn off.
6.2 Adjusting Focus and Keystone
- Focus: Rotate the manual focus adjustment knob located on the top of the projector until the image appears sharp and clear.
- Keystone: Keystone correction can be adjusted manually using the remote control. Alternatively, the projector may offer an automatic keystone correction function. Refer to the on-screen menu for options.
6.3 Selecting Input Source
Use the 'Source' button on the remote control or the projector's control panel to cycle through available input sources (HDMI, USB).
6.4 Audio Output
- Internal Speaker: The projector has a built-in 3W speaker for audio playback.
- External Audio (AUX): Connect external speakers or headphones to the 3.5mm AUX audio output port for enhanced sound.
- Bluetooth Audio: Pair the projector with a Bluetooth-enabled sound system for wireless audio output. Navigate to the Bluetooth settings in the projector's menu to initiate pairing.
6.5 USB Media Playback
- Insert a USB flash drive into the USB port.
- Select 'USB' as the input source.
- Use the remote control to navigate through the files and select the media you wish to play.
7. Maintenance
7.1 Cleaning the Lens
Use a soft, lint-free cloth specifically designed for optical lenses to gently wipe the projector lens. Avoid using abrasive cleaners or excessive force.
7.2 Cleaning the Projector Body
Wipe the exterior of the projector with a soft, dry cloth. Do not use liquid cleaners or solvents.
7.3 Ventilation
Regularly check that the ventilation openings are clear of dust and debris to prevent overheating. Do not obstruct the airflow during operation.
7.4 Storage
When not in use for extended periods, store the projector in a cool, dry place, away from direct sunlight and extreme temperatures. Consider using the original packaging for protection.
8. Troubleshooting
If you encounter issues with your projector, refer to the following common problems and solutions:
| Problem | Possible Cause | Solution |
|---|---|---|
| No image on screen | Power not connected; Incorrect input source; Source device off/disconnected. | Check power cable; Select correct input source; Ensure source device is on and connected. |
| Image is blurry | Focus not adjusted; Projector too close/far from screen. | Adjust the focus knob; Reposition the projector within the recommended distance. |
| Image is distorted (trapezoid shape) | Keystone not adjusted. | Adjust keystone correction via remote control or on-screen menu. |
| No sound | Volume too low; External audio device not connected/paired; Muted. | Increase volume; Check AUX/Bluetooth connection; Unmute the projector. |
| Remote control not working | Batteries low/incorrectly inserted; Obstruction between remote and projector. | Replace batteries; Ensure clear line of sight to IR receiver. |
9. Specifications
| Feature | Specification |
|---|---|
| Model Number | PRO-260 |
| Power Supply | 110-240 Vac, 50-60 Hz, 650 mA |
| Lumens | 110 ANSI Lumens (4,840 Lumens) |
| Maximum Resolution | 720p (Native 1280 x 720) |
| Screen Size | 89 cm – 254 cm (35" - 100") |
| Projection Distance | 1 m – 3 m |
| Aspect Ratio | 16:9 |
| Speaker Power | 3 W x 1 |
| USB Memory Capacity | Up to 128 GB |
| Connectivity Technology | HDMI, USB, Bluetooth, 3.5mm AUX |
| Display Type | LED |
| Form Factor | Portable |
| Mounting Type | Tabletop Mount |
| Product Dimensions (L x W x H) | 13.5 x 17 x 22.5 cm |
| Product Weight | 1 kg |
10. Warranty and Support
For warranty information and customer support, please refer to the warranty card included with your product or visit the official STEREN website. Keep your purchase receipt as proof of purchase for any warranty claims.