GAMDIAS AURA GC9M
GAMDIAS Aura GC9M Black Micro Tower Cabinet User Manual
Model: AURA GC9M | Brand: GAMDIAS
1. Introduction and Overview
The GAMDIAS AURA GC9M ARGB Series Micro Tower Cabinet, available in black and white, features a compact panoramic design with three built-in ARGB fans. It offers enhanced compatibility for various PC components and includes tempered glass front and side panels to showcase your build's aesthetics. This manual provides essential information for the proper installation, operation, and maintenance of your new PC case.


2. Product Features
The GAMDIAS Aura GC9M Micro Tower Cabinet is designed with several key features to enhance your PC building experience:
- Motherboard Compatibility: Supports Mini-ITX and Micro-ATX motherboards.
- Pre-installed ARGB Fans: Includes two 120mm ARGB fans at the bottom and one 120mm ARGB fan at the rear for optimal cooling and lighting.
- Component Clearances:
- CPU cooler height limitation: 155mm
- VGA length limitation: 280mm
- PSU length limitation: 150mm
- Top Liquid Cooler limitation: RAM height <31mm
- Front I/O Ports: Equipped with 1x USB 3.0, 2x USB 2.0, 1x HD Audio jack, and 1x LED Switch Button for convenient connectivity.
- Panoramic Tempered Glass: Front and side panels made of tempered glass provide a clear view of your internal components.
- Tool-less Access: Features an easy latch mechanism for quick and convenient access to the interior.


3. Setup and Installation
Follow these steps for setting up and installing components into your GAMDIAS Aura GC9M cabinet:
3.1 Unpacking
Carefully remove the cabinet from its packaging. Inspect for any signs of damage during transit. Retain the packaging for future transport or storage.

3.2 Accessing the Interior
- Locate the tool-less latch mechanism on the side panel (refer to Figure 2.2).
- Gently unlatch and remove the tempered glass side panel to access the interior.
3.3 Motherboard Installation
- Ensure your motherboard is Mini-ITX or Micro-ATX compatible.
- Align the motherboard with the standoffs inside the case.
- Secure the motherboard using the appropriate screws.
3.4 Power Supply Unit (PSU) Installation
- Install your PSU into the designated compartment. Ensure the PSU length does not exceed 150mm.
- Secure the PSU with screws from the rear of the case.
3.5 Graphics Card (VGA) Installation
- Insert your graphics card into the appropriate PCIe slot on the motherboard.
- Ensure the VGA card length does not exceed 280mm (refer to Figure 2.3).
- Secure the graphics card with screws.
3.6 CPU Cooler Installation
Install your CPU cooler according to its manufacturer's instructions. The maximum CPU cooler height supported is 155mm.
3.7 Fan and Radiator Installation
The case comes with three pre-installed 120mm ARGB fans (two bottom, one rear). Additional fans or radiators can be installed as per the cooling support diagram (refer to Figure 2.4). Ensure RAM height is less than 31mm if installing a top liquid cooler.
3.8 Cable Management
Utilize the cable routing options behind the motherboard tray to manage cables neatly. This improves airflow and aesthetics.
4. Operating the Cabinet
Once all components are installed and connected, you can begin operating your PC. The front I/O panel provides convenient access to essential functions:
- Power Button: Located on the front I/O panel, press to power on or off your system.
- USB Ports: Use the 1x USB 3.0 and 2x USB 2.0 ports for connecting peripherals and external devices.
- HD Audio Jacks: Connect your headphones and microphone to the dedicated audio jacks.
- LED Switch Button: This button controls the lighting modes of the pre-installed ARGB fans. Press to cycle through various lighting effects.
5. Maintenance
Regular maintenance helps ensure optimal performance and longevity of your PC cabinet:
- Dust Cleaning: Periodically clean dust from the interior of the case, especially from fan blades and dust filters (if present). Use compressed air or a soft brush.
- Exterior Cleaning: Wipe the exterior surfaces, including tempered glass panels, with a soft, damp cloth. Avoid abrasive cleaners that may scratch the surface.
- Fan Inspection: Check fan operation regularly to ensure they are spinning freely and quietly. Clean any accumulated dust from fan blades.
6. Troubleshooting
This section addresses common issues you might encounter:
6.1 Fans Not Spinning or ARGB Not Working
- Check Connections: Ensure all fan power cables and ARGB cables are securely connected to the motherboard or a dedicated fan/ARGB controller.
- Motherboard Compatibility: Verify that your motherboard has compatible ARGB headers if you intend to control lighting via software. The pre-installed fans may require a specific controller or direct power connection if no ARGB header is available.
- LED Switch: If using the LED switch button, ensure it is functioning correctly by pressing it to cycle through modes.
6.2 Front I/O Ports Not Functioning
- Internal Connections: Confirm that the USB and HD Audio cables from the front I/O panel are correctly plugged into the corresponding headers on your motherboard.
- Driver Installation: Ensure all necessary motherboard drivers, especially for audio and USB, are installed.
6.3 Side Panel Gap or Misalignment
- Re-seat Panel: Remove and re-seat the tempered glass side panel, ensuring it aligns correctly with the chassis and the latch mechanism engages fully.
- Check for Obstructions: Ensure no internal components or cables are preventing the panel from closing flush.
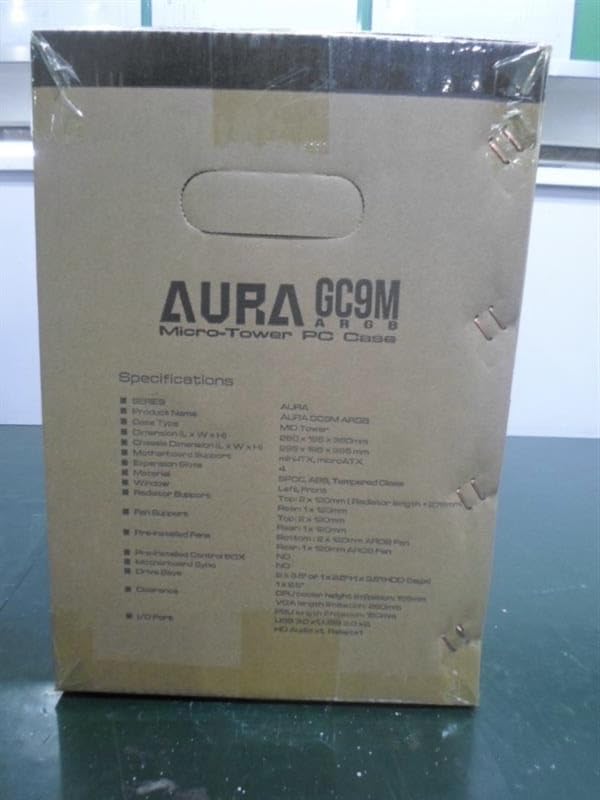
7. Specifications
| Feature | Detail |
|---|---|
| Model Name | AURA GC9M |
| Case Type | Micro-Tower |
| Motherboard Support | Mini-ITX, Micro-ATX |
| Material | Metal, Tempered Glass |
| Color | Black |
| Product Dimensions (LxWxH) | 27.99 x 38 x 19.51 cm (11.02 x 14.96 x 7.68 inches) |
| Item Weight | 3 kg (6.61 lbs) |
| Pre-installed Fans | Bottom: 2 x 120mm ARGB Fan, Rear: 1 x 120mm ARGB Fan |
| CPU Cooler Height Limitation | 155mm |
| VGA Length Limitation | 280mm |
| PSU Length Limitation | 150mm |
| Top Liquid Cooler Limitation | RAM height <31mm |
| I/O Ports | 1x USB 3.0, 2x USB 2.0, 1x HD Audio, 1x LED Switch Button |
8. Warranty and Support
Specific warranty details for the GAMDIAS Aura GC9M Micro Tower Cabinet are not provided in this manual. For comprehensive warranty information, technical support, or service inquiries, please refer to the official GAMDIAS website or contact their customer support directly. Keep your proof of purchase for warranty claims.
Related Documents - AURA GC9M
 |
GAMDIAS AURA GC12 ARGB Mid-Tower Case User Manual User manual for the GAMDIAS AURA GC12 ARGB Mid-Tower PC Case, detailing its features, specifications, and installation guide for a seamless build experience. |
 |
GAMDIAS APOLLO M2 Elite Mid-Tower PC Case Quick Installation Guide This guide provides quick installation instructions for the GAMDIAS APOLLO M2 Elite mid-tower PC case, detailing specifications, component mounting, and compatibility for PC builders. |
 |
MARS IE4M Micro-Tower PC Case: Installation Guide & Specifications Comprehensive guide to the GAMDIAS MARS IE4M Micro-Tower PC Case, covering installation, safety, specifications, and maintenance for optimal PC building. |
 |
GAMDIAS ATHENA E1 Elite Mid-Tower PC Case: Quick Installation Guide This guide provides step-by-step instructions for installing the GAMDIAS ATHENA E1 Elite Mid-Tower PC Case. Learn about specifications, component compatibility, and assembly for a seamless PC build. |
 |
GAMDIAS AURA GC2 Mid-Tower PC Case Quick Installation Guide A concise guide to installing the GAMDIAS AURA GC2 Mid-Tower PC Case, covering specifications, component installation, and I/O connections. |
 |
GAMDIAS AEOLUS P2 1203 ARGB PWM Fan Installation Guide Installation guide for the GAMDIAS AEOLUS P2 1203 ARGB PWM fan, detailing package contents, mounting instructions, and connection diagrams for PC cases and radiators. |
Ask a question about this manual
Ask about setup, troubleshooting, compatibility, parts, safety, or missing instructions. Manuals+ will review the question and use this page’s manual context to help answer it.