
1. Overview
The PowMr 3600W Solar Inverter (POW-LVM3.6M-24V) is an all-in-one solar inverter charger designed to integrate both solar and AC power sources for battery charging and load powering. It features a pure sine wave AC output and supports selectable frequencies of 50Hz or 60Hz. This inverter is compatible with various 24V battery types, including lead-acid (sealed, AGM, gel, flooded) and lithium batteries.
Key Features:
- Power Output: 3.6KW (3600W) pure sine wave output, 24V DC to 120V AC.
- MPPT Controller: Built-in 120A MPPT charge controller.
- PV Input: Maximum PV input of 4200W, 500V (VOC), 18A. PV starting voltage >60V.
- AC Charger: 80A AC charger with hybrid charging up to 120A (AC charger + PV charger).
- Battery Compatibility: Suitable for 24V lead-acid (sealed, AGM, gel, flooded) and lithium batteries. Recommended battery cable size: 2AWG.
- Display: Real-time LCD display for system data and operating status, allowing user configuration of input voltage range, charging current, and AC/solar charging priority.
- Multi-Mode Operation: Offers 3 battery charging modes (solar first, solar and utility, only solar) and 3 load output working modes (utility first, solar first, SBU priority).
- Protections: Features 360° protections including short circuit, over current, over voltage, under voltage, overload, backfill, over-temperature, and overcharge protection.

Figure 1: PowMr 3600W Hybrid Solar Inverter highlighting its key features and dimensions.

Figure 2: The inverter is suitable for diverse applications such as residential, commercial, agricultural, and emergency backup power.
2. Unboxing
Upon opening the package, you will find the PowMr 3600W Solar Inverter and its accompanying user manual. Please inspect all components for any signs of damage during transit. If any items are missing or damaged, contact customer support immediately.
What's in the Box:
- 1 x PowMr 3600W Solar Inverter
- 1 x Instruction Manual
Video 1: Unboxing the PowMr 24V 3600W Pure Sine Wave Solar Inverter, showing the contents of the package.
3. Safety Information
Read all instructions and warnings carefully before installation and operation. Failure to follow these instructions may result in electric shock, fire, or severe injury. Keep this manual for future reference.
- Installation must be performed by qualified personnel.
- Ensure all wiring is correctly polarized to avoid reverse connection.
- Do not connect the battery after the utility is turned on.
- Verify battery voltage is within the acceptable range for the inverter before connection.
- Install a suitably rated DC circuit breaker between the battery and the inverter.
- Ensure proper ventilation around the inverter to prevent overheating.
- Do not expose the inverter to rain, snow, spray, or excessive dust.

Figure 3: The inverter is equipped with comprehensive 360° protection mechanisms for safe operation.
4. Installation
This section provides step-by-step instructions for installing the PowMr 3600W Solar Inverter. Ensure all safety precautions are followed.
4.1. Mounting the Inverter
- Determine the specific installation location, ensuring it is a dry, well-ventilated area away from direct sunlight and flammable materials.
- Secure the inverter to the wall using two screws through the mounting holes at the top of the inverter.
4.2. Battery Connection
- Connect the positive (red) and negative (black) cables from the battery to a suitably rated DC circuit breaker.
- Check that the battery voltage is within the acceptable range for the inverter (24V nominal) using a multimeter.
- Unscrew the four screws on the port cover at the bottom of the inverter and remove the cover.
- Connect the battery positive and negative lines from the DC circuit breaker to the corresponding battery terminals on the inverter, ensuring correct polarity to avoid reverse connection.
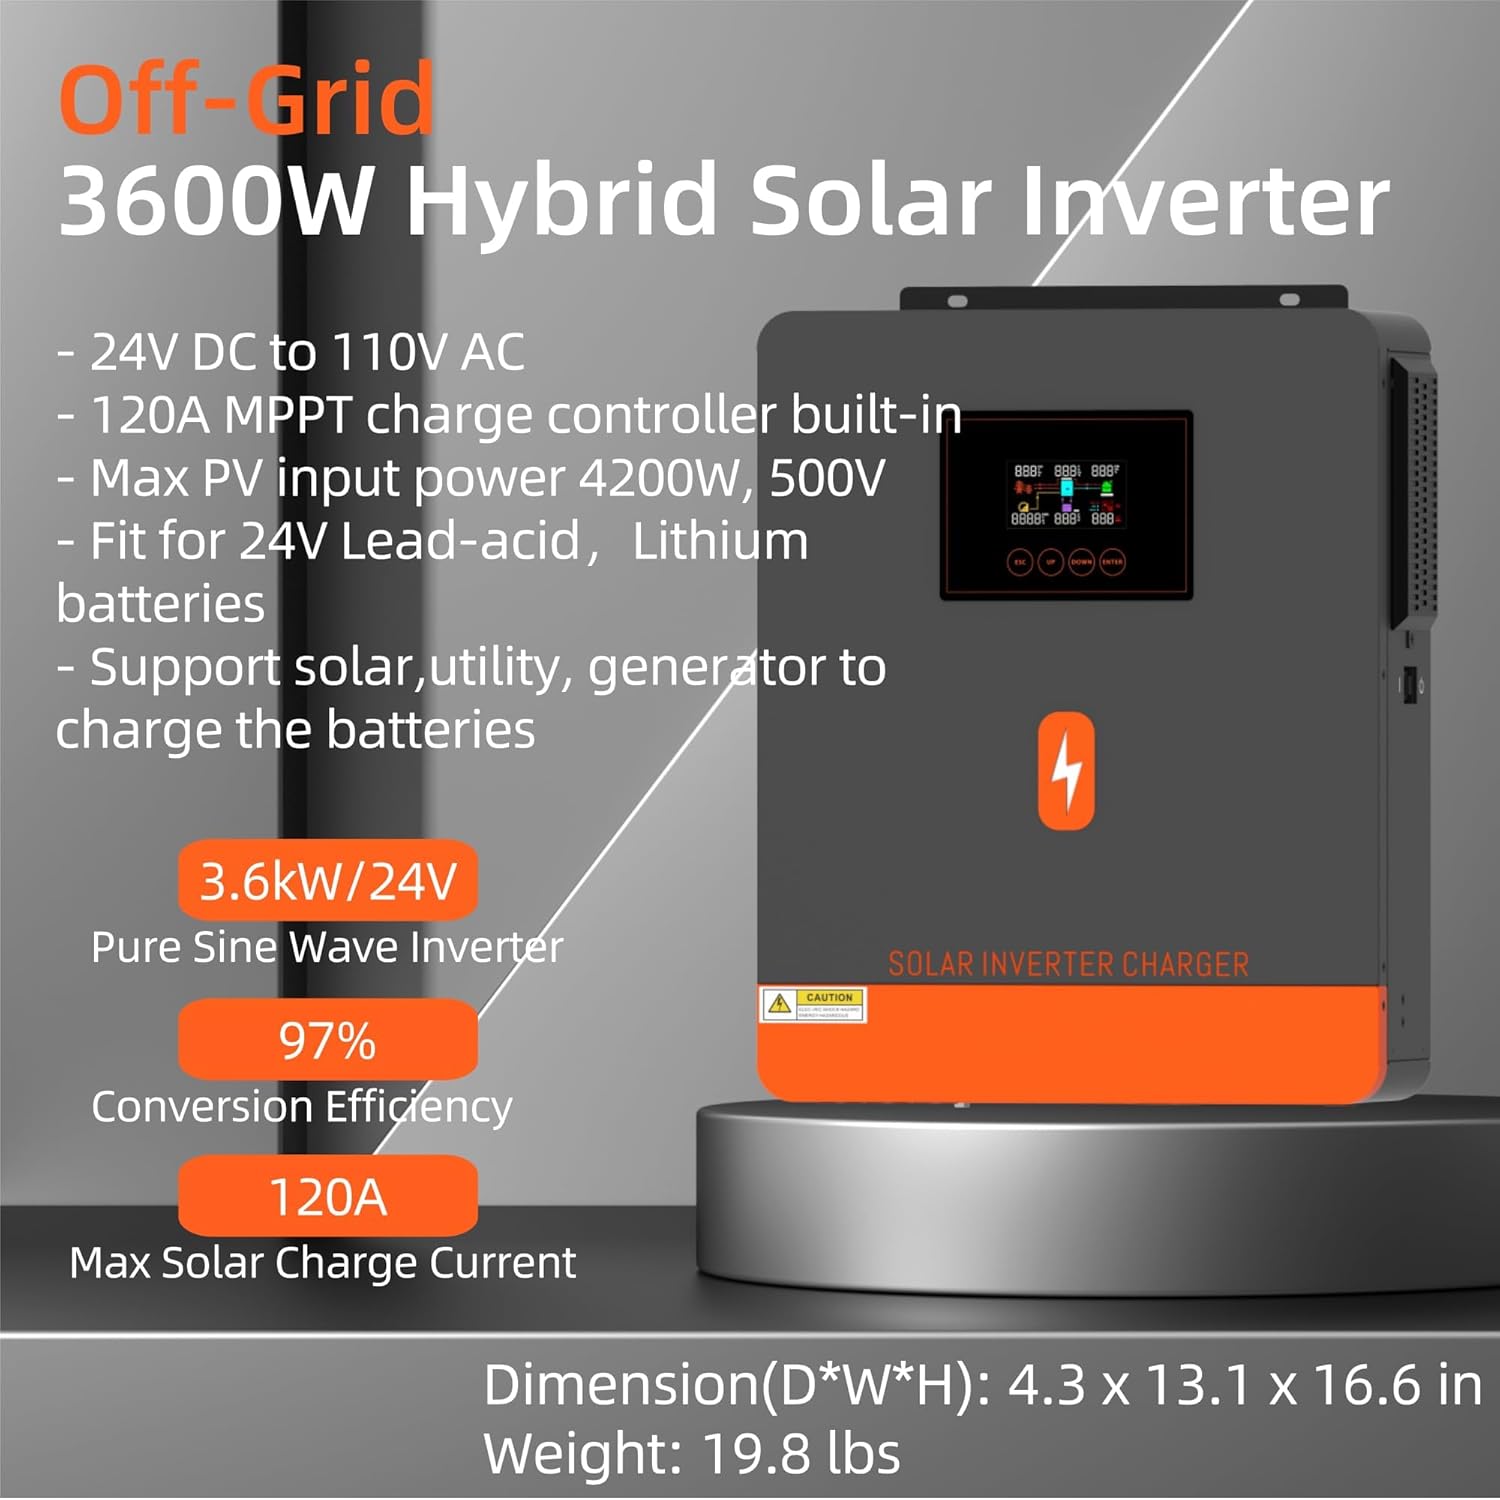
Figure 4: The inverter supports 120A fast charging and is compatible with multiple 24V battery types.
4.3. PV Array Connection
- Connect the PV array to the positive and negative PV input ports of the inverter. Ensure the PV input voltage and current are within the inverter's specifications (Max PV Input: 4200W, 500V VOC, 18A).
4.4. AC Input (Utility/Generator) Connection
- Connect the inverter to the utility power or generator via the AC input port.
4.5. AC Output (Loads) Connection
- Connect the loads to the main AC output port and the secondary AC output port. You can choose to enable the dual output smart management feature to coordinate the main output switch, ensuring stable power supply to the secondary output line.
4.6. Power On Sequence
- After completing all AC output wiring, replace the port cover and secure it with the four screws.
- Close the battery circuit breaker.
- Power on the inverter using the power switch.
- If the inverter shows no abnormalities, sequentially activate the PV input, AC input, and AC output lines.
Video 2: Detailed installation and wiring guide for the PowMr 3600W Pure Sine Wave Solar Inverter.
5. Operation
The inverter features an intuitive LCD display and control buttons for easy operation and configuration.
5.1. LCD Display and Settings
The LCD display provides real-time system data and operating status. Use the control buttons (ESC, UP, DOWN, ENTER) to navigate the menu and adjust settings.
- Input Voltage Range: Adjust the input voltage range for home appliances or personal computers.
- Battery Charging Current: Configure the battery charging current based on your specific application and battery type.
- AC/Solar Charging Priority: Set the priority between AC and solar charging sources.
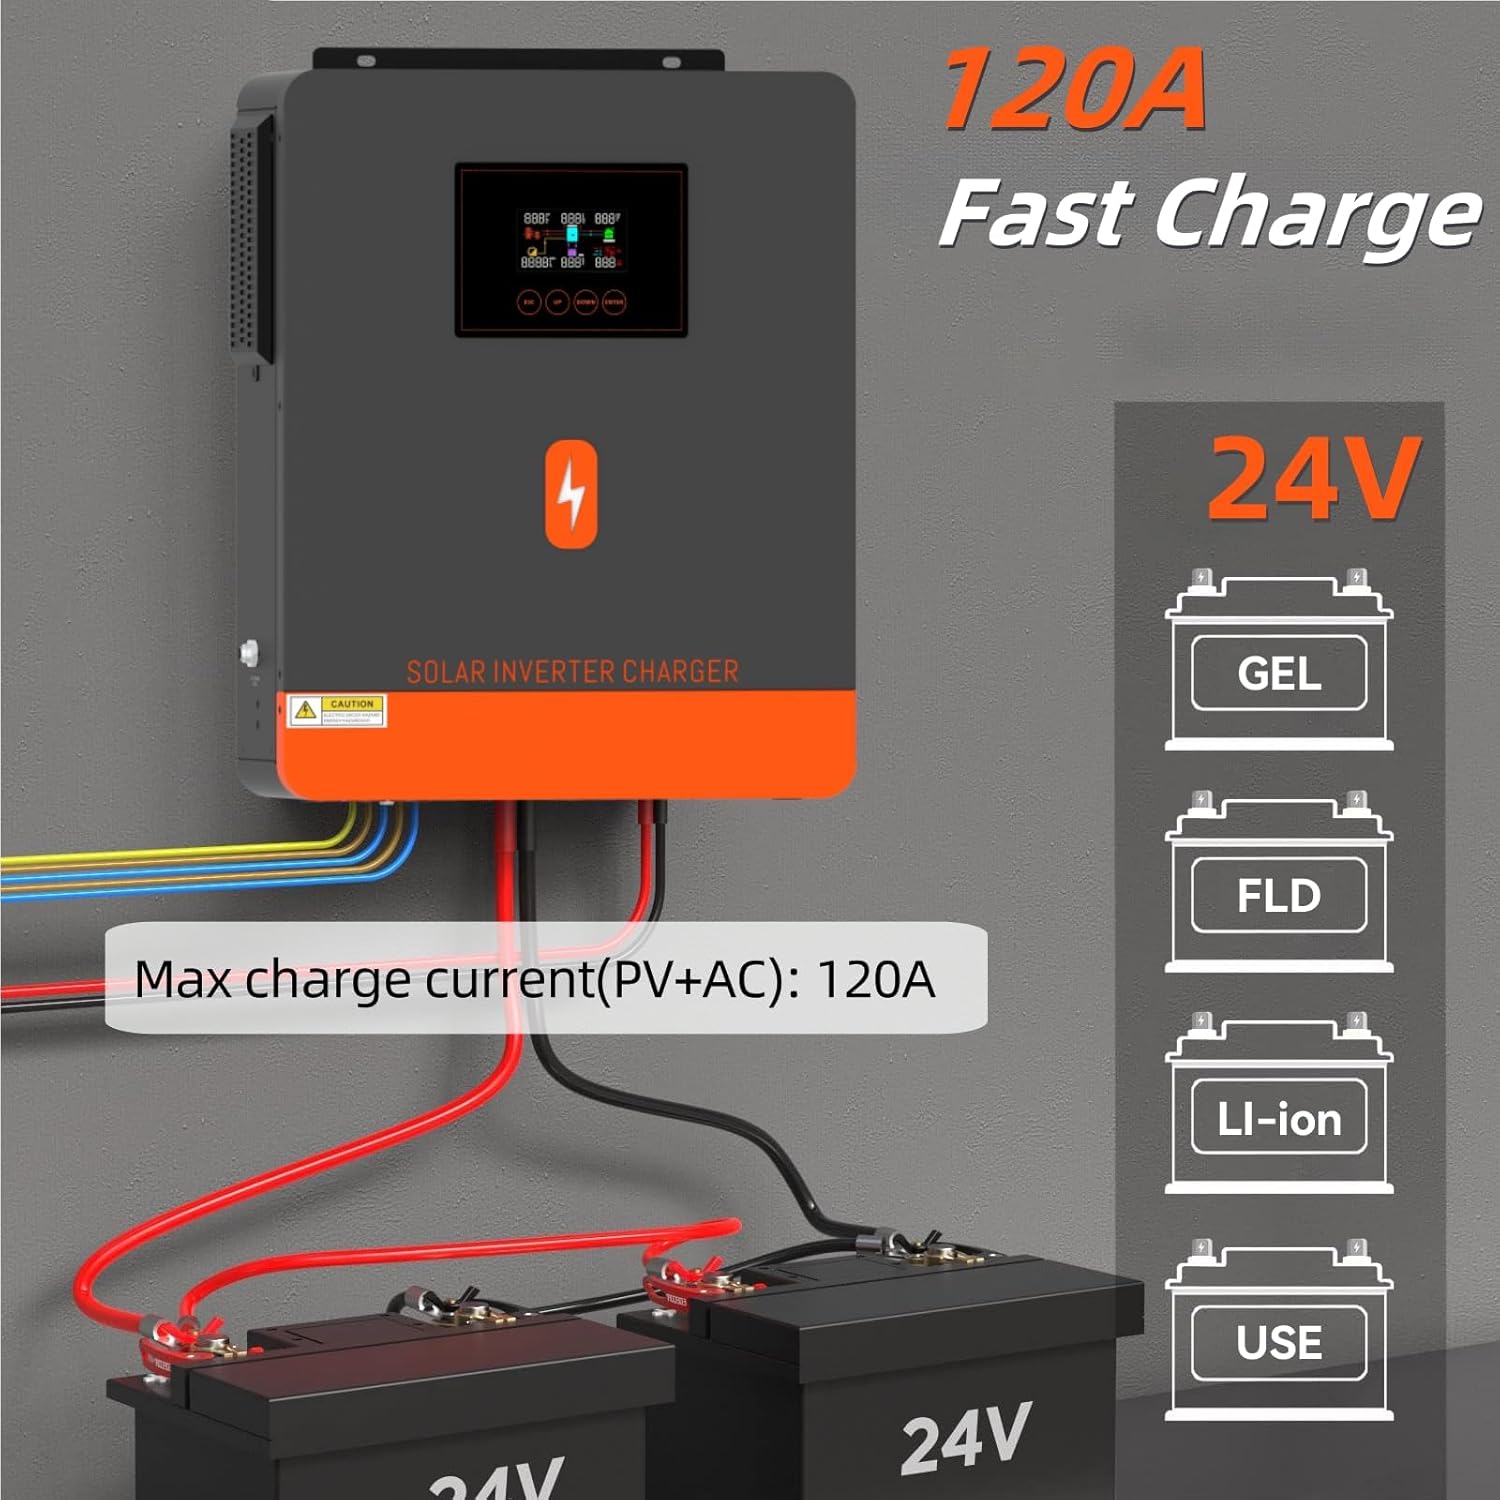
Figure 5: The inverter's LCD display allows for easy configuration of various operational parameters.
5.2. Charging and Output Modes
The inverter offers flexible charging and output modes to suit different energy management needs.
- Battery Charging Modes:
- Solar First
- Solar and Utility
- Only Solar
- Load Output Working Modes:
- Utility First
- Solar First
- SBU Priority
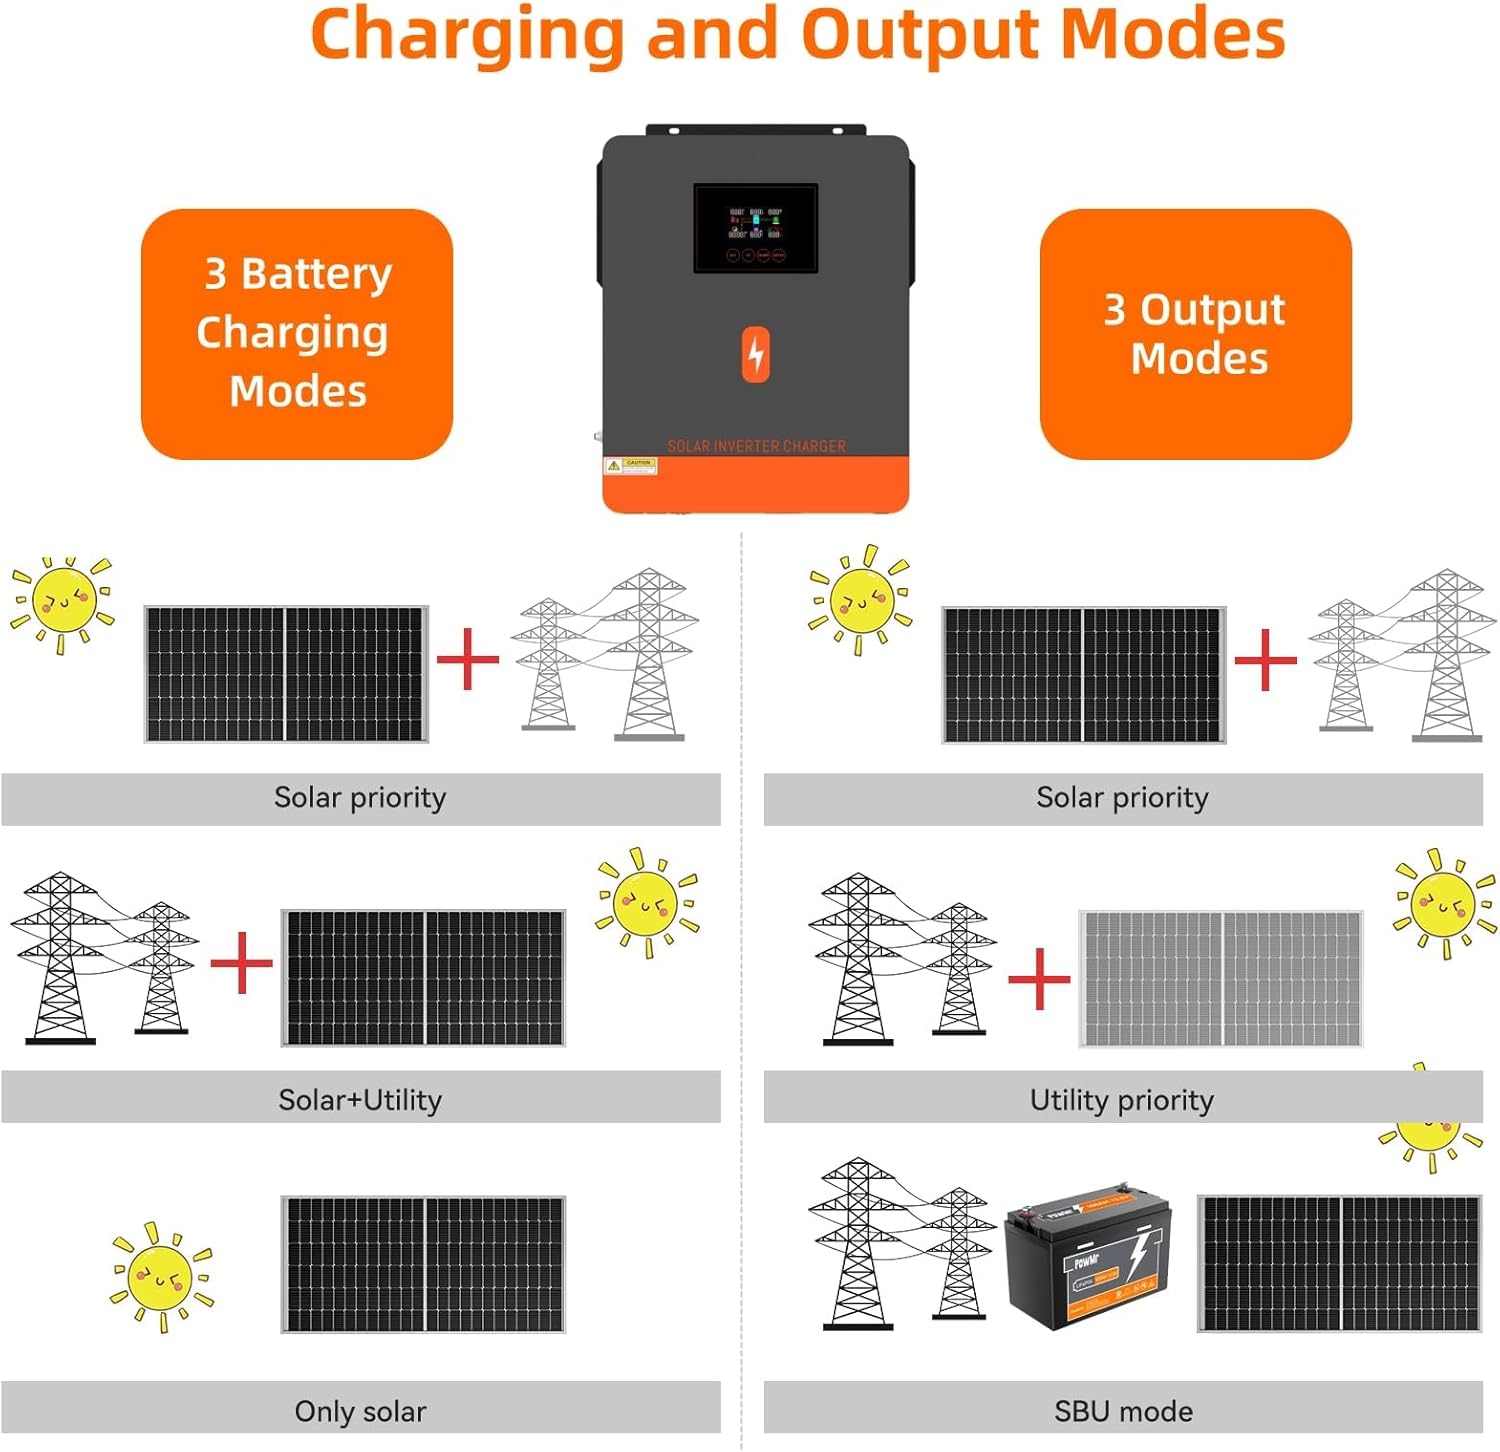
Figure 6: Visual representation of the available charging and output modes for optimized energy usage.
6. Maintenance
Regular maintenance ensures optimal performance and longevity of your PowMr Solar Inverter.
- Cleaning: Periodically clean the exterior of the inverter with a dry cloth. Ensure ventilation openings are free from dust and debris.
- Connections: Regularly check all electrical connections for tightness and signs of corrosion.
- Environment: Ensure the installation environment remains within the specified temperature and humidity ranges.
- Battery Health: Monitor battery health and ensure proper charging cycles to extend battery life.
7. Troubleshooting
This section provides solutions to common issues you might encounter with your inverter. For more complex problems, contact customer support.
- No Power Output: Check battery connections, DC circuit breaker, and AC output connections. Ensure the inverter is powered on.
- Low Battery Voltage Alarm: Verify battery charge level. Check PV input and AC input for proper power supply.
- Overload Alarm: Reduce the connected load. Ensure the total load does not exceed the inverter's rated capacity.
- Over-temperature Alarm: Ensure adequate ventilation around the inverter. Clean any dust from the cooling vents.
- PV Input Not Detected: Check PV array connections and ensure sufficient sunlight. Verify PV input voltage.
8. Specifications
Detailed technical specifications for the PowMr 3600W Solar Inverter (POW-LVM3.6M-24V).
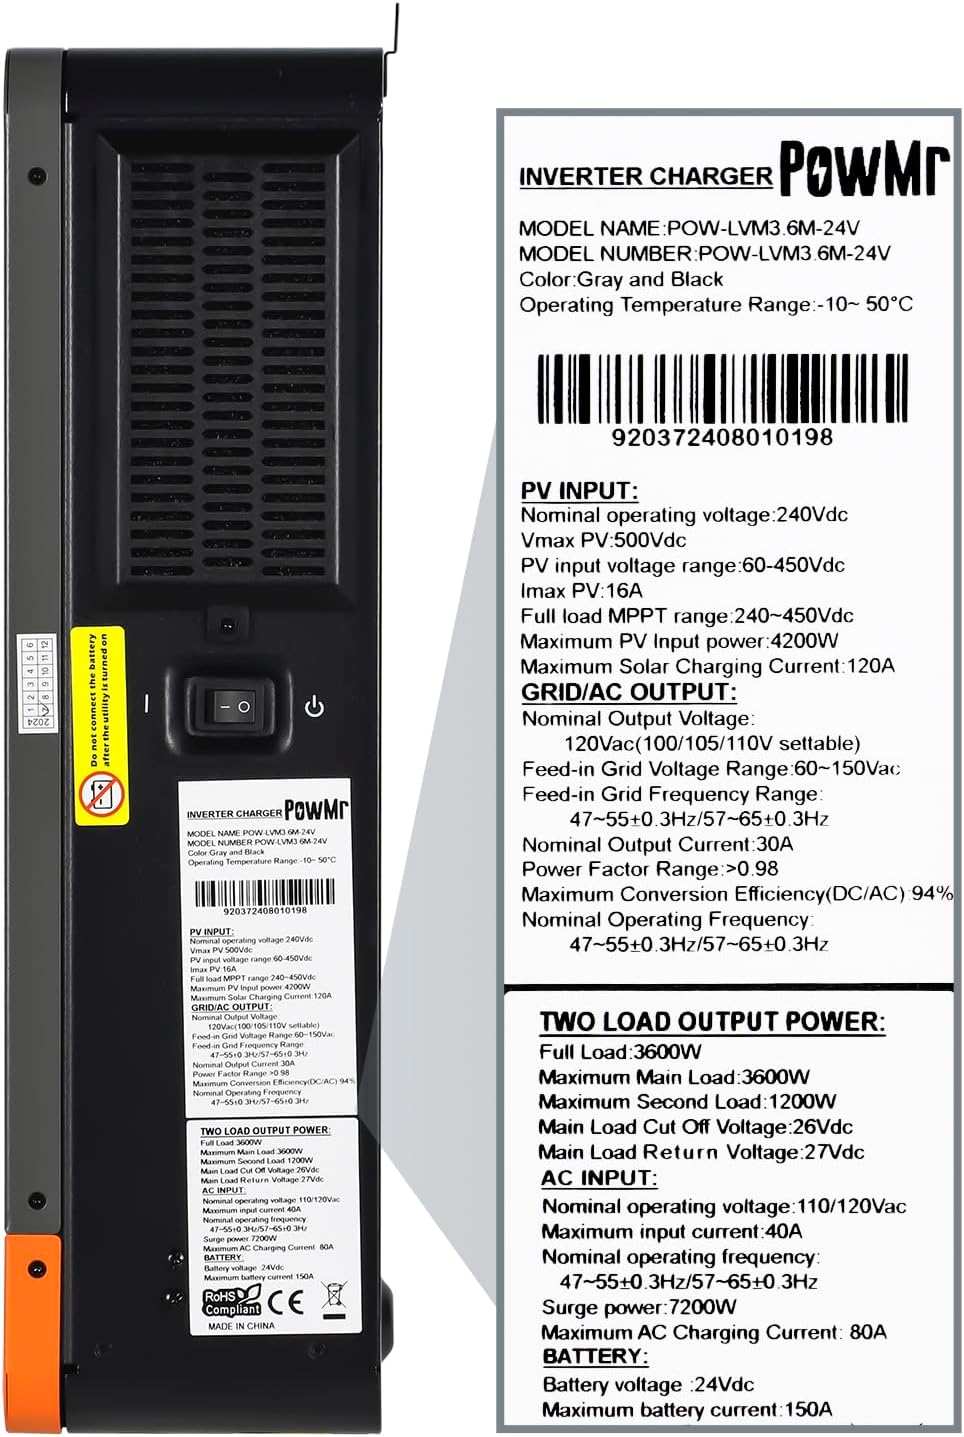
Figure 7: Product label displaying detailed technical specifications. Product ID: 920372408010198.
| Feature | Specification |
|---|---|
| Model Name | POW-LVM3.6M-24V |
| Wattage | 3600 watts |
| Power Source | Solar Powered |
| Recommended Uses | Home, Office, Vehicle |
| Brand | PowMr |
| Manufacturer | PowMr |
| Item Weight | 20 pounds |
| Product Dimensions | 16 x 4 x 13 inches |
| Max PV Input | 4200W, 500V (VOC), 18A |
| MPPT Controller Current | 120A |
| AC Charger Current | 80A |
| DC/AC Efficiency | 97% |
9. Warranty and Support
For warranty information, technical support, or service inquiries, please refer to the contact details provided in your product packaging or visit the official PowMr website. Keep your purchase receipt as proof of purchase for warranty claims.