Introduction
Thank you for choosing the diymore USB Rechargeable Cordless Soldering Iron Kit. This portable and versatile soldering iron is designed for various electronic repair and DIY projects, offering convenience with its cordless operation and precise temperature control. This manual provides essential information for the safe and effective use of your new soldering iron.

Figure 1: Complete diymore Soldering Iron Kit including the iron, multiple tips, charging cable, soldering wire, rosin, and stand.
Product Features
- Intelligent Five-Speed Temperature Adjustment: Features an LED display for precise temperature control, adjustable from 260°C to 420°C. Supports switching between Celsius and Fahrenheit.
- Integrated Plug-and-Play Soldering Tips: Easy to replace by unscrewing, ensuring simple and convenient operation.
- Worry-Free Type-C Charging: Equipped with a Type-C charging port, allowing connection to computers, USB ports, or mobile power sources for convenient charging.
- High-Capacity Lithium Battery: Built-in 1000mAh lithium battery provides approximately 20 minutes of high-energy endurance on a full charge.
- Fast Heating: 8W power with an integrated heating core allows for tinning in just 6 seconds due to rapid heat conduction.
Package Contents
Please verify that all items are present in your package:
- 1 x diymore USB Rechargeable Cordless Soldering Iron
- 3 x Replaceable Soldering Iron Tips (Round, Horseshoe, Knife Head)
- 1 x USB Type-C Charging Cable
- 1 x Soldering Wire
- 1 x Rosin (Solid Rosin Welding Flux)
- 1 x Soldering Iron Stand with Cleaning Sponge
- 1 x Storage Case
Setup
1. Charging the Soldering Iron
Before first use, fully charge the soldering iron. Connect the provided USB Type-C cable to the charging port on the soldering iron and a compatible USB power source (e.g., computer, USB adapter, power bank). The charging time is approximately 90 minutes.

Figure 2: Charging the soldering iron via its Type-C port. A red light indicates charging, and a green light indicates charging is complete.
The LED indicator light will be red during charging and turn green when charging is complete.
2. Installing Soldering Tips
Ensure the soldering iron is off and cool before installing or replacing tips. To install a tip, gently push it into the heating element opening until it is securely seated. To remove, pull the tip straight out. The kit includes three types of tips: Round, Horseshoe, and Knife Head, for various soldering tasks.

Figure 3: Illustration of how to insert and remove the replaceable soldering iron tips. The kit includes Round, Horseshoe, and Knife Head tips.
Operating Instructions
1. Power On/Off
Press and hold the power button (usually marked with a circle and a line) for a few seconds to turn the soldering iron ON or OFF. The LCD screen will illuminate upon power-on.
2. Temperature Adjustment
Once powered on, the LCD will display the current temperature. Use the '+' and '-' buttons to adjust the temperature. The soldering iron offers five preset temperature levels:
- 260°C (500°F)
- 300°C (572°F)
- 340°C (644°F)
- 380°C (716°F)
- 420°C (788°F)

Figure 4: The five adjustable temperature levels displayed on the LCD screen.

Figure 5: Overview of the soldering iron's controls, including the ON/OFF button, heating key (+), and desuperheating key (-), along with the LCD digital display.
3. Switching Temperature Units (°C/°F)
To switch between Celsius (°C) and Fahrenheit (°F), double-click the power button (or the main adjustment button, depending on the model variant). The display will change accordingly.
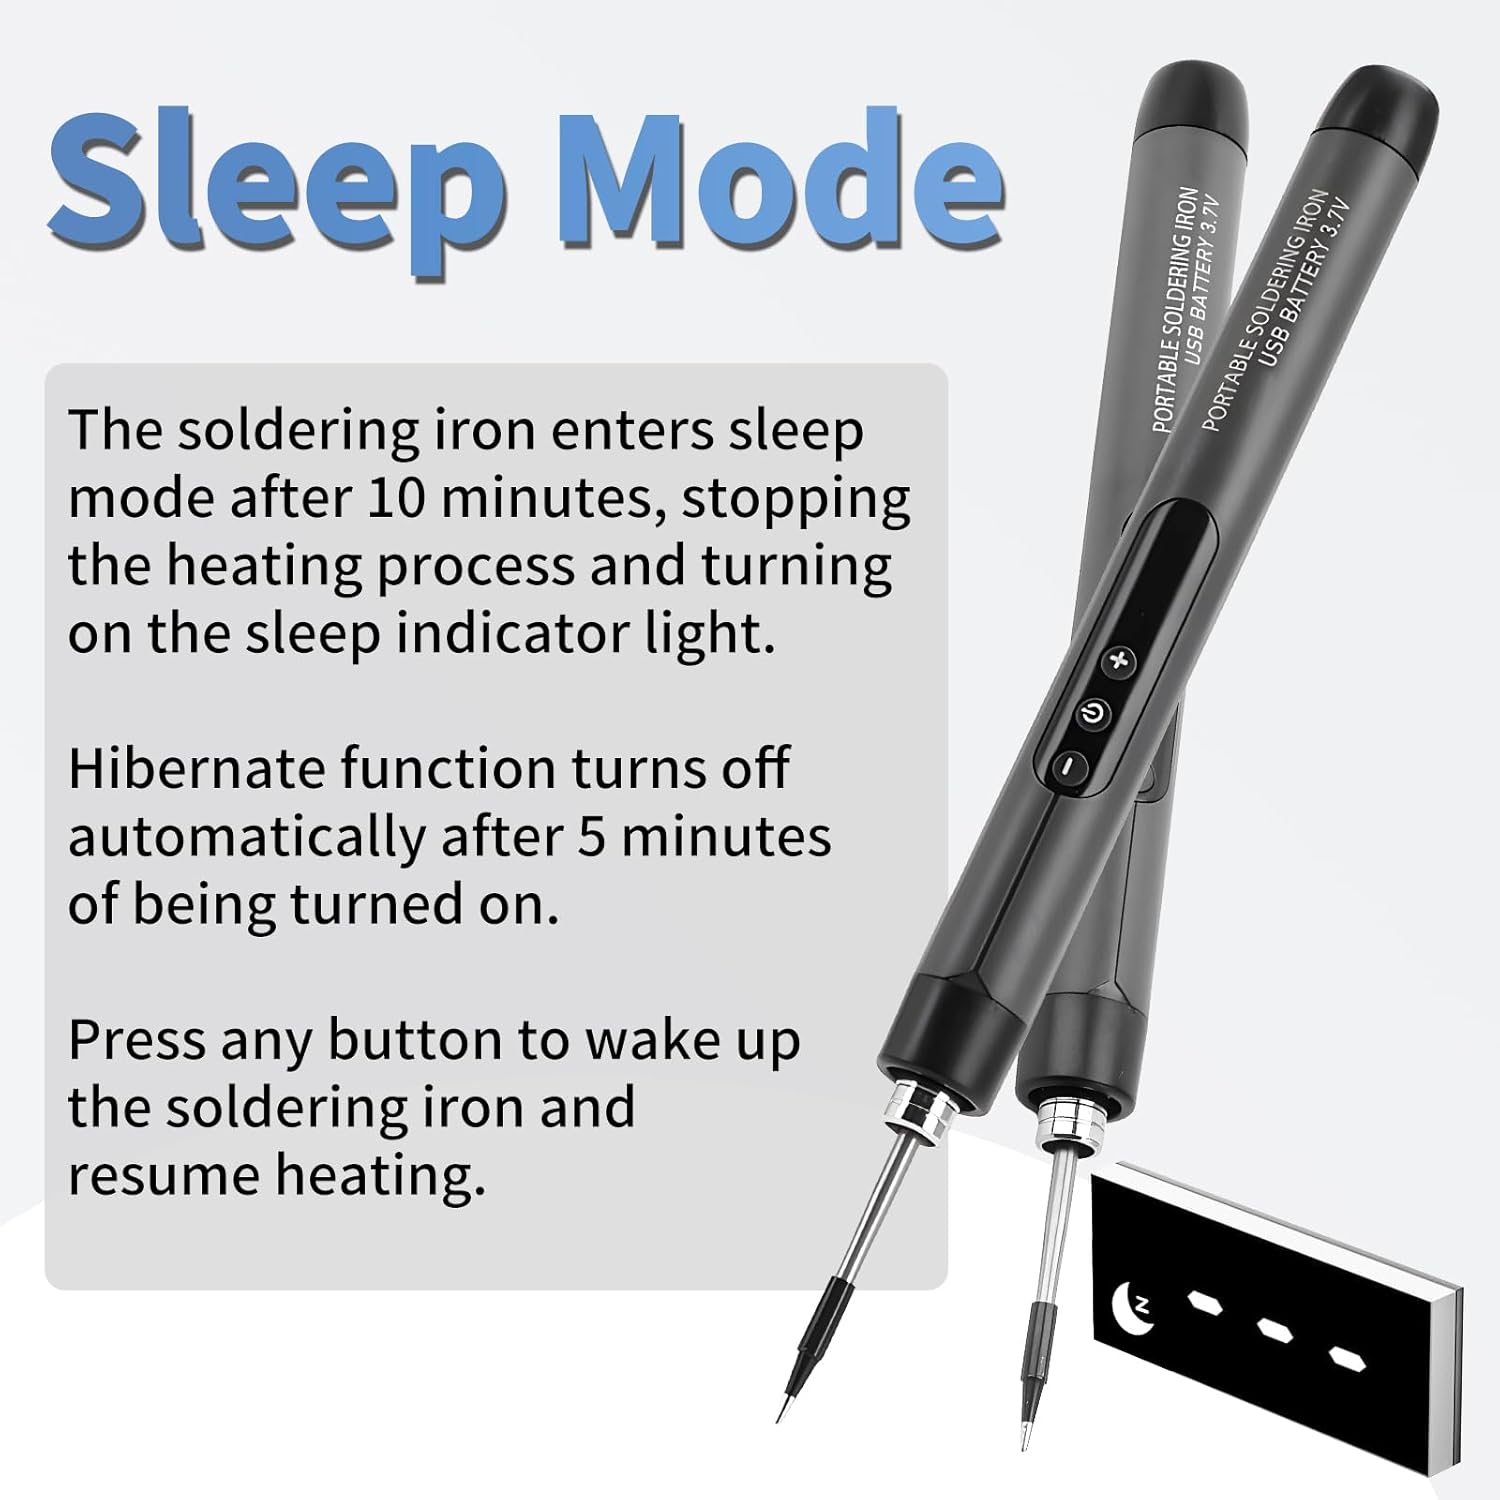
Figure 6: Double-clicking the button allows toggling the temperature display between Celsius and Fahrenheit.
4. Sleep Mode
The soldering iron is equipped with an automatic sleep mode to conserve battery and enhance safety. If left idle for 10 minutes, the soldering iron will enter sleep mode, stopping the heating process. The sleep indicator light will turn on.
The hibernate function automatically turns off after 5 minutes of being turned on if no activity is detected.
To wake up the soldering iron and resume heating, press any button.

Figure 7: Explanation of the automatic sleep mode, which activates after 10 minutes of inactivity, and how to reactivate the iron.
5. Basic Soldering Use
- Select the appropriate soldering tip for your task and ensure it is securely installed.
- Turn on the soldering iron and set your desired temperature. Wait for the iron to reach the set temperature (approximately 6 seconds for tinning).
- Clean the tip using the damp sponge on the soldering stand.
- Apply a small amount of solder to the tip to tin it, ensuring good heat transfer.
- Place the hot tip against the components to be soldered, heating both simultaneously.
- Apply solder to the heated joint, not directly to the iron tip. Allow the solder to flow and create a strong connection.
- Remove the solder and then the iron. Allow the joint to cool naturally.
- Always return the soldering iron to its stand when not in use.

Figure 8: The diymore cordless soldering iron in use for detailed electronic work.
Maintenance
- Tip Cleaning: Regularly clean the soldering tip using the damp sponge provided in the stand. This helps remove oxidation and ensures efficient heat transfer. Never file or sand the tip.
- Tip Tinning: After each use, or if the tip becomes discolored, apply a small amount of fresh solder to the tip to keep it tinned. This prevents oxidation and prolongs tip life.
- Storage: Store the soldering iron in its protective case when not in use. Ensure the iron is completely cool before storing. Keep it in a dry place away from direct sunlight and moisture.
- Battery Care: For optimal battery life, avoid fully discharging the battery frequently. Charge the iron when the low battery alarm (L-0) appears. If storing for extended periods, charge the battery to about 50% every few months.
Troubleshooting
This section addresses common issues you might encounter with your soldering iron.
| Problem/Error Code | Possible Cause | Solution |
|---|---|---|
| H-E (Heater Core Failure) | The heating core or soldering tip is not properly inserted or is faulty. | Ensure the soldering tip is fully and correctly inserted. If the problem persists, the heating core or tip may need replacement. |
| L-0 (Low Battery Alarm) | The battery charge is critically low. | Recharge the soldering iron using the provided Type-C cable. |
| Iron not heating up | Not powered on, low battery, or tip not properly installed. | Ensure the iron is powered on. Check battery level and charge if necessary. Verify the soldering tip is securely installed. |
| Temperature not stable | Tip is dirty or oxidized, or not properly tinned. | Clean and re-tin the soldering tip. Ensure the tip is fully inserted. |
Figure 9: Examples of error codes displayed on the LCD screen: H-E for heater core failure and L-0 for low battery.
Specifications
Detailed technical specifications for the diymore USB Rechargeable Cordless Soldering Iron Kit:
| Parameter | Value |
|---|---|
| Model Number | IDCE0070-AAA |
| Soldering Tip Type | C200S (Integrated Heating Core) |
| Voltage | 5 V |
| Power | 8 W |
| Battery Capacity | 1000 mAh Lithium-Polymer |
| Temperature Control | Five-speed adjustment |
| Adjustable Temperature Range | 260°C - 420°C (500°F - 788°F) |
| Charging Time | Approx. 90 minutes |
| Battery Endurance | Approx. 20 minutes (high energy) |
| Sleep Mode | Automatic after 10 minutes of inactivity |
| Charging Port | Type-C |
| Product Dimensions (L x W x H) | 190 x 16.5 mm (after tip installation) / 23 x 9 x 4 cm (packaged) |
| Product Weight | 30 grams |
| Heating Time (Tinning) | 6 seconds |
| Display | LCD Digital Display |
| Light | Yes |

Figure 10: Visual representation of the soldering iron's dimensions and a summary of its key specifications.
Warranty and Support
For information regarding warranty coverage, technical support, or spare parts availability, please refer to the product packaging or contact diymore customer service directly. Specific warranty terms may vary by region and retailer.