Easythreed K10 Small Entry Level Portable 3D Printer User Manual
Model: K10
Your guide to setting up, operating, and maintaining your K10 3D Printer.
1. Introduction
The Easythreed K10 is a compact and portable FDM (Fused Deposition Modeling) 3D printer designed for beginners and educational use. Its user-friendly design and small footprint make it ideal for desks, classrooms, or dormitories. This manual provides essential information for assembly, operation, maintenance, and troubleshooting to ensure a smooth 3D printing experience.

2. Safety Information
Please read and understand all safety warnings before operating the printer to prevent injury or damage to the device.
- CAUTION: NOZZLE IS HOT! The printer's nozzle reaches high temperatures during operation. Never touch the hot nozzle directly. Always use appropriate tools to remove excess filament or clear blockages.
- Ensure the power adapter used matches the specified requirements: Voltage = 12V & Current ≥ 2A. Using an incorrect power supply can damage the printer.
- Keep the printer away from flammable materials and out of reach of small children.
- Operate the printer in a well-ventilated area.
- Do not attempt to disassemble or modify the printer beyond the instructions provided in this manual.

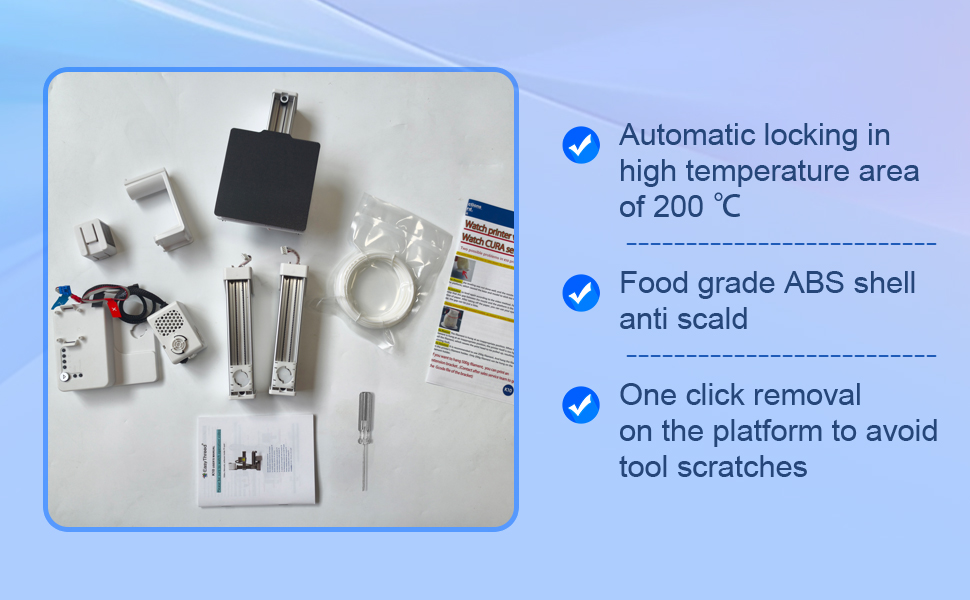
3. Package Contents
Before beginning assembly, please verify that all components are present in your package:
- Easythreed K10 3D Printer components (Y-axis and control box base, printing platform, Z-axis, X-axis, print head, consumables rack)
- TF Card (preloaded with operation manual, teaching videos, and slicer software like Cura/ORCA)
- 1.75mm PLA/TPU Filament (250g standard, with included extension holder STL for 500g spools)
- Power Adapter
- Tools for assembly and maintenance (e.g., screwdriver)
4. Setup and Assembly
The K10 printer is designed for easy assembly. Follow these steps to get your printer ready for its first print:
- Install Y-axis and control box base: Place the Y-axis component onto the control box base.
- Install printing platform: Secure the printing platform onto the Y-axis.
- Install Z-axis: Attach the Z-axis vertical support to the main base.
- Install X-axis: Mount the X-axis horizontal bar onto the Z-axis.
- Install print head: Slide the print head onto the X-axis and connect its cables.
- Install consumables rack: Attach the filament holder to the top of the Z-axis.
- Connect Cables: Ensure all necessary cables (power, motor, sensor) are securely connected. Refer to the labels on the cables and ports for correct connection.
- Power On: Connect the power adapter to the printer and a power outlet. Flip the power switch to ON.

5. Operating Instructions
5.1. Critical Leveling Guide
Proper bed leveling is crucial for successful prints and to prevent damage to the magnetic build plate. The K10 features a click-leveling system:
- Press the button labeled "1" to move the nozzle to the first leveling point.
- When the nozzle touches the magnetic plate, power off the printer.
- Adjust the leveling knob beneath the build plate at this point until the nozzle is just touching the plate with slight resistance (use a piece of paper between the nozzle and plate to gauge).
- Repeat this process for points "2", "3", and "4", powering off the printer at each point to adjust.
- After adjusting all four points, power on the printer and re-check all points to ensure consistent leveling.
Incorrect leveling can lead to models not sticking to the build plate or even damage. It is recommended to watch the detailed video provided on the TF card for a visual guide to mastering this essential step.

5.2. Filament Loading
The K10 supports 1.75mm PLA and TPU filaments. To load filament:
- Place the filament spool on the consumables rack.
- Gently feed the filament into the small hole on the print head until you feel resistance.
- Press the "Feed" button on the control panel. The printer will automatically heat the nozzle and pull the filament through. Continue holding the button until melted filament extrudes from the nozzle.

5.3. Printing Process
The K10 operates exclusively via TF card (no direct computer connection). Ensure your 3D models are converted to G-code files using compatible slicer software (Cura or ORCA) with the EasyThreed profile. The TF card included with your printer contains the necessary software and profiles.
- Save your G-code file to the TF card.
- Insert the TF card into the printer's TF card slot.
- The printer will automatically detect the newest G-code file on the card.
- Press the main print button (often indicated by a play symbol) to start printing.
- To stop a print, press the main print button again.
For optimal results, use only G-code files converted via the teaching video and profile provided on the TF card. The printer is designed to be open-source and customizable, allowing advanced users to modify hardware and software as needed.
6. Maintenance
Regular maintenance ensures the longevity and optimal performance of your K10 3D printer:
- Clean the Build Plate: After each print, ensure the magnetic build plate is clean and free of filament residue. This helps with adhesion for subsequent prints.
- Nozzle Cleaning: If you notice clogs or poor extrusion, carefully clean the nozzle using the provided tools. Remember, the nozzle is hot during operation.
- Check Belts and Rails: Periodically inspect the belts and linear rails for any debris or signs of wear. Keep them clean to ensure smooth movement.
- Firmware Updates: Check the Easythreed website or the TF card for any available firmware updates to improve printer performance.
7. Troubleshooting
Here are solutions to some common issues you might encounter:
| Problem | Possible Cause | Solution |
|---|---|---|
| Print not sticking to build plate | Incorrect bed leveling, dirty build plate, or incorrect first layer settings in slicer. | Re-level the print bed carefully (refer to Section 5.1). Clean the build plate with isopropyl alcohol. Adjust first layer height and temperature in your slicer software. |
| Filament not extruding | Nozzle clogged, filament tangled, or incorrect temperature. | Clear the nozzle using the provided needle or by manually pushing filament through. Ensure filament spool is untangled. Verify correct printing temperature for your filament type. |
| Poor print quality (e.g., stringing, rough surfaces) | Incorrect print settings (temperature, retraction, speed), or worn nozzle. | Adjust print settings in your slicer software. Ensure proper filament drying. Consider replacing the nozzle if it's old or damaged. |
| Printer not responding | Power issue, TF card error, or firmware issue. | Check power connections. Reformat TF card and re-load G-code files. If issues persist, contact Easythreed support. |
If you encounter problems not listed here or require further assistance, please contact Easythreed customer support.
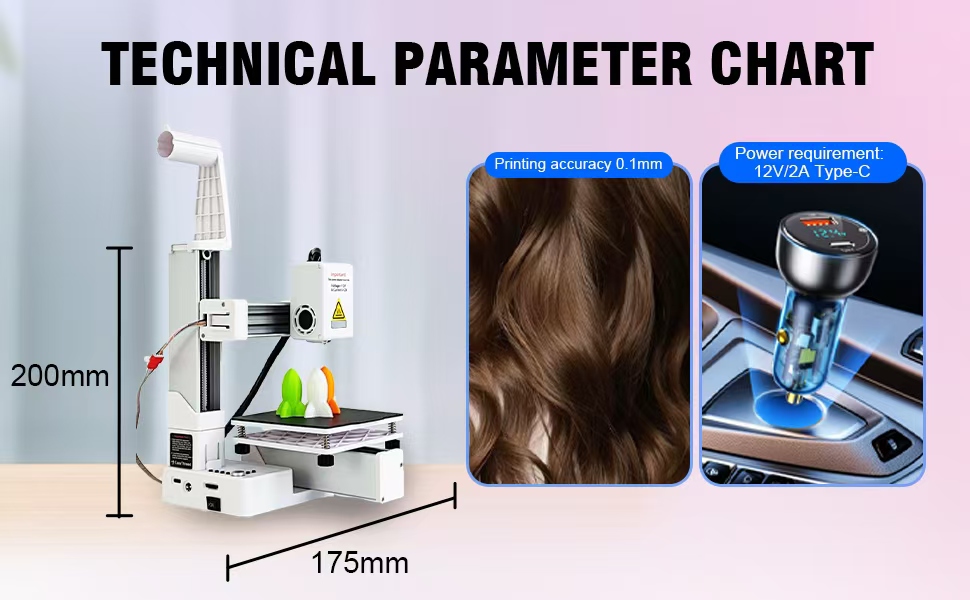
8. Specifications
| Feature | Detail |
|---|---|
| Model | K10 |
| Build Volume | 100 x 100 x 100 mm |
| Product Dimensions | 6.08 x 7.87 x 6.89 inches (15.44 x 19.99 x 17.5 cm) |
| Item Weight | 2.2 pounds (1 Kilogram) |
| Material | Stainless Steel (internal components) |
| Color | White |
| Filament Compatibility | 1.75mm PLA/TPU |
| Power Requirement | 12V / 2A (Type-C) |
| Connectivity | TF Card only |
| Manufacturer | Easythreed |
9. Warranty and Support
Easythreed is committed to providing reliable products and excellent customer service.
- Warranty: The K10 3D Printer comes with a 1-year warranty from the date of purchase. This covers manufacturing defects and malfunctions under normal use.
- Technical Support: Enjoy lifetime technical support for your Easythreed K10 printer. If you have any questions, need assistance with setup, operation, or troubleshooting, please do not hesitate to contact our support team.
- Replacements: In case of damage during shipping or any issues covered under warranty, contact us for free replacements.
For support, please refer to the contact information provided on the TF card or visit the official Easythreed website.
