
Kärcher T 10/1 Adv HEPA
Kärcher T 10/1 ADV HEPA Dry Vacuum Cleaner
User Manual
1. Introduction
Thank you for choosing the Kärcher T 10/1 ADV HEPA Dry Vacuum Cleaner. This professional-grade dry vacuum is designed for efficient and hygienic cleaning in various environments, including offices, catering facilities, and retail spaces. Its robust construction, quiet operation, and advanced HEPA-14 filtration system ensure high safety standards and excellent suction performance.
This manual provides essential information for the safe and effective use, setup, operation, and maintenance of your Kärcher T 10/1 ADV HEPA vacuum cleaner. Please read it thoroughly before initial use and keep it for future reference.

Figure 1: Kärcher T 10/1 ADV HEPA Dry Vacuum Cleaner. This image shows the complete vacuum unit with its canister body, wheels, flexible suction hose, and the standard floor nozzle attached.
2. Safety Instructions
Always observe the following safety precautions to prevent injury and damage to the appliance:
- Read all instructions before operating the appliance.
- Do not use the vacuum cleaner to pick up flammable or combustible liquids, hot ashes, or sharp objects.
- Ensure the power cord is not damaged and is properly connected to a grounded outlet.
- Do not operate the vacuum cleaner without the filter bag and HEPA filter properly installed.
- Keep hands, feet, and loose clothing away from rotating parts and suction openings.
- Unplug the appliance from the power outlet before performing any maintenance, cleaning, or when not in use.
- This appliance is designed for dry vacuuming only. Do not use it for wet vacuuming.
- The HEPA-14 filter ensures high safety standards in hygienically sensitive areas. Handle with care during replacement.
3. Package Contents
Upon unpacking, verify that all components are present and undamaged:
- Kärcher T 10/1 ADV HEPA Vacuum Cleaner Unit
- Suction Hose (2 m) with manifold
- Telescopic Suction Tube (height-adjustable)
- Fleece Filter Bag (1x)
- Permanent Main Filter
- Filter Basket
- Combination Floor Nozzle (switchable)
- Parquet Nozzle
- Crevice Nozzle
- Upholstery Nozzle (referred to as furniture nozzle in some descriptions)
- HEPA-14 Filter
4. Setup
Follow these steps for initial assembly and preparation for use:
- Unpack the Unit: Carefully remove all components from the packaging.
- Install Filter Bag: Open the vacuum cleaner by lifting the top section. Insert the fleece filter bag into the designated compartment within the canister. Ensure it is seated correctly.

Figure 2: Installation of the fleece filter bag. The image shows the interior of the vacuum cleaner's canister with a white fleece filter bag properly placed inside.
- Install HEPA Filter: Locate the HEPA filter slot, typically on the top section of the vacuum. Insert the HEPA-14 filter, ensuring it clicks securely into place.

Figure 3: The HEPA-14 filter. This image provides a close-up view of the black and white HEPA filter cartridge, labeled "SAFETY HEPA" and "HIGH EFFICIENCY PARTICULATE AIR FILTER". For more information, visit kaer.ch/er/28894240.
- Assemble the Unit: Reattach the top section of the vacuum cleaner to the canister, ensuring it is securely latched.

Figure 4: Separating the vacuum cleaner's top section from the canister. A hand is shown lifting the upper part of the vacuum, which contains the motor and filter, away from the lower dust collection canister.
- Connect Hose and Tubes: Attach the flexible suction hose to the inlet on the vacuum cleaner. Connect the telescopic suction tube to the hose, and then attach your desired nozzle (e.g., combination floor nozzle, parquet nozzle, crevice nozzle, or upholstery nozzle) to the end of the telescopic tube.
- Power Cord Management: The vacuum features integrated storage for the power cord. Unwind the necessary length before plugging into a suitable power outlet.
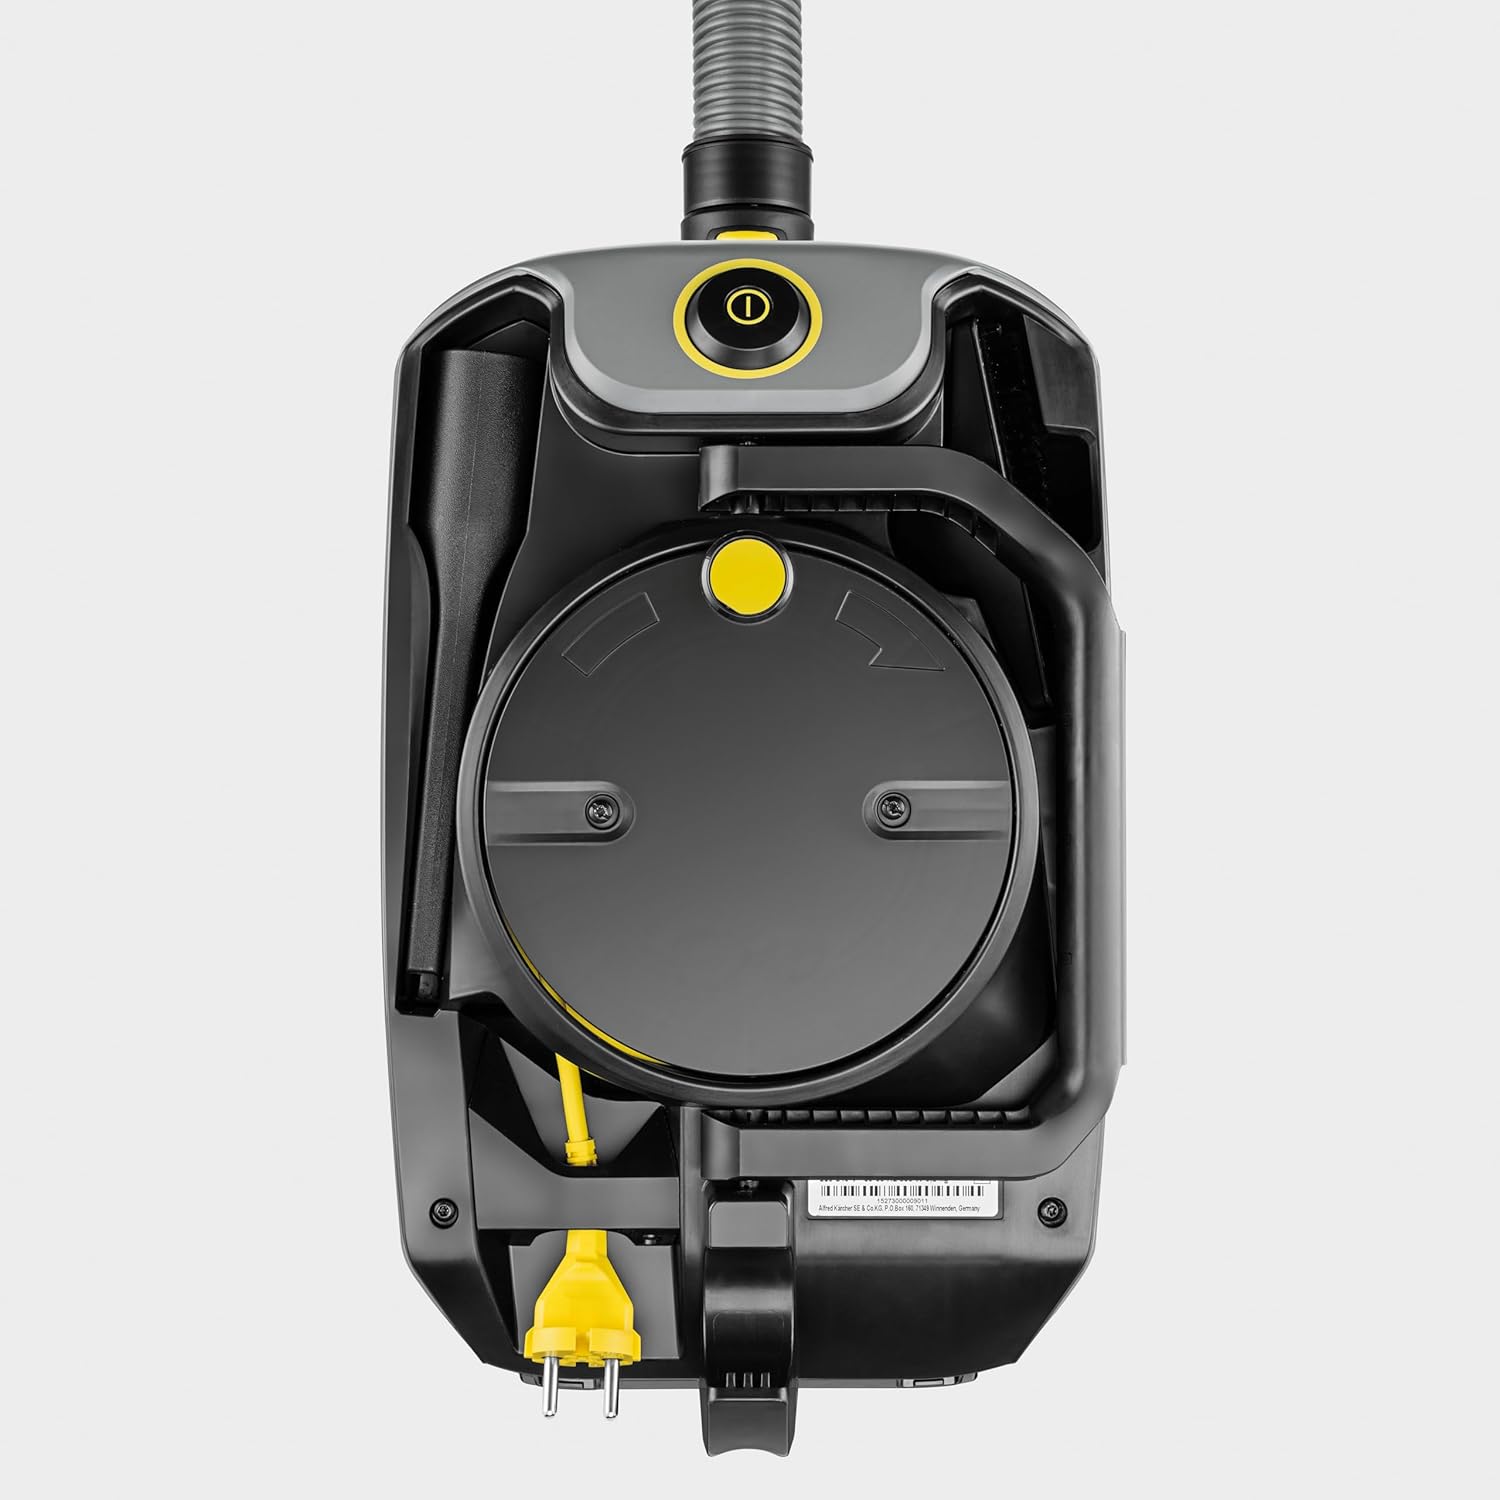
Figure 5: Underside view with power cord storage. This image displays the bottom of the vacuum cleaner, highlighting the integrated storage area for the power cord and the robust wheels. For more information, visit 15273000009011.
5. Operation
Operating your Kärcher T 10/1 ADV HEPA is straightforward:
- Power On/Off: Plug the power cord into a grounded electrical outlet. Locate the power switch (usually a large yellow button or rocker switch) on the top of the unit and press it to turn the vacuum cleaner on. Press again to turn it off.
- Nozzle Selection: Choose the appropriate nozzle for the surface you are cleaning.
- Combination Floor Nozzle: Suitable for both hard floors and carpets. Adjust the brush setting as needed.
- Parquet Nozzle: Ideal for delicate hard floors like parquet, providing gentle cleaning.
- Crevice Nozzle: Perfect for narrow gaps, corners, and hard-to-reach areas.
- Upholstery Nozzle: Designed for cleaning furniture, curtains, and other fabric surfaces.
- Adjusting Suction Tube: Use the height adjustment mechanism on the telescopic suction tube to set a comfortable working height.
- Maneuvering: The vacuum cleaner is designed to be highly maneuverable and tilt-resistant, thanks to its large wheels and stable chassis. Pull the unit by the hose or use the comfortable carry handle for transport.

Figure 6: Vacuum cleaner in use. This image shows a person operating the Kärcher T 10/1 ADV HEPA vacuum cleaner on a carpeted floor in an office environment, demonstrating its maneuverability.
- Quiet Operation: With a noise level of 52 dB(A), this vacuum is suitable for use during day cleaning and in noise-sensitive areas without causing significant disturbance.
6. Maintenance
Regular maintenance ensures optimal performance and extends the lifespan of your vacuum cleaner:
- Filter Bag Replacement: Replace the fleece filter bag when it is full or when suction power noticeably decreases. Always use genuine Kärcher filter bags for best results.
- HEPA Filter Cleaning/Replacement: The HEPA-14 filter is designed for high filtration efficiency. While it can be gently tapped to remove loose dust, it should be replaced periodically, especially if suction remains low after filter bag replacement, or if visible damage occurs. Refer to the filter's specific instructions for replacement frequency.
- Main Filter Cleaning: The permanent main filter should be cleaned regularly by shaking or brushing off accumulated dust.
- Exterior Cleaning: Wipe the exterior of the vacuum cleaner with a damp cloth. Do not use harsh cleaning agents or solvents.
- Hose and Nozzle Inspection: Periodically check the suction hose and nozzles for blockages or damage. Clear any obstructions immediately.
- Storage: Store the vacuum cleaner in a dry, safe place. The integrated accessory storage on the unit keeps nozzles within reach.
7. Troubleshooting
If you encounter issues with your Kärcher T 10/1 ADV HEPA, refer to the following common problems and solutions:
| Problem | Possible Cause | Solution |
|---|---|---|
| No suction or low suction power |
|
|
| Vacuum cleaner does not turn on |
|
|
| Unusual noise during operation |
|
|
If the problem persists after attempting these solutions, please contact Kärcher customer support or an authorized service center.
8. Specifications
| Feature | Detail |
|---|---|
| Brand | Kärcher |
| Model Name | T 10/1 Adv HEPA |
| Item Model Number | 1.527-307.0 |
| Rated Power | Max. 585 watts |
| Vacuum | 18 kPa |
| Tank Capacity | 10 Liters |
| Noise Level | 52 dB(A) |
| Filter Type | HEPA 14 Filter |
| Suction Hose Length | 2 Meters |
| Product Dimensions (L x W x H) | 16.93" x 10.04" x 14.57" |
| Item Weight | 18.66 pounds |
| Color | Anthracite |
| Form Factor | Canister |
| Indoor/Outdoor Usage | Indoor |
| Special Features | Lightweight, Wheels, Compact, HEPA |
9. Warranty and Support
For warranty information, please refer to the documentation provided with your purchase or visit the official Kärcher website. Warranty terms and conditions may vary by region and retailer.
If you require technical assistance, spare parts, or have questions not covered in this manual, please contact Kärcher customer support. Contact details can typically be found on the Kärcher website or on the product packaging.
Online Resources: For additional support and product information, visit the official Kärcher website: www.kaercher.com
Related documentsT 10/1 Adv HEPA


Ask a question about this manual
Ask about setup, troubleshooting, compatibility, parts, safety, or missing instructions. Manuals+ will review the question and use this page’s manual context to help answer it.