Introduction
This manual provides detailed instructions for the installation, operation, and maintenance of your Obbmox Wireless Outdoor Security Camera. Designed for comprehensive home surveillance, this camera features 2K resolution, 180° pan rotation, color night vision, and advanced motion detection capabilities. Please read this manual thoroughly before using the product to ensure proper function and safety.
Safety Information
- Ensure the camera is installed in a secure location, out of reach of unauthorized individuals.
- Use only the specified power adapter and charging cable to prevent damage or fire.
- Do not expose the camera to extreme temperatures outside its operating range (-4°F to 140°F / -20°C to 60°C).
- Avoid placing the camera near strong magnetic fields or sources of interference.
- Do not attempt to disassemble or repair the camera yourself. Contact customer support for assistance.
- Ensure the camera is connected to a 2.4GHz Wi-Fi network only. 5GHz Wi-Fi is not supported.
Package Contents
- Obbmox Wireless Outdoor Security Camera (Model: DE520)
- Mounting Bracket
- USB Charging Cable
- Mounting Screws and Wall Anchors
- User Manual (this document)
Product Overview
The Obbmox DE520 camera is designed for versatile surveillance, offering a wide range of features for enhanced security.

Figure 1: Obbmox Wireless Outdoor Security Camera and Live View on Smartphone.
Key features include:
- 2K QHD Color Night Vision: Provides clear, high-definition images day and night.
- 180° Pan Rotate: Offers wide coverage to minimize blind spots.
- PIR Motion Detection: Accurately detects human movement.
- 2-Way Audio: Allows for real-time communication.
- IP65 Waterproof: Designed to withstand various weather conditions.
- Rechargeable Battery: Ensures long-lasting, wire-free operation.
- Cloud & SD Storage: Flexible options for video recording and playback.

Figure 2: Overview of Camera Features.
Setup
1. Download the CloudEdge App
Search for "CloudEdge" in the App Store (iOS) or Google Play (Android), or scan the QR codes provided in the Quick Start guide to download the app. Ensure your phone's location services are enabled for proper setup.
2. Register an Account
Open the CloudEdge app and follow the prompts to register a new account. You will need to select your current country/region and enter a valid email address and password. Note: Some regions may not support camera registration.
3. Power On and Connect the Camera
Ensure the camera is fully charged before initial setup. Power on the camera. When the camera is ready to connect, press and hold the RESET button for 5 seconds until you hear a sound and see a red light flashing. This indicates the camera is in pairing mode.
4. Installation
The camera supports both desktop placement and wall hanging. For wall installation, use the provided mounting bracket, screws, and wall anchors. Drill holes as indicated by the positioning sticker, then secure the bracket and hang the camera. Adjust the camera angle for optimal viewing. A screwdriver may be needed to tighten the screw on the camera holder for desired angle.

Figure 3: Versatile Placement Options for Your Camera.
Operating Instructions
1. Live View & Video Playback
Access real-time video feed through the CloudEdge app. The camera supports up to 128GB TF (MicroSD) card for local storage (not included). Additionally, a Lifetime Free 7-day Rolling Cloud Storage is available, allowing you to access recordings from the past week. Ensure the TF card is inserted before the camera enters dormancy for normal use.

Figure 4: Live View and Storage Options in the CloudEdge App.
2. 180° Pan Rotation & 2K Color Night Vision
Utilize the 180° pan feature via the app to cover a wider area and eliminate blind spots. The 2K resolution provides crisp, high-definition images. With color night vision, the camera captures clear and detailed footage even in low-light conditions, enhancing surveillance effectiveness around the clock.

Figure 5: 180° Pan Coverage for Comprehensive Monitoring.

Figure 6: Superior 2K QHD Vision Day and Night.
3. PIR Motion Detection & Smart Siren
The camera is equipped with PIR (Passive Infrared) motion detection to accurately identify movement. Upon detection, the camera can trigger a smart siren and spotlight to deter intruders. You will receive instant notifications on your smartphone.

Figure 7: PIR Motion Detection and Smart Siren Functionality.
4. 2-Way Talk
The built-in microphone and speaker allow for two-way audio communication. You can speak through the camera to visitors or deter unwanted guests directly from your smartphone.
5. Multi-Alarm & User Sharing
Receive various types of alerts for suspicious activities. The User Sharing function allows you to grant access to your camera feed to family members or trusted friends, enabling collaborative home monitoring.
6. Customized Activity Zone & Smart AI Analysis
Set personalized activity zones to focus motion detection on specific areas, reducing false alarms. The camera also supports Smart AI Analysis (requires subscription) to accurately detect persons, vehicles, pets, and packages, further refining alerts and playback.
7. Selectable Working Time
Configure custom schedules for motion detection alarms through the app. This feature helps conserve battery power by activating detection only during specific times of the day or night.
Maintenance
1. Battery Charging
The camera is powered by a long-lasting rechargeable battery. When the battery level is low, connect the camera to a power source using the provided USB charging cable. A full charge ensures consistent performance.
2. Weather Resistance
The camera has an IP65 waterproof rating, making it resistant to dust and water jets. It is designed to withstand various weather conditions, including rain and snow, within its specified temperature range.
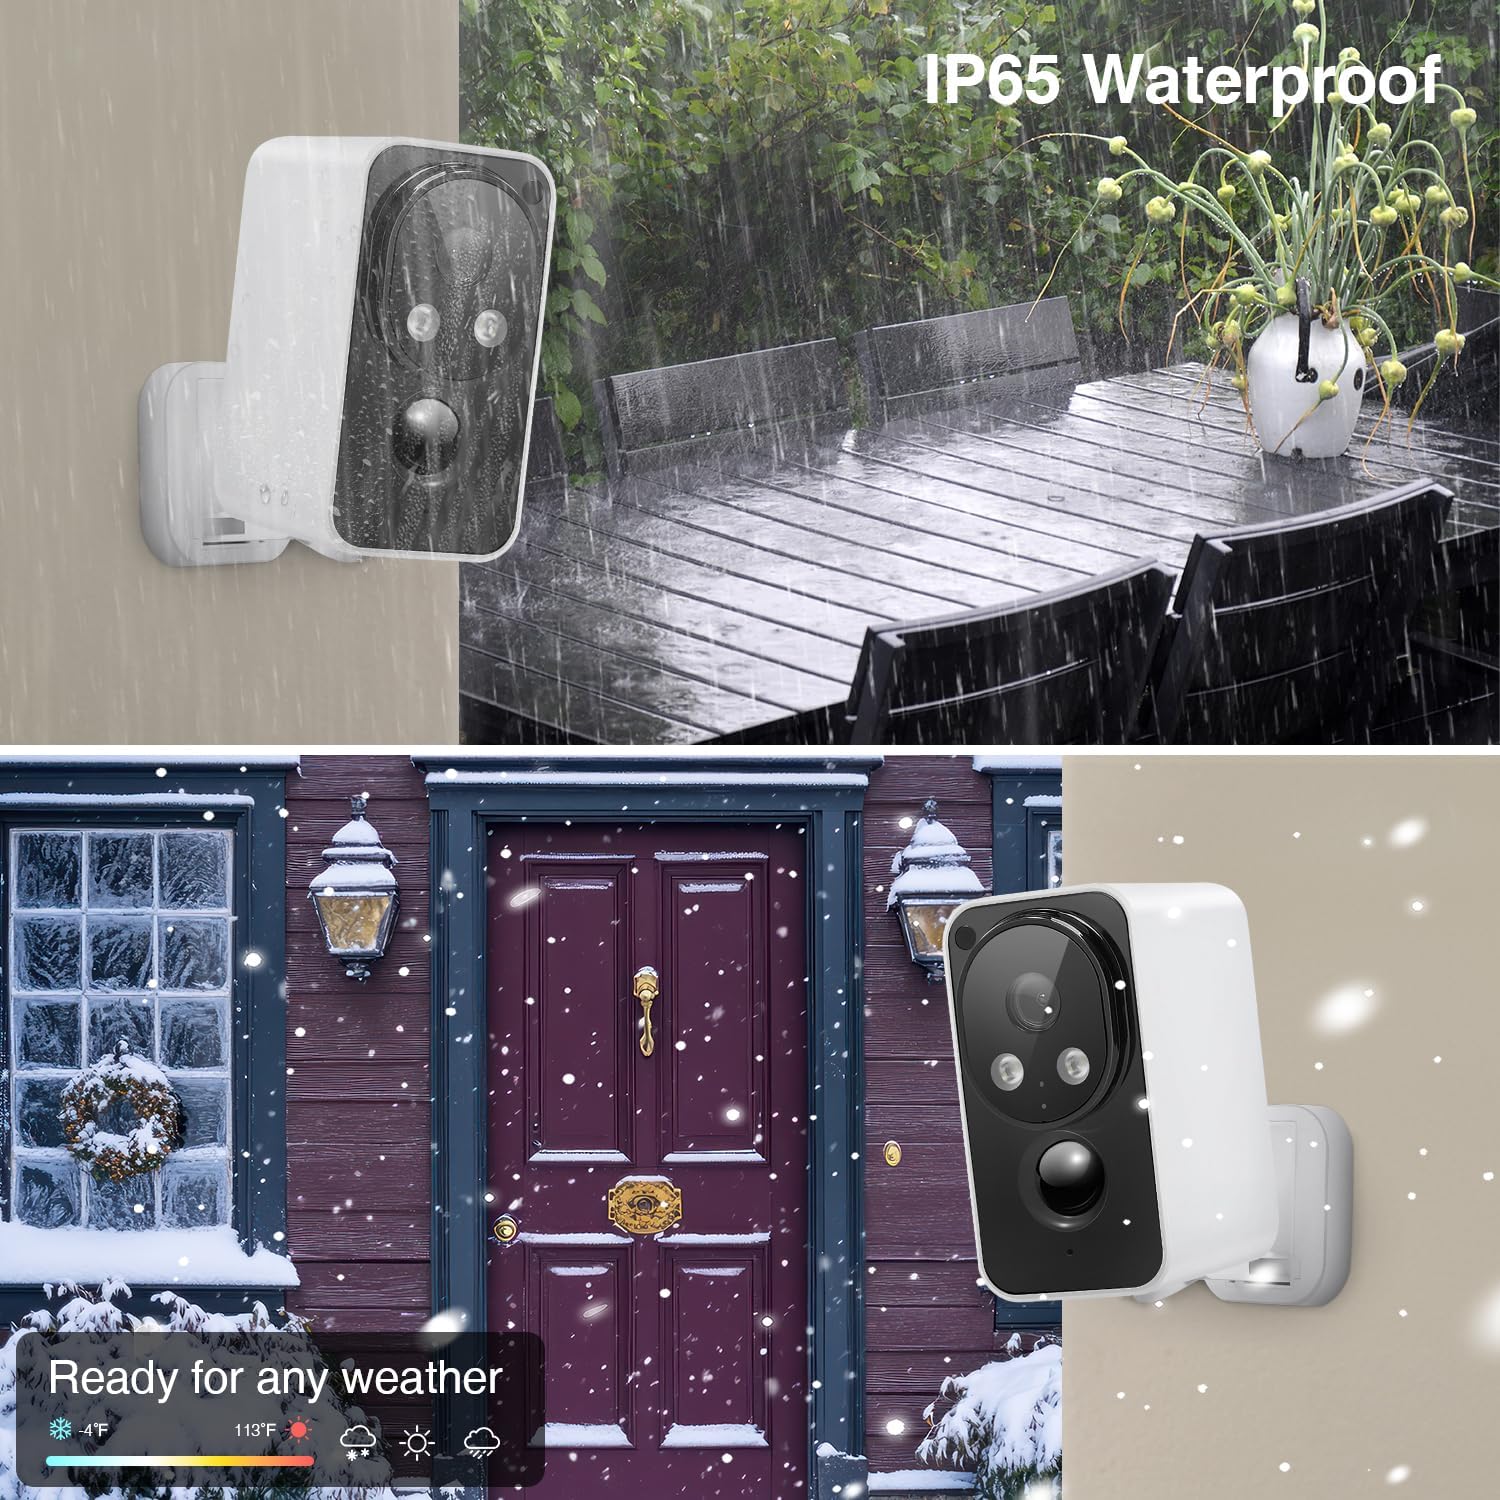
Figure 8: IP65 Waterproof and All-Weather Durability.
3. Storage Management
Regularly check the available storage on your TF card. For optimal performance, consider formatting the TF card periodically through the app settings. Cloud storage automatically manages older footage based on the 7-day rolling period.
Troubleshooting
- Camera not connecting to Wi-Fi: Ensure your Wi-Fi network is 2.4GHz. Check Wi-Fi signal strength at the camera's location. Reset the camera and try pairing again.
- Motion detection not working or too sensitive: Adjust the motion detection sensitivity settings in the app. Ensure the camera's field of view is clear of obstructions. For optimal performance, ensure the camera faces lateral motion rather than direct motion.
- Poor video quality: Check your Wi-Fi connection stability. Ensure the camera lens is clean.
- Battery draining quickly: Reduce the frequency of live view access. Adjust motion detection settings and recording duration. Ensure the camera is not in an area with constant motion.
- Cannot hear 2-way audio: Check the volume settings on your phone and within the app. Ensure there are no obstructions blocking the camera's microphone or speaker.
Specifications
| Feature | Detail |
|---|---|
| Model Name | DE520 |
| Brand | Obbmox |
| Video Capture Resolution | 2K |
| Connectivity Technology | Wireless (2.4GHz Wi-Fi) |
| Power Source | Battery Powered (1 Lithium Polymer battery included) |
| Indoor/Outdoor Usage | Indoor/Outdoor (IP65 Waterproof) |
| Controller Type | CloudEdge App |
| Mounting Type | Wall Mount |
| Item Dimensions (L x W x H) | 2.6 x 1.97 x 4.09 inches |
| Item Weight | 12 ounces |
| Storage Options | Lifetime Free 7-day Rolling Cloud Storage, TF Card (up to 128GB) |
Warranty and Support
Obbmox provides a standard warranty for this product. For detailed warranty terms and conditions, please refer to the product packaging or contact Obbmox customer support.
If you encounter any issues or have questions regarding your Obbmox Wireless Outdoor Security Camera, please contact our support team:
- Email: Support@Ob-Assistance@outlook.com
- Phone: +1 313-380-6888
Our support team is available to assist you with technical issues, setup guidance, and general inquiries.
