
1. Introduction
Thank you for choosing the Endark 6x8FT Wood Heavy-Duty Metal Storage Shed. This manual provides essential information for the safe and efficient assembly, operation, and maintenance of your new storage shed. Please read all instructions carefully before beginning assembly and retain this manual for future reference.
This shed is designed to provide a spacious and secure storage solution for gardening tools, lawn mowers, bicycles, and other outdoor equipment. Its durable construction ensures protection against various weather conditions.
2. Safety Information
Always prioritize safety during assembly and use. Failure to follow these instructions may result in injury or damage to the product.
- Read all instructions thoroughly before assembly.
- Ensure all parts are present and undamaged before starting.
- Wear appropriate safety gear, including gloves and eye protection, during assembly.
- Assembly requires at least two people.
- Choose a level and stable surface for installation.
- Keep children and pets away from the assembly area.
- Do not assemble in strong winds or adverse weather conditions.
- Secure the shed to the ground after assembly to prevent wind damage.
- Do not store flammable liquids or hazardous materials inside the shed.
3. Package Contents and Dimensions
Your Endark storage shed is delivered in multiple packages. Please verify all components against the packing list provided with your product. Some packages may arrive separately.

This diagram illustrates the key dimensions of the Endark 6x8FT Storage Shed, including its height, width, and depth. It also indicates that the shed is delivered in three separate packages, which may arrive at different times. Essential measurements for the front and side profiles are provided to aid in planning and assembly.
The shed's approximate assembled dimensions are 63.2"D x 93.1"W x 76.6"H.
4. Setup and Assembly
Assembly of the Endark storage shed requires careful attention to detail. Each part is clearly labeled, and a comprehensive instruction manual with diagrams is included in your package to guide you through the installation process step-by-step.
- Site Preparation: Choose a flat, level, and solid surface for the shed. Ensure adequate drainage around the site.
- Unpacking: Carefully unpack all boxes and verify all parts against the provided parts list. Separate and organize components for easier access.
- Base Assembly: Assemble the base frame according to the detailed instructions. Ensure it is square and level.
- Wall Panel Installation: Attach the wall panels to the base frame, following the numerical or alphabetical order specified in the manual. Secure all fasteners as directed.
- Roof Assembly: Construct the roof frame and attach the roof panels. Pay close attention to the sloping design for proper water runoff.
- Door Installation: Install the sliding doors onto their rails. Ensure they operate smoothly.
- Final Checks: Tighten all fasteners, ensure doors open and close correctly, and check for overall stability.
- Anchoring: Securely anchor the shed to the ground using appropriate anchoring kits (sold separately or as recommended by local building codes) to prevent movement in high winds.

This image displays the Endark 6x8FT Wood Heavy-Duty Metal Storage Shed with its double sliding doors fully open, showcasing the spacious interior. The shed is equipped with shelving units for organized storage of various items, such as tools and garden equipment. The exterior features a wood-grain finish on the side panels and a grey metal roof.
For detailed visual guidance, refer to the assembly diagrams in the separate instruction booklet.
5. Operating Instructions
The Endark storage shed is designed for ease of use and security.
5.1 Sliding Doors
The shed features double sliding doors with smooth rails for convenient access. To open, gently slide the doors along their tracks. To close, slide them back until they meet in the center.
5.2 Locking Mechanism
A lockable door handle is integrated to secure your belongings. To lock the shed, align the doors, engage the latch, and use a padlock (not included) through the designated hole on the handle. Ensure the padlock is securely fastened to prevent unauthorized access.
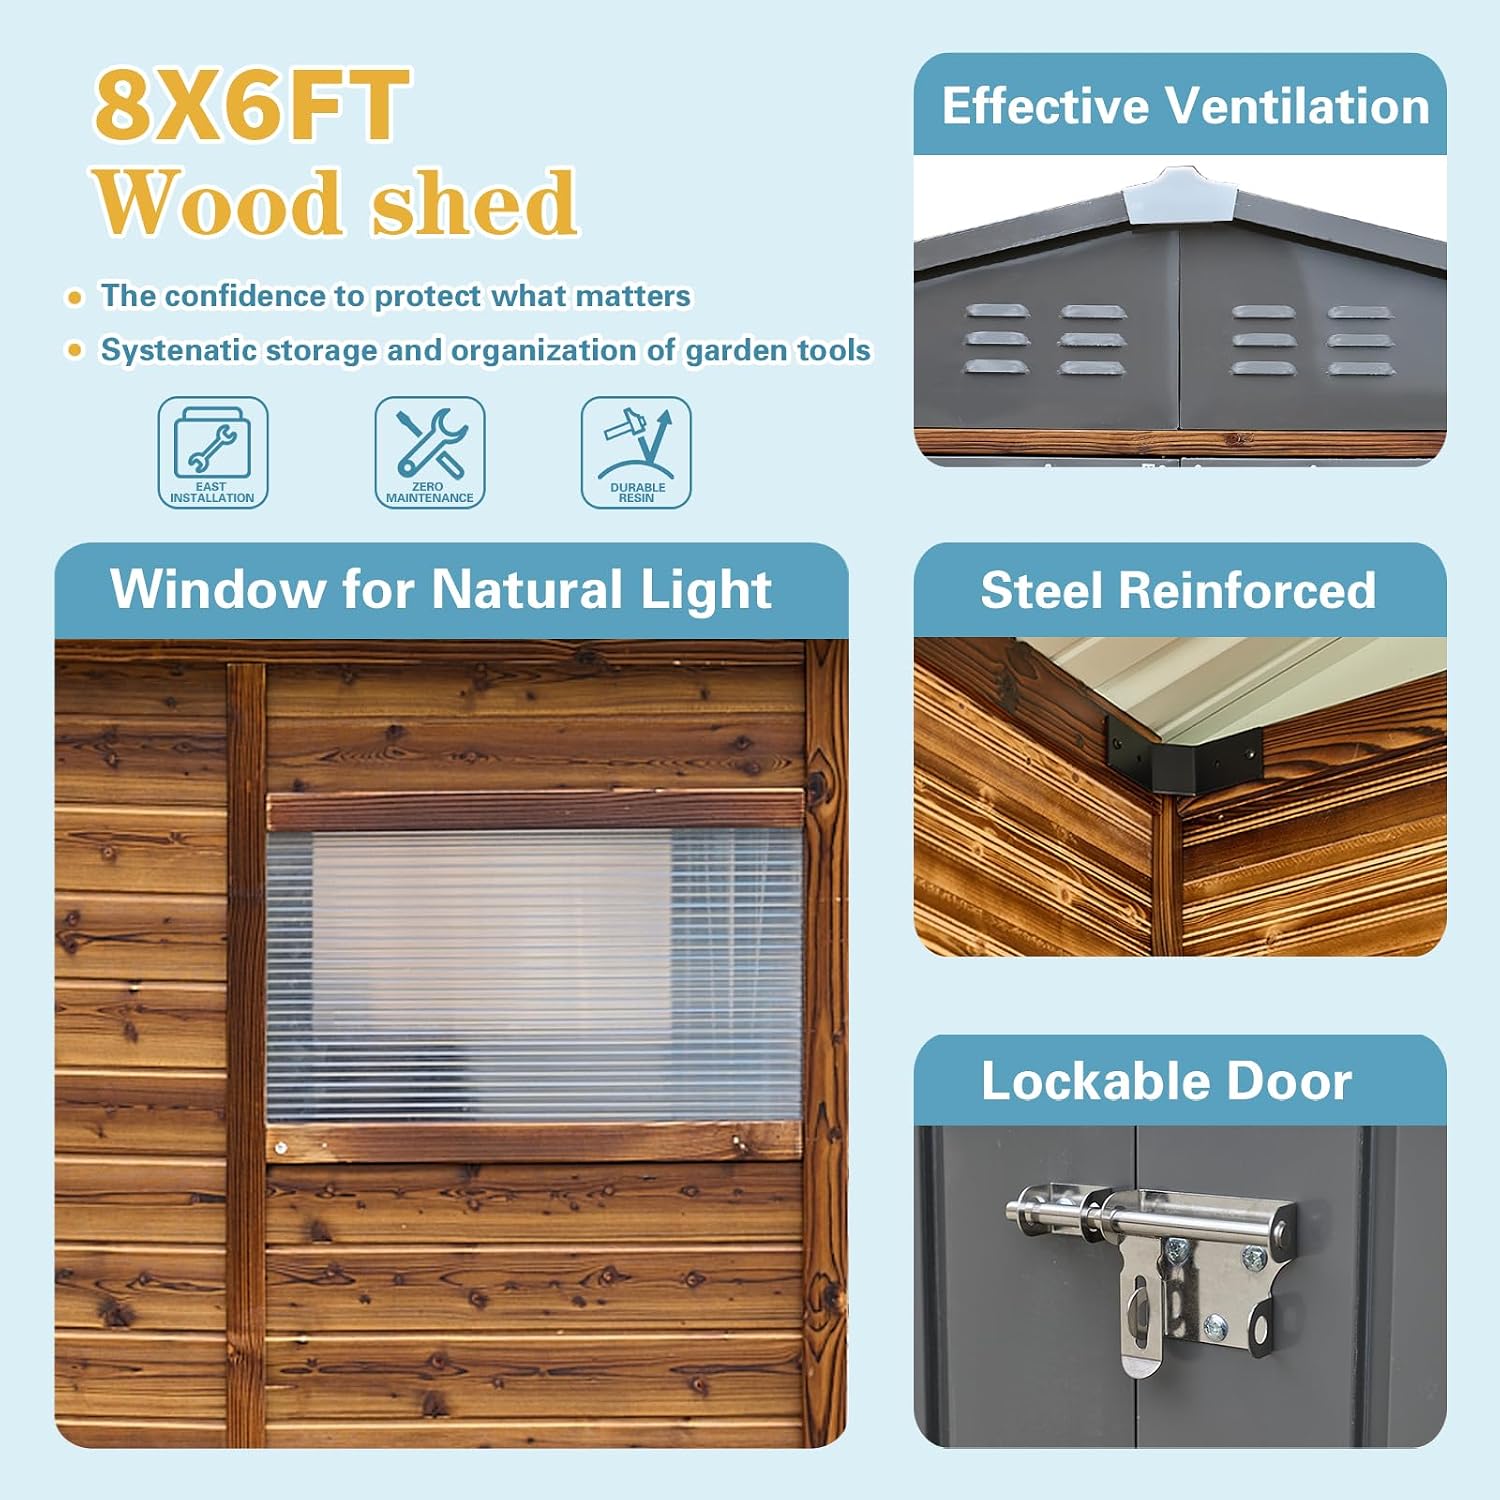
This image highlights several important features of the Endark 6x8FT Storage Shed. It shows the effective ventilation system located on the roof, a window designed for natural light, steel-reinforced corners for enhanced stability, and a close-up of the secure, lockable door mechanism.

This image provides a closer look at specific design elements of the shed. It illustrates the natural lighting system through the window, the air circulation system with vents, the top stable firmware for roof integrity, and the fixed door lock buckle for security.
5.3 Ventilation
The built-in air vents on the top of the shed ensure good air circulation, which helps keep your stored items dry and in optimal condition. Do not obstruct these vents.
6. Maintenance
Regular maintenance will extend the life and appearance of your Endark storage shed.
- Cleaning: Periodically clean the exterior of the shed with mild soap and water. Avoid abrasive cleaners or harsh chemicals that could damage the UV-resistant coating. Rinse thoroughly with clean water.
- Door Tracks: Keep the sliding door tracks clear of debris (leaves, dirt, etc.) to ensure smooth operation. Lubricate tracks with a silicone-based spray if doors become stiff.
- Fasteners: Annually check all screws and bolts for tightness. Re-tighten as necessary to maintain structural integrity.
- Ventilation: Ensure the air vents remain unobstructed to allow for proper air circulation and prevent moisture buildup.
- Drainage: Keep the area around the shed clear of debris to ensure proper water runoff from the sloping roof.
- Damage Inspection: Regularly inspect the shed for any signs of damage, such as dents, rust, or loose panels. Address any issues promptly to prevent further deterioration.
7. Troubleshooting
This section addresses common issues you might encounter with your storage shed.
- Doors are difficult to slide:
- Check the door tracks for obstructions (dirt, leaves, small stones). Clean them thoroughly.
- Ensure the shed is installed on a level surface. Uneven ground can cause the frame to twist, affecting door alignment.
- Apply a silicone-based lubricant to the door tracks.
- Water leakage inside the shed:
- Inspect the roof panels and seams for any gaps or loose fasteners. Tighten or seal as needed.
- Check the seals around the doors and windows.
- Ensure proper drainage around the shed and that the ground is not sloping towards the base.
- Verify that all roof panels are correctly overlapped and secured according to assembly instructions.
- Shed feels unstable or wobbly:
- Confirm that the shed is securely anchored to the ground.
- Check all frame connections and panel fasteners for tightness. Re-tighten any loose components.
- Ensure the base is perfectly level. Adjust if necessary.
- Condensation inside the shed:
- Ensure the air vents are clear and unobstructed to allow for proper air circulation.
- Avoid storing wet items inside the shed without allowing them to dry first.
- Consider adding a moisture absorber if the problem persists in very humid environments.
8. Specifications
| Feature | Detail |
|---|---|
| Brand | Endark |
| Model Number | GA7005 |
| Product Dimensions (D x W x H) | 63.2"D x 93.1"W x 76.6"H |
| Material | Alloy Steel (Frame), Metal (Top), Wood (Base/Side Panels) |
| Color | Wood (panels), Grey (frame/roof) |
| Water Resistance Level | Waterproof |
| Door Style | Sliding Doors |
| Assembly Required | Yes |
| GTIN / UPC | 797387760862 |
9. Warranty Information
Specific warranty details for the Endark 6x8FT Wood Heavy-Duty Metal Storage Shed are typically provided with the product packaging or can be obtained directly from the manufacturer. Please refer to the documentation included with your purchase for comprehensive warranty terms and conditions.
10. Customer Support
Should you have any questions regarding the assembly, operation, maintenance, or any other aspect of your Endark storage shed, please do not hesitate to contact our dedicated customer support team. Refer to your product packaging or the manufacturer's website for contact information.
We are committed to ensuring a satisfying user experience and are available to assist with any concerns.