1. Introduction
This manual provides detailed instructions for the installation, operation, maintenance, and troubleshooting of your Blütezeit 1400lb Chain Drive Sliding Gate Opener. Please read this manual thoroughly before installation and use to ensure proper function and safety. Keep this manual for future reference.
2. Safety Information
- Ensure all installation steps are performed by qualified personnel or under professional supervision.
- Keep children and pets away from the gate area during operation.
- Do not attempt to repair the unit yourself. Contact customer support for assistance.
- Verify that the gate is properly balanced and moves freely before installing the opener.
- Install the infrared sensors to prevent the gate from closing on obstacles.
- Always use the manual release key during power outages or emergencies.
3. Package Contents
Verify that all components are present and undamaged before proceeding with installation.

Image: All components included in the Blütezeit 1400lb Chain Drive Sliding Gate Opener package.
- 1 × Gate Opener Unit with Built-in Backup Battery & WiFi Module
- 2 × 9.84ft Chains (total 19.68ft)
- 1 × Installation Kits (various bolts, nuts, brackets)
- 2 × Remote Controls (Batteries Included)
- 2 × Manual Keys
- 1 × Infrared Sensor
4. Setup and Installation
4.1 Main Unit Mounting
Secure the main unit to a stable, level surface. A concrete slab is recommended for optimal stability. Ensure the unit is positioned correctly relative to the gate's path.
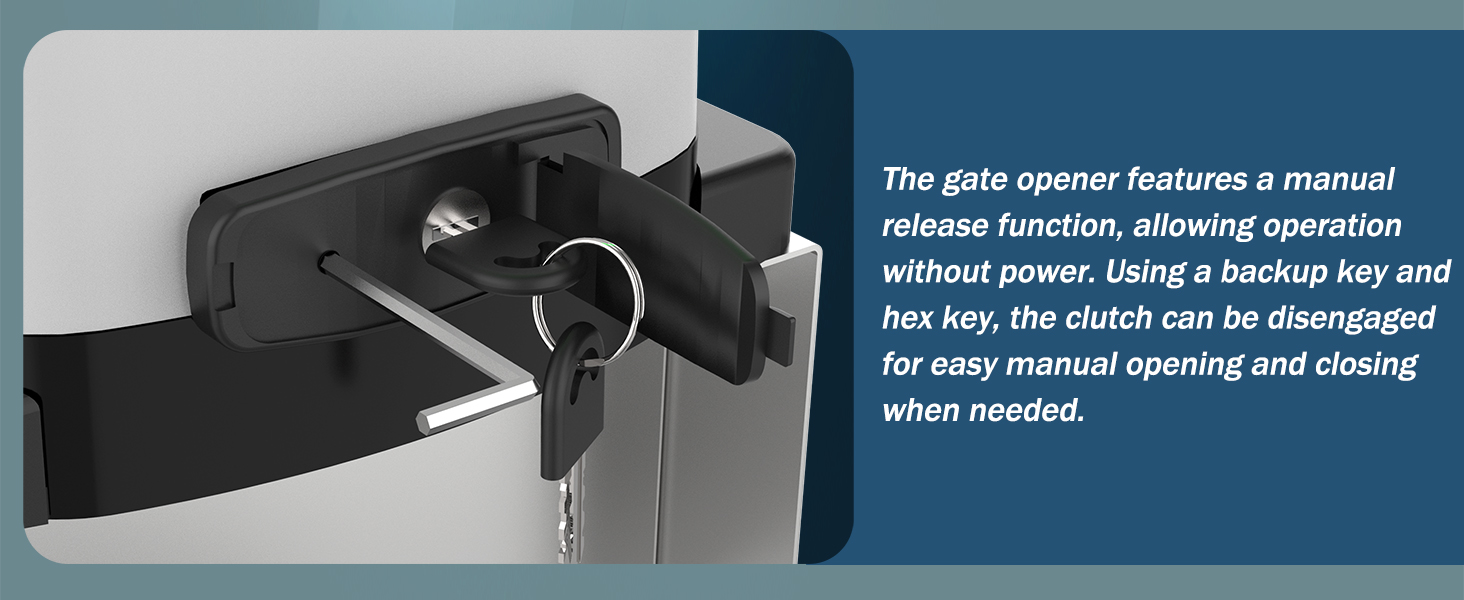
Image: The main gate opener unit installed on a concrete base, ready for chain attachment.
4.2 Chain Bracket Installation
Attach the chain brackets to the gate. Two types of fixing bolts are provided: square bolts for square tube gates and U-bolts for round tube gates. Select the appropriate bolts for your gate type.
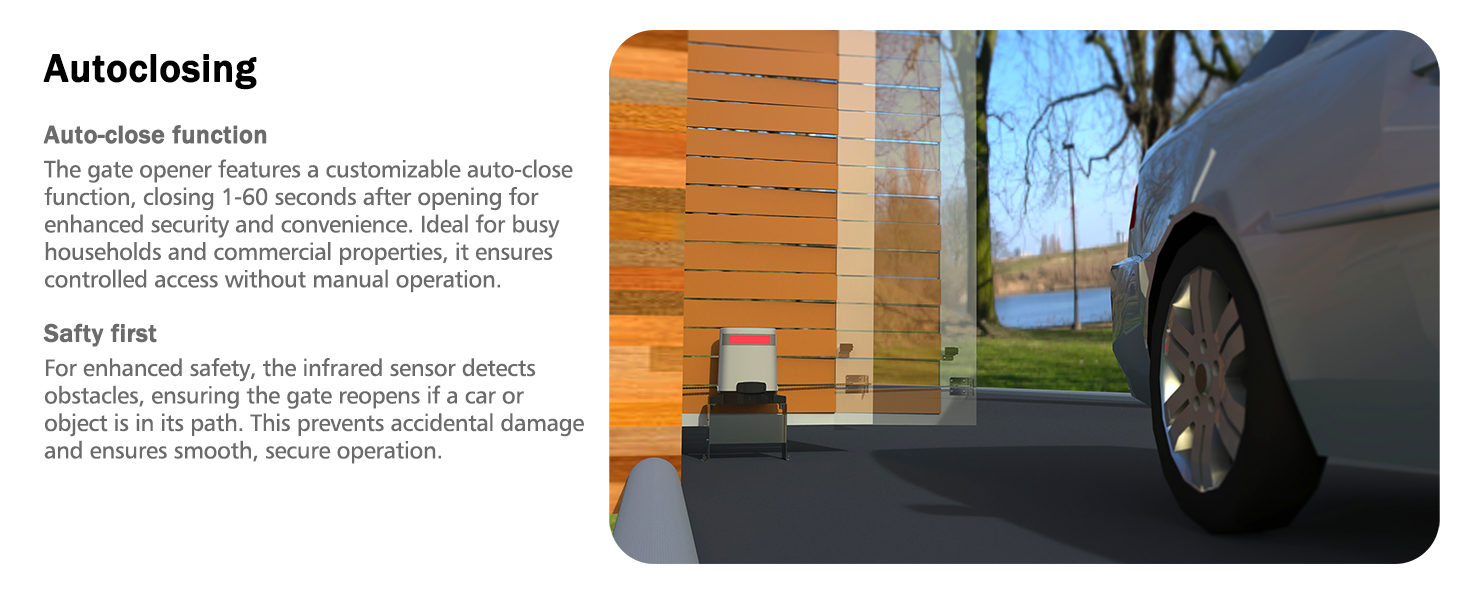
Image: Illustration of chain fixed-plate mounted using both U-shaped and right-angle clamps for different gate types.
4.3 Chain Attachment
Connect the heavy-duty chain to the main unit's sprocket and secure it to the installed chain brackets on the gate. Ensure the chain is taut but not overly tight to allow smooth operation.

Image: Detailed view of the chain drive system, highlighting the gears and chain for smooth transmission.
4.4 Magnetic Limit Switches
Install the two magnetic limit switches on the gate to accurately detect the open and closed positions. These switches ensure precise gate positioning and enhance safety.
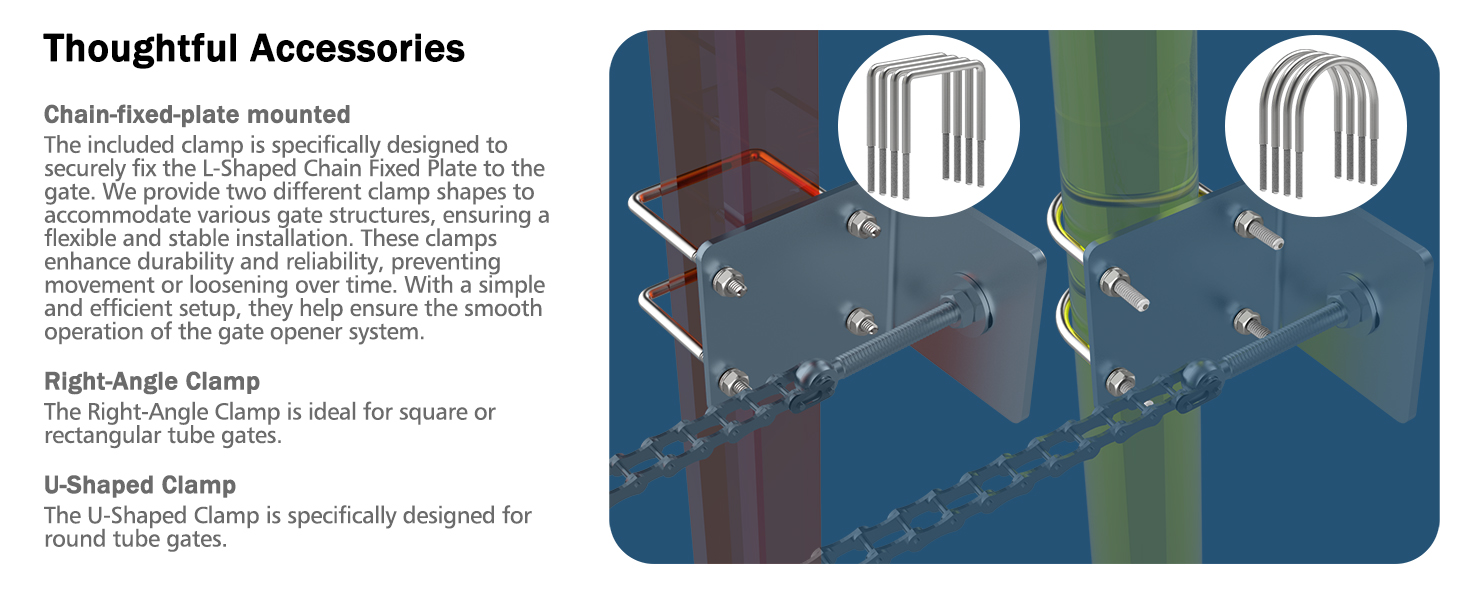
Image: A magnetic switch mounted on a gate, used for detecting open and closed positions.
4.5 Solar Power Connection (Optional)
If using a solar panel (sold separately), connect it to the motor unit. The system supports 20W or 25W solar panels for efficient charging. No extra wiring is needed for the solar panel connection.

Image: A solar panel connected to the gate opener unit, providing an eco-friendly power option.
4.6 Infrared Sensor Installation
Install the infrared sensors on opposite sides of the gate opening. These sensors detect obstacles in the gate's path, stopping and reversing the gate to prevent accidents.

Image: An infrared sensor, crucial for detecting obstacles and ensuring gate safety.
4.7 WiFi Module Setup
The gate opener includes a pre-installed WiFi module. Download the 'eWeLink' app on your smartphone and follow the in-app instructions to connect your gate opener for remote control.
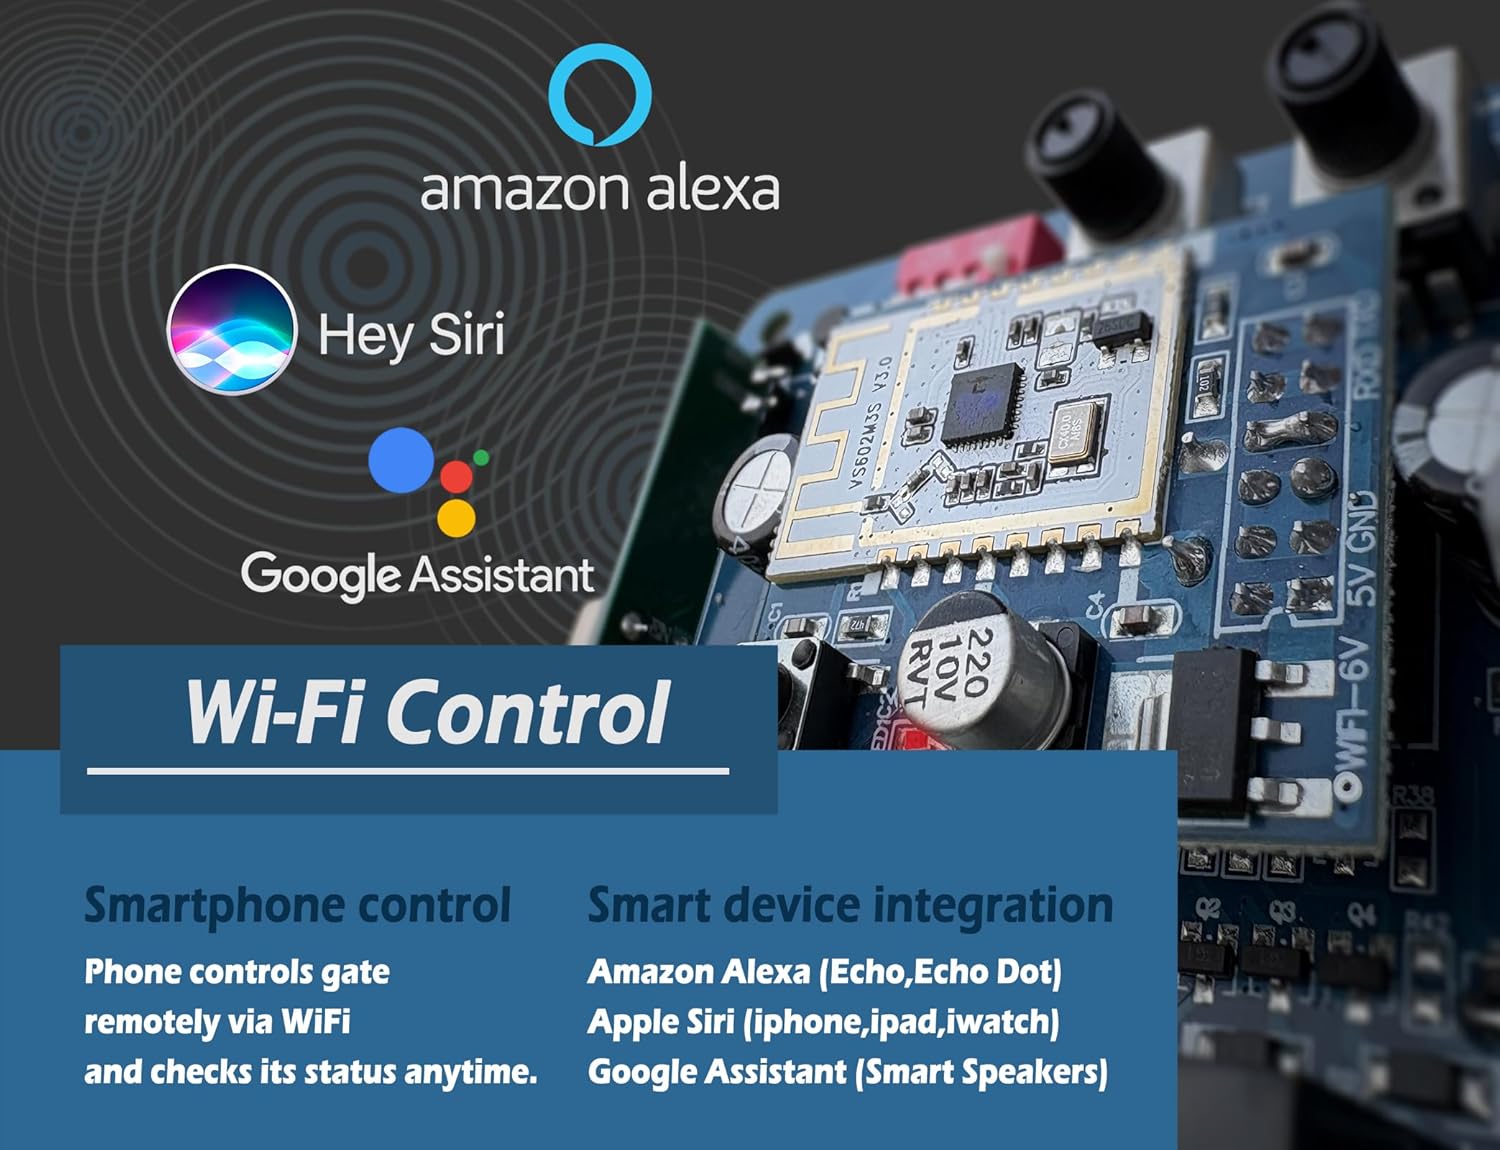
Image: A circuit board showing the integrated WiFi module for smartphone control.
5. Operating Instructions
5.1 Remote Control Usage
Use the provided remote controls to open, close, or stop the gate. The remotes offer a range of up to 165 feet. Press the designated button for the desired action.
5.2 Manual Release
In case of a power outage or system malfunction, use the manual keys to disengage the clutch mechanism. This allows you to open and close the gate manually.

Image: Close-up of the manual release mechanism, showing the keyhole for disengaging the clutch.
5.3 Auto-Close Function
The gate opener features a customizable auto-close function. You can set the gate to automatically close between 1 and 60 seconds after opening. Refer to the detailed programming instructions for setting this feature.
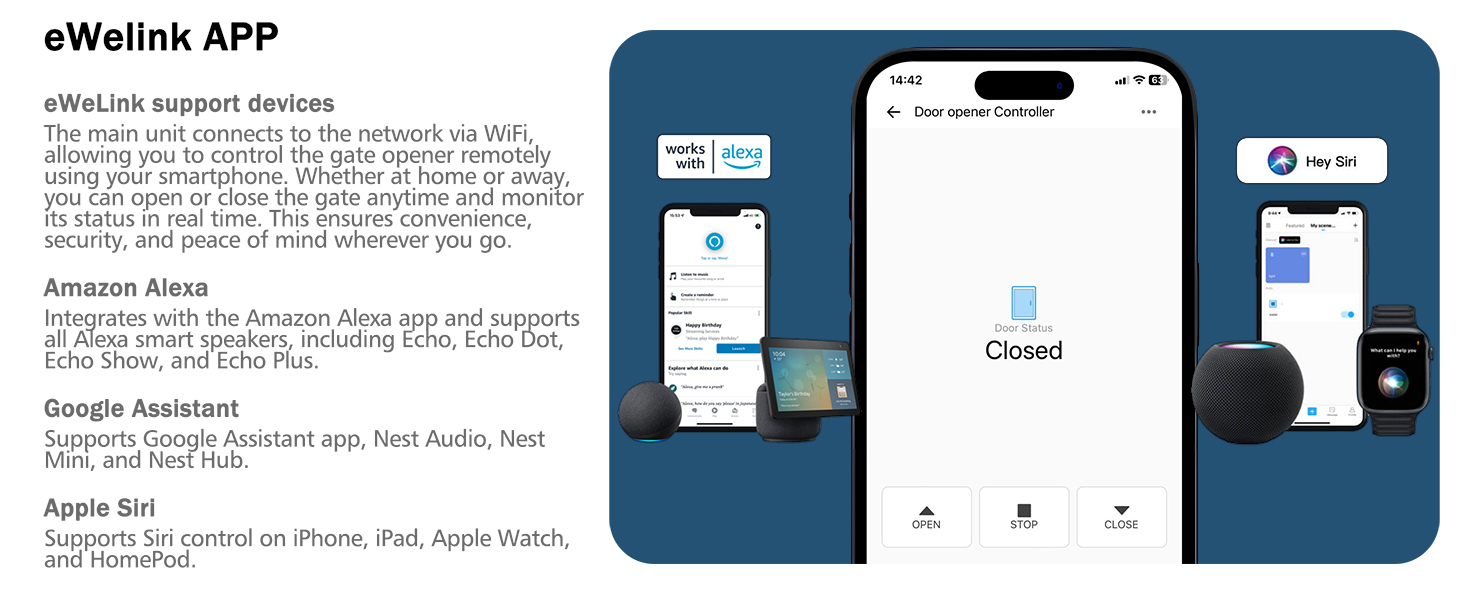
Image: A gate automatically closing, with an infrared sensor detecting a car for safety.
5.4 LED Status Indicator
The built-in LED light on the main unit indicates the gate's status: green for open and red for closed. This provides clear visual feedback on the gate's position.

Image: The gate opener unit displaying a green LED, indicating the gate is open.
5.5 Smart WiFi Control
Control your gate remotely using the 'eWeLink' app on your smartphone. The app allows you to open, close, and monitor the gate's status from anywhere with an internet connection. It integrates with Amazon Alexa, Apple Siri, and Google Assistant.
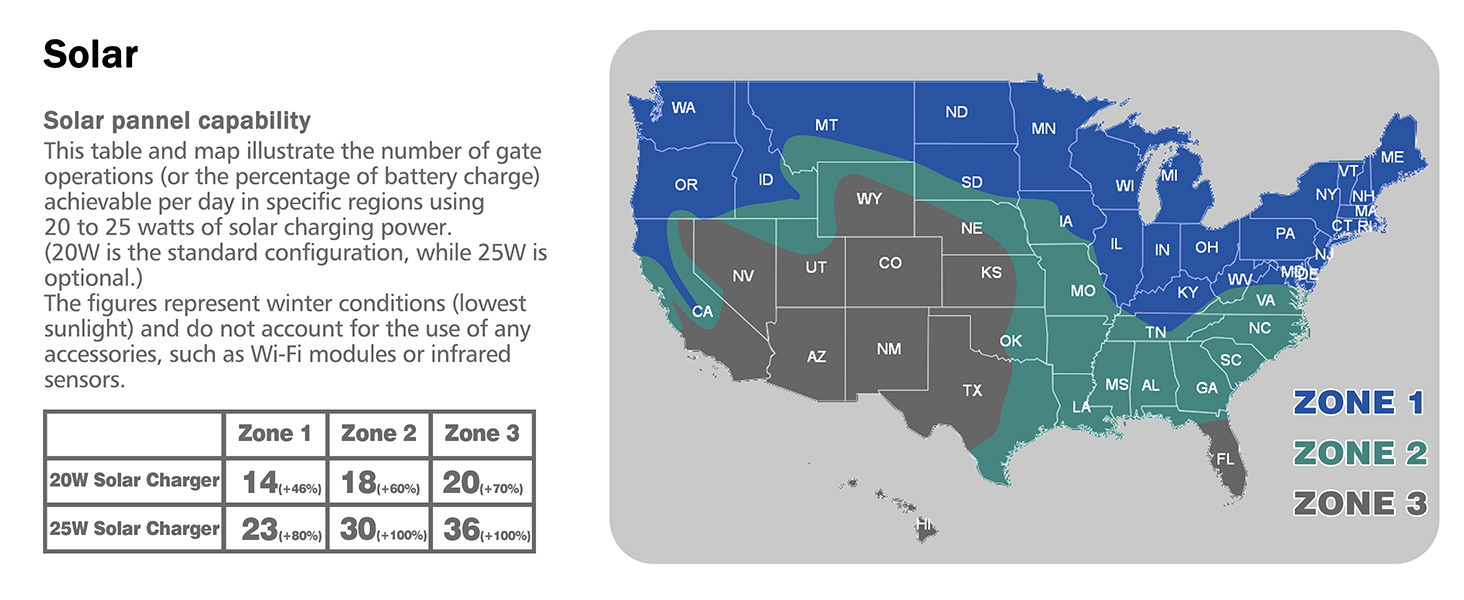
Image: A smartphone displaying the eWeLink app interface for controlling the gate opener.
Video: An overview of the Blütezeit Sliding Gate Opener, highlighting its solar compatibility, WiFi control, and backup battery features.
6. Maintenance
6.1 General Cleaning
Regularly clean the exterior of the motor unit and the gate's track to remove dirt, debris, and leaves that could obstruct operation. Use a soft, damp cloth for cleaning.
6.2 Chain Lubrication
Periodically inspect and lubricate the drive chain to ensure smooth and quiet operation. Use a suitable chain lubricant to prevent rust and wear.
6.3 Battery Maintenance
The built-in DC24V 6.0Ah lithium-ion battery provides backup power. Ensure the solar panel (if installed) is clean and free from obstructions to maintain optimal charging. The battery offers 3-5 days of standby without WiFi or IR sensors.
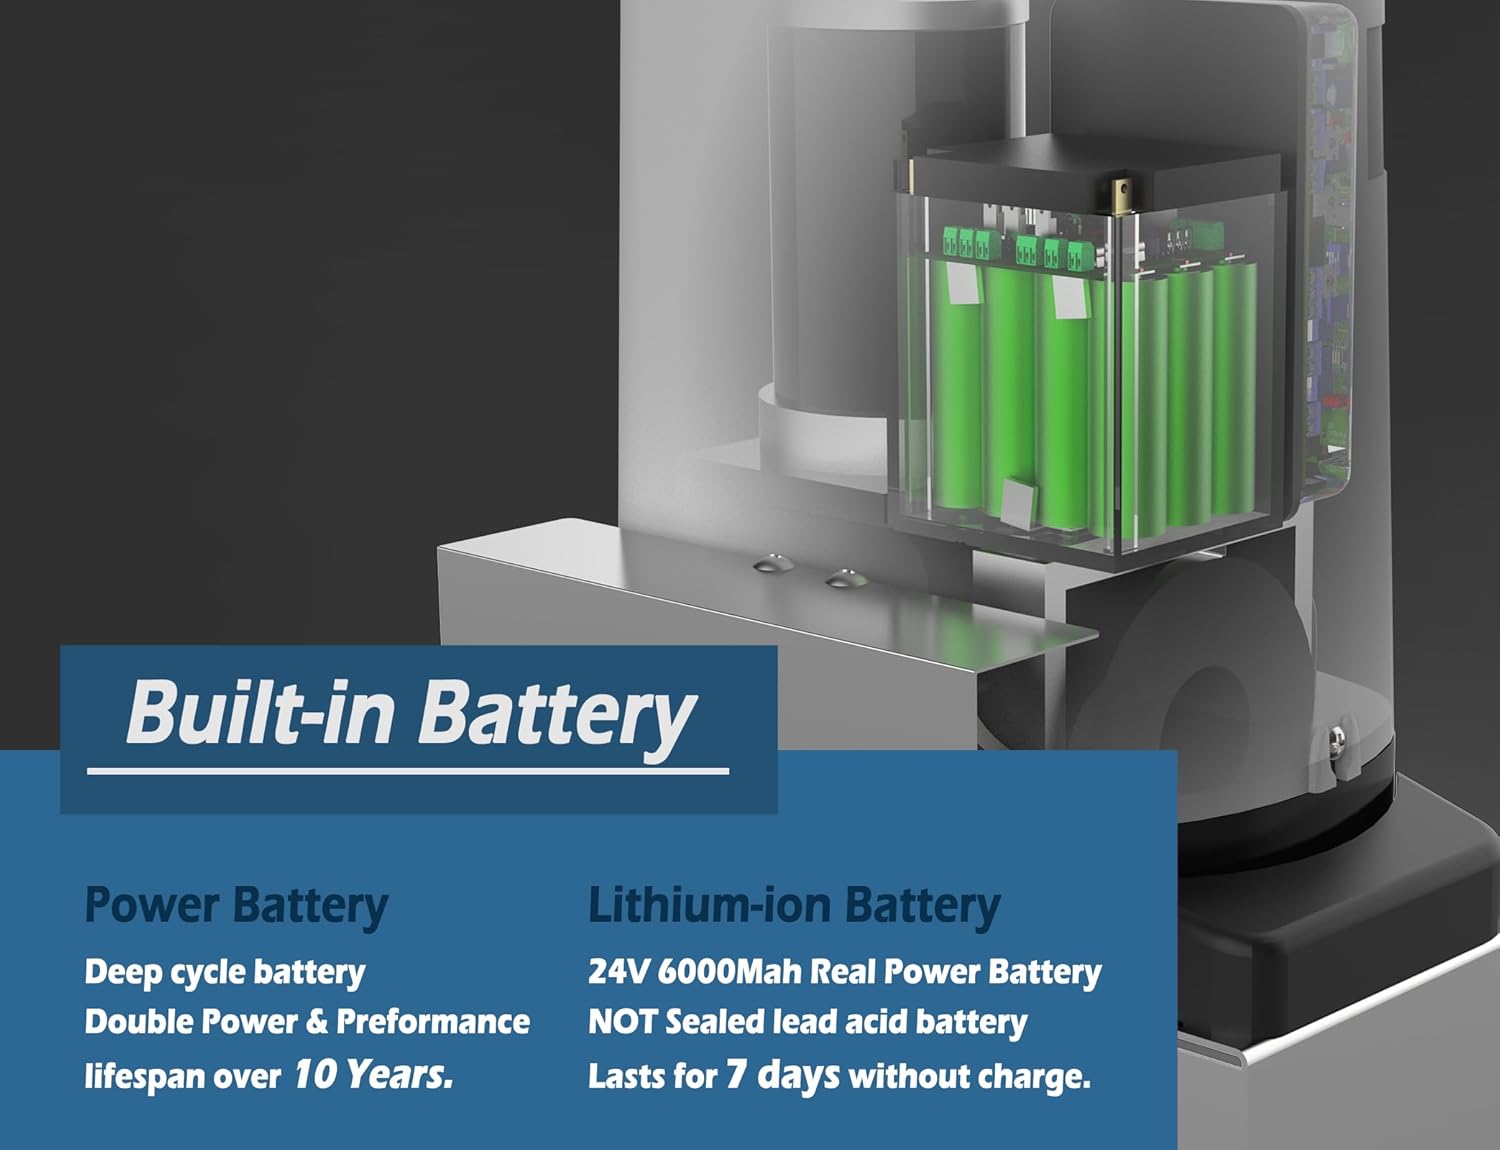
Image: An internal view of the gate opener, highlighting the integrated lithium-ion battery for backup power.
6.4 Sensor Cleaning
Keep the infrared sensors clean and free from dirt, spiderwebs, or other obstructions that could interfere with their detection capabilities.
7. Troubleshooting
| Problem | Possible Cause | Solution |
|---|---|---|
| Gate does not open/close | No power, remote battery low, obstruction, sensor misalignment. | Check power supply, replace remote batteries, clear obstruction, realign sensors. |
| Gate stops unexpectedly | Obstruction detected by IR sensor, limit switch issue. | Clear path, check IR sensor alignment, verify limit switch positions. |
| Remote control not working | Remote battery dead, out of range, remote not paired. | Replace battery, move closer to gate, re-pair remote according to instructions. |
| WiFi control issues | No internet connection, app not configured correctly. | Check WiFi signal, reconfigure eWeLink app, ensure module is powered. |
8. Specifications
| Feature | Detail |
|---|---|
| Model Number | ME-GO-600-C1 |
| Max Gate Weight | 1400 lbs |
| Motor Power | 280W |
| Battery Type | DC24V 6.0Ah Lithium-Ion (Included) |
| Solar Power Support | Compatible with 20W or 25W solar panels (Sold Separately) |
| WiFi Control | eWeLink App, compatible with Alexa, Siri, Google Assistant |
| Remote Range | Up to 165 ft |
| Auto-Close Timer | 1 to 60 seconds |
| Safety Features | Infrared Sensor, Manual Release Key |
| Product Dimensions | 12.2 x 8.46 x 10.83 inches |
| Item Weight | 43.4 pounds |
| Included Chains | 2 x 9.84ft (total 19.68ft) |
9. Warranty and Support
Blütezeit products undergo strict quality checks to ensure durability and performance. For warranty information, please refer to the documentation included with your purchase or contact Blütezeit customer service.
Technical Support
If you encounter any problems during installation or operation, please contact Blütezeit technical support. Our professionals are available to provide assistance and solutions.

Image: Visual representation of available technical support channels, including online and phone support.


