
1. Important Safety Information
Read and understand all safety warnings and instructions before operating this snow blower.
- Always wear appropriate protective clothing, including gloves and eye protection.
- Keep hands and feet away from rotating parts.
- Never operate the snow blower in an enclosed area due to carbon monoxide poisoning risk. Ensure adequate ventilation.
- Always turn off the engine and allow the auger to stop completely before unclogging or performing any maintenance.
- Store the snow blower and fuel separately in a cool, dry, well-ventilated area.
- Always follow the manufacturer's instructions for operation and maintenance.
2. Product Overview
The PowerSmart 24-Inch Self-Propelled Gas Snow Blower, Model HB7109A, is designed for efficient snow removal. It features a powerful Briggs & Stratton 208cc engine, electric start, and a two-stage clearing system capable of handling various snow conditions.

Image: The PowerSmart Two-Stage Snow Blower in action, demonstrating its snow clearing capability.
Key Features:
- Engine: B&S 208cc OHV 4-cycle engine for reliable performance.
- Clearing Capacity: 24-inch clearing width and 20-inch clearing height.
- Starting System: Convenient 120V electric start with recoil start backup.
- Drive System: Self-propelled with 6 forward and 2 reverse speed settings.
- Comfort & Visibility: Integrated handle warmers and LED lights for nighttime operation.
- Snow Discharge: 180-degree chute rotation and up to 50 feet throwing distance.

Image: A visual summary of the PowerSmart snow blower's key features, including the B&S engine, heavy-duty auger, 24-inch clearing width, 20-inch snow depth, 50ft throwing distance, handle warmer, and 180-degree chute rotation.
3. Setup and Assembly
This section provides general guidance for setting up your snow blower. Refer to the detailed assembly instructions included in your product packaging for specific steps.
3.1 Unpacking and Initial Inspection
- Carefully remove the snow blower and all components from the packaging.
- Inspect for any shipping damage. Contact customer support immediately if damage is found.
- Ensure all parts listed in the packing list are present.
3.2 Handlebar Assembly
Attach the handlebars to the main unit using the provided hardware. Ensure all bolts are securely tightened.
3.3 Chute Assembly
Mount the discharge chute and its rotation mechanism according to the instructions. Verify that the chute rotates freely and locks into position.
3.4 Fluid Checks and Fueling
- Engine Oil: Check the engine oil level and fill with the recommended type and amount of oil (typically SAE 5W-30 for cold weather). Do not overfill.
- Fuel: Fill the fuel tank with fresh, unleaded gasoline (minimum 87 octane). Do not use E85 or E15 fuel. Always add fuel stabilizer to prevent fuel degradation.

Image: A detailed view of the Briggs & Stratton 208cc OHV engine, emphasizing its design and features relevant to cold-weather starting.
4. Operating Instructions
4.1 Starting the Engine
Your snow blower offers two starting methods: electric start and recoil start.
- Electric Start (120V): Connect the power cord to a grounded 120V outlet and then to the snow blower's electric start port. Press and hold the electric start button until the engine starts. Disconnect the cord immediately after starting.
- Recoil Start: Ensure the fuel valve is open and the choke is set appropriately for cold starting. Pull the recoil starter handle firmly and smoothly until the engine starts.
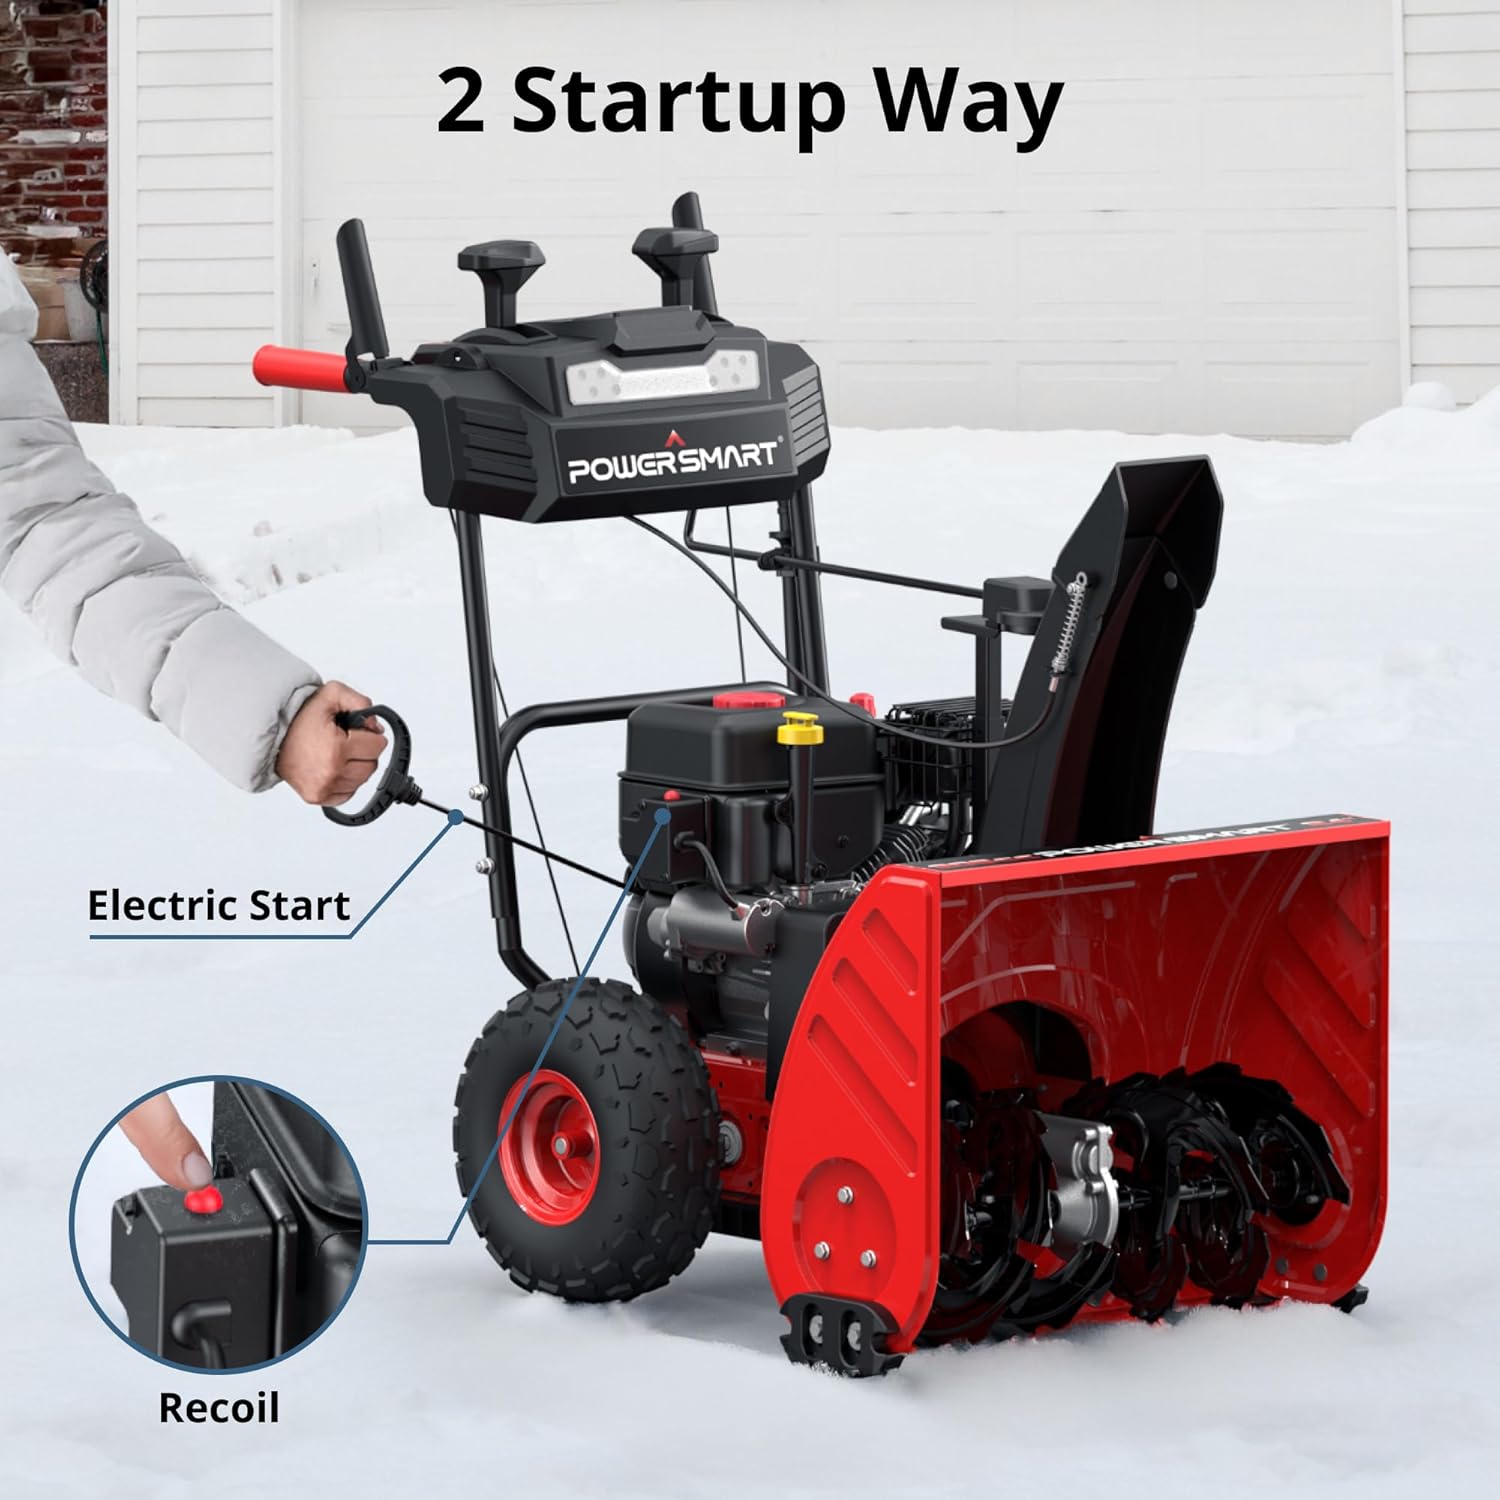
Image: Illustration of the two starting methods: the electric start button and the recoil pull handle.
4.2 Engaging the Drive and Auger
- Once the engine is running, engage the drive lever to activate the self-propelled wheels. Select your desired speed (6 forward, 2 reverse) using the gear selector.
- Engage the auger lever to begin clearing snow. The heavy-duty steel auger and impeller will cut through tough, icy snow.
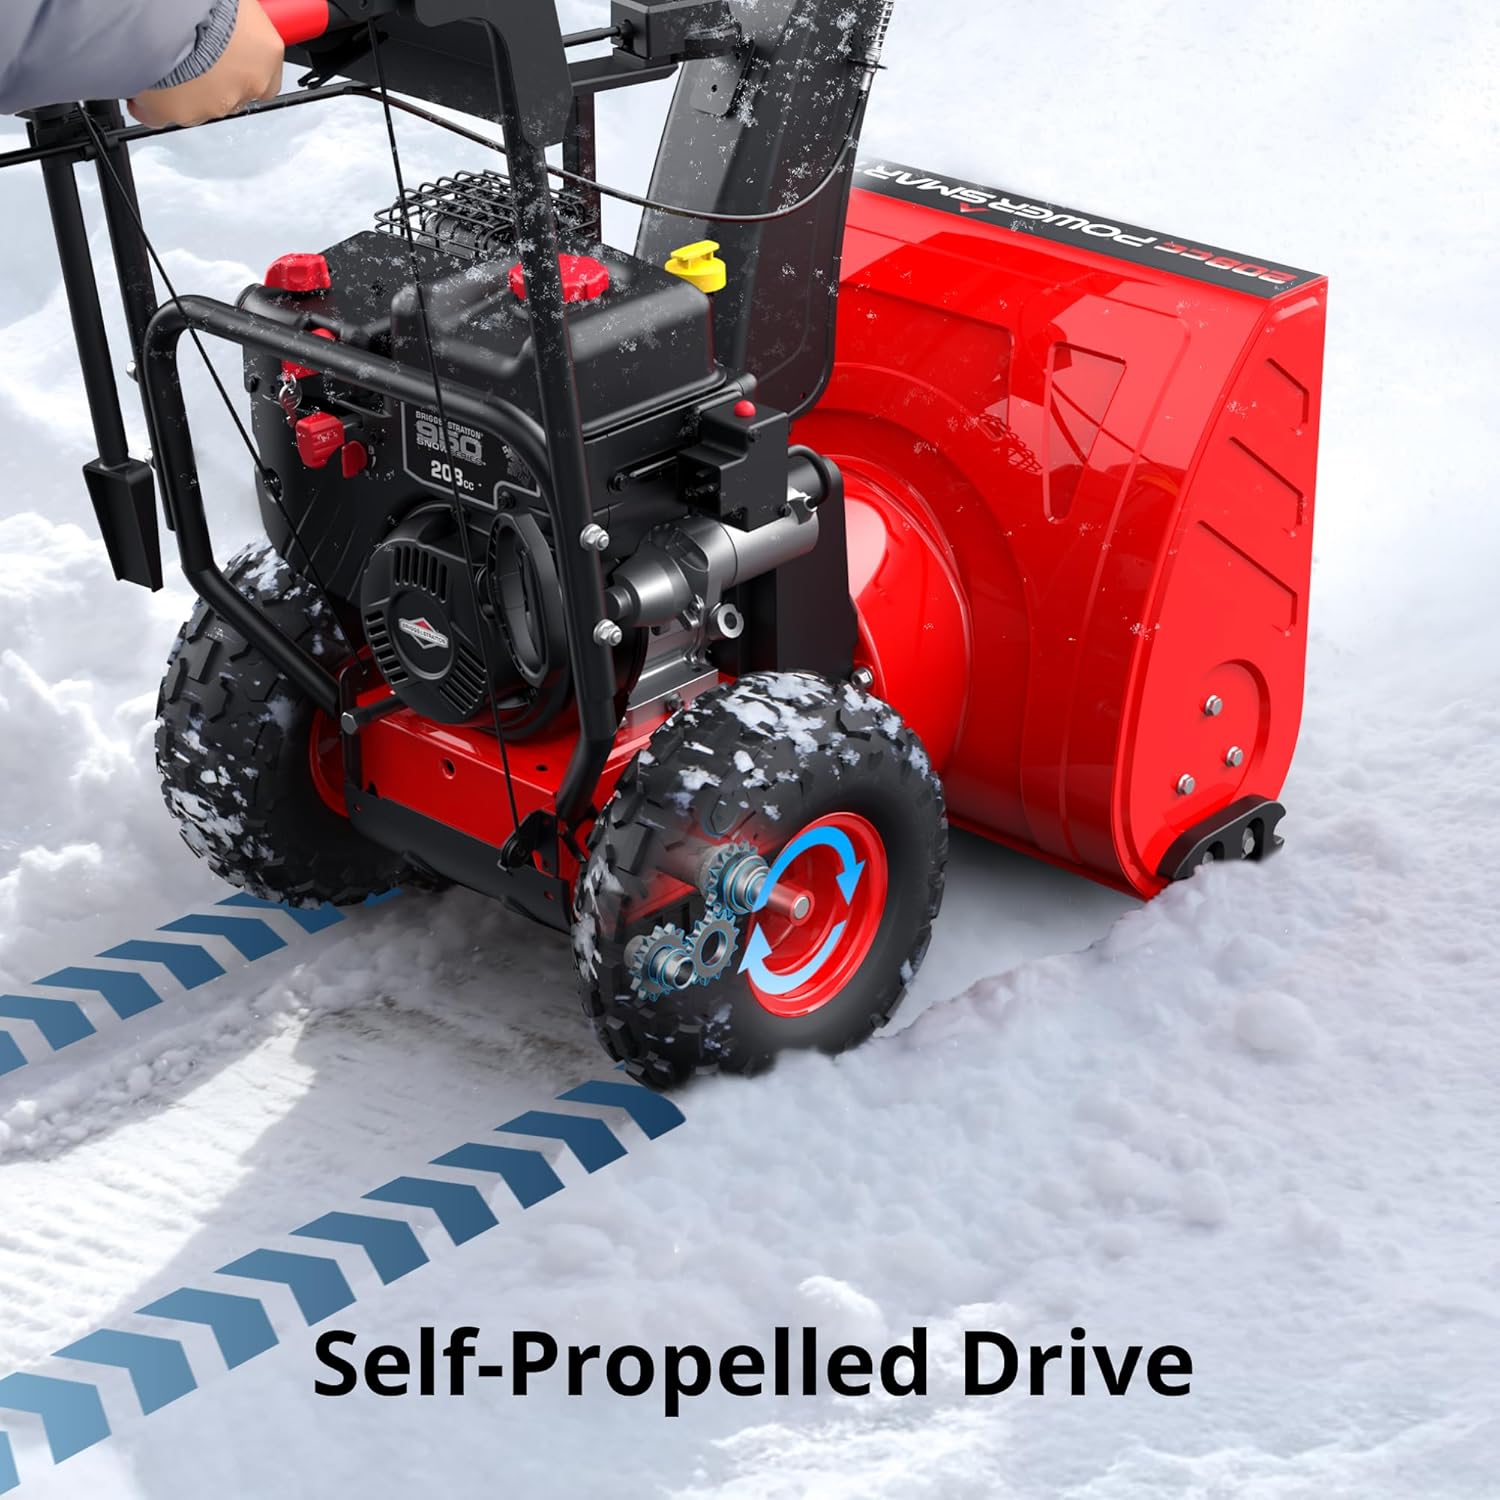
Image: The self-propelled drive system of the PowerSmart snow blower, indicating movement.

Image: A close-up view of the robust steel auger and impeller, crucial for effective snow removal.
4.3 Clearing Snow
- Guide the snow blower through the snow, allowing the self-propelled system to do the work.
- Adjust the discharge chute direction using the crank to throw snow up to 50 feet away, avoiding cleared areas or obstacles. The chute offers 180-degree rotation.
- The 24-inch clearing width and 20-inch clearing height are suitable for various snow types, including fluffy, heavy, and wet snow.

Image: The snow blower demonstrating its ability to clear a 24-inch wide path through 20 inches of snow, suitable for fluffy, heavy, or wet snow.
4.4 Using Additional Features
- Handle Warmers: Activate the handle warmers for increased comfort during cold operation.
- LED Lights: Turn on the integrated LED lights for improved visibility when operating in low-light conditions or at night.

Image: Visual representation of the LED light providing illumination, the handle warmer for user comfort, and the 180-degree chute rotation capability.
4.5 Shutting Down
When finished, disengage the auger and drive levers. Turn off the engine using the ignition switch. Allow the engine to cool before storing.
5. Maintenance
Regular maintenance ensures optimal performance and extends the life of your snow blower. Always refer to the engine manual for specific maintenance schedules.
- After Each Use: Clean snow and debris from the auger housing, chute, and engine. Inspect for loose fasteners or damaged parts.
- Engine Oil: Check oil level before each use. Change engine oil after the first 5 hours of operation, then every 25 hours or annually.
- Spark Plug: Inspect and clean the spark plug annually or every 50 hours. Replace if worn.
- Fuel System: Use fresh fuel with stabilizer. Drain the fuel system or run the engine dry before long-term storage.
- Auger and Impeller: Inspect the auger blades and impeller for wear or damage. Replace shear pins as needed.
- Skid Shoes: Adjust or replace skid shoes as they wear down to protect the auger housing.
6. Troubleshooting
This section addresses common issues you might encounter. For problems not listed here, contact PowerSmart customer support.
| Problem | Possible Cause | Solution |
|---|---|---|
| Engine does not start | No fuel, stale fuel, spark plug issue, choke setting incorrect, electric start not connected. | Check fuel level, use fresh fuel, inspect spark plug, adjust choke, ensure electric start cord is properly connected. |
| Loss of power during operation | Clogged auger/chute, engine overloaded, low fuel, dirty air filter. | Clear clogs (engine off!), reduce snow intake, refuel, clean/replace air filter. |
| Snow not throwing far enough | Wet/heavy snow, clogged chute, impeller worn, engine speed too low. | Clear chute (engine off!), operate at higher engine speed, inspect impeller for wear. |
| Snow blower not moving | Drive belt issue, transmission problem, speed selector incorrect. | Check drive belt, ensure speed selector is engaged, consult service manual or professional. |
7. Specifications
| Feature | Detail |
|---|---|
| Brand | PowerSmart |
| Model Number | HB7109A |
| Power Source | Gas Powered |
| Engine Type | 4 Cycle OHV |
| Engine Displacement | 208 Cubic Centimeters |
| Clearing Width | 24 Inches |
| Ideal Snow Depth | 20 Inches |
| Number of Speeds | 8 (6 Forward, 2 Reverse) |
| Item Weight | 148.7 pounds |
| Product Dimensions | 48.7"D x 27.8"W x 44.2"H |
| UPC | 840432709337 |
8. Warranty and Customer Support
For warranty information, please refer to the warranty card included with your product or visit the official PowerSmart website. If you require technical assistance, replacement parts, or have questions regarding your snow blower, please contact PowerSmart customer support.
PowerSmart Customer Support: Refer to your product documentation for the most current contact information or visit the PowerSmart official website.


