
Introduction
The Memorex MX-BCD20 is a versatile portable stereo system designed to provide high-quality audio playback from multiple sources. It features a top-loading CD player, AM/FM radio, and an auxiliary input for connecting external devices. Its compact design and flexible power options make it suitable for use at home or on the go.
Important Safety Information
Please read all instructions carefully before operating this unit. Keep this manual for future reference.
- Do not expose this unit to rain or moisture.
- Do not block any ventilation openings.
- Ensure proper power supply (AC adapter or 6 'C' batteries).
- Do not open the unit's casing; refer all servicing to qualified personnel.
- Avoid placing the unit near heat sources or in direct sunlight.
- Clean only with a dry cloth.
Package Contents
- Memorex MX-BCD20 Portable CD Player
- AC Power Adapter
- Instruction Manual (this document)
Product Overview
Familiarize yourself with the various parts and controls of your Memorex Portable CD Player.
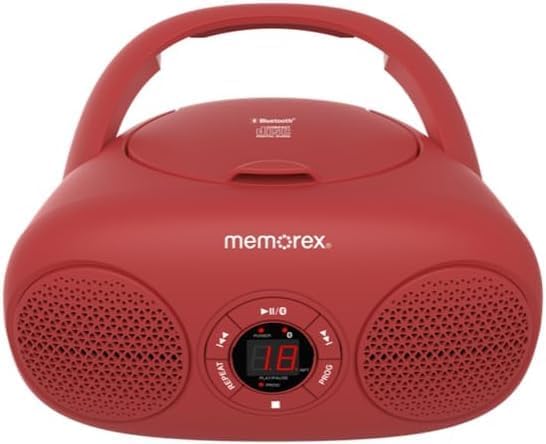
Figure 1: Front view of the Memorex MX-BCD20 Portable CD Player, showing the main controls and speakers.

Figure 2: Rear view illustrating the battery compartment and a side view highlighting the tuning dial and function switch.
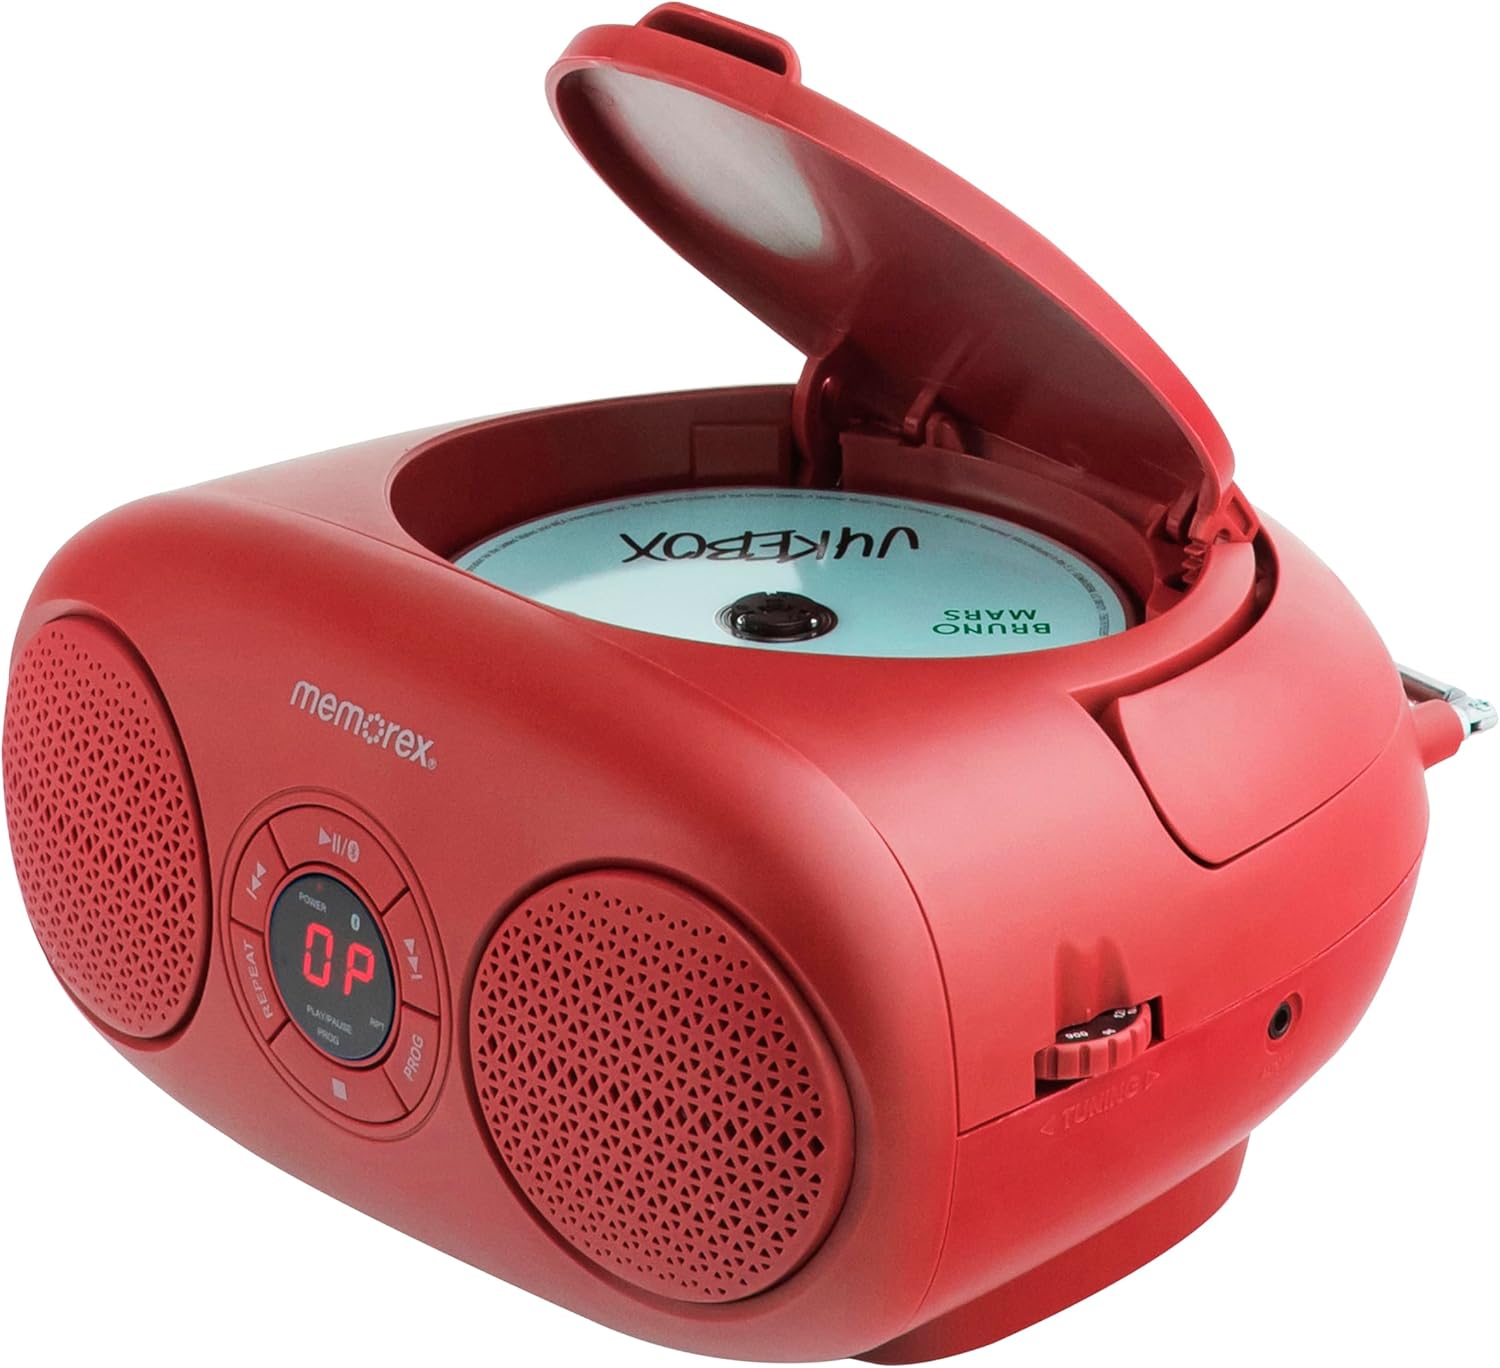
Figure 3: Top view with the CD compartment lid open, ready for disc insertion.
Controls and Indicators:
- POWER Button: Turns the unit On/Off.
- PLAY/PAUSE Button (►/▮▮): Starts or pauses CD playback.
- STOP Button (■): Stops CD playback.
- SKIP/SEARCH Buttons (◀◀ / ►►): Skips tracks or searches within a track on CD.
- REPEAT Button (RPT): Repeats current track or all tracks on CD.
- PROGRAM Button (PROG): Programs CD tracks for custom playback.
- VOLUME Dial: Adjusts the audio output level.
- FUNCTION Switch: Selects between CD, AM, FM, or AUX modes.
- TUNING Dial: Tunes AM/FM radio frequencies.
- LED Display: Shows CD track number or radio frequency.
- Telescopic Antenna: For FM radio reception.
- AUX Input Jack: For connecting external audio devices.
- AC Input Jack: For connecting the AC power adapter.
- Battery Compartment: Holds 6 'C' batteries for portable use.
Setup
Powering the Unit:
The Memorex MX-BCD20 can be powered by either the included AC adapter or 6 'C' batteries (not included).
AC Power:
- Insert the small end of the AC power adapter into the AC input jack on the back of the unit.
- Plug the other end of the AC power adapter into a standard AC wall outlet (120V ~ 60Hz).
Battery Power:
- Open the battery compartment cover located on the bottom of the unit.
- Insert 6 'C' size batteries (not included), ensuring correct polarity (+/-) as indicated inside the compartment.
- Close the battery compartment cover securely.
Note: When the unit is connected to AC power, battery power is automatically disconnected. Remove batteries if the unit will not be used for an extended period.
Antenna Setup:
For optimal FM radio reception, fully extend the telescopic antenna. For AM reception, the unit has a built-in antenna, so no adjustment is needed, but you may need to rotate the unit for better signal.

Figure 4: The unit with its telescopic antenna extended for improved FM radio reception.
Operating Instructions
General Operation:
- Press the POWER button to turn the unit on.
- Adjust the VOLUME dial to your desired listening level.
- Use the FUNCTION switch to select your desired mode: CD, AM, FM, or AUX.
CD Playback:
- Set the FUNCTION switch to "CD".
- Open the CD compartment lid by gently lifting it.
- Place a CD (or CD-R/RW) onto the center spindle with the label side facing up.
- Close the CD compartment lid firmly until it clicks. The LED display will show the total number of tracks.
- Press the PLAY/PAUSE (►/▮▮) button to begin playback. The current track number will be displayed.
- To pause playback, press PLAY/PAUSE (►/▮▮) again. Press it once more to resume.
- To stop playback, press the STOP (■) button.
Skipping Tracks:
- During playback, press SKIP/SEARCH (►►) to skip to the next track.
- Press SKIP/SEARCH (◀◀) to skip to the beginning of the current track. Press it twice to skip to the previous track.
Searching Within a Track:
- During playback, press and hold SKIP/SEARCH (►►) to fast-forward through the current track.
- Press and hold SKIP/SEARCH (◀◀) to fast-reverse through the current track.
- Release the button to resume normal playback.
Repeat Playback:
- Press the REPEAT (RPT) button once during playback to repeat the current track. "REPEAT 1" will appear on the display.
- Press the REPEAT (RPT) button a second time to repeat all tracks on the CD. "REPEAT ALL" will appear.
- Press the REPEAT (RPT) button a third time to cancel repeat playback.
Program Playback:
You can program up to 20 tracks to play in a specific order.
- In STOP mode, press the PROGRAM (PROG) button. "PROG" will flash on the display.
- Use the SKIP/SEARCH (◀◀ / ►►) buttons to select the first track you wish to program.
- Press PROGRAM (PROG) again to confirm the selection. The display will show the program number (e.g., "01" for the first programmed track).
- Repeat steps 2 and 3 to add more tracks to your program.
- After programming all desired tracks, press the PLAY/PAUSE (►/▮▮) button to start programmed playback.
- To clear the program, open the CD compartment lid or press the STOP (■) button twice.
Radio Operation:
- Set the FUNCTION switch to "AM" or "FM".
- For FM reception, extend the telescopic antenna fully.
- Rotate the TUNING dial to select your desired radio station. The frequency will be shown on the LED display.
- Adjust the VOLUME dial as needed.
Tip: For better AM reception, try rotating the entire unit. For FM, adjust the position and extension of the telescopic antenna.
Auxiliary Input (AUX):
You can connect an external audio device (e.g., smartphone, MP3 player) to the unit using a 3.5mm audio cable (not included).
- Set the FUNCTION switch to "AUX".
- Connect one end of a 3.5mm audio cable to the AUX input jack on the unit.
- Connect the other end of the cable to the headphone jack or audio output of your external device.
- Start playback on your external device. The audio will be routed through the Memorex unit's speakers.
- Adjust the volume using both the unit's VOLUME dial and your external device's volume control.
Maintenance
- Cleaning: Wipe the unit with a soft, dry cloth. Do not use abrasive cleaners or solvents.
- CD Care: Handle CDs by their edges. Keep them clean and free of scratches. Store them in their cases when not in use.
- Storage: If storing the unit for a long period, remove the batteries to prevent leakage.
Troubleshooting
| Problem | Possible Cause | Solution |
|---|---|---|
| No power | AC adapter not connected properly; Batteries depleted or inserted incorrectly. | Check AC connection; Replace batteries or ensure correct polarity. |
| CD not playing | CD inserted incorrectly; CD is dirty or scratched; CD compartment lid not closed. | Re-insert CD label side up; Clean CD with a soft cloth; Close lid firmly. |
| Poor radio reception | Antenna not extended (FM); Unit position (AM). | Fully extend FM antenna; Rotate unit for better AM signal. |
| No sound from AUX | AUX cable not connected; External device volume too low. | Ensure AUX cable is securely connected; Increase volume on external device. |
Specifications
- Model: MX-BCD20
- Power Source: AC 120V ~ 60Hz or 6 x 'C' Batteries (DC 9V)
- CD Compatibility: CD, CD-R/RW
- Radio Frequencies: AM/FM
- Auxiliary Input: 3.5mm Stereo Jack
- Dimensions (L x W x H): 10 x 10 x 6 inches (approx.)
- Weight: 2.14 pounds (approx.)
Warranty and Support
Memorex products are designed for reliability and performance. For warranty information or technical support, please refer to the contact details provided on the product packaging or visit the official Memorex website. Keep your purchase receipt as proof of purchase for warranty claims.


