1. Introduction
The Chatthen Caregiver Call Button System is designed to provide reliable assistance for individuals requiring monitoring, such as the elderly, disabled, or those with specific health needs. It features a wireless receiver and call buttons, ensuring timely alerts without the need for Wi-Fi. This system enhances safety and provides peace of mind for both users and caregivers.
2. Package Contents
Verify that all items listed below are included in your package:
- 1 x Receiver Unit
- 1 x SOS Call Button (Pendant Style)
- 1 x Watch Pager Style Call Button
- 1 x Hanging Rope (for SOS Call Button)
- 1 x Double-sided Tape (for mounting)
- Screws (for mounting)
- CR2032 Batteries (pre-installed in call buttons)
- 1 x USB-C Charging Cable (for Receiver)

Image 1: Components of the Chatthen Caregiver Call Button System, showing the receiver, SOS button, and watch pager.
3. Product Overview
Receiver Unit
The receiver unit features a digital display, control buttons for settings, volume, and music selection, a mute button, and a prominent SOS button. It also includes a speaker for audible alerts and a USB-C charging port.
Call Buttons (SOS Button & Watch Pager)
The system includes two types of call buttons: a pendant-style SOS button and a watch pager style button. Both are equipped with a large, easy-to-press call button to send an alert to the receiver.
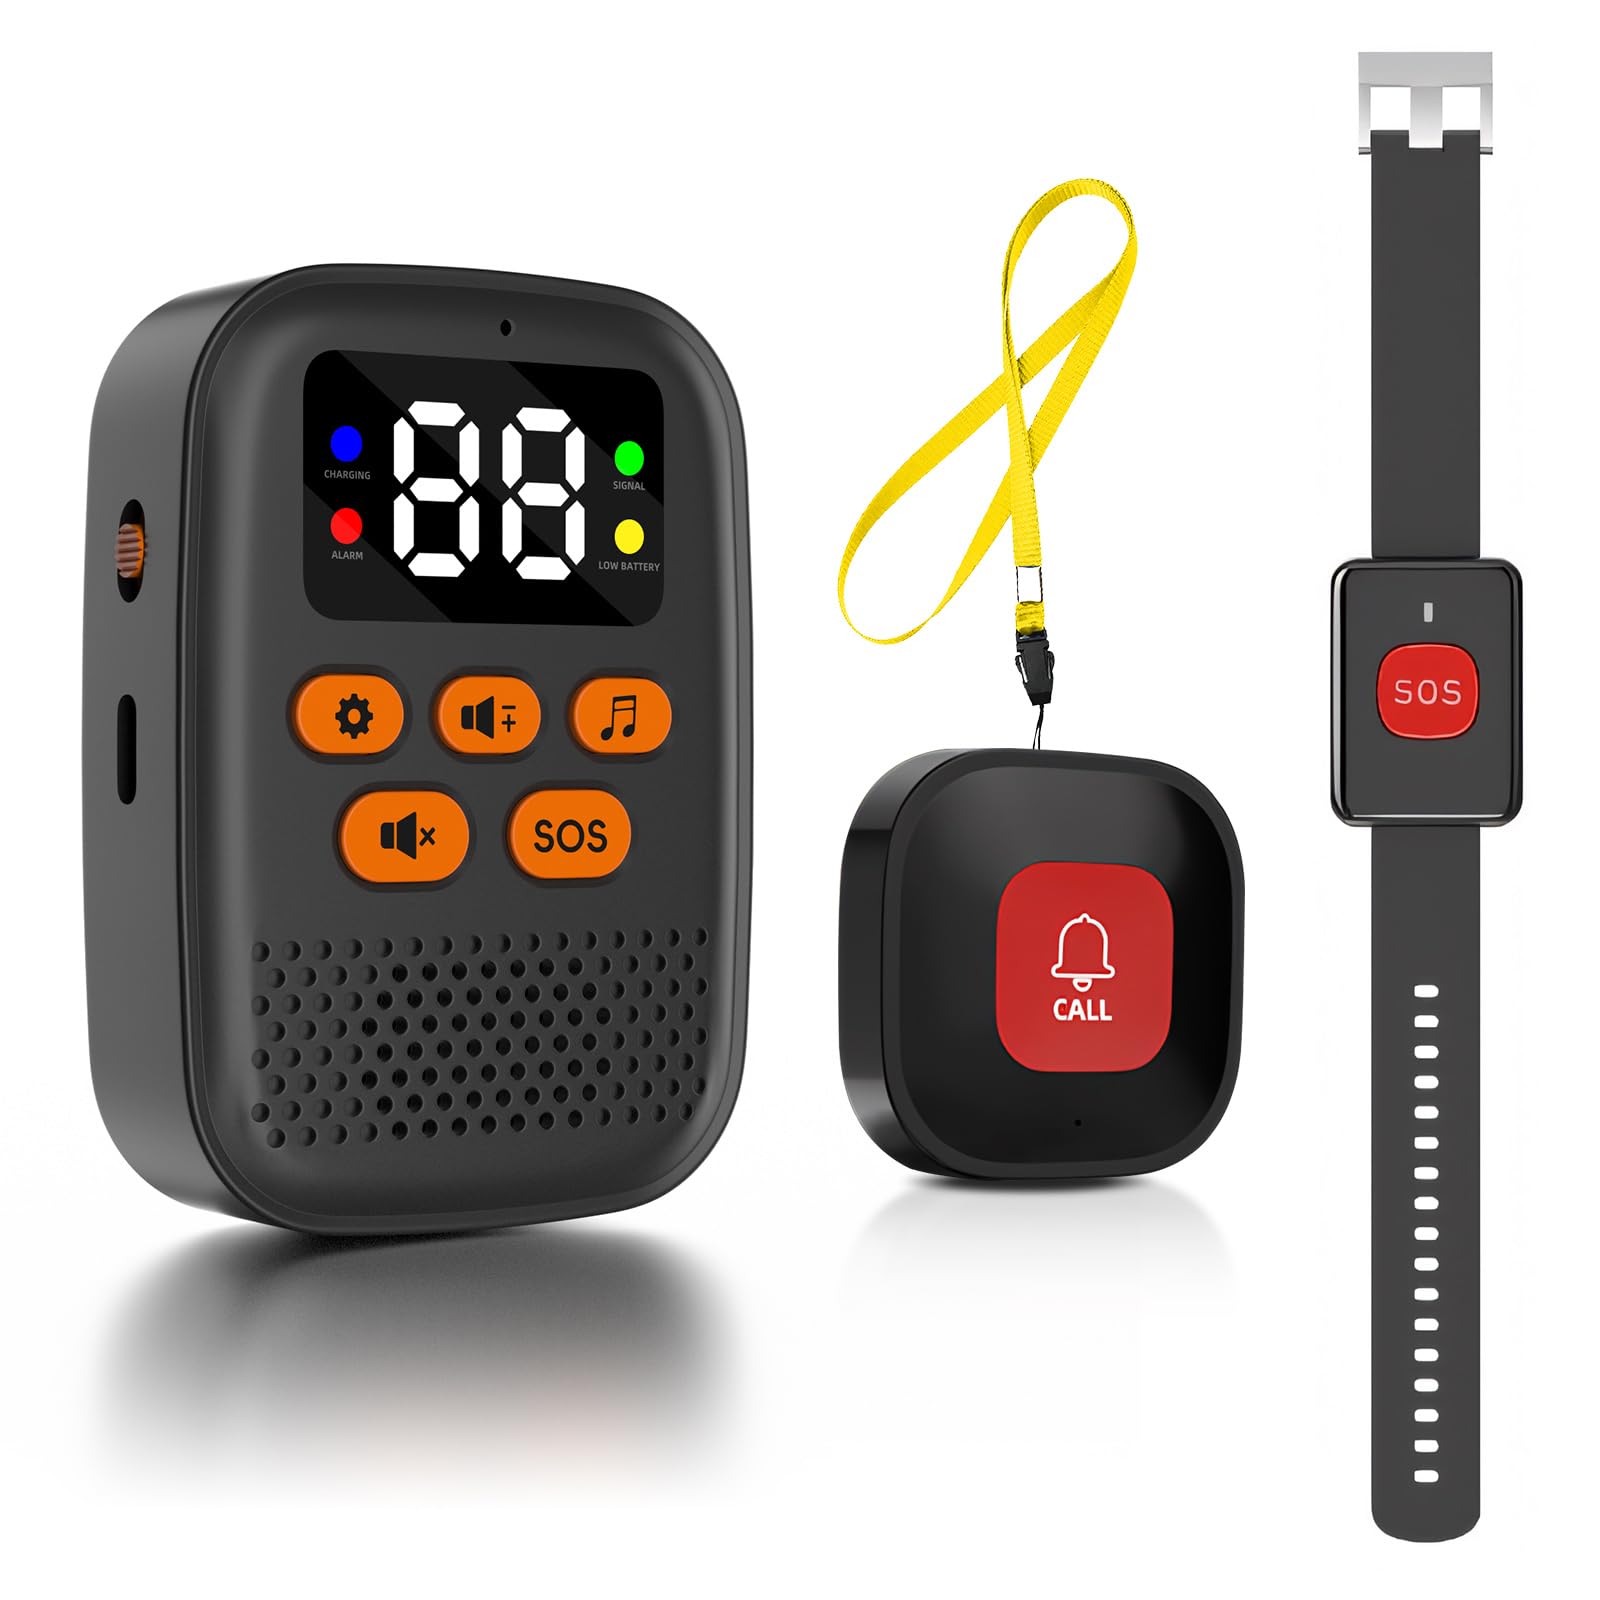
Image 2: The Chatthen Caregiver Call Button System, highlighting the receiver and call buttons.
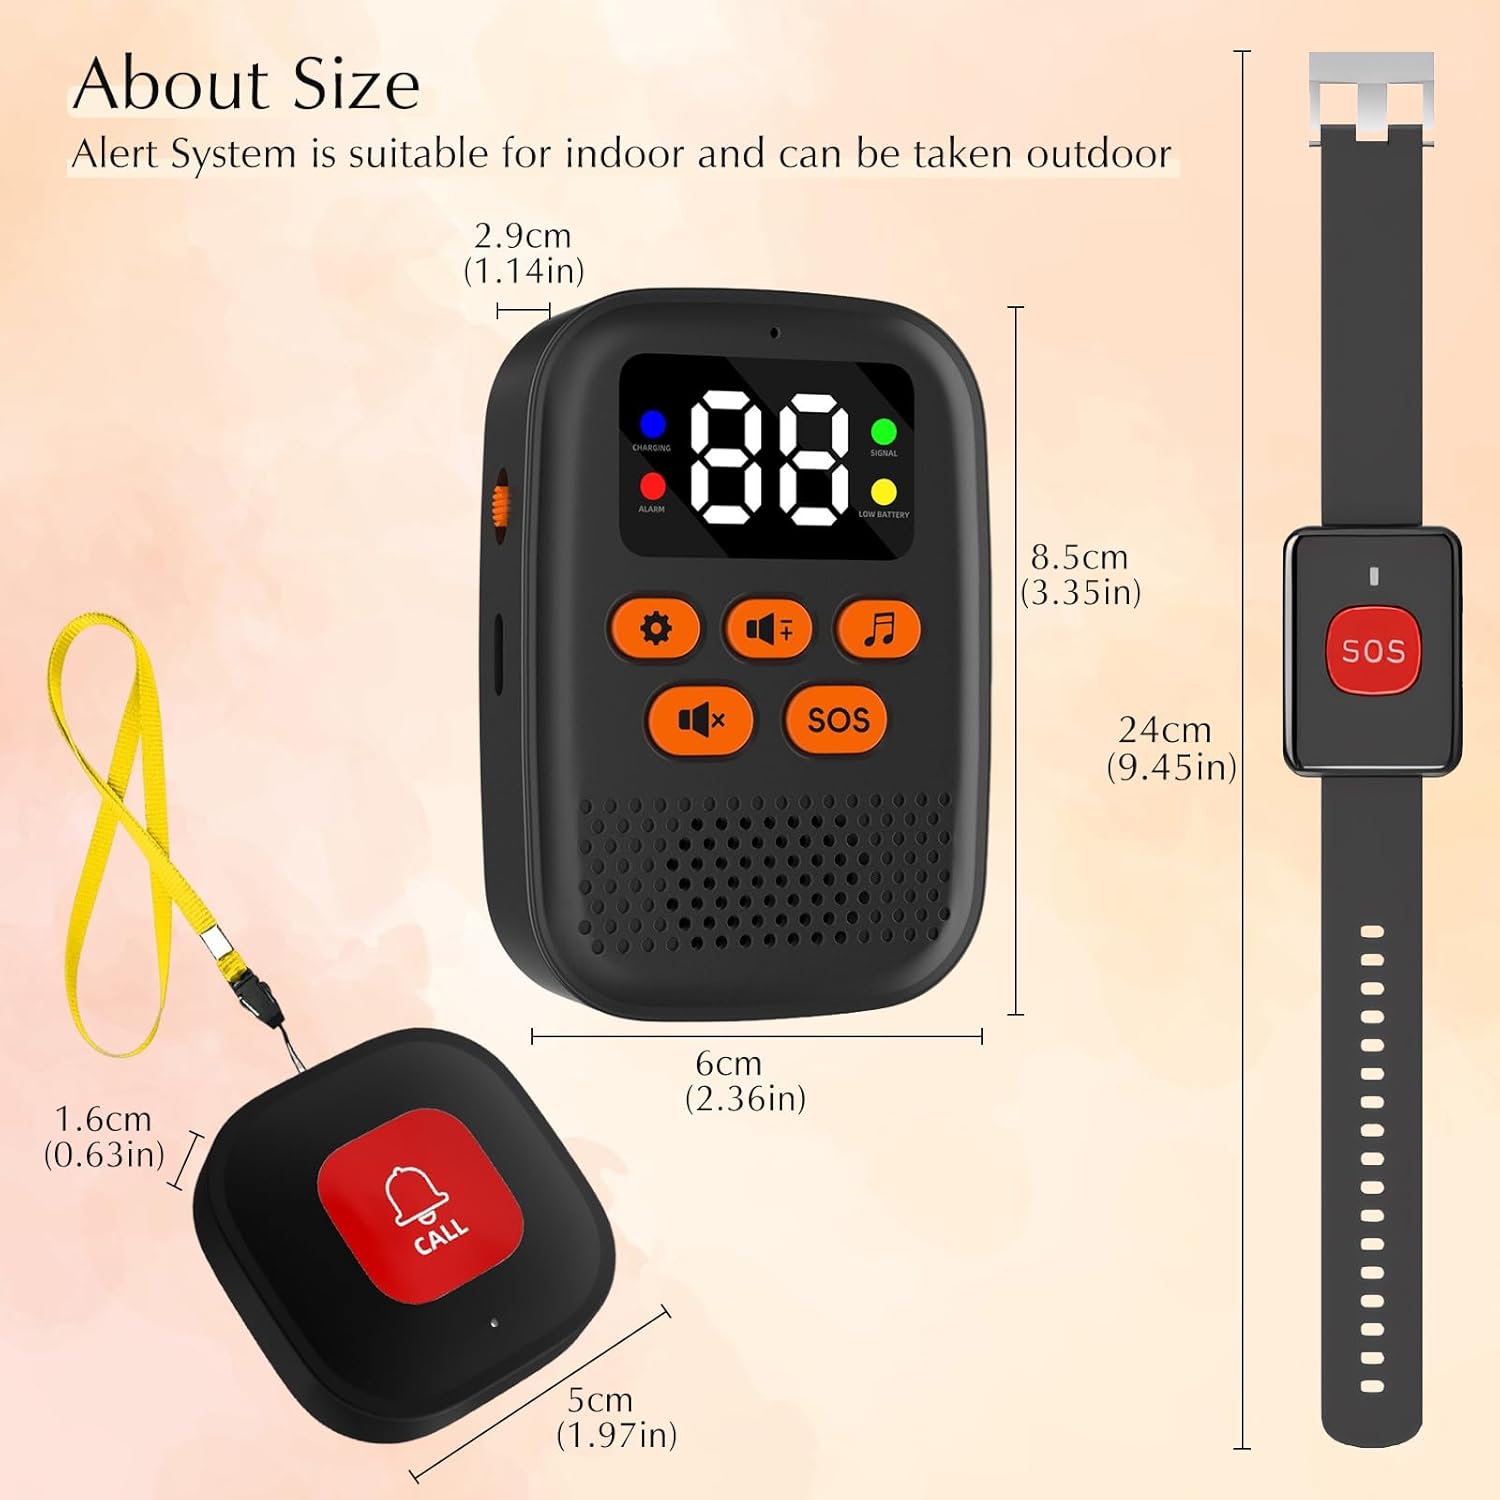
Image 3: Detailed dimensions of the receiver unit and the SOS call button for reference.
4. Setup
4.1. Charging the Receiver
Connect the provided USB-C charging cable to the receiver's charging port and plug the other end into a standard USB power adapter (not included). The charging indicator light on the receiver will illuminate. A full charge typically takes approximately 2 hours and provides up to 4 days of standby battery life.

Image 4: The receiver unit being charged via its USB-C port.
4.2. Installing/Checking Batteries in Call Buttons
The SOS Call Button and Watch Pager utilize CR2032 coin cell batteries, which are usually pre-installed. To replace a battery, carefully open the battery compartment on the back of the button, remove the old battery, and insert a new CR2032 battery with the positive (+) side facing up. Ensure the compartment is securely closed.
4.3. Pairing Additional Call Buttons (if applicable)
Your system typically comes with the included call buttons pre-paired to the receiver. If you acquire additional call buttons or need to re-pair an existing one, follow these general steps:
- On the receiver, press and hold the 'Settings' button (often indicated by a gear icon) until the receiver enters pairing mode (e.g., a specific indicator light flashes or a 'P' appears on the display).
- While the receiver is in pairing mode, press the call button you wish to pair.
- The receiver will confirm successful pairing with a chime or a change in its display. If pairing fails, repeat the process.
4.4. Placement and Mounting
Place the receiver unit in a central location within the area where monitoring is needed. The system offers an operating range of up to 328 feet (100 meters) in open areas. Walls and other obstructions may reduce this range.
The SOS Call Button can be worn around the neck using the provided hanging rope, or mounted on a wall or flat surface using the double-sided tape or screws. The Watch Pager is designed to be worn on the wrist.

Image 5: Visual representation of the system's wireless range within a typical home environment.

Image 6: Examples of how the call buttons and receiver can be used in different settings, such as worn on the wrist, around the neck, or placed on a surface.
5. Operating Instructions
5.1. Initiating a Call
To request assistance, simply press the large 'SOS' or 'CALL' button on your pendant-style SOS button or watch pager. This will immediately send a signal to the receiver unit.

Image 7: An example of the call button being used in a situation requiring assistance.
5.2. Receiving Alerts
When a call button is pressed, the receiver will emit an audible alarm, vibrate, and display the number corresponding to the activated button. This allows the caregiver to identify which button was pressed.
The receiver offers 16 selectable ringtones and 3 adjustable volume levels, ranging from 0 dB (silent with vibration) to 110 dB (maximum loudness). Use the volume control buttons on the receiver to adjust as needed.

Image 8: The receiver's display indicating available music options and adjustable volume levels.
5.3. Muting the Alarm
To silence an active alarm on the receiver, press the 'Mute' button (typically indicated by a speaker icon with a cross or line through it). This will stop the audible alert while keeping the system active for future calls.

Image 9: The receiver's mute function, allowing for quick silencing of alarms.
6. Maintenance
6.1. Cleaning
Wipe the receiver and call buttons with a soft, dry cloth. Do not use liquid cleaners, abrasive materials, or immerse the devices in water, as this may cause damage.
6.2. Battery Replacement (Call Buttons)
Replace the CR2032 batteries in the call buttons when the low battery indicator appears on the receiver for a specific button, or if a button fails to transmit a signal reliably. Refer to Section 4.2 for battery installation instructions.
6.3. Receiver Battery
Recharge the receiver unit when the low battery alert is displayed on its screen to ensure continuous operation.
7. Troubleshooting
| Problem | Possible Cause | Solution |
|---|---|---|
| Receiver does not alarm when button is pressed. | Call button is out of range. Call button battery is low or depleted. Call button is not paired with the receiver. | Move the call button closer to the receiver. Replace the CR2032 battery in the call button. Refer to Section 4.3 to re-pair the call button. |
| Short operating range. | Thick walls or metal objects obstructing the signal. Interference from other wireless devices. | Reposition the receiver to a more central location or away from major obstructions. Ensure the receiver is not placed too close to other electronic devices. |
| Receiver not charging. | USB-C cable is faulty or not properly connected. USB power adapter is not working. | Check the USB-C cable connection at both ends. Try a different USB-C cable or power adapter. |
| Call button not responding. | Low or depleted CR2032 battery. Button malfunction. | Replace the CR2032 battery. If the issue persists, contact customer support. |
8. Specifications
| Feature | Detail |
|---|---|
| Model | AG656 |
| Brand | Chatthen |
| Operating Range | Up to 328 ft (100 meters) in open areas |
| Receiver Battery | Built-in 600mAh rechargeable (2 hours charge for 4 days standby) |
| Call Button Battery | CR2032 (included) |
| Volume Levels | 3 levels (0 dB to 110 dB) |
| Ringtones | 16 options |
| Pairing Capacity | Up to 30 call buttons |
| Charging Port | USB-C |
| Receiver Dimensions | 3.54 x 1.57 x 4.53 inches |
| Item Weight | 4.9 ounces |
9. Warranty and Support
For warranty information, technical assistance, or any questions regarding your Chatthen Caregiver Call Button System, please contact Chatthen customer support. You can typically find contact details through the retailer's platform where you purchased the product or on the official Chatthen brand website. Please retain your purchase receipt as proof of purchase for warranty claims.

