
1. Introduction
This manual provides detailed instructions for the installation, operation, and maintenance of your Backnets Digital Display 3-Function Shower Valve. Please read this manual thoroughly before installation and use to ensure proper function and safety. Keep this manual for future reference.
2. Safety Information
- Always turn off the main water supply before beginning any plumbing work.
- Ensure all connections are secure to prevent leaks.
- If you are unsure about any installation steps, consult a qualified plumber.
- This shower valve is cUPC certified to ensure safe water temperature and prevent scalding.
- Wear appropriate safety gear, such as gloves and eye protection, during installation.
3. Package Contents
Verify that all components are present before installation:
- Digital Display Shower Mixer Valve Body
- Decorative Trim Plate
- Temperature Control Knob
- Diverter Buttons (3 functions)
- Installation Hardware (screws, seals, etc.)
4. Product Overview
The Backnets Digital Display 3-Function Shower Valve is designed to provide a versatile and safe showering experience. Key features include:
- Digital Temperature Display: Hydro-powered, no batteries required. Displays real-time water temperature.
- Three-Function Diverter: Allows selection between three shower outlets (e.g., rain shower, handheld shower, body jets) or simultaneous operation of multiple functions.
- Durable Construction: Made from high-quality brass and multi-layer electroplated stainless steel for longevity.
- Safety Certified: cUPC certified to maintain a safe water temperature and prevent scalding.
- Standard Connections: US standard NPT 1/2" threads for easy integration into existing plumbing systems.
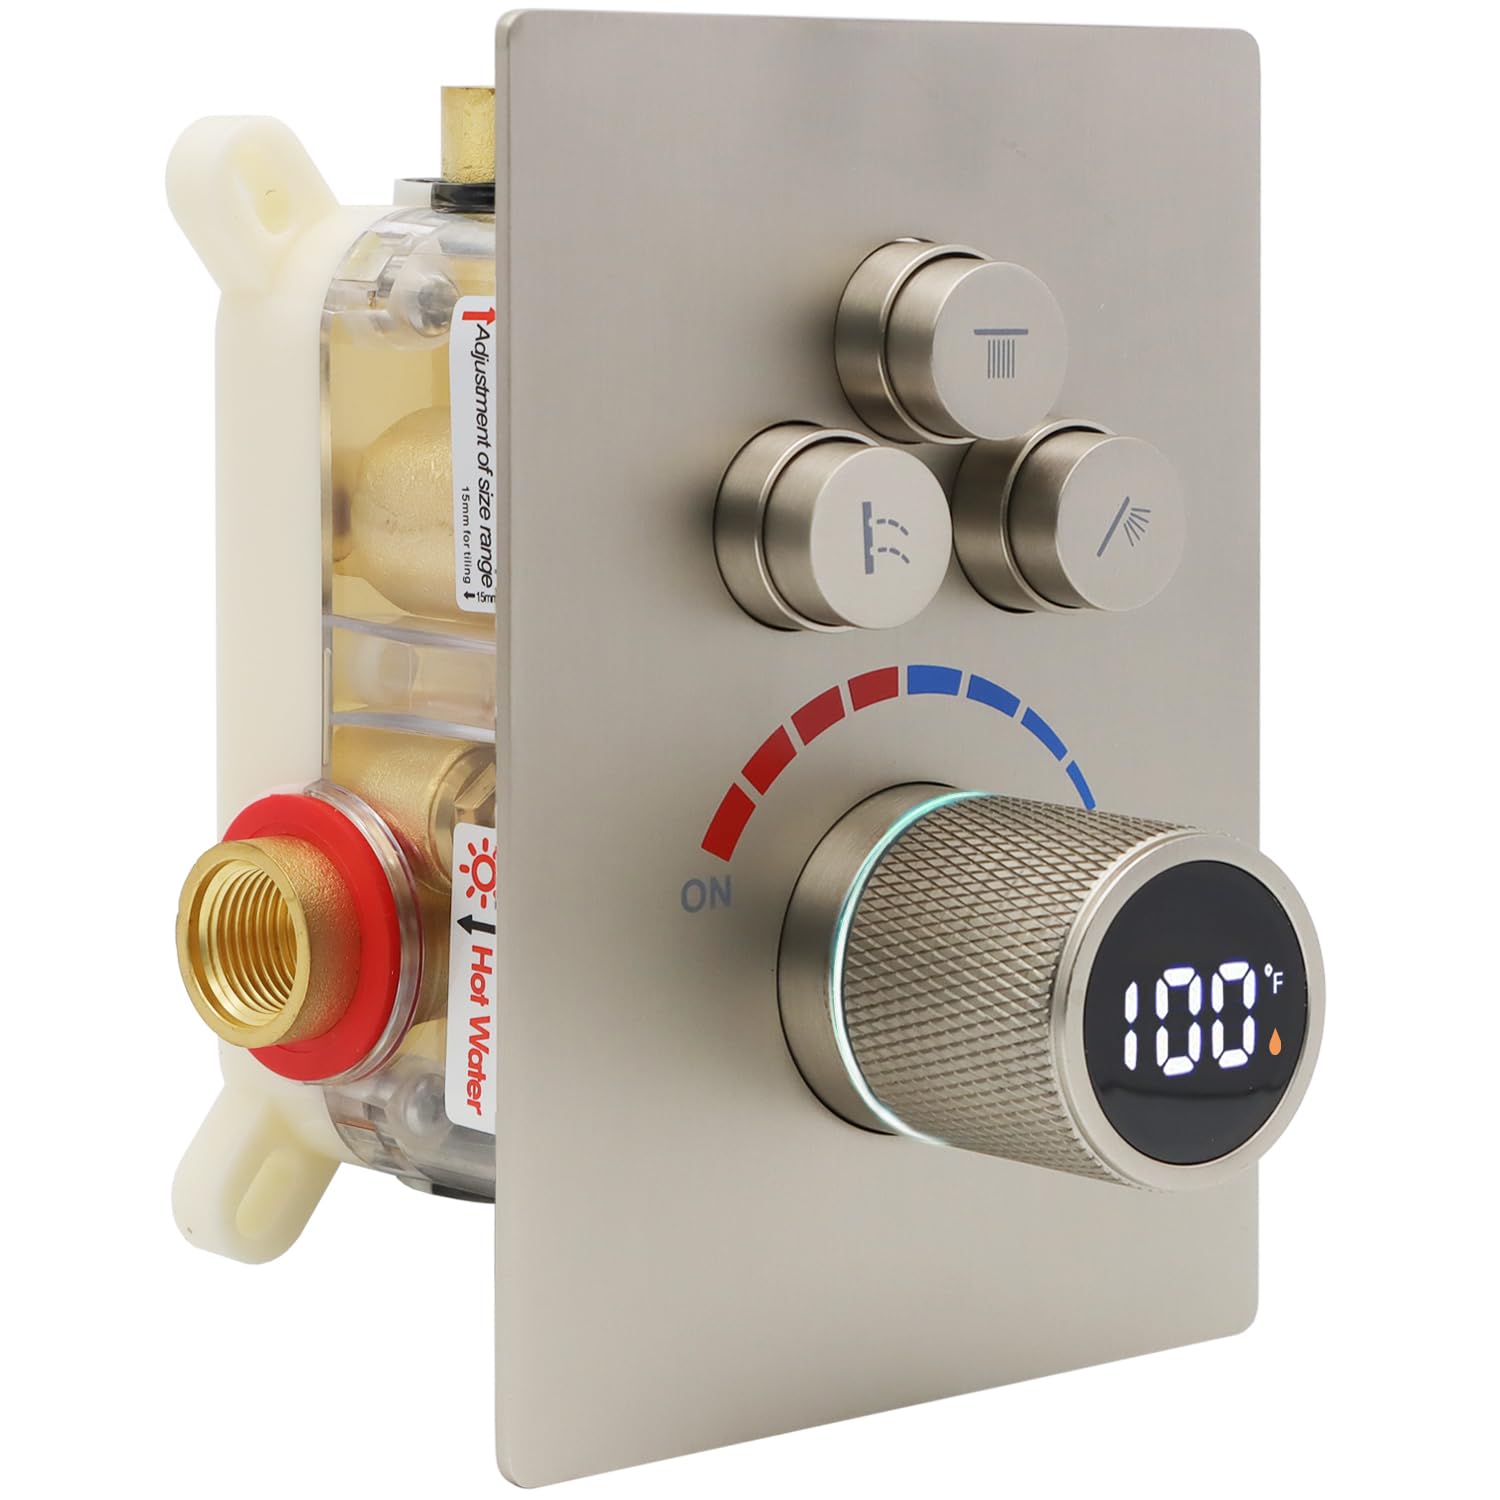
Figure 1: Overview of the Backnets Digital Display 3-Function Shower Valve.
5. Installation Guide
5.1 Pre-Installation Steps
- Turn off the main water supply to your home.
- Remove any existing shower valve and clean the installation area.
- Ensure the rough-in opening in the wall is adequate for the valve body. The valve body dimensions are approximately 9.5 x 2.8 x 3.6 inches (L x W x H), with an adjustment range of 2.75-3.54 inches (70-90mm) for the rough-in depth.

Figure 2: Shower valve dimensions and rough-in depth.
5.2 Connecting Water Lines
- Identify the hot and cold water inlets on the valve body. The inlets are 1/2" NPT standard threads.
- Connect the hot water supply line to the designated hot inlet (typically marked 'H' or red).
- Connect the cold water supply line to the designated cold inlet (typically marked 'C' or blue).
- Connect your shower outlets (e.g., shower head, handheld, body jets) to the three outlet ports. These are also 1/2" NPT standard threads.
- Use appropriate plumbing tape or sealant on all threaded connections to ensure a watertight seal.

Figure 3: Diagram showing hot/cold inlets and three outlets (Outlet1, Outlet2, Outlet3).
5.3 Pressure Testing
Important: After installing the shower valve, a pressure test must be performed.
- Block all outlets of the shower valve.
- Adjust the water pressure to 10kg (1MPa) for testing.
- Check all water pipe connections and the inside of the shower valve for any leaks. Address any leaks immediately before proceeding.

Figure 4: Visual guide for pressure testing the shower valve.
5.4 Final Assembly
- Once all connections are secure and leak-free, install the decorative trim plate over the valve body.
- Attach the temperature control knob and diverter buttons according to the manufacturer's instructions.
- Turn on the main water supply.
6. Operating Instructions
6.1 Temperature Control
The large central knob controls the water temperature and flow. Rotate the knob to adjust the temperature. The integrated digital display will show the current water temperature in real-time. This display is hydro-powered and requires no batteries.
- Rotate towards the red indicator for hotter water.
- Rotate towards the blue indicator for colder water.
- The temperature indicator light will glow blue for temperatures ≤ 100°F and orange for temperatures > 100°F.

Figure 5: Digital display showing water temperature and hot/cold indicators.

Figure 6: Explanation of temperature indicator light colors (blue for cool, orange for warm).
6.2 Diverter Functions
The three smaller buttons above the temperature knob control the water flow to different shower outlets. Each button typically corresponds to a specific function (e.g., rain shower head, handheld shower, body jets).
- Press a button to activate the corresponding shower function.
- This valve allows you to turn on functions individually, or activate two or three functions simultaneously for a customized showering experience.

Figure 7: The shower system operating multiple functions simultaneously, demonstrating the valve's capability.
7. Maintenance
To ensure the longevity and optimal performance of your Backnets shower valve, follow these maintenance guidelines:
- Cleaning: Clean the brushed nickel finish regularly with a soft cloth and mild soap and water. Avoid abrasive cleaners, harsh chemicals, or scouring pads, as these can damage the finish.
- Inspection: Periodically check for any signs of leaks around the connections. Tighten connections if necessary.
- Mineral Buildup: In areas with hard water, mineral deposits may accumulate. Use a vinegar solution or a specialized descaling product designed for plumbing fixtures to remove buildup.
8. Troubleshooting
If you encounter issues with your shower valve, refer to the following common solutions:
| Problem | Possible Cause | Solution |
|---|---|---|
| No water flow or low pressure | Main water supply off; clogged inlets/outlets; kinked supply lines. | Check main water supply; inspect and clean inlets/outlets; straighten supply lines. |
| Water leaks from connections | Loose connections; insufficient sealant/tape. | Turn off water supply, tighten connections, reapply plumbing tape/sealant if necessary. |
| Inaccurate temperature display | Insufficient water flow to power the display. | Ensure adequate water pressure and flow. The display is hydro-powered. |
| Diverter buttons not switching functions | Internal mechanism obstruction or wear. | Ensure buttons are fully pressed. If issue persists, contact customer support. |
9. Specifications
| Feature | Detail |
|---|---|
| Brand | Backnets |
| Model Number | B0DWRKL163 |
| Material | Brass, Stainless Steel |
| Exterior Finish | Brushed Nickel |
| Valve Type | Diverter Valve |
| Number of Functions | 3 (Three Function) |
| Inlet/Outlet Thread Size | 1/2" NPT (US Standard) |
| Item Dimensions (L x W x H) | 9.5 x 2.8 x 3.6 inches |
| Certification | cUPC |
| Power Source for Display | Hydroelectric (no batteries required) |

Figure 8: Comparison highlighting the solid brass construction and quality of the Backnets valve body.
10. Warranty and Support
Backnets is committed to providing high-quality products and excellent customer service. For any questions, technical support, or warranty claims, please contact Backnets customer service through the retailer where the product was purchased or visit the official Backnets store page.
The product is cUPC certified, ensuring compliance with safety standards.
For more information, you may visit the Backnets Store on Amazon.