Important Safety Instructions
Please read all instructions carefully before using this appliance. Retain this manual for future reference.
- Ensure the appliance is connected to a grounded power outlet.
- Do not immerse the appliance, cord, or plug in water or other liquids.
- Close supervision is necessary when the appliance is used by or near children.
- Unplug from outlet when not in use and before cleaning. Allow to cool before putting on or taking off parts, and before cleaning the appliance.
- Do not operate any appliance with a damaged cord or plug, or after the appliance malfunctions or has been damaged in any manner.
- The use of accessory attachments not recommended by the appliance manufacturer may result in fire, electric shock, or injury to persons.
- Do not use outdoors.
- Do not let the cord hang over the edge of a table or counter, or touch hot surfaces.
- Do not place on or near a hot gas or electric burner, or in a heated oven.
- Always attach plug to appliance first, then plug cord into the wall outlet. To disconnect, turn any control to "off", then remove plug from wall outlet.
- Do not use appliance for other than intended use.
- Scalding may occur if the water tank lid is removed during the brewing cycle.
- This appliance is for household use only.
Product Overview
The BLACK+DECKER BXCM1001IN is a 15 Bar Espresso Coffee Maker designed for home use, featuring an 1100W heating element and a 1.5L water tank.

Image: Front view of the BLACK+DECKER BXCM1001IN Espresso Coffee Maker, showcasing its design and main controls.
Key Features
- 15 Bar Pressure: Ensures optimal extraction for rich crema and flavor.
- 1100W Power: Provides efficient heating for quick coffee preparation.
- Espresso/Cappuccino/Hot Water Function: Versatile for various coffee beverages.
- Dual Stainless Steel Filter: Durable and helps prevent powder from entering the cup.
- Detachable Drip Tray: Facilitates easy cleaning and maintenance.
- Overheating and Pressure Protection: Enhances safety during operation.
- Stainless Steel Body: Offers durability and a premium aesthetic.
- Adjustable Foaming Wand: Allows for customizable milk frothing levels.
- Dual Thermostat: Provides better control over water and milk temperature.
- 1.5L Detachable Transparent Water Tank: Large capacity for fewer refills and easy monitoring.
- Auto Shut-Off: For energy saving and safety.

Image: Table summarizing key features of the BLACK+DECKER BXCM1001IN Espresso Coffee Maker, including 15 Bar Pressure, Stainless Steel Body, Adjustable Foaming, Dual Thermostat, and 1.5L Water Tank.

Image: Visual representation of the coffee maker's features, including 1100W power, 15 bar pressure, 1.5L detachable transparent water tank, and dual stainless steel filter.
Components
Familiarize yourself with the parts of your espresso machine:
- Detachable Water Tank: Located at the back, for water storage.
- Control Panel with Light Indicator: Front-facing panel with buttons and indicator lights for operation.
- Analog Temperature Dial: Displays the current temperature of the machine.
- Knob to Release Steam: Controls the steam function for frothing.
- Metal Funnel Handle: For attaching the filter basket.
- Built-in Steamer Spout: Used for frothing milk or dispensing hot water.
- Removable Drip Tray: Collects excess liquid and is easy to clean.
- 2 Drip Outlets: Allows for brewing two cups simultaneously.
- Anti-Slip Base: Provides stability on countertops.

Image: Diagram illustrating the various components of the BLACK+DECKER BXCM1001IN Espresso Coffee Maker, including the water tank, control panel, temperature dial, steam knob, funnel handle, steamer spout, drip tray, and drip outlets.
Setup and First Use
Before using your BLACK+DECKER BXCM1001IN Espresso Coffee Maker for the first time, it is essential to clean the internal system to ensure optimal coffee taste.
Initial Cleaning Procedure
- Pour warm water into the water tank. Ensure the water level does not exceed the "MAX" mark. Replace the water tank cover.
- Place a jug on the removable shelf.
- Ensure the steam control knob is in the OFF position.
- Connect the appliance to a power source. The red indicator light will illuminate.
- Press the coffee switch. The pump will start, and water will flow out. Close the pump by pressing the coffee switch again.
- Press the steam switch. The appliance will pre-heat, and the pre-heating indicator will illuminate. Once pre-heating is finished, press the coffee switch; hot water will flow out.
- After water stops flowing, you can pour the water in each container out. The appliance is now ready for brewing.
Note: There may be noise when pumping water for the first time. This is normal, as the appliance is releasing air. The noise should subside after approximately 20 seconds.
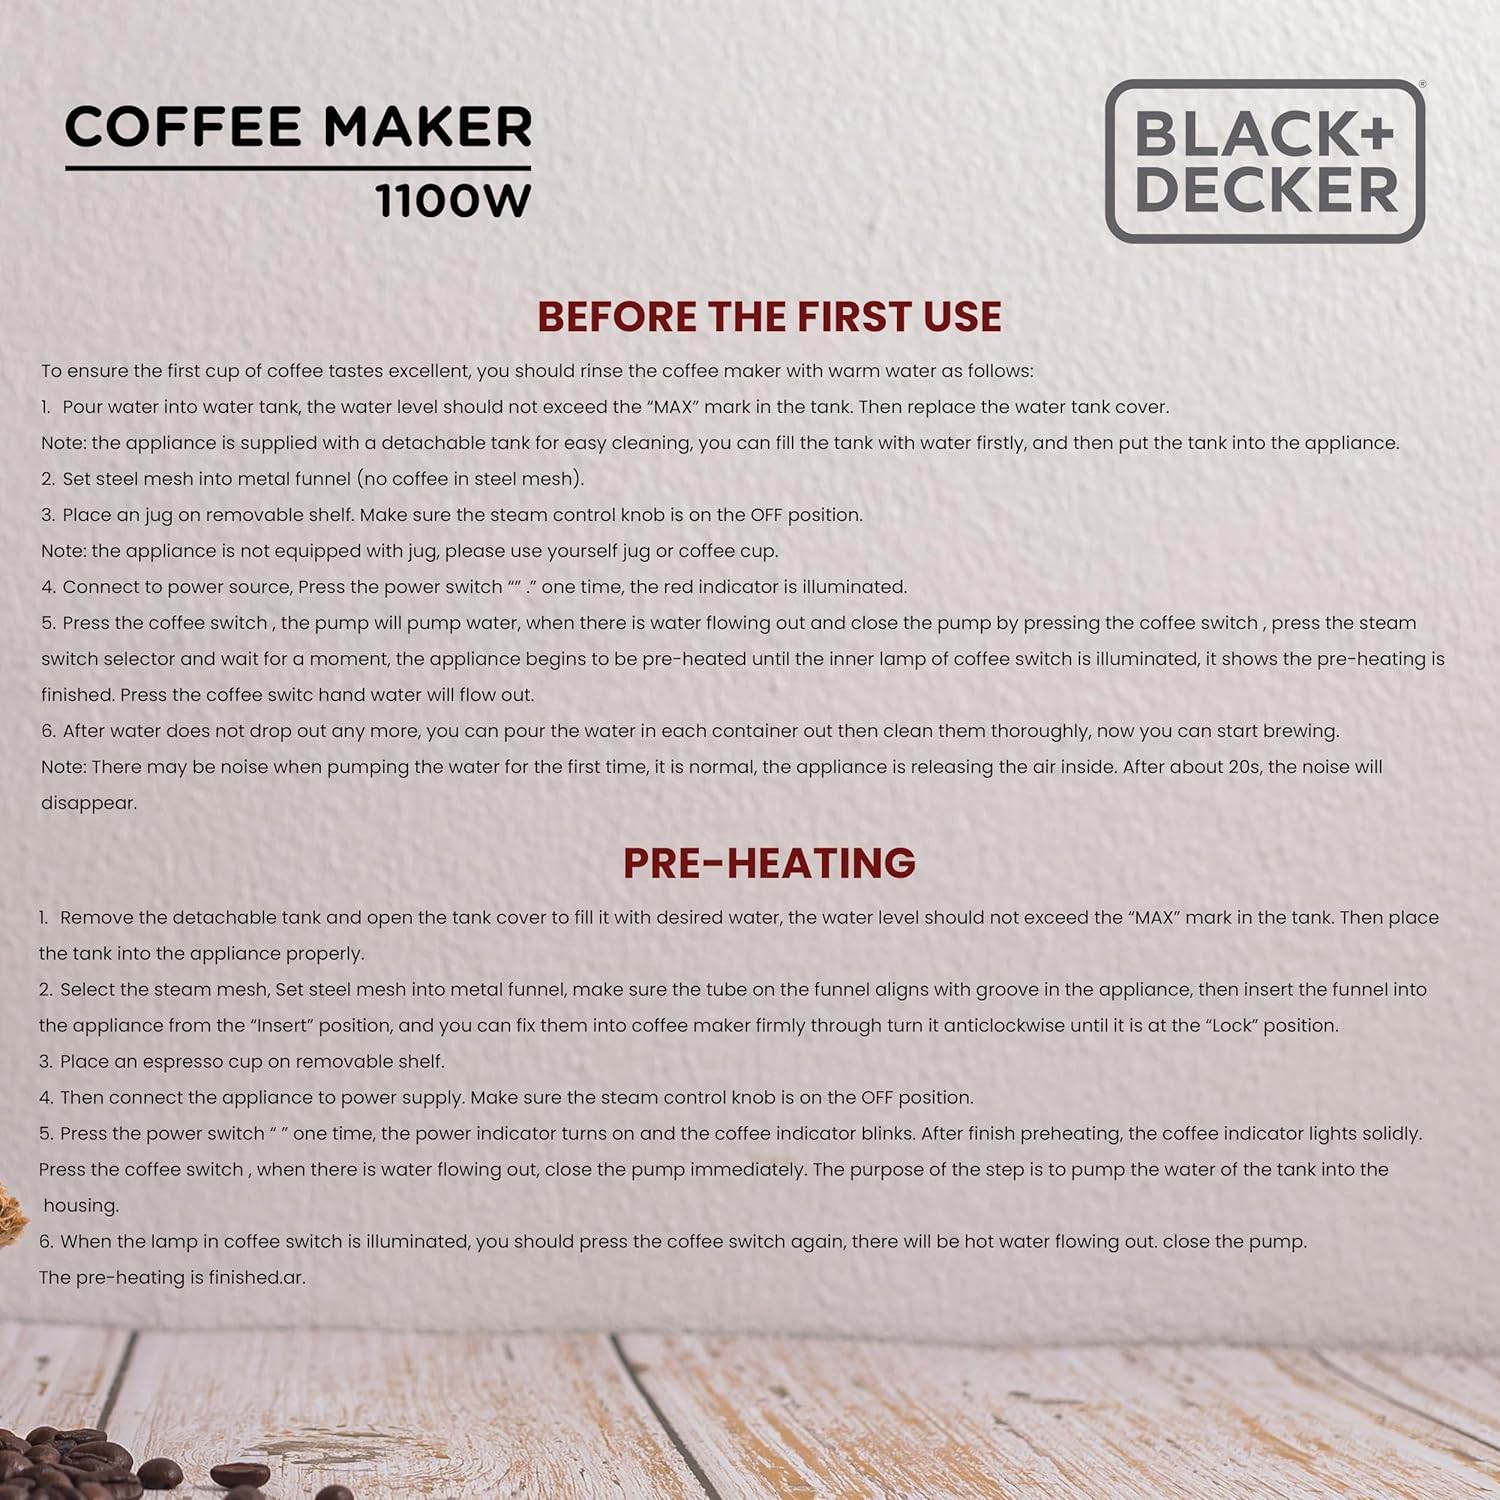
Image: Detailed instructions for the initial cleaning and first use of the espresso coffee maker, including filling the water tank, placing a jug, and operating the coffee and steam switches.
Operating Instructions
Pre-heating the Appliance
- Remove the detachable tank and open the tank cover to fill it with desired water. The water level should not exceed the "MAX" mark. Then place the tank back into the appliance properly.
- Select the steam mesh. Set the steel mesh into the metal funnel, making sure the tube on the funnel aligns with the groove in the appliance. Then insert the funnel into the appliance from the "insert" position, and you can fix it into the coffee maker firmly through a turn until it locks.
- Place an espresso cup on the removable shelf.
- Connect the appliance to the power supply. Make sure the steam control knob is in the OFF position.
- Press the power switch " " one time. The power indicator turns on and the coffee indicator blinks. After finishing preheating, the coffee indicator lights solid.
- Press the coffee switch. When water is flowing out, close the pump immediately. The purpose of this step is to pump water into the tank housing.
- When the lamp in the coffee switch is illuminated, you should press the coffee switch again. There will be hot water flowing out. Close the pump. The pre-heating is finished.
Making Espresso
- Ensure the appliance is pre-heated as described above.
- Add desired amount of ground coffee into the filter basket. Do not overfill. Tamp the coffee lightly.
- Attach the metal funnel handle with the filled filter basket to the appliance, ensuring it is securely locked.
- Place one or two espresso cups under the drip outlets.
- Press the coffee switch. Coffee will begin to brew into the cups.
- Once the desired amount of espresso is brewed, press the coffee switch again to stop the flow.
- Carefully remove the funnel handle and discard the used coffee grounds.
Frothing Milk (for Cappuccino/Latte)
- Fill a pitcher with cold milk (preferably cold, fresh milk for best results).
- Ensure the machine is pre-heated and the steam function is ready (steam indicator light solid).
- Submerge the steamer spout into the milk, just below the surface.
- Turn the steam control knob to release steam.
- Move the pitcher up and down gently to create foam. Be careful of hot steam.
- Once desired foam consistency is achieved, turn the steam control knob to the OFF position.
- Wipe the steamer spout immediately with a damp cloth to prevent milk residue from drying.
Cleaning and Maintenance
Regular cleaning ensures optimal performance and extends the lifespan of your espresso machine.
Daily Cleaning
- Drip Tray: Empty and clean the removable drip tray after each use. Wash with warm, soapy water and rinse thoroughly.
- Filter Basket and Funnel Handle: Remove the filter basket from the funnel handle and rinse both under running water. Remove any coffee grounds.
- Water Tank: Empty any remaining water from the tank and rinse it. Refill with fresh water for the next use.
- Steamer Spout: After frothing milk, immediately wipe the steamer spout with a damp cloth. Run a short burst of steam to clear any internal milk residue.
- Exterior: Wipe the exterior of the appliance with a soft, damp cloth. Do not use abrasive cleaners or scouring pads.
Descaling (Monthly or as needed)
Mineral deposits from water can build up over time, affecting performance. Descale your machine regularly.
- Prepare a descaling solution according to the descaler manufacturer's instructions, or use a mixture of white vinegar and water (1:1 ratio).
- Fill the water tank with the descaling solution.
- Place a large container under the coffee outlets and the steam spout.
- Run the machine through a brewing cycle without coffee until half of the solution has passed through.
- Turn on the steam function and let half of the remaining solution pass through the steam spout.
- Turn off the machine and let it sit for 15-20 minutes.
- Run the remaining solution through the coffee outlets and steam spout until the tank is empty.
- Rinse the water tank thoroughly and fill it with fresh water.
- Run two full tanks of fresh water through the machine (one through coffee outlets, one through steam spout) to rinse out any descaling solution residue.
Note: The frequency of descaling depends on your water hardness and usage.
Troubleshooting
Refer to this section for common issues and their solutions.
| Problem | Possible Cause | Solution |
|---|---|---|
| No power | Appliance not plugged in; power outlet faulty. | Ensure plug is securely in a working outlet. Check circuit breaker. |
| No water flow | Water tank empty; tank not properly seated; machine needs priming/descaling. | Fill water tank; ensure tank is correctly inserted; perform initial cleaning/pre-heating steps; descale if necessary. |
| Coffee brews too slowly or not at all | Coffee grounds too fine or tamped too hard; filter basket clogged; machine needs descaling. | Use coarser grind; tamp less firmly; clean filter basket; descale machine. |
| Coffee is weak | Not enough coffee grounds; coffee grounds too coarse; brewing too quickly. | Increase coffee amount; use finer grind; ensure proper tamping. |
| Steam wand not producing steam | Steam spout clogged; machine not hot enough for steam. | Clean steamer spout; wait for steam indicator light to be solid. |
| Water leaking from machine | Water tank not properly seated; drip tray full or not correctly placed. | Ensure water tank is securely in place; empty and correctly position drip tray. |
If the problem persists after attempting these solutions, please contact customer support.
Specifications
| Model Number | BXCM1001IN |
| Power | 1100W |
| Pressure | 15 Bar |
| Water Tank Capacity | 1.5 Litres |
| Product Dimensions (D x W x H) | 33D x 22.4W x 29H Centimeters |
| Item Weight | 3 kg |
| Special Features | Auto Shut-Off, Milk Frother, Removable Tank, Timer |
| Included Components | 1 Coffee Maker |
| Country of Origin | China |
| Manufacturer | Stovekraft Limited |
Warranty and Support
Your BLACK+DECKER BXCM1001IN Espresso Coffee Maker comes with a 2-year warranty from the date of purchase, covering manufacturing defects.
For any product inquiries, installation assistance, or warranty claims, please contact our customer care team.

Image: Customer care contact information for BLACK+DECKER, showing a headset icon and the phone number 6364914202.
Customer Care Number: 6364914202
(Call or WhatsApp for enquiries and installation)


