1. Introduction
Thank you for choosing the Pureatic V3 Robot Vacuum and Mop Combo. This device is designed to provide efficient and convenient cleaning for your home, combining vacuuming, sweeping, and mopping functionalities. With 5000Pa suction power, smart navigation, and multiple control options, the V3 ensures a thorough clean on various floor types, including hard floors and carpets.
This manual provides essential information for the safe operation, setup, maintenance, and troubleshooting of your Pureatic V3 robot vacuum. Please read it carefully before use and retain it for future reference.
2. Safety Instructions
To reduce the risk of injury or damage, read these safety instructions carefully and keep them accessible during the product's lifespan.
- This appliance can be used by children aged 8 years and above and persons with reduced physical, sensory or mental capabilities or lack of experience and knowledge if they have been given supervision or instruction concerning use of the appliance in a safe way and understand the hazards involved.
- Children should be supervised to ensure that they do not play with the appliance.
- Cleaning and user maintenance shall not be made by children without supervision.
- Use only the original power adapter provided by the manufacturer.
- Do not operate the robot in areas with standing water or excessive moisture.
- Keep the robot away from open flames or heat sources.
- Ensure all cables, curtains, and small objects are cleared from the floor before operation to prevent entanglement.
- Do not use the robot to pick up large debris, sharp objects, or liquids.
- The robot contains a battery. Do not expose it to high temperatures or direct sunlight.
3. Package Contents
Verify that all components are present in the package:
- Pureatic V3 Robot Vacuum
- Charging Dock
- Power Adapter
- Remote Control (batteries not included)
- Side Brushes (2 pairs)
- HEPA Filter (pre-installed)
- Cleaning Tool
- Water Tank
- Mop Pad
- User Manual
4. Product Overview
Familiarize yourself with the main components of your Pureatic V3 robot vacuum.
Top View
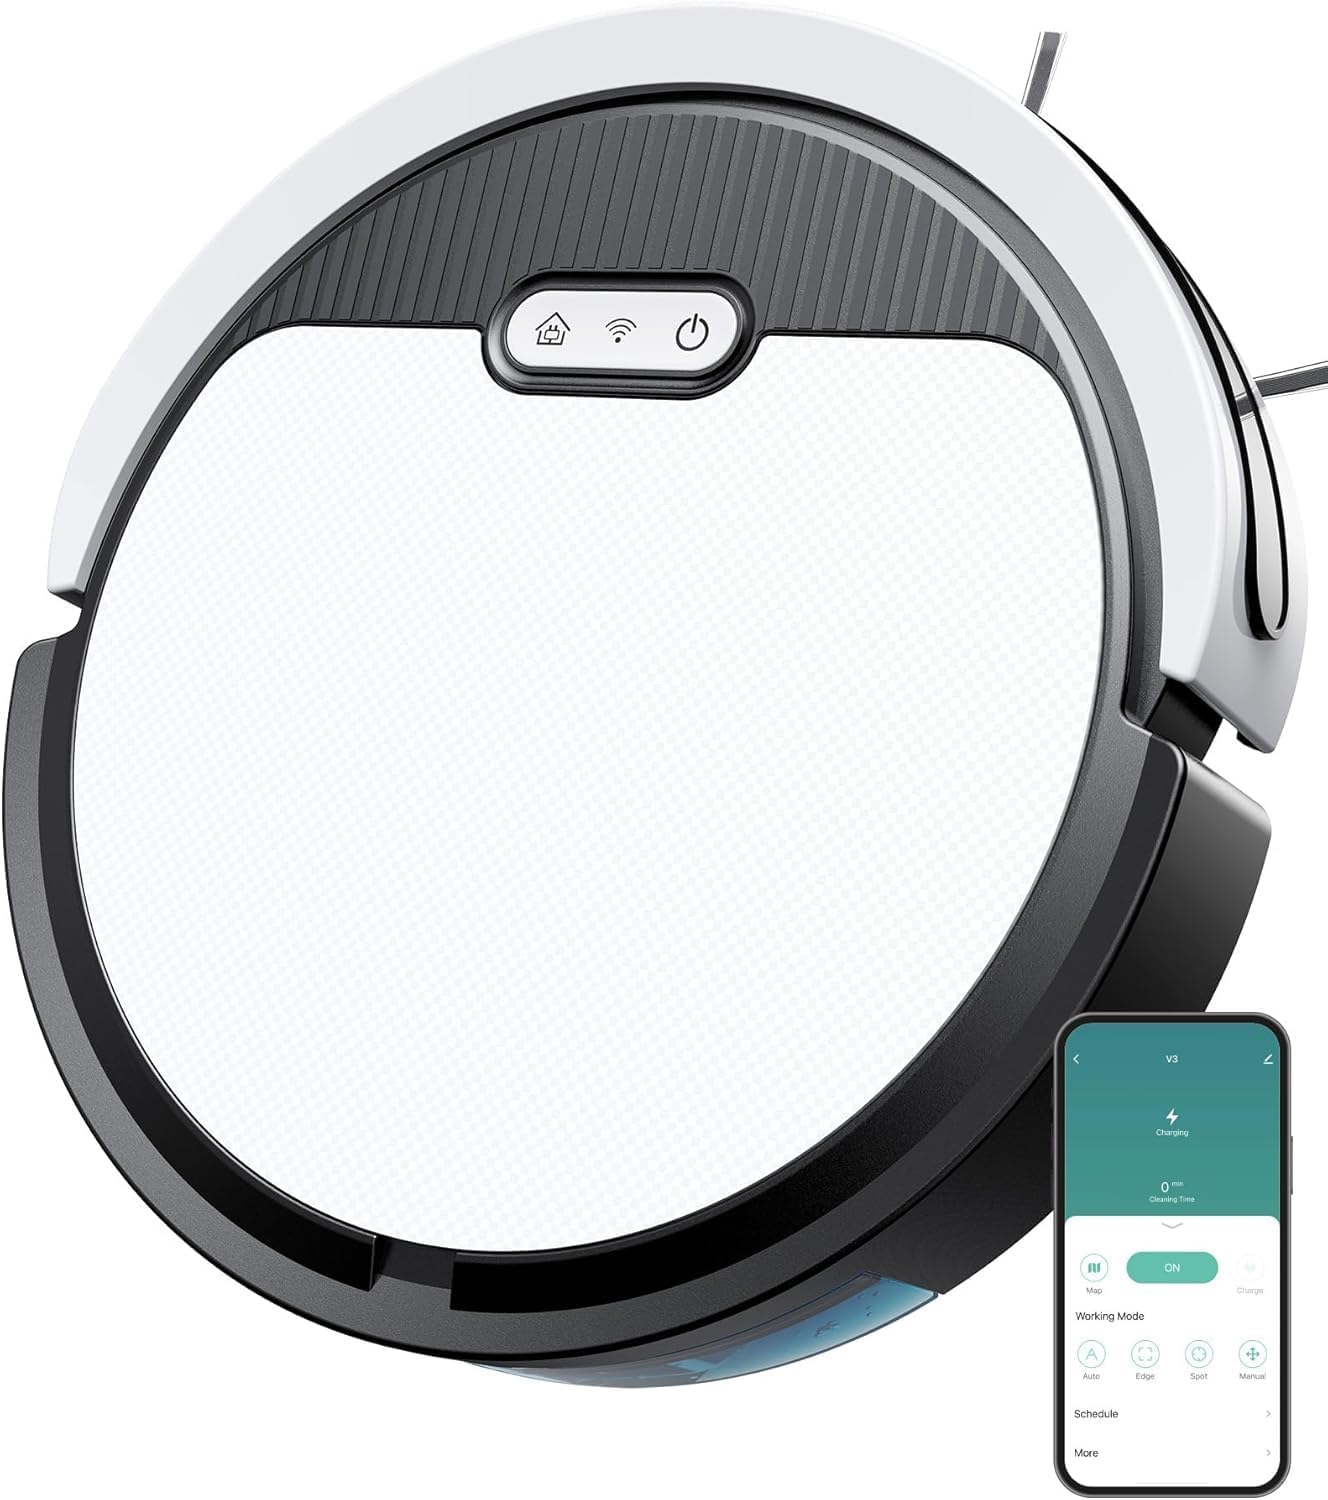
Image: Top view of the Pureatic V3 robot vacuum, showing the power button, Wi-Fi indicator, and dustbin access panel.
Bottom View and Components

Image: Bottom view of the Pureatic V3 robot vacuum, highlighting the powerful suction inlet and side brushes.

Image: Exploded view of the Pureatic V3 showing the 650ml hair collection box (dustbin), 100ml water tank, and mop plate with mop pad.
- Main Unit: Contains the motor, battery, and control systems.
- Dustbin: Collects dry debris. Capacity: 650ml.
- Water Tank: Holds water for mopping. Capacity: 100ml.
- Side Brushes: Sweep debris into the suction path.
- Main Wheels: Allow the robot to move across various surfaces.
- Charging Contacts: Connect with the charging dock for power.
- Sensors: Infrared sensors for obstacle detection and cliff sensors to prevent falls.

Image: Diagram illustrating the anti-fall sensors on the underside of the robot vacuum, detecting edges and preventing drops.
5. Setup
5.1 Charging Dock Placement
Place the charging dock against a wall in an open area, ensuring there are no obstacles within 1 meter (3 feet) to the front and 0.5 meters (1.5 feet) to the sides. Connect the power adapter to the charging dock and plug it into a wall outlet.
5.2 Initial Charging
Place the robot vacuum onto the charging dock, aligning its charging contacts with those on the dock. The robot will automatically begin charging. For first-time use, ensure the robot is fully charged (approximately 4-5 hours) before operation.

Image: The robot vacuum automatically returning to its charging dock for recharging, demonstrating intelligent route planning.
5.3 Side Brush Installation
Press the side brushes onto the square posts on the bottom of the robot until they click into place.
5.4 App Connection (2.4G WiFi Only)
Download the Pureatic app from your smartphone's app store. Follow the in-app instructions to connect your robot vacuum to your home's 2.4GHz Wi-Fi network. Ensure your router is set to 2.4GHz or has a combined 2.4GHz/5GHz network.
6. Operating Instructions
6.1 Control Methods
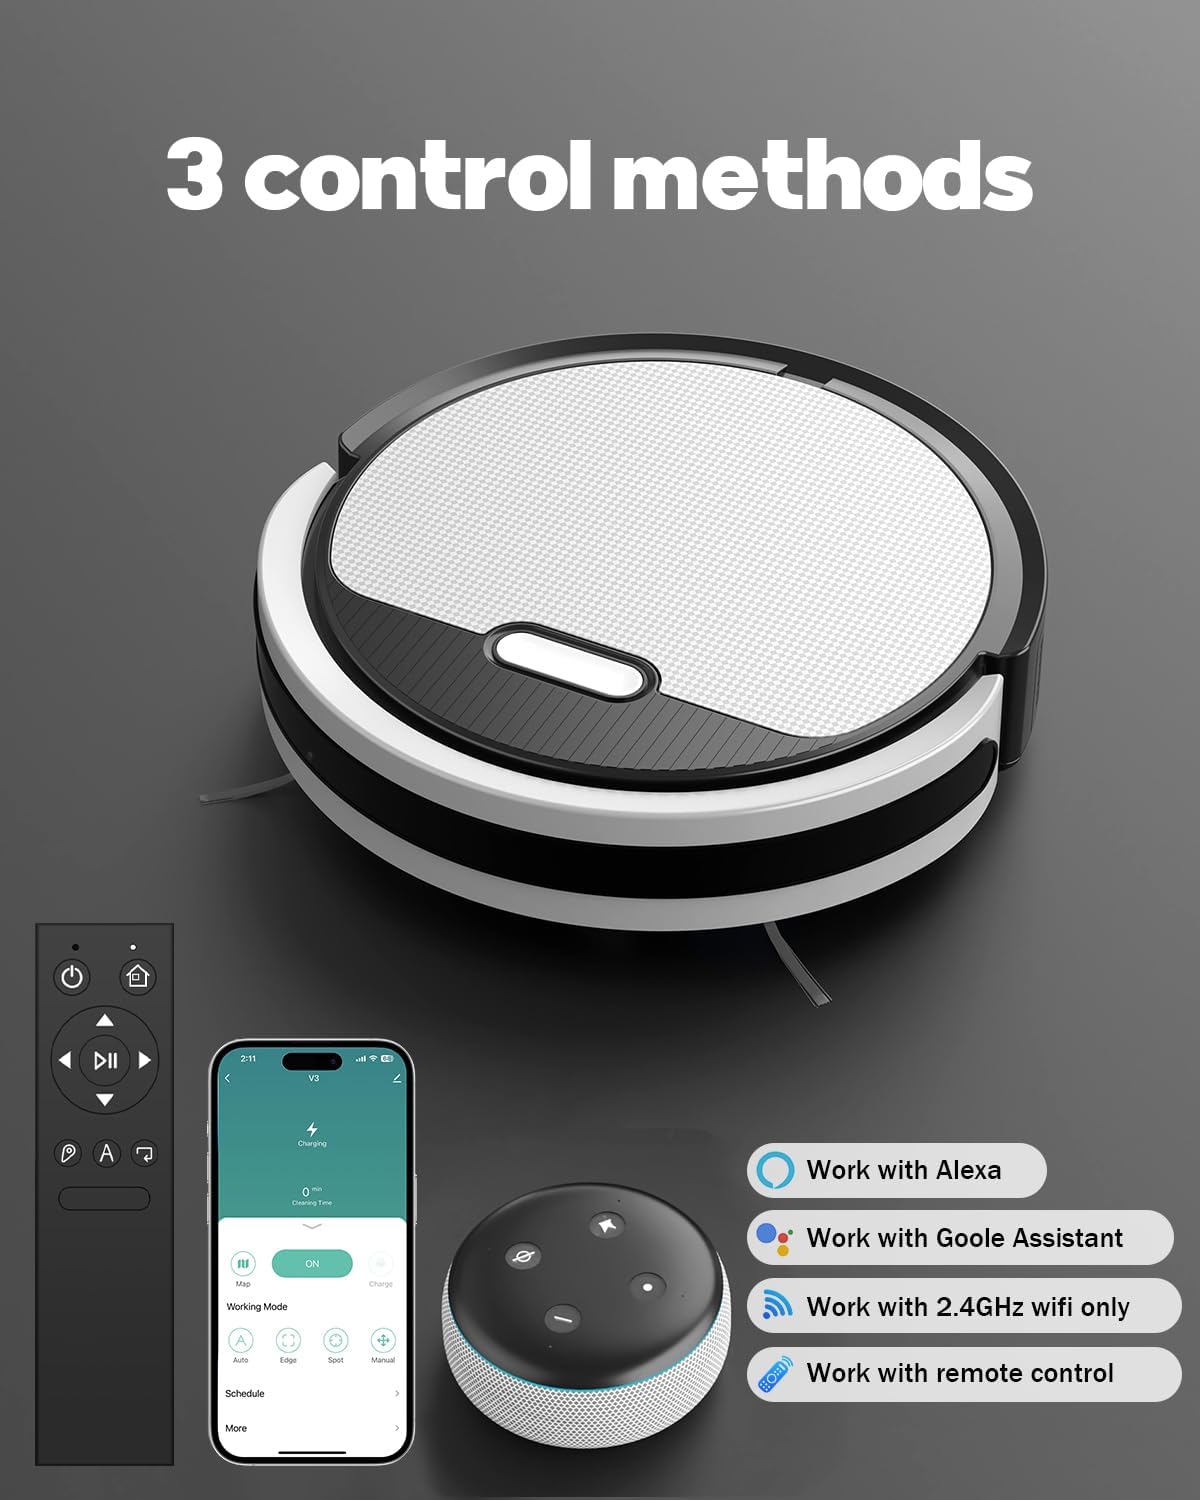
Image: The Pureatic V3 robot vacuum can be controlled via the mobile app, remote control, or voice assistants like Alexa and Google Assistant.
App Control
The Pureatic app allows for comprehensive control and monitoring of your robot vacuum. You can start/stop cleaning, select cleaning modes, adjust suction power and water flow, schedule cleaning times, and view cleaning status.

Image: Screenshot of the Pureatic app interface, displaying options for Zigzag Mode, Spot Mode, Edge Mode, and controls for suction power (Quiet, Standard, Strong) and water flow (Low, Medium, High).

Image: The robot vacuum operating under a sofa, controlled by the mobile app displayed on a smartphone.
Remote Control
Use the included remote control for basic functions such as starting/stopping cleaning, sending the robot back to the charging dock, and manually directing its movement.

Image: The remote control for the Pureatic V3 robot vacuum, showing buttons for power, home, directional control, play/pause, and cleaning modes.
Voice Control
Integrate your Pureatic V3 with Amazon Alexa or Google Home for convenient voice commands. Refer to the app for detailed instructions on connecting to voice assistants.

Image: The robot vacuum being controlled by voice command through an Amazon Alexa device, with the command "Alexa, Turn on the V3" displayed.
6.2 Cleaning Modes
The Pureatic V3 offers several cleaning modes to suit different needs:
- Auto Clean: The robot intelligently navigates and cleans the entire accessible area.
- Spot Clean: The robot cleans a specific area in a spiral pattern, ideal for concentrated dirt.
- Edge Clean: The robot cleans along walls and furniture edges.
- Zigzag Clean: The robot cleans in a systematic zigzag pattern, covering the area efficiently.
- Scheduled Clean: Set specific times for the robot to automatically start cleaning.
- Manual Control: Use the app or remote to direct the robot's movement.

Image: Illustration of the 3-in-1 cleaning system, showing separate modes for Vacuum Only, Mop Only, and Vacuum & Mop.
6.3 Suction Power and Water Flow Adjustment
Adjust the suction power (Low, Medium, High) and water flow (Low, Medium, High) via the app to suit different cleaning needs and floor types.

Image: The robot vacuum cleaning a carpet, with icons indicating adjustable suction levels: Low, Medium, and High for 5000Pa strong suction.
6.4 Mopping Function
To use the mopping function, fill the water tank with clean water (and a small amount of neutral floor cleaner if desired, following cleaner instructions). Attach the mop pad to the water tank and then insert the assembly into the robot. The robot will automatically dispense water as it cleans. Do not use the mopping function on carpets.
7. Maintenance
Regular maintenance ensures optimal performance and extends the lifespan of your robot vacuum.
7.1 Emptying the Dustbin and Cleaning the Filter
- Press the dustbin release button and pull out the dustbin.
- Open the dustbin cover and empty the contents into a trash can.
- Remove the HEPA filter and tap it gently to remove dust. Do not wash the HEPA filter with water.
- Rinse the dustbin with water if necessary, ensuring it is completely dry before reinstallation.
- Reinstall the HEPA filter and dustbin.
7.2 Cleaning the Water Tank and Mop Pad
- Remove the water tank from the robot.
- Empty any remaining water.
- Detach the mop pad and wash it by hand or machine. Allow it to air dry completely.
- Rinse the water tank and allow it to air dry.
7.3 Cleaning Side Brushes
Regularly check the side brushes for tangled hair or debris. Pull them off their posts and use the cleaning tool or scissors to remove any obstructions. Reinstall them securely.
7.4 Cleaning Sensors and Charging Contacts
Wipe the cliff sensors, infrared sensors, and charging contacts on both the robot and the charging dock with a clean, dry cloth to ensure proper function.
8. Troubleshooting
If you encounter issues with your Pureatic V3, refer to the following common problems and solutions:
| Problem | Possible Cause | Solution |
|---|---|---|
| Robot does not start | Low battery; Power switch off | Charge the robot; Turn on the power switch |
| Robot cannot charge | Charging contacts dirty; Charging dock not powered | Clean charging contacts; Ensure dock is plugged in |
| Poor suction | Dustbin full; Filter clogged; Suction inlet blocked | Empty dustbin; Clean/replace filter; Clear suction inlet |
| Robot gets stuck frequently | Obstacles on floor; Sensors dirty | Clear floor area; Clean sensors |
| Water not dispensing for mopping | Water tank empty; Water outlet clogged | Fill water tank; Clean water outlet |
| App connection failed | Incorrect Wi-Fi band (not 2.4GHz); Incorrect password | Ensure 2.4GHz Wi-Fi; Re-enter password; Restart router/robot |
If the problem persists, please contact customer support.
9. Specifications
| Feature | Specification |
|---|---|
| Brand | Pureatic |
| Model Name | Pureatic V3 |
| Product Dimensions | 12"L x 12"W x 2.99"H |
| Included Components | Battery |
| Filter Type | HEPA |
| Battery Life | 120 minutes |
| Voltage | 11.1 Volts |
| Dustbin Capacity | 650 Milliliters |
| Water Tank Capacity | 100 Milliliters |
| Power Source | Battery Powered |
| Batteries Included | Yes (1 12V battery) |
| Control Method | App, Remote, Voice |
| Compatible Devices | Amazon Echo, Google Home, Smartphones |
| Form Factor | Cylindrical |
| Item Weight | 5.13 pounds |
| Manufacturer | Pureatic |
10. Warranty and Support
For warranty information, please refer to the documentation provided at the time of purchase or contact your retailer. Pureatic is committed to providing reliable customer service.
Our customer service team is available to assist with setup, troubleshooting, and ensuring the best performance of your robot vacuum. For support, please refer to the contact information provided in your product packaging or on the official Pureatic website.