1. Overview
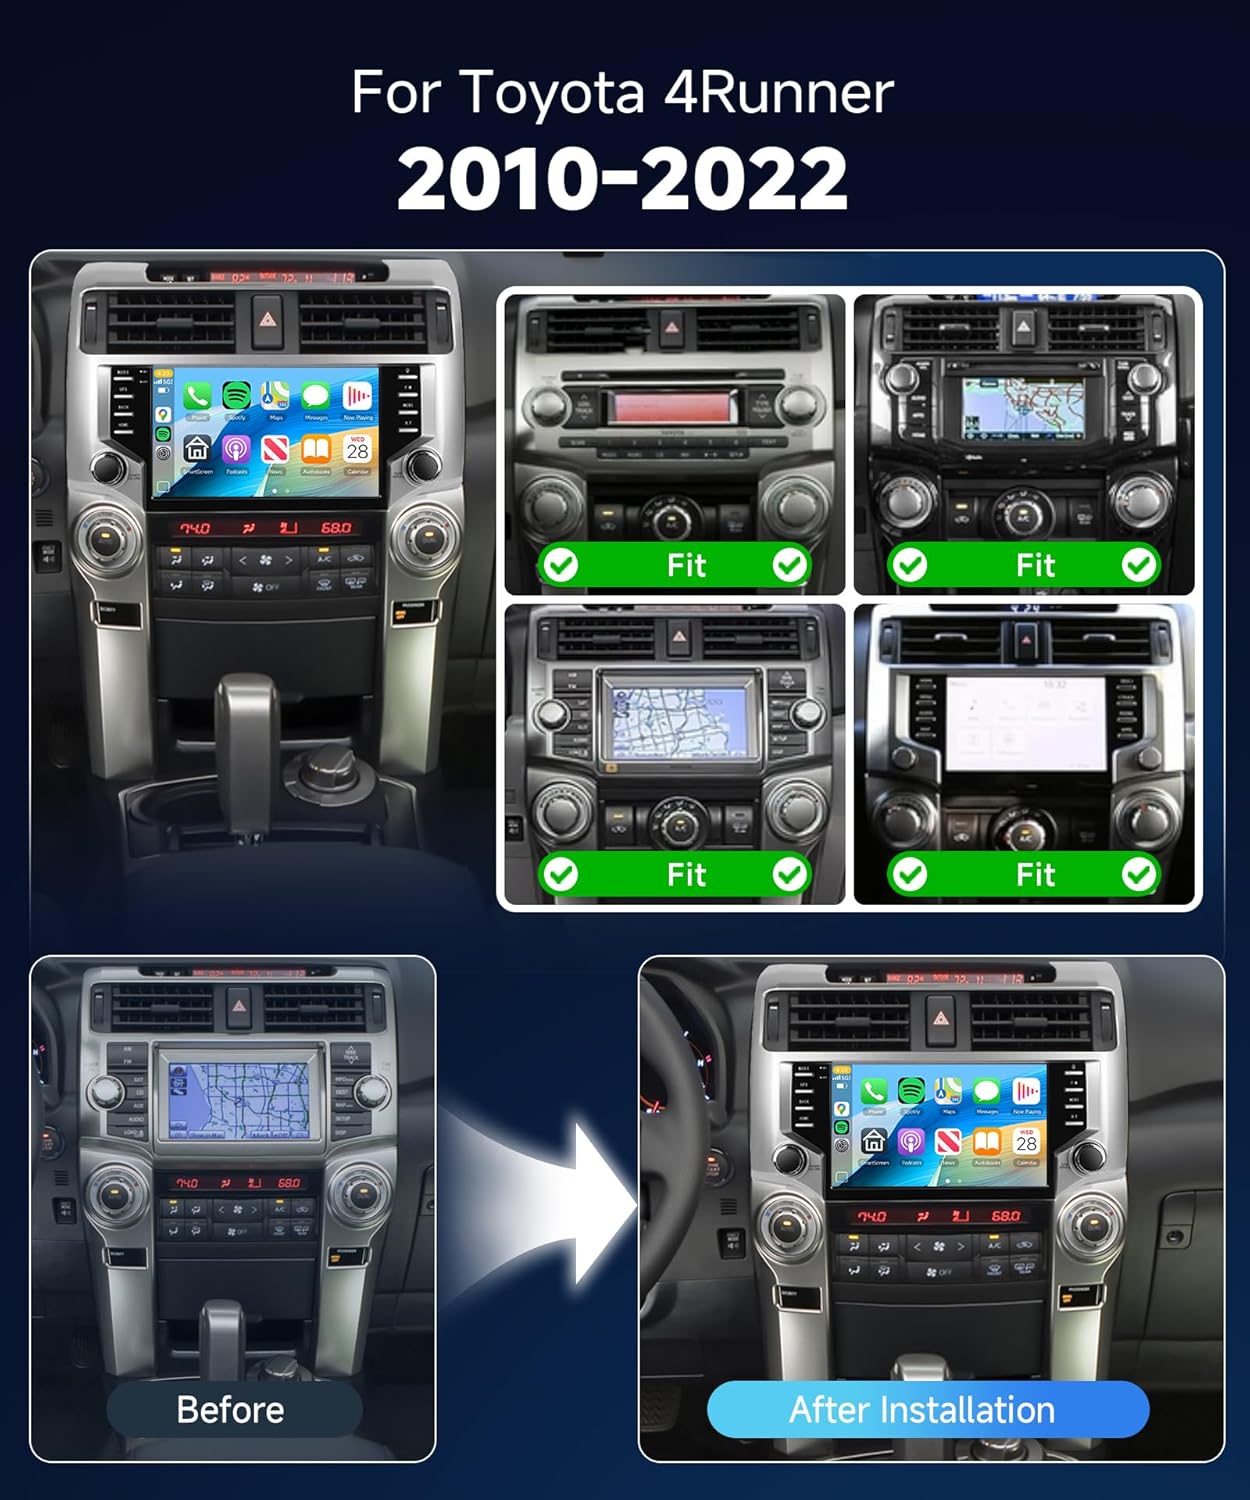
This manual provides detailed instructions for the installation, setup, and operation of your new METEESER 9-inch Android 13 Car Stereo. Designed specifically for Toyota 4Runner models from 2010 to 2022, this head unit offers advanced features including Wireless CarPlay, Android Auto, GPS navigation, a 32-band Digital Signal Processor (DSP), Bluetooth 5.0, and support for a backup camera. Please read this manual thoroughly before beginning installation or operation to ensure proper use and to avoid damage to the unit or your vehicle.
2. Package Contents
Before installation, please verify that all items listed below are included in your package:
- Car Stereo Head Unit (9-inch IPS Touch Screen)
- Power Cable
- RCA Cable
- USB Cable x 2
- Radio Antenna
- GPS Antenna
- Rear Camera Input Cable
- User Manual
- Microphone (External Mic)
- Installation Tool
- Canbus Decoder (if applicable for your vehicle model)
- Toyota 4Runner Adapter Cable (specific to 2010-2022 models)
- Button Adapter Cable (if applicable)

3. Installation Guide
This section provides step-by-step instructions for installing the METEESER Car Stereo in your Toyota 4Runner. It is recommended to have basic automotive knowledge and tools. If you are unsure about any step, please consult a professional installer.
3.1. Removing the Factory Radio
Carefully remove the trim pieces and bolts securing the factory radio. Use a pry tool to avoid scratching the dashboard. Disconnect all wiring harnesses from the back of the factory unit.
Video 3.1: Detailed guide on how to remove the factory radio from a Toyota 4Runner (2011-2019 models). This video demonstrates the use of pry tools and socket wrenches to safely detach the dashboard trim and the original head unit.
Video 3.2: Installation video for a stereo in Toyota 4Runner (2014-2019). This video provides a visual walkthrough of the removal and installation process for the car stereo.
3.2. Wiring Connections
Connect the provided wiring harnesses to the new head unit and the vehicle's existing wiring. Ensure all connections are secure. Pay close attention to the Canbus decoder connection if your vehicle requires it.

Video 3.3: Instructions on how to plug the harness to the car radio. This video demonstrates the correct connection points for the various cables.

3.3. Final Installation
Once all wiring is connected and tested, carefully place the new head unit into the dashboard opening. Secure it with the original bolts and reattach the trim pieces until they click into place.

4. Initial Setup
After successful installation, turn on your vehicle's ignition to power on the car stereo. The unit will boot up, displaying the Android logo. Follow the on-screen prompts for initial setup, including language selection, time zone, and Wi-Fi connection.
- Wi-Fi Connection: Connect to a stable Wi-Fi network or mobile hotspot to enable online features, app downloads, and online map updates.
- Bluetooth Pairing: Go to the Bluetooth settings on the head unit and pair your smartphone for hands-free calls and audio streaming.
- CarPlay/Android Auto Setup: For wireless CarPlay or Android Auto, ensure Bluetooth is connected, then open the respective app on the head unit and follow the pairing instructions on your phone.
5. Operating Instructions
5.1. Wireless CarPlay & Android Auto
This head unit supports both wireless CarPlay and Android Auto. Once your phone is paired via Bluetooth and Wi-Fi, open the CarPlay or Android Auto application on the head unit. Your phone's interface will be mirrored on the car stereo, allowing access to navigation, music, calls, and messages via voice control or touch.

Video 5.1: Demonstration of connecting to wireless CarPlay. The video shows the steps to pair a smartphone and activate the CarPlay interface on the car stereo.
5.2. GPS Navigation
The unit comes with built-in GPS and supports offline maps. For online navigation and real-time traffic updates, connect the unit to Wi-Fi. You can download additional navigation apps from the Google Play Store.

5.3. DSP Audio & Bluetooth 5.0
Utilize the 32-band DSP equalizer to fine-tune your audio experience. Adjust sound settings, reduce noise, and enhance bass for optimal sound quality. Bluetooth 5.0 ensures a stable and fast connection for hands-free calls and high-quality audio streaming.

Video 5.2: Display of the main functions of the Toyota 4Runner radio (2009-2019). This video demonstrates various features including the DSP settings and user interface options.
5.4. Backup Camera
The car stereo supports an HD rear view camera. When the vehicle is shifted into reverse, the camera feed will automatically display on the screen, providing a wide-angle view and parking guidelines for safer maneuvering.
6. Maintenance
- Screen Cleaning: Use a soft, lint-free cloth to clean the IPS touchscreen. Avoid abrasive cleaners or solvents that could damage the screen.
- Software Updates: Periodically check for software updates via the system settings. Keeping the software updated ensures optimal performance and access to new features.
- General Care: Avoid exposing the unit to extreme temperatures or direct sunlight for prolonged periods. Ensure all cables are securely connected to prevent intermittent issues.
7. Troubleshooting
| Problem | Possible Cause | Solution |
|---|---|---|
| Unit does not power on | Loose power connection; Blown fuse | Check power cable connections; Inspect and replace vehicle fuse if necessary. |
| No sound output | Speaker wires disconnected; Volume too low; Amplifier issue | Verify speaker connections; Increase volume; Check amplifier wiring/functionality. |
| CarPlay/Android Auto not connecting | Bluetooth/Wi-Fi not connected; Phone compatibility issue | Ensure Bluetooth and Wi-Fi are active and paired; Check phone's compatibility and software version. |
| GPS signal lost or inaccurate | GPS antenna obstruction/disconnection; Outdated maps | Ensure GPS antenna has clear sky view and is connected; Update maps via Wi-Fi. |
| Backup camera not displaying | Camera cable disconnected; Reverse signal not detected | Check camera wiring and connections; Verify reverse signal detection cable is correctly wired. |
8. Specifications
- Operating System: Android 13.0
- Processor: 8-Core
- RAM: 6GB
- Internal Storage: 128GB
- Screen Size: 9 Inches
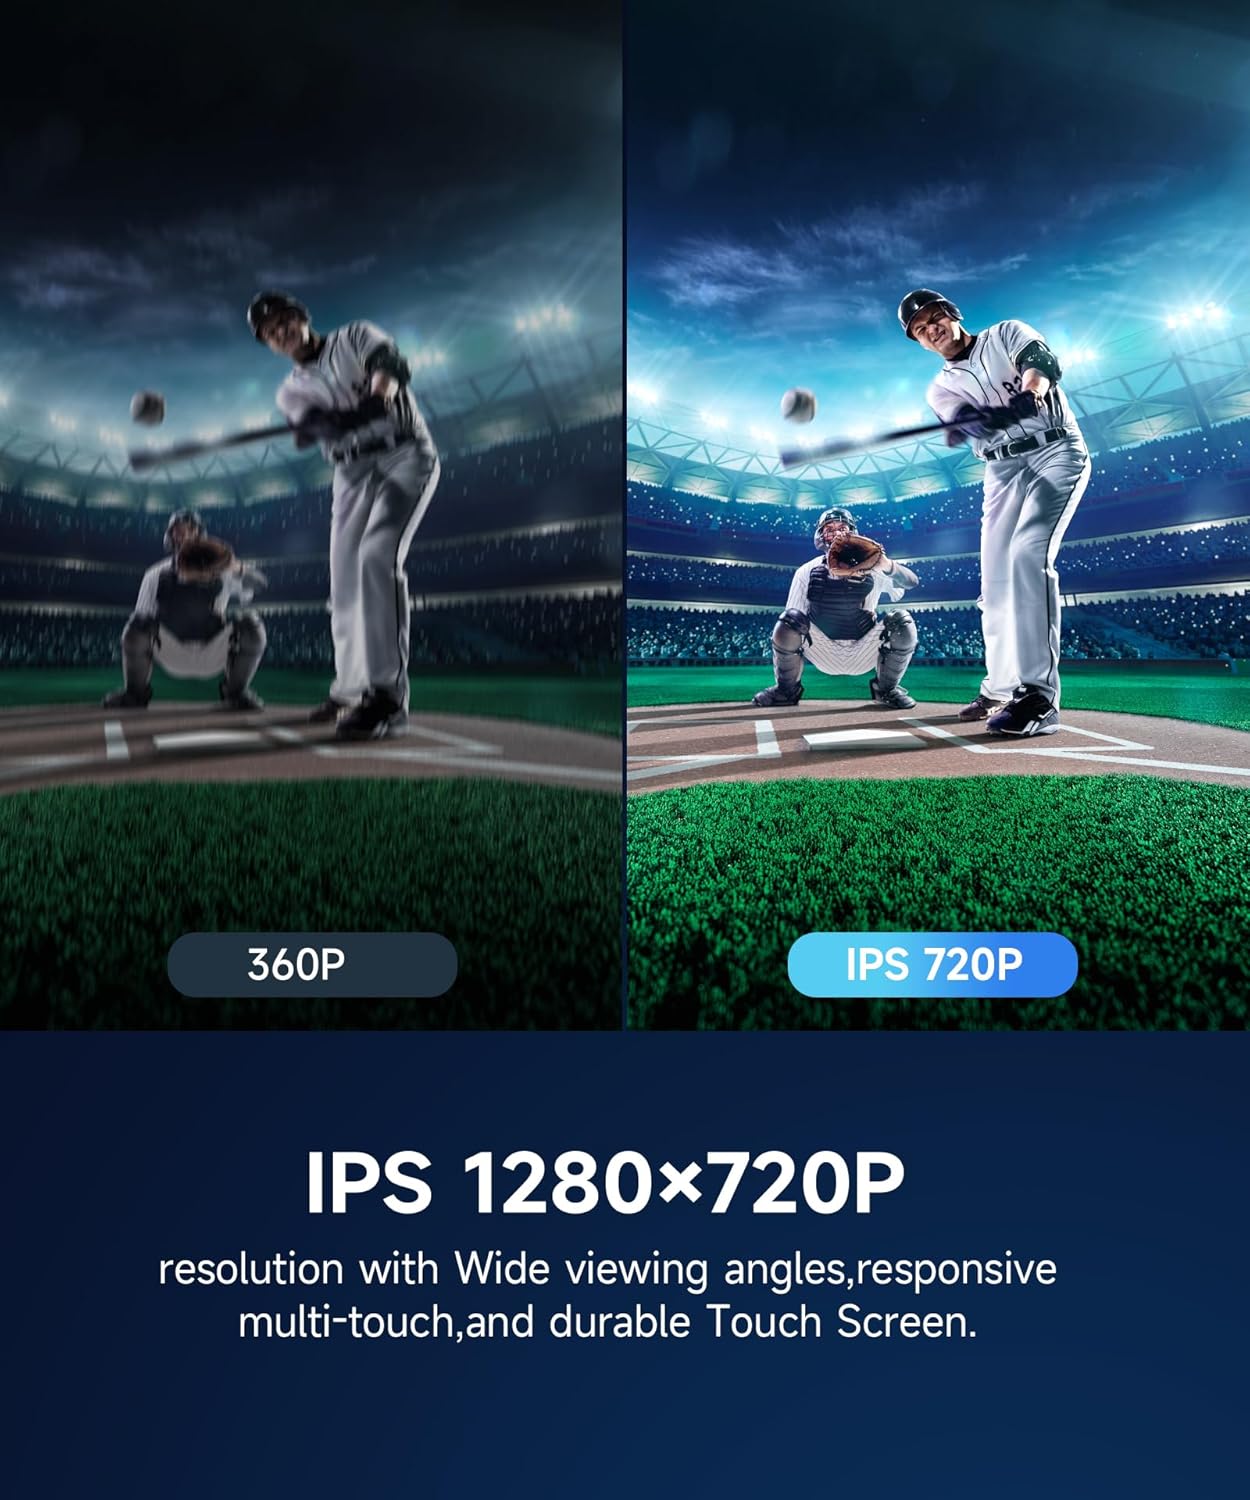
- Display Type: IPS Touch Screen
- Resolution: 1280*720P
- Connectivity: Wireless CarPlay, Android Auto, GPS, Bluetooth 5.0, Wi-Fi, USB, FM/RDS Radio
- Audio: 32-band DSP, Amplifier support (JBL sound system compatible)
- Special Features: Split screen, Customizable UI, Steering Wheel Control (SWC), Mirror Link (iOS/Android), HD Rear View Camera support, Subwoofer output
- Item Weight: 4.22 pounds
- Product Dimensions: 10.03 x 5.51 x 1.57 inches
9. Warranty and Support
This METEESER Car Stereo comes with a 2-year warranty covering manufacturing defects. For technical support, troubleshooting assistance, or warranty claims, please contact METEESER Tech directly through your Amazon order page. Click on "METEESER Tech" and then "Ask a question" to reach our support team.
