
JALL PH10
JALL 10" Large Digital Wall Clock User Manual
Model: PH10 | Brand: JALL
Introduction
This manual provides comprehensive instructions for the setup, operation, and maintenance of your JALL 10" Large Digital Wall Clock. Designed for clarity and versatility, this clock features a large LED display with RGB color options, an alarm, countdown timer, temperature display, and automatic Daylight Saving Time (DST) adjustment. Please read this manual thoroughly to ensure proper use and longevity of your device.
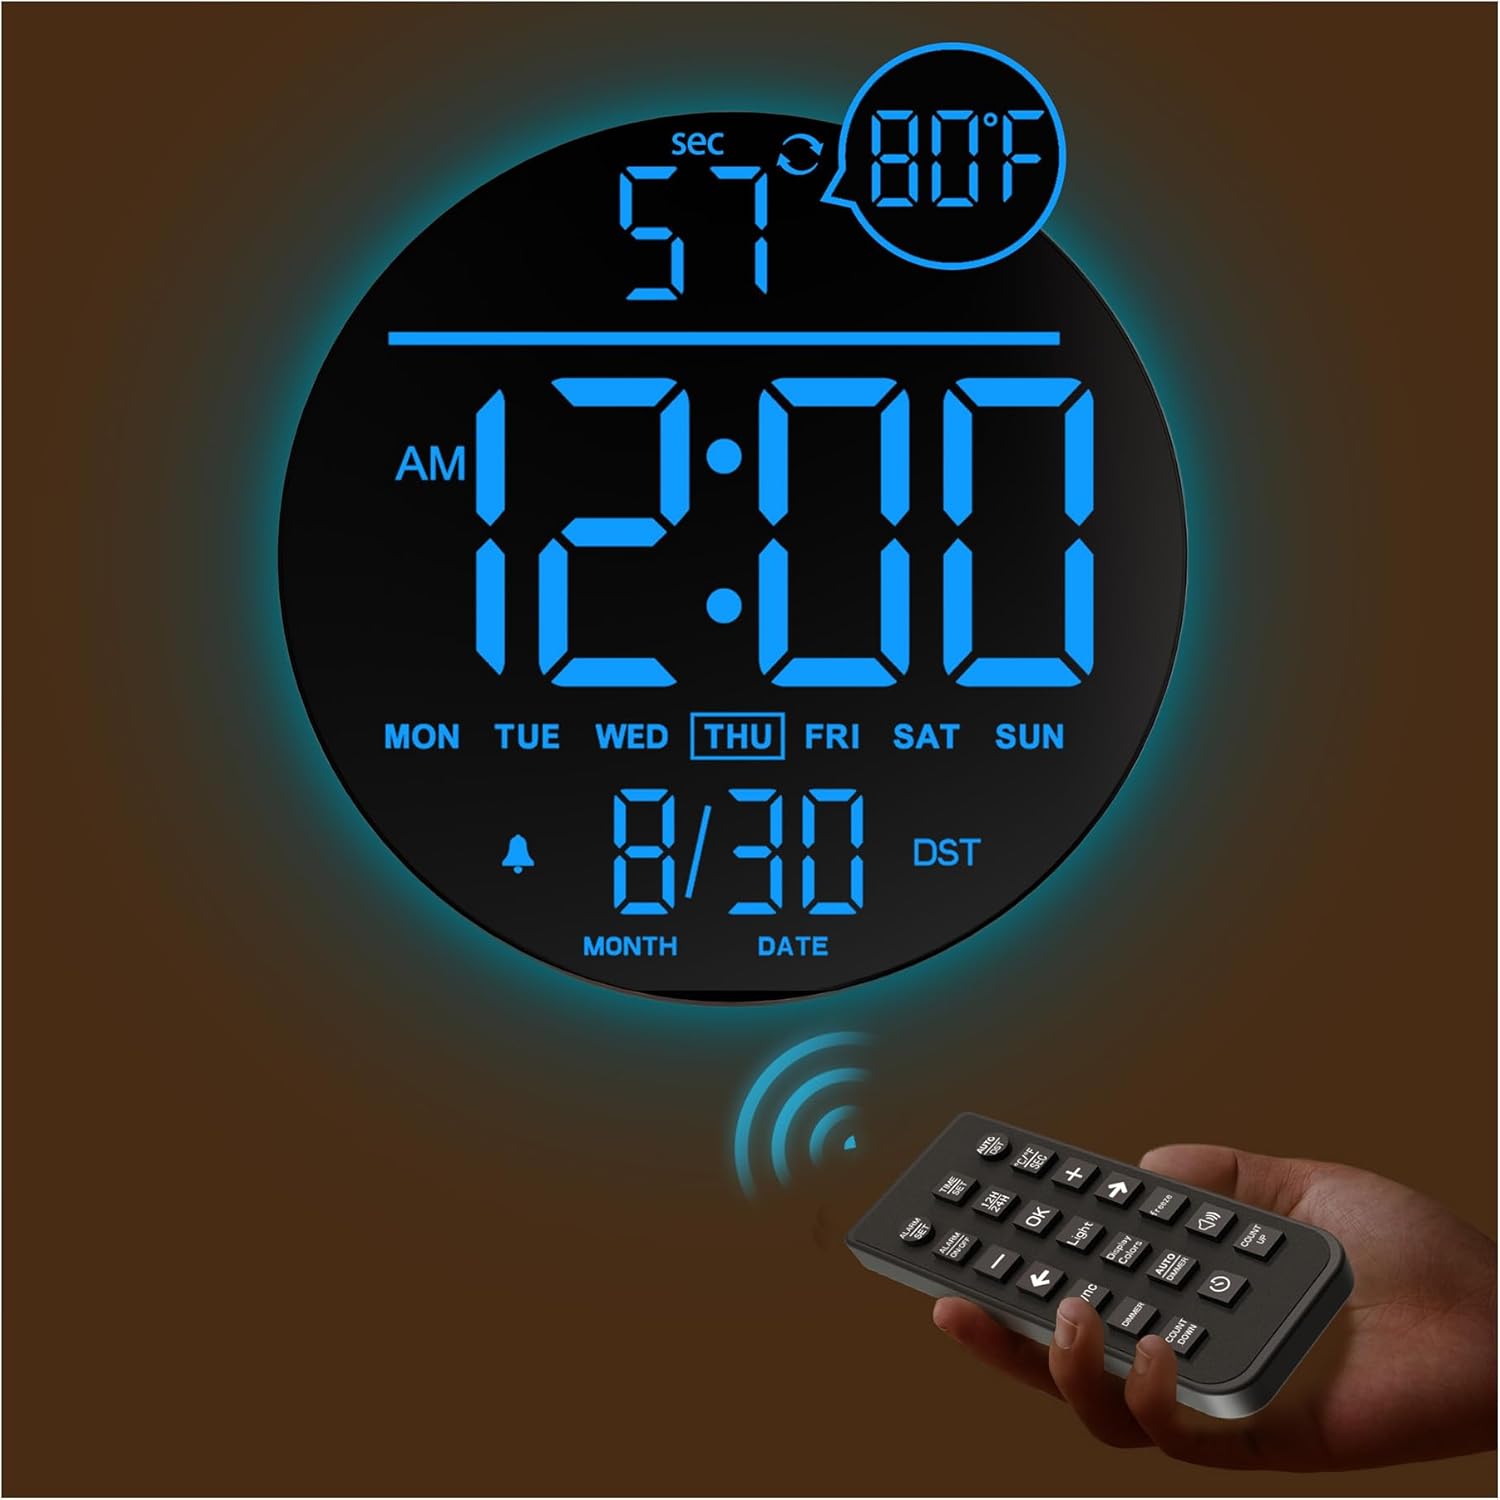
Figure 1: JALL 10" Large Digital Wall Clock with its main display showing time, date, and temperature.
Package Contents
Verify that all items listed below are included in your package:
- JALL 10" Large Digital Wall Clock
- Remote Control
- 5V/2A Power Adapter
- 11.5-foot Power Cord
- User Manual (This document)
- Wall Mounting Hardware (screws, anchors)
Product Overview
The JALL Digital Wall Clock is designed for clear visibility and ease of use, integrating multiple functions into a single, sleek unit.
Key Features:
- 10-inch Large LED Display: Provides excellent readability from various distances and angles.
- RGB Color Options: Customize display and night light colors with up to 8 vibrant options.
- Automatic Brightness Adjustment: Sensors adjust display brightness based on ambient light.
- Daylight Saving Time (DST) Adjustment: Automatically updates for DST changes.
- Alarm Function: Set multiple alarms for daily reminders.
- Countdown/Count-up Timer: Useful for various activities like workouts or cooking.
- Temperature Display: Shows ambient room temperature.
- Night Light: Integrated subtle illumination for nighttime navigation.
- Remote Control: Conveniently manage all settings from a distance.

Figure 2: The clock's display integrates time, date, day of the week, seconds, and temperature for a comprehensive view.
Setup
1. Power Connection
The JALL Digital Wall Clock is primarily powered by the included 5V/2A power adapter and 11.5-foot cord. It is not battery-operated for primary function.
- Connect the power cord to the DC-5V port on the back of the clock.
- Plug the power adapter into a standard electrical outlet.
- The clock display will illuminate.
Battery Backup: For retaining settings during power outages, insert two AAA batteries (not included) into the battery compartment on the back of the clock. These batteries do not power the display.

Figure 3: Power connection and battery backup for the clock. Note that AAA batteries are for memory retention only.
2. Mounting Options
The clock can be wall-mounted or placed on a flat surface using its integrated stand.
- Wall Mounting: Use the provided screws and anchors to securely mount the clock on a wall. Ensure the power cord can reach an outlet.
- Tabletop Placement: Utilize the built-in stand on the back of the clock for stable placement on a desk, shelf, or nightstand.

Figure 4: The clock can be easily set up on a wall or tabletop.
Operating Instructions
All functions of the clock are controlled via the included remote control. Familiarize yourself with the remote's buttons for optimal use.

Figure 5: The remote control allows for easy adjustment of clock settings.
1. Setting Time and Date
- Press the TIME SET button on the remote. The time digits will flash.
- Use the + and - buttons to adjust the hour.
- Press OK to confirm the hour and move to minutes.
- Adjust minutes using + and -, then press OK.
- Continue this process for setting the year, month, and date.
- Press OK to exit time/date setting mode.
- To switch between 12H and 24H format, press the 12H/24H button.
2. Display Colors (RGB)
The clock offers multiple display colors for the time and date, and a separate night light color.
- Press the Display Colors button to cycle through available display colors.
- Press the freeze button to stop the color cycling and keep the current color.

Figure 6: Explore various colorful display modes for the clock digits.
3. Night Light Functionality
The clock features a customizable night light around its perimeter.
- Press the Light button to cycle through different night light colors.
- Press the sync button to synchronize the night light color with the main display color.
- Use the DIMMER buttons to adjust the brightness of the night light.

Figure 7: The clock's night light offers multiple colors and brightness levels.
4. Automatic Brightness (Auto Dimmer)
The clock can automatically adjust its brightness based on ambient light conditions.
- Press the AUTO DIMMER button to activate or deactivate this feature.
- When active, the clock will dim in darker environments to protect your eyes and save energy.

Figure 8: The auto-dimming feature adjusts display brightness automatically.
5. Daylight Saving Time (DST)
The clock supports automatic adjustment for Daylight Saving Time.
- Press the AUTO DST button to enable or disable this feature.
- When enabled, the clock will automatically adjust its time during spring forward and fall back.

Figure 9: Automatic DST adjustment simplifies time changes.
6. Alarm Function
Set alarms for daily reminders.
- Press the ALARM SET button. The alarm time will flash.
- Use + and - to set the desired alarm hour and minutes.
- Press OK to confirm.
- Press ALARM ON/OFF to activate or deactivate the alarm. An alarm icon will appear on the display when active.
7. Countdown and Count-up Timer
The clock includes versatile timer functions.
- Countdown: Press the COUNT DOWN button. Use + and - to set the desired time (up to 99 minutes). Press OK to start. The clock will beep when the countdown finishes.
- Count-up: Press the COUNT UP button. The timer will start from 00:00 and count upwards (up to 99 minutes). Press OK to pause/resume.

Figure 10: The countdown and count-up timers are useful for various activities.
8. Temperature Display
The clock displays the ambient temperature.
- Press the °C/°F SEC button to switch between Celsius (°C) and Fahrenheit (°F) temperature units.
- This button also toggles the display of seconds on the main time display.
9. Official Product Video
Watch this official product video for a visual guide on the JALL 10" Large Digital Wall Clock's features and operation.
Video 1: Overview of the JALL 10" Large Digital Wall Clock, demonstrating its various functions and display options.
Maintenance
To ensure the longevity and optimal performance of your JALL Digital Wall Clock, follow these maintenance guidelines:
- Cleaning: Gently wipe the display and casing with a soft, dry, lint-free cloth. Avoid using abrasive cleaners, solvents, or spray cleaners directly on the clock, as they may damage the surface.
- Placement: Place the clock in a location away from direct sunlight, extreme temperatures, and high humidity to prevent damage to electronic components and maintain display clarity.
- Power: Always use the provided power adapter. Do not attempt to power the clock with other adapters unless specified by the manufacturer.
Troubleshooting
| Problem | Possible Cause | Solution |
|---|---|---|
| Clock display is off. | No power supply; power adapter disconnected. | Ensure the power adapter is securely plugged into the clock and a working electrical outlet. |
| Remote control is not working. | Batteries in remote are dead or incorrectly inserted; remote not pointed at clock. | Replace remote control batteries. Ensure correct polarity. Point remote directly at the clock's sensor. |
| Time/Date is incorrect after power outage. | Backup batteries (AAA) are not installed or are dead. | Install fresh AAA batteries for memory retention. Reset time and date manually if necessary. |
| Temperature reading seems inaccurate. | Clock is placed near a heat source or vent; internal sensor needs time to stabilize. | Relocate the clock away from direct heat/cold sources. Allow several hours for the sensor to acclimate to the room's ambient temperature. |
| Display colors are not changing. | Color freeze function is active. | Press the freeze button on the remote to deactivate the color freeze function. |
Specifications
| Feature | Detail |
|---|---|
| Brand | JALL |
| Model Number | PH10 |
| Display Type | Digital LED |
| Display Size | 10 inches (Diameter) |
| Product Dimensions | 10"W x 10"H |
| Power Source | Corded Electric (5V/2A adapter included) |
| Battery Backup | 2 x AAA batteries (not included) for memory retention |
| Mounting Type | Wall Mount, Tabletop |
| Special Features | Alarm, Auto Dimmable, Daylight Saving, Countdown/Count-up Timer, RGB Color, Temperature Display |
| Material | Plastic |
| Item Weight | 1.83 pounds |
Warranty and Support
JALL products are manufactured with high-quality standards. For warranty information or technical support, please refer to the contact details provided on the product packaging or visit the official JALL website. Keep your purchase receipt as proof of purchase for any warranty claims.
Related documentsPH10

Ask a question about this manual
Ask about setup, troubleshooting, compatibility, parts, safety, or missing instructions. Manuals+ will review the question and use this page’s manual context to help answer it.