
1. Introduction
This manual provides comprehensive instructions for the installation, operation, and maintenance of your Aoonav 9-inch Android 12 Car Radio multimedia player. This unit is specifically designed for Dodge Charger models manufactured between 2015 and 2019, offering an upgraded in-car entertainment and navigation experience.
Compatibility Note: This unit is designed for Dodge Charger models from 2015-2019. It is not compatible with Dodge Challenger models due to differences in the dashboard framework.
2. Safety Information
- Read all instructions carefully before installation and operation.
- Professional installation is recommended to ensure proper function and avoid damage to your vehicle or the unit.
- Do not operate the unit in a manner that distracts you from driving. Always prioritize road safety.
- Ensure all wiring connections are secure and properly insulated to prevent short circuits.
- Keep the unit away from water and excessive moisture.
3. Package Contents
Verify that all components listed below are present in your package:
- 9-inch Android Car Radio Unit
- Brand New Bright Grey Frame (for Dodge Charger 2015-2019)
- Power Adapter
- RCA Cable
- Camera-In Cable
- GPS Antenna
- OEM USB Adapter
- OEM Radio Adapter
- Speaker
- 4G Antenna
- Extra Microphone (MIC)
- 2x USB Ports
- Power Cords
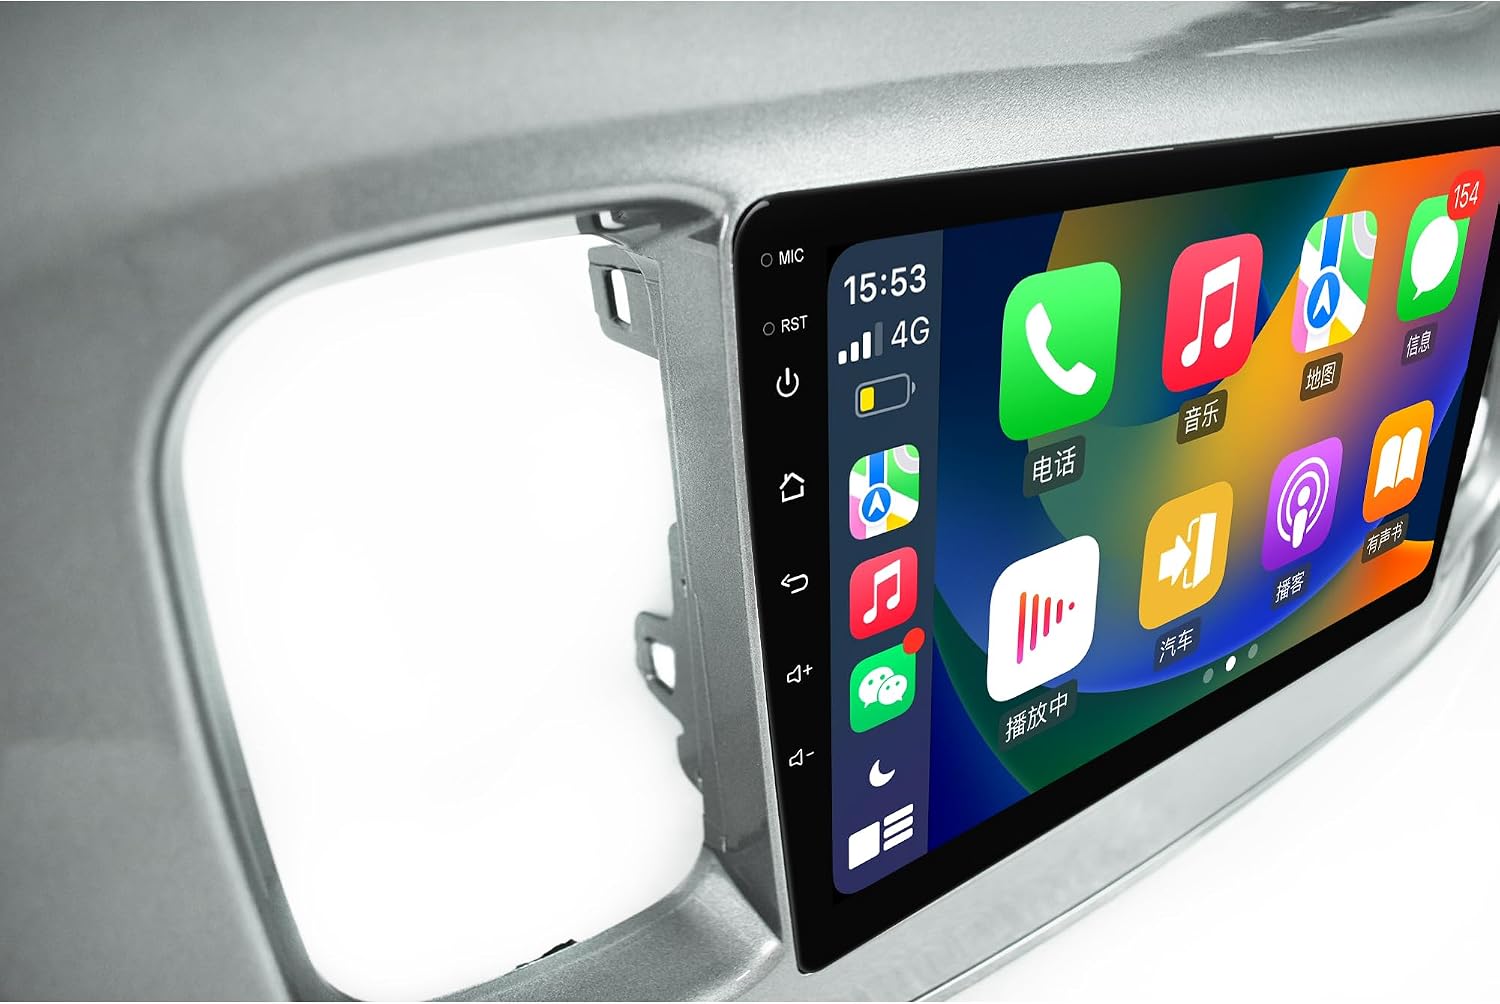
Figure 3.1: Included Components
4. Setup and Installation
Installation of the Aoonav Android 12 Car Radio involves replacing the existing factory radio unit in your Dodge Charger. The provided frame is designed to integrate seamlessly into your vehicle's dashboard.
4.1 Pre-Installation Steps
- Park your vehicle on a level surface and engage the parking brake.
- Turn off the engine and remove the key from the ignition.
- Disconnect the negative terminal of your car battery to prevent electrical shorts during installation.
- Carefully remove the existing factory radio and dashboard trim according to your vehicle's service manual.
4.2 Wiring Connections
Connect the provided wiring harnesses to the corresponding ports on the new Android head unit and your vehicle's wiring. Refer to the wiring diagram (if provided separately) for specific connections.
- Power Cords: Connect the main power harness.
- GPS Antenna: Connect the GPS antenna and route it to a location with a clear view of the sky (e.g., dashboard, A-pillar).
- 4G Antenna: Connect the 4G antenna for cellular data connectivity.
- USB Adapters: Connect the OEM USB adapters to retain factory USB ports or add new ones.
- Camera-In: If installing a reverse camera, connect its video input to the 'Camera-In' port.
- RCA Cables: Use for external amplifiers or video outputs if applicable.
- External Microphone: Connect the extra microphone for improved call quality.
4.3 Unit Installation
- Mount the Android head unit into the new bright grey frame.
- Carefully insert the assembled unit into the dashboard opening, ensuring all wires are tucked away and not pinched.
- Secure the unit and frame using the appropriate screws or clips.
- Reinstall any removed dashboard trim pieces.
- Reconnect the negative terminal of your car battery.

Figure 4.1: Before and After Installation Comparison

Figure 4.2: Installed Unit in Vehicle
5. Operating Instructions
Your Aoonav car radio runs on the Android 12 operating system, providing a familiar and intuitive user interface.
5.1 Basic Operation
- Power On/Off: Press and hold the power button on the unit or use the vehicle's ignition.
- Touchscreen: Navigate the interface using touch gestures similar to a smartphone or tablet. The 9-inch IPS HD screen offers 1280*720 resolution.
- Volume Control: Adjust volume using the physical buttons on the unit, steering wheel controls, or the on-screen interface.
- Home Screen: Access various applications and widgets from the customizable home screen.

Figure 5.1: Unit Home Screen
5.2 Connectivity Features
- Wireless CarPlay & Android Auto: Connect your smartphone via Bluetooth or charging cable to access navigation, music, calls, and messages directly on the unit's screen. This feature enhances driving safety by minimizing phone interaction.
- Wi-Fi: Connect to a mobile hotspot or available Wi-Fi networks to download apps from the App Store (e.g., YouTube, Netflix, Facebook) and browse the internet.
- Bluetooth 5.1: Pair your phone for hands-free calling, phone book synchronization, and audio streaming.
5.3 Navigation
The unit features built-in GPS + GLONASS for high-precision navigation. It supports both online and offline maps, including popular applications like Apple Maps, Google Maps, and Waze. Ensure the GPS antenna is properly installed for optimal signal reception.

Figure 5.2: Navigation Interface
5.4 Audio System
The unit includes a built-in DSP (Digital Signal Processor) and 4*60W surround stereo output, providing an immersive audio experience. Adjust sound settings through the audio equalizer in the system settings.
5.5 System Settings
Access the 'Settings' menu to customize various aspects of the unit, including display, sound, network, connected devices, and system information.

Figure 5.3: System Information Screen
6. Maintenance
- Cleaning the Screen: Use a soft, lint-free cloth to gently wipe the touchscreen. Avoid abrasive cleaners or solvents.
- Software Updates: Periodically check for system software updates through the unit's settings menu to ensure optimal performance and access to new features.
- General Care: Avoid exposing the unit to extreme temperatures or direct sunlight for prolonged periods.
7. Troubleshooting
If you encounter issues with your Aoonav car radio, refer to the following common problems and solutions:
| Problem | Possible Cause | Solution |
|---|---|---|
| Unit does not power on | Loose power connection, blown fuse, incorrect wiring. | Check all power connections, inspect vehicle fuses, verify wiring against diagram. |
| No sound output | Volume too low, mute enabled, incorrect speaker wiring, amplifier issue. | Increase volume, check mute status, verify speaker connections, check external amplifier if used. |
| GPS signal weak or inaccurate | GPS antenna not properly installed or obstructed. | Ensure GPS antenna has a clear view of the sky, reposition if necessary. |
| CarPlay/Android Auto not connecting | Bluetooth not paired, USB cable faulty, phone software issue. | Ensure Bluetooth is on and paired, try a different USB cable, restart phone and unit. |
| Touchscreen unresponsive | System freeze, debris on screen. | Restart the unit. Clean the screen. If issue persists, contact support. |
8. Specifications
| Feature | Detail |
|---|---|
| Model Name | RM |
| Operating System | Android 12 |
| Processor | Octa-USI8581A core |
| Memory (RAM) | 4GB |
| Storage (ROM) | 64GB |
| Screen Size | 9 Inches |
| Display Type | IPS HD Capacitive Touch Screen |
| Resolution | 1280*720 |
| Audio Output Power | 4*60W |
| Bluetooth Version | 5.1 |
| Connectivity | Bluetooth, USB, Wi-Fi |
| Navigation | GPS + GLONASS, Supports Online/Offline Maps |
| Special Features | Wireless CarPlay, Android Auto, Built-in DSP, Touchscreen, Steering Wheel Control Support |
| Product Dimensions | 37.63 x 3.2 x 10.27 inches |
| Item Weight | 6.93 pounds |
9. Warranty and Support
Aoonav is committed to providing quality products and customer service.
- Warranty: This product comes with a one-year warranty from the date of purchase.
- Returns & Replacements: A 30-day money-back guarantee and 12-month replacement policy are offered.
- Technical Support: Lifetime technical support is available. If you have any questions regarding installation or use, please contact us.
For technical assistance or warranty claims, please contact Aoonav customer service via email: autostereo@163.com. We aim to reply within 24 hours.