
1. Safety Instructions
Please read all instructions carefully before using the KEENSTAR 20Bar Espresso Machine. Keep this manual for future reference.
- Ensure the appliance is connected to a grounded power outlet with the correct voltage.
- Do not immerse the machine, power cord, or plug in water or other liquids.
- Keep children and pets away from the appliance during operation.
- Unplug the machine when not in use and before cleaning.
- Do not operate the machine with a damaged cord or plug.
- Use only medium-ground coffee (greater than 0.5mm) to prevent clogging and ensure proper extraction.
- Do not exceed the maximum water level indicated on the water tank.
- Ensure the portafilter is fully locked before starting the brewing process.
- Exercise caution when handling hot surfaces and steam.
2. Product Overview
2.1 Components
The KEENSTAR 20Bar Espresso Machine includes the following main components:
- Control Panel (Touch Screen)
- Water Tank (37oz / 1.1 Liters)
- Steam Knob
- Portafilter Handle
- Portafilter
- 1-Shot Filter Basket
- 2-Shot Filter Basket
- Cup Plate (Heated)
- Removable Drip Tray
- Steam Nozzle (Milk Frother)
- Coffee Spoon & Tamper
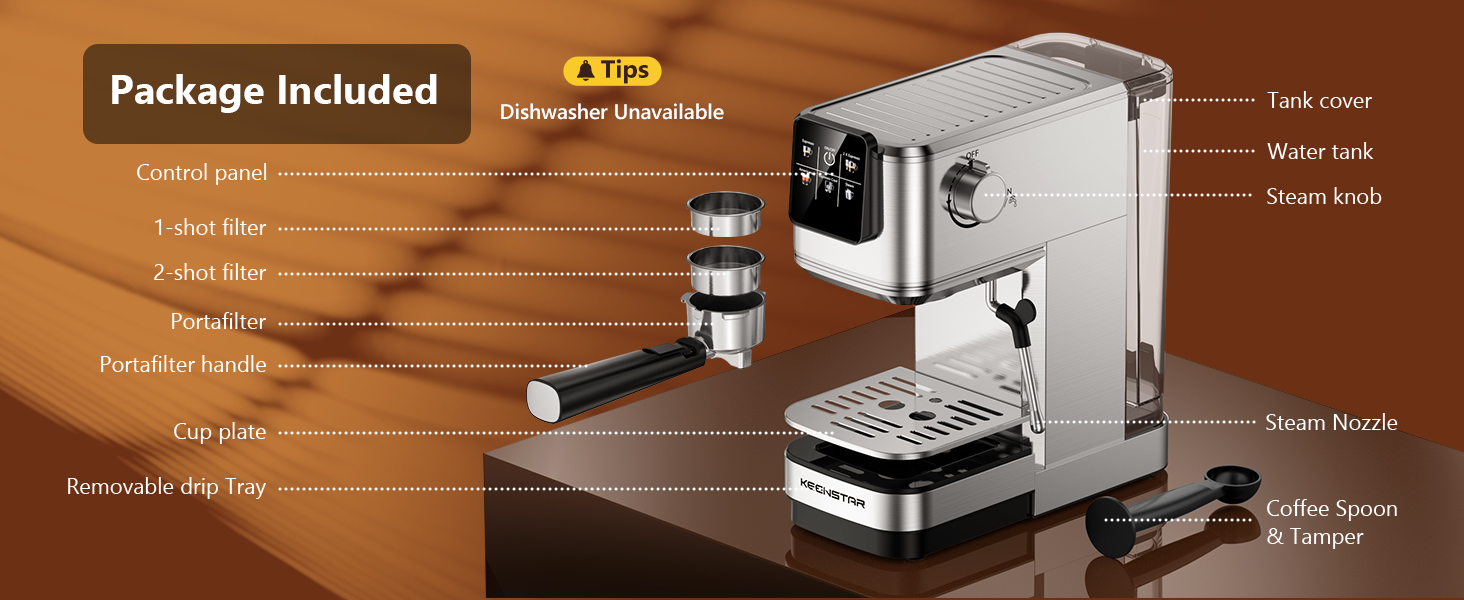
Figure 1: Overview of KEENSTAR Espresso Machine components.
2.2 Specifications
| Feature | Specification |
|---|---|
| Brand | KEENSTAR |
| Model Name | JH-C5010E |
| Pressure System | 20 Bar Professional Pump |
| Power | 1350W |
| Water Tank Capacity | 1.1 Liters (37oz) |
| Product Dimensions | 11.8"D x 5.5"W x 12.6"H |
| Material | Stainless Steel |
| Coffee Input Type | Ground Coffee |
| Filter Type | Reusable (1-shot, 2-shot) |
| Special Features | Rapid Cold Brew, Touch Screen, Milk Frother, Fast Heating System, Pre-Soak Technology |

Figure 2: Product dimensions for the KEENSTAR Espresso Machine.
3. Setup
3.1 Initial Cleaning
Before first use, clean all removable parts (water tank, portafilter, filter baskets, drip tray) with warm soapy water. Wipe the exterior of the machine with a damp cloth.
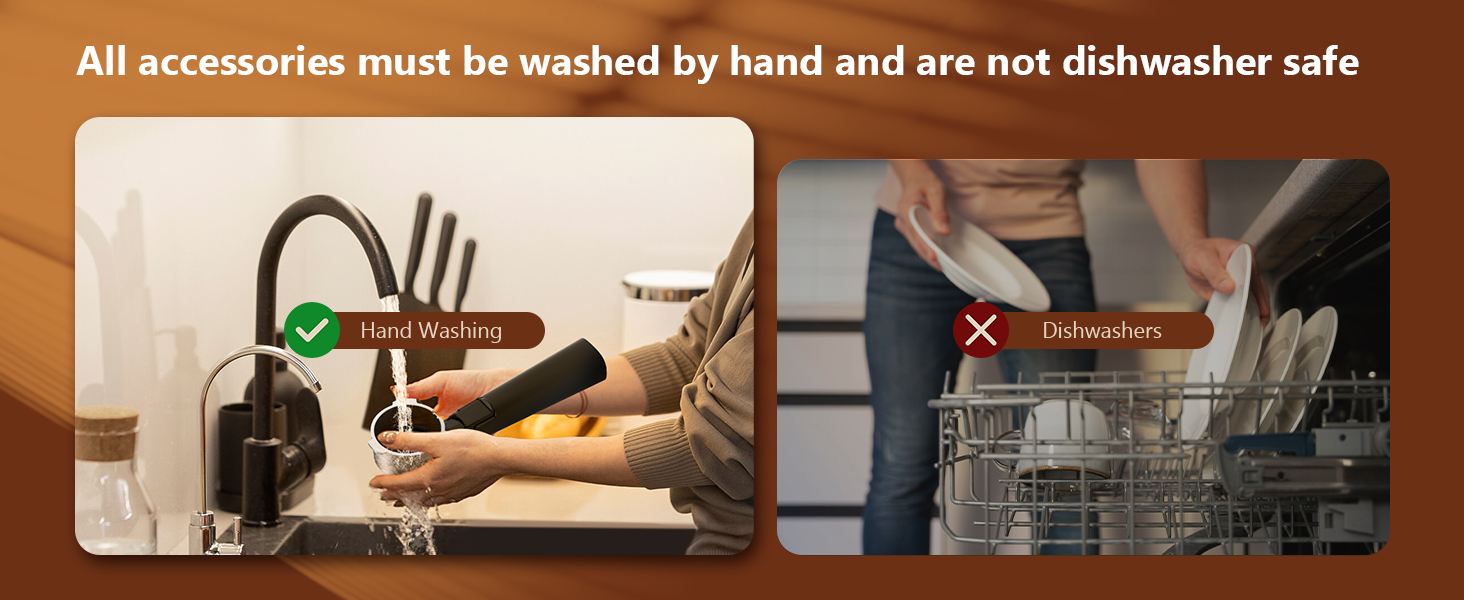
Figure 3: All accessories must be washed by hand and are not dishwasher safe.
3.2 Priming the Machine (Before Each Use)
To ensure optimal performance and drain air from the pipes, prime the machine before each use:
- Fill the water tank with fresh water and press the power button to turn on the machine.
- Turn the steam knob to the "ON" position.
- Wait for water to run out from the steam wand in a steady stream.
- Turn the steam knob to the "OFF" position.
- Turn off the coffee machine.
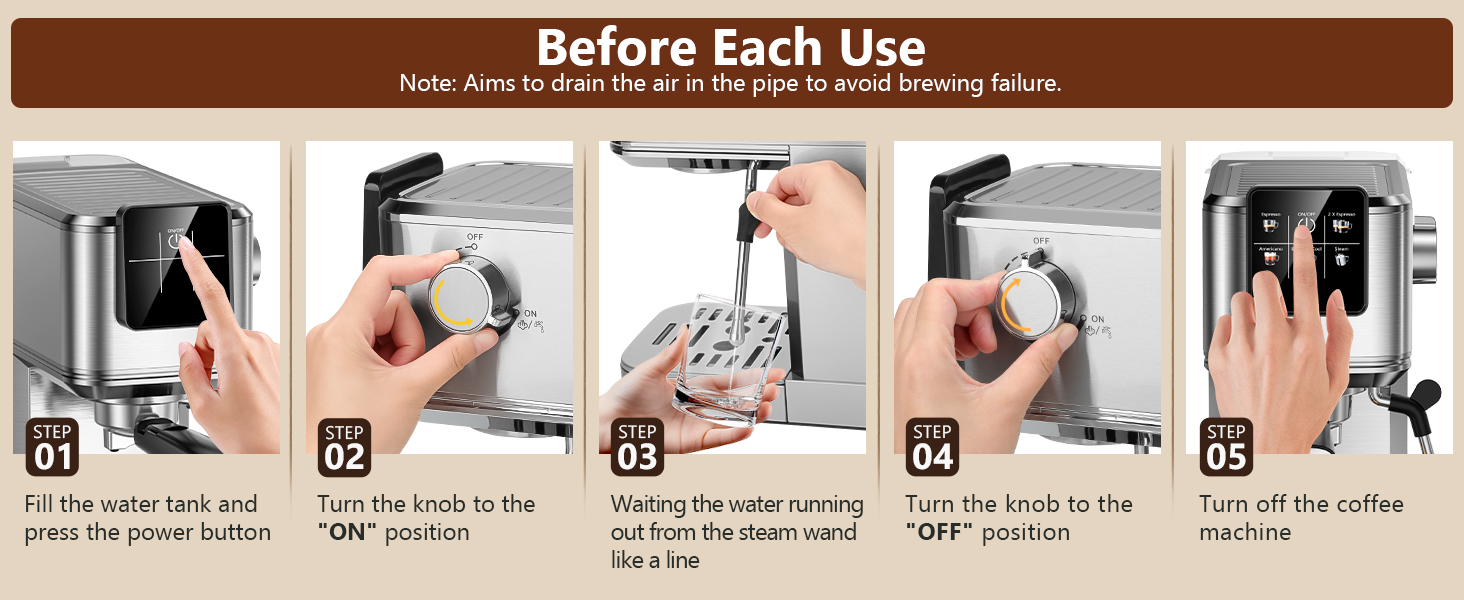
Figure 4: Steps for priming the machine before each use.
Note: Do not exceed the maximum water level (1200ml) in the water tank.
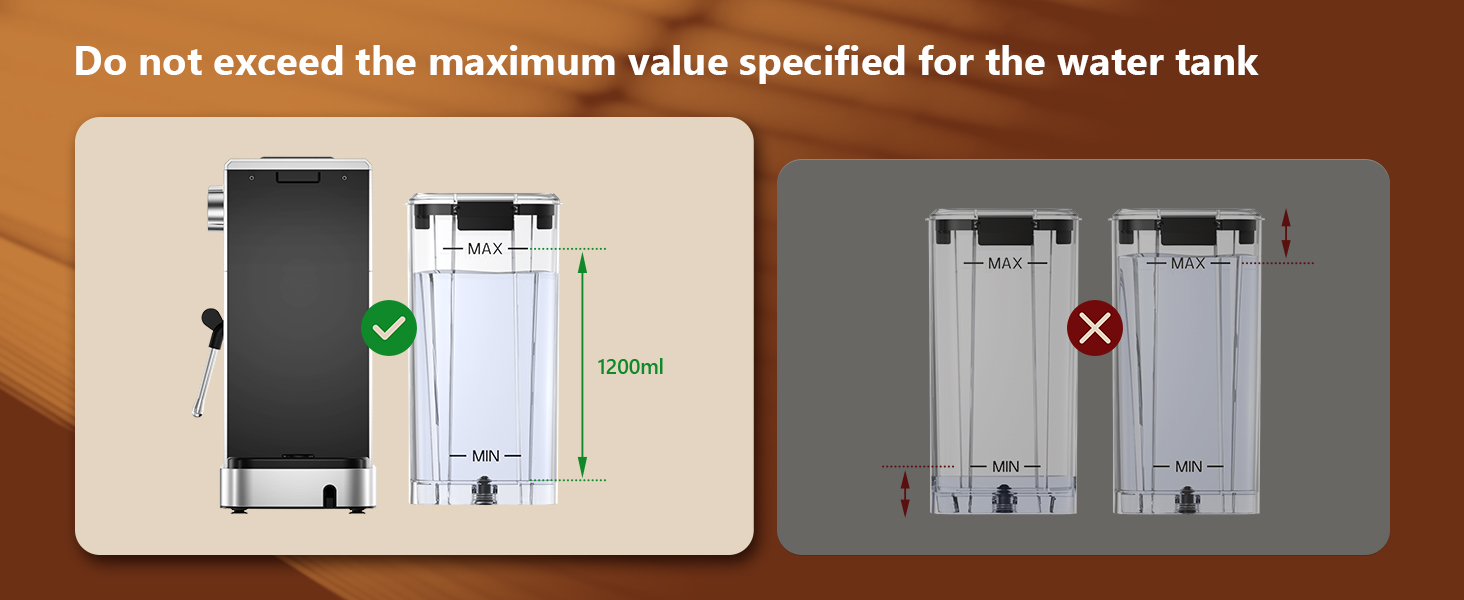
Figure 5: Illustration of correct water tank fill level.
4. Operating Instructions
4.1 Making Espresso
Follow these steps to brew a perfect espresso:
- Fill the water tank and press the power button. The indicator will blink during preheating.
- Load the appropriate filter basket (1-shot or 2-shot) with medium-ground coffee (recommended >0.5mm) and tamp it firmly.
- Place the portafilter into the machine and turn it to the right until it is fully locked. Place a cup underneath.
- Once the indicator light is steady (preheating complete), press the "Espresso" button for a single shot or "2 X Espresso" for a double shot.
- The machine will automatically brew the espresso.

Figure 6: Step-by-step guide for making espresso.
Note: Ensure the steam knob is set to the "OFF" position before brewing coffee. The blinking indicator signifies preheating; it's ready to brew when steady.
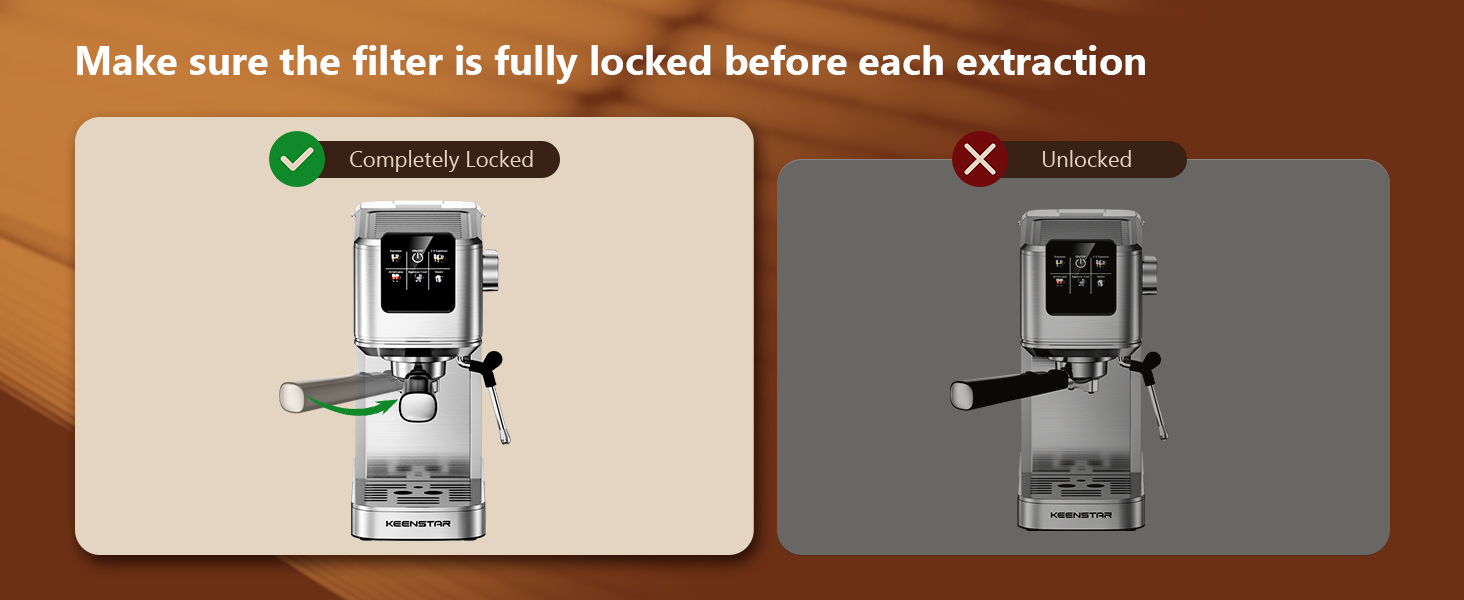
Figure 7: Correctly locking the portafilter before brewing.
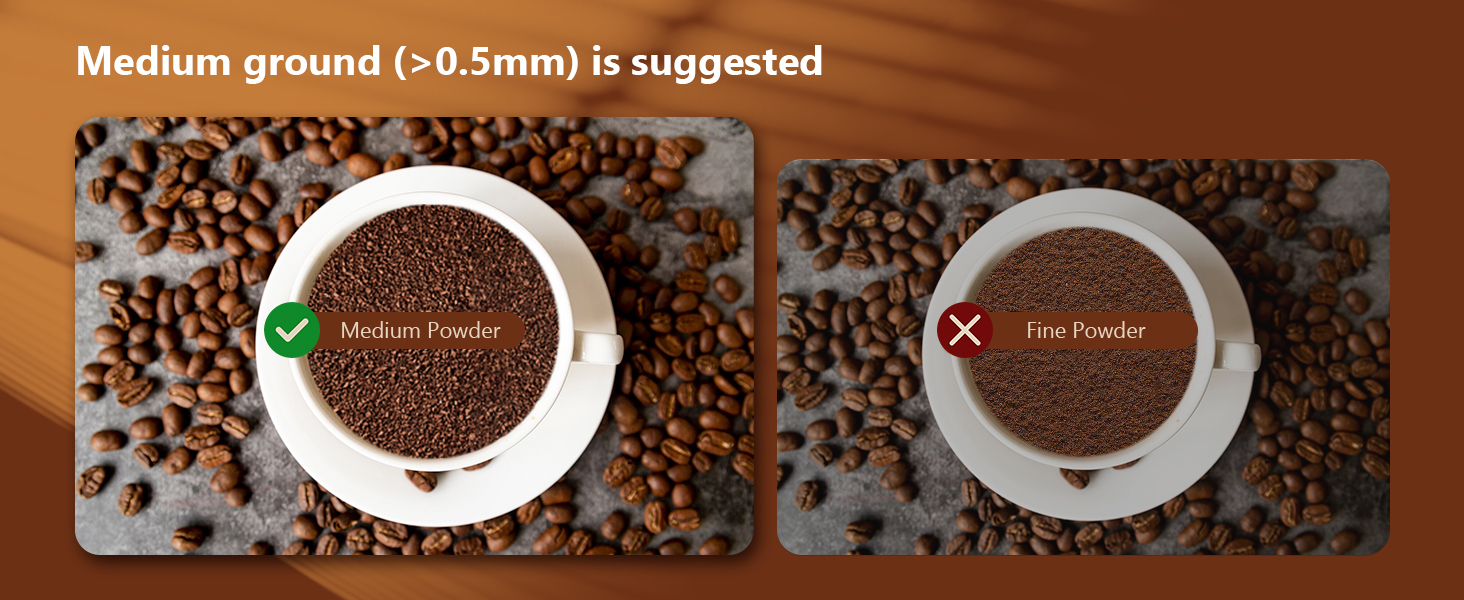
Figure 8: Medium ground coffee is recommended for optimal extraction.
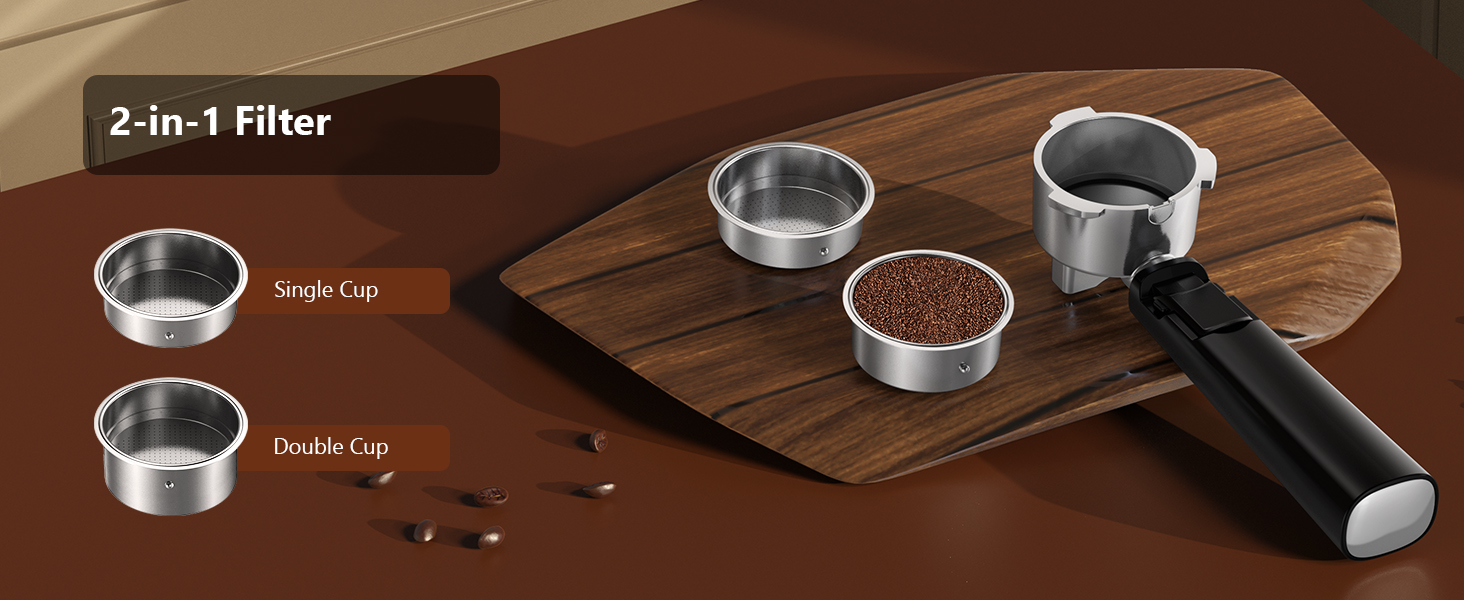
Figure 9: Use the appropriate 2-in-1 filter for single or double espresso shots.
4.2 Making Cold Brew Espresso
The machine features a rapid cold brew function:
- Fill the water tank 2/3 full with ice cubes, then add water.
- Prepare the portafilter with ground coffee as described for espresso.
- Press the "Espresso Cool" button on the touch screen.
- The machine will brew a smooth, fresh cold brew espresso in approximately 10 minutes.

Figure 10: Preparing cold brew espresso with ice in the water tank.
4.3 Milk Frothing
To create creamy milk foam for lattes and cappuccinos:
- Press the power button to turn on the machine.
- Press the "Steam" button on the touch screen to preheat the steam wand. The indicator will blink.
- Once preheating is complete (indicator steady), turn the steam knob to the "ON" position to release any residual water from the pipe.
- Insert the steam nozzle approximately 1 inch into a pitcher of cold milk.
- Gradually turn the steam knob until steam begins to emerge, frothing the milk to your desired texture.
- Turn the steam knob to "OFF" and clean the steam wand immediately after use.
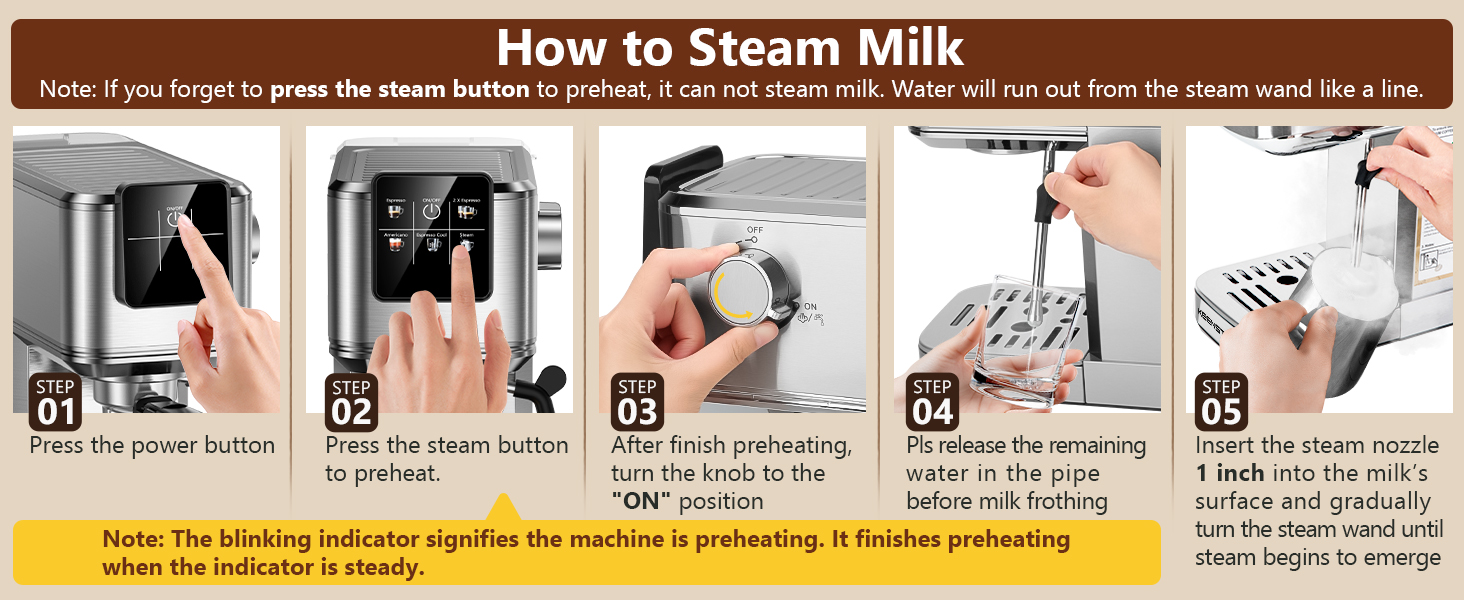
Figure 11: Detailed steps for frothing milk using the steam wand.
Note: If you forget to press the steam button to preheat, water will run out from the steam wand instead of steam.
5. Cleaning and Maintenance
5.1 Daily Cleaning
- Drip Tray: Empty and clean the removable drip tray after each use.
- Portafilter & Filter Baskets: Remove spent coffee grounds and rinse the portafilter and filter baskets thoroughly under running water.
- Steam Wand: Wipe the steam wand immediately after frothing milk with a damp cloth to prevent milk residue from drying. Briefly activate the steam function to clear any internal blockages.
- Water Tank: Rinse the water tank regularly and refill with fresh water.
- Exterior: Wipe the exterior of the machine with a soft, damp cloth. Do not use abrasive cleaners or scouring pads.

Figure 12: The removable drip tray simplifies cleaning.
5.2 Descaling
Regular descaling is essential to maintain machine performance and extend its lifespan. The frequency depends on water hardness and usage. Refer to the full product manual for detailed descaling instructions and recommended descaling solutions.
6. Troubleshooting
If you encounter issues with your KEENSTAR Espresso Machine, refer to the table below for common problems and solutions:
| Problem | Possible Cause | Solution |
|---|---|---|
| No coffee dispenses. | No water in tank; tank not properly seated; machine not primed; coffee too fine/tamped too hard; portafilter not locked. | Fill water tank; ensure tank is seated; prime the machine; use medium-ground coffee and tamp correctly; lock portafilter fully. |
| Coffee brews too slowly or drips. | Coffee grounds too fine; too much coffee; machine needs descaling. | Use coarser grind; reduce coffee amount; descale the machine. |
| Coffee brews too quickly. | Coffee grounds too coarse; not enough coffee; tamping too light. | Use finer grind; increase coffee amount; tamp more firmly. |
| Steam wand not producing steam. | Steam button not pressed for preheating; steam wand clogged. | Press "Steam" button and wait for preheating; clean steam wand thoroughly. |
| Machine leaks water. | Water tank not properly seated; drip tray full; portafilter not locked correctly. | Ensure water tank is secure; empty drip tray; lock portafilter firmly. |
If the problem persists after attempting these solutions, please contact KEENSTAR customer support.
7. Warranty and Support
KEENSTAR offers the following support for your espresso machine:
- 30-Day Money-Back Guarantee: If you are not satisfied with your purchase, you may return it within 30 days for a full refund.
- 1-Year Free Replacement: The product is eligible for a free replacement within 1 year from the date of purchase for manufacturing defects.
- Lifetime After-Customer Service: KEENSTAR provides lifetime customer service to assist with any questions or issues you may encounter.
For warranty claims or technical assistance, please refer to the contact information provided with your product packaging or visit the official KEENSTAR website.