
Bucktool SSA16GV
BUCKTOOL 16-Inch Scroll Saw (Model SSA16GV) User Manual
Model: SSA16GV | Brand: Bucktool
1. Introduction
This manual provides essential information for the safe operation, maintenance, and troubleshooting of your BUCKTOOL 16-Inch Scroll Saw, Model SSA16GV. Please read and understand all instructions before operating the tool to ensure safety and optimal performance.

Image: The BUCKTOOL 16-Inch Scroll Saw, Model SSA16GV, ready for use in a woodworking environment.
1.1 Product Overview Video
Video: An overview of Bucktool power tools, showcasing general features and quality. This video provides a broader look at the brand's offerings.
2. Safety Instructions
Always follow basic safety precautions to reduce the risk of fire, electric shock, and personal injury when using power tools.
2.1 General Safety Rules
- Read the Manual: Familiarize yourself with the tool's controls and operation.
- Wear Eye Protection: Always wear safety glasses or goggles.
- Secure Workpiece: Ensure the material being cut is firmly held.
- Keep Work Area Clean: Cluttered areas invite accidents.
- Avoid Dangerous Environment: Do not use power tools in damp or wet locations, or expose them to rain.
- Keep Children Away: All visitors should be kept a safe distance from the work area.
- Use Proper Extension Cord: Ensure the cord is in good condition and suitable for outdoor use if applicable.
- Do Not Force Tool: It will do the job better and safer at the rate for which it was designed.
- Maintain Tools With Care: Keep tools sharp and clean for best and safest performance.
- Disconnect Tools: Unplug tools before servicing, changing accessories, or when not in use.
2.2 Specific Scroll Saw Safety
- Ensure the blade is correctly installed and tensioned before starting.
- Keep hands clear of the blade path at all times.
- Do not wear loose clothing or jewelry that could get caught in moving parts.
- Always use the dust blower to maintain a clear line of sight.
- Never leave the scroll saw running unattended.
3. Product Overview & Components
The BUCKTOOL 16-Inch Scroll Saw is designed for precision woodworking. Familiarize yourself with its main components.

Image: Detailed diagram illustrating the various components of the scroll saw, including the power switch, control knob, work table, and dust hood.
3.1 Key Components
- Power Switch: On/Off control for the saw.
- Variable Speed Control Knob: Adjusts blade speed from 360 to 1550 RPM.
- Blade Tension Knob: Adjusts tension for the scroll saw blade.
- Work Table: Large 19-11/16" x 13-3/8" surface for supporting workpieces.
- Sawdust Blower: Keeps the cutting line clear of debris.
- Magnetic Dust Hood: Collects sawdust for a cleaner work area.
- External Dust Hose Fitting: Allows connection to an external dust collection system.
- Adjustable Tilting Arm: Pivots 30° left and 45° right for angled cuts.
- Tool Box: Integrated storage for accessories.
- Pinless Blade Clamps: For quick and easy blade changes.
4. Setup
4.1 Unpacking and Placement
Carefully remove the scroll saw from its packaging. Place the saw on a stable, level workbench. For optimal stability and to minimize vibration, it is recommended to fasten the saw to the workbench using the bolt holes provided in the base.
4.2 Blade Installation
The BUCKTOOL scroll saw uses pinless blades for versatile cutting. Follow these steps to install a blade:
- Ensure the saw is unplugged from the power source.
- Lift the upper arm to allow "top-down" blade insertion.
- Insert the blade into the lower blade clamp, ensuring it is securely seated.
- Lower the upper arm using the side pull ring.
- Insert the top of the blade into the upper blade clamp.
- Use the rapid-tension lever and tool-less blade clamps to secure the blade firmly.
- Adjust the blade tension knob until the blade is taut but not overly stressed. A properly tensioned blade will produce a clear "ping" sound when plucked.
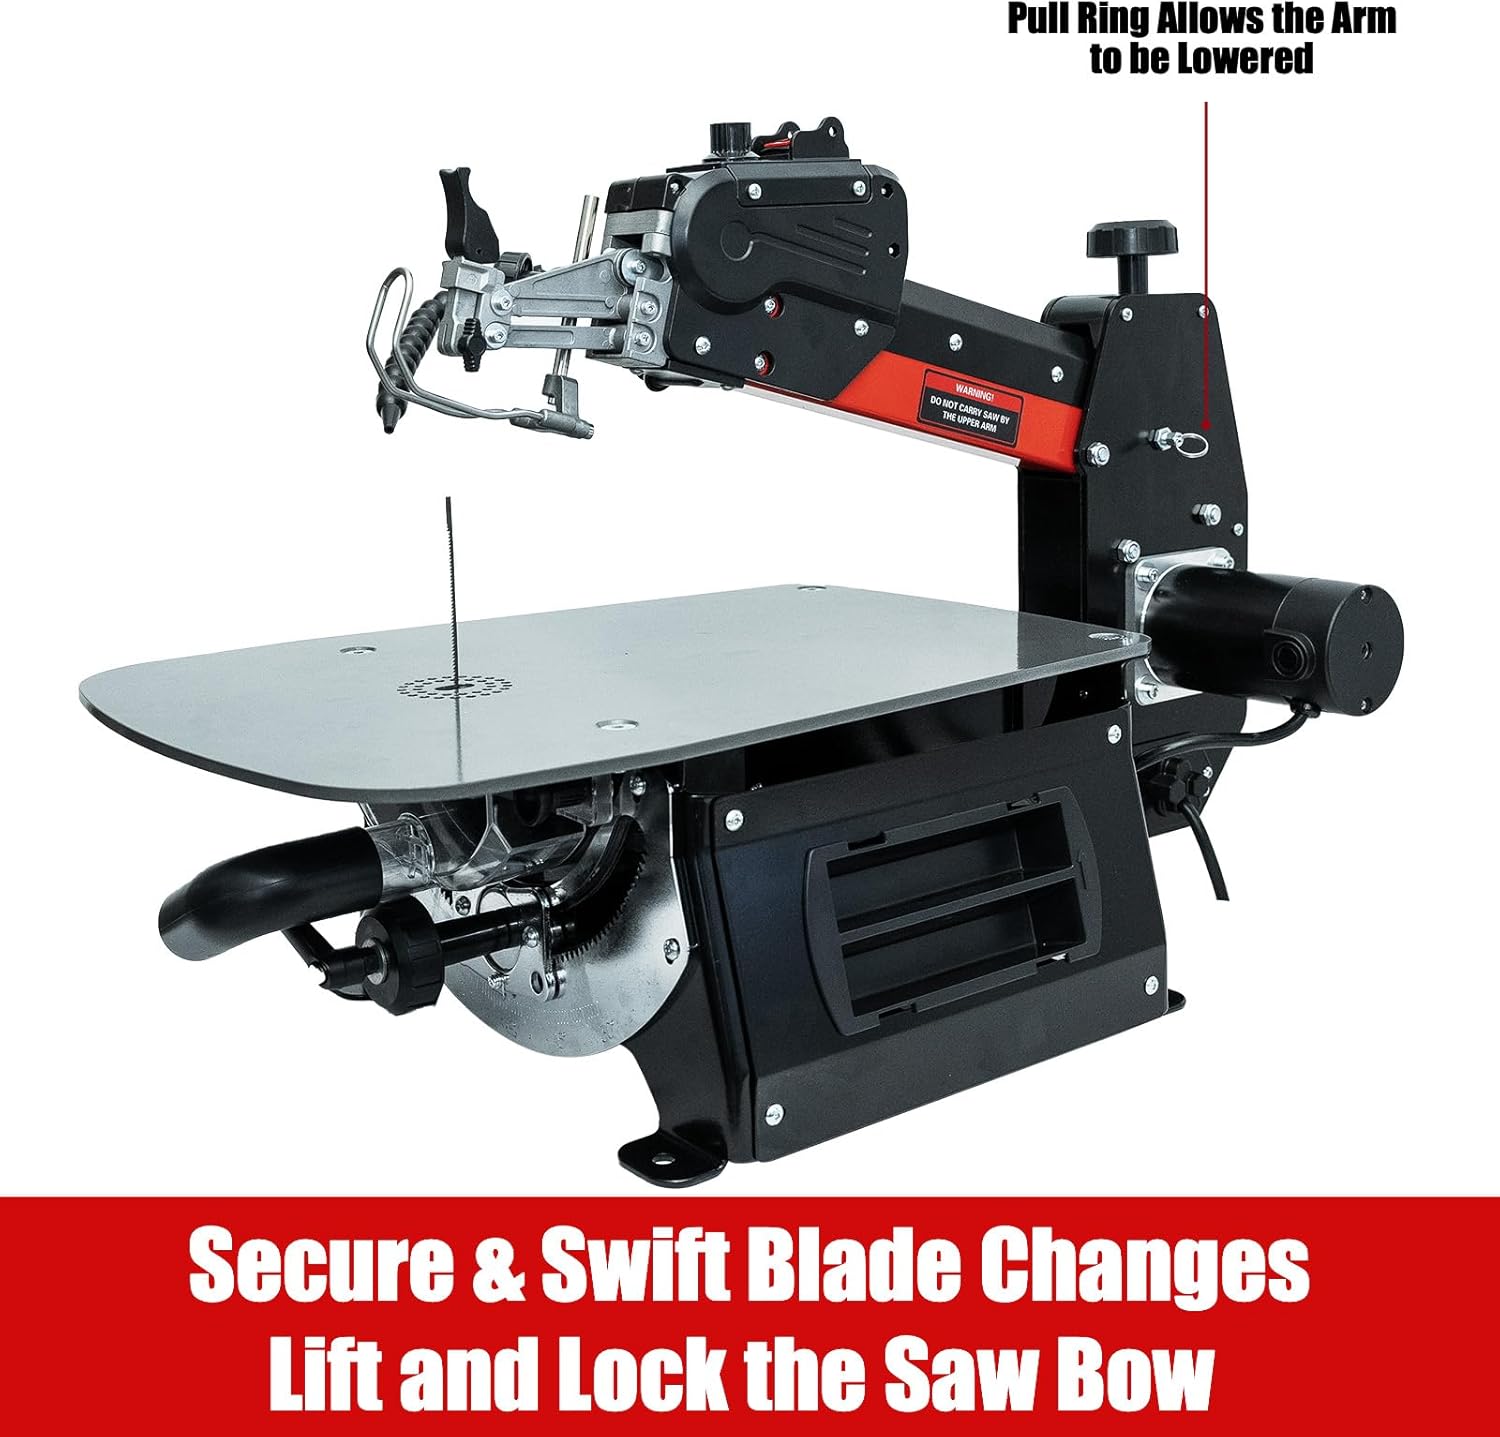
Image: The scroll saw's upper arm lifted, demonstrating the mechanism for secure and swift blade changes.
4.3 Dust Collection Setup
The saw features an integrated magnetic dust hood and an adjustable sawdust blower. For enhanced dust management, connect an external dust hose to the fitting located on the saw.

Image: A close-up view of the magnetic dust hood, designed to assist in keeping the work area clean.
5. Operation
Before operating, ensure all safety precautions are followed and the workpiece is properly secured.
5.1 Powering On/Off and Variable Speed Control
Plug the scroll saw into a suitable power outlet. Use the power switch to turn the saw on or off. The variable speed control knob allows you to adjust the blade speed from 360 to 1550 RPM, providing flexibility for different materials and cutting tasks.

Image: A hand adjusting the variable speed control knob, which allows for speed adjustments from 360 to 1550 RPM, ensuring safe operation with the switch lock.
5.2 Making Cuts
- General Cutting: Guide the workpiece smoothly into the blade. Do not force the material; let the blade do the work.
- Angled Cuts: The innovative rotating saw arm pivots 30° left and 45° right. This allows for precise angled cuts and complex bevels without needing to tilt the work table. Adjust the arm to the desired angle before starting the cut.
- Inside Cutouts: For internal cuts, drill a pilot hole in the workpiece. Disconnect power, release blade tension, and detach the blade from the upper clamp. Thread the blade through the pilot hole, reattach to the upper clamp, and re-tension. Perform the cut, then reverse the process to remove the blade.

Image: The scroll saw demonstrating its dual-side pivoting capability (30° Left / 45° Right) for enhanced control and ease in making angled cuts.

Image: A close-up showing the scroll saw blade cutting a wooden workpiece, highlighting the 5-inch saw blade length and 2-inch cutting depth.

Image: A user carefully guiding a piece of wood through the scroll saw, demonstrating precise and meticulous cutting.
6. Maintenance
Regular maintenance ensures the longevity and safe operation of your scroll saw.
6.1 Cleaning
- Always unplug the saw before cleaning.
- Use a brush or compressed air to remove sawdust and debris from the work table, blade area, and motor vents.
- Wipe down exterior surfaces with a clean, damp cloth. Avoid using harsh chemicals.
- Regularly empty the dust collection system or dust bag if connected.
6.2 Blade Replacement
Replace blades when they become dull or break. Refer to section 4.2 for detailed blade installation instructions. Always use appropriate pinless blades (e.g., 18 TPI and 15 TPI blades are included) for your cutting needs.
6.3 General Care
- Store the scroll saw in a dry, clean environment when not in use.
- Periodically check all fasteners and tighten if necessary.
- Inspect the power cord for any damage.
7. Troubleshooting
This section addresses common issues you might encounter with your scroll saw.
| Problem | Possible Cause | Solution |
|---|---|---|
| Saw does not start | No power supply; faulty switch | Check power connection; ensure switch is ON; contact support if switch is faulty. |
| Excessive vibration | Saw not securely mounted; loose components; unbalanced blade | Securely mount the saw to a workbench; check and tighten all fasteners; ensure blade is correctly installed and not bent. |
| Blade breaks frequently | Incorrect blade tension; forcing workpiece; wrong blade type for material | Adjust blade tension (not too tight, not too loose); allow blade to cut at its own pace; use appropriate blade TPI for material thickness. |
| Inaccurate cuts | Dull blade; incorrect blade tension; workpiece not stable | Replace dull blade; adjust blade tension; ensure workpiece is firmly supported. |
| Dust accumulation on cutting line | Sawdust blower blocked or off; dust collection system not connected/working | Clear sawdust blower nozzle; ensure blower is active; connect and verify external dust collection system. |
8. Specifications
Technical data for the BUCKTOOL 16-Inch Scroll Saw, Model SSA16GV.
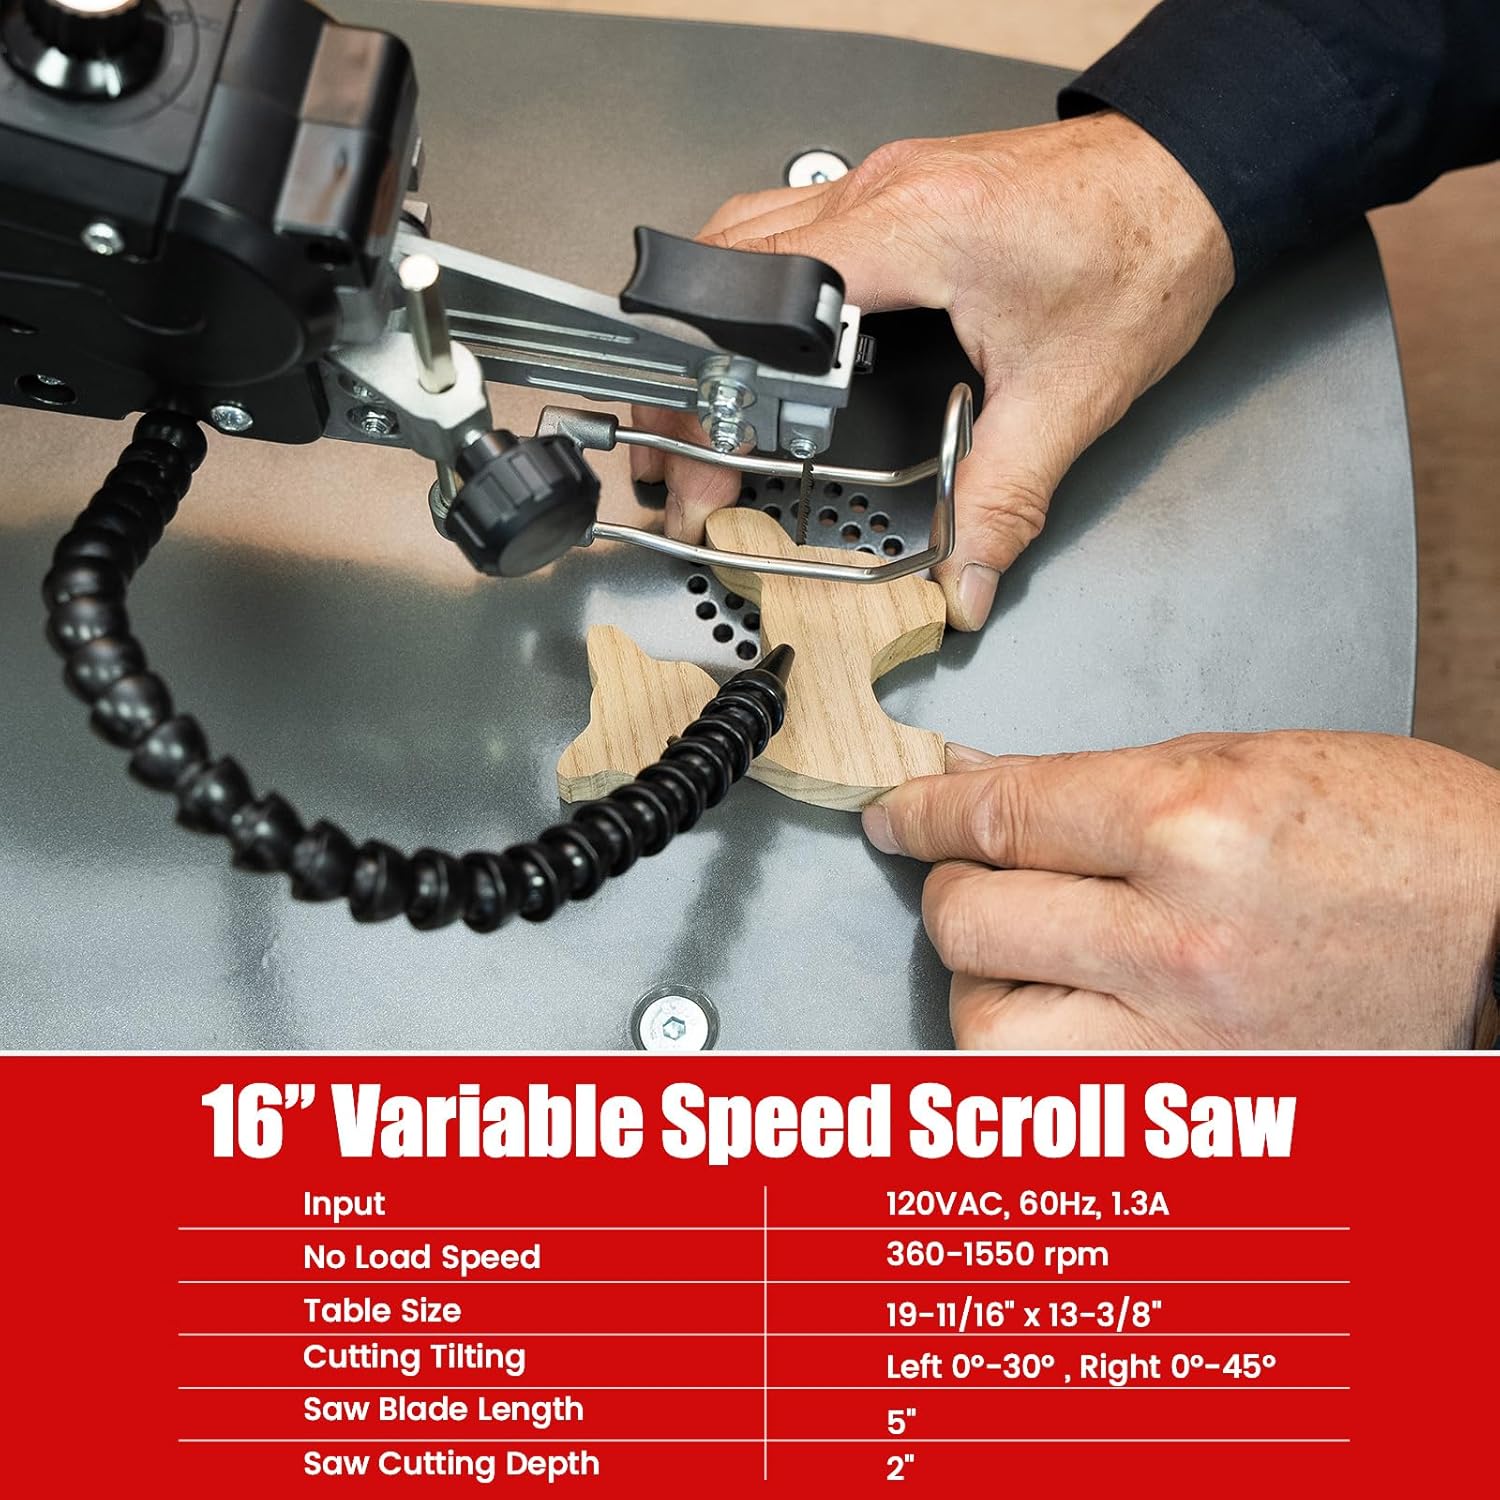
Image: A detailed table outlining the key specifications of the 16-inch variable speed scroll saw, including input voltage, no-load speed, table size, cutting tilt, blade length, and cutting depth.
| Feature | Detail |
|---|---|
| Model Number | SSA16GV |
| Power Source | Corded Electric |
| Motor | 1.3 Amp |
| Wattage | 156 watts |
| Variable Speed Range | 360 - 1550 RPM |
| Table Size | 19-11/16" x 13-3/8" |
| Cutting Tilting (Saw Arm) | Left 0° - 30°, Right 0° - 45° |
| Saw Blade Length | 5 inches |
| Saw Cutting Depth | 2 inches |
| Blade Material | High Carbon Steel |
| Included Components | Bare Tool, 1x18 TPI & 1x15 TPI Pinless Blades |
| Item Dimensions (L x W x H) | 27.95" x 13.38" x 16.54" (approximate, based on image) |

Image: Diagram illustrating the product dimensions (Length, Width, Height) of the BUCKTOOL 16-Inch Scroll Saw.
9. Warranty
The BUCKTOOL 16-Inch Scroll Saw is backed by a 2-year manufacturer’s warranty. This warranty covers defects in materials and workmanship under normal use. Please retain your proof of purchase for warranty claims.
For detailed warranty terms and conditions, please refer to the documentation included with your product or contact customer support.
10. Customer Support
Should you have any inquiries, issues, or require assistance with your BUCKTOOL 16-Inch Scroll Saw, please do not hesitate to reach out to our customer support team. We are committed to delivering the highest standard of customer support.
Contact information can typically be found on the manufacturer's website or on the product packaging.
Ask a question about this manual
Ask about setup, troubleshooting, compatibility, parts, safety, or missing instructions. Manuals+ will review the question and use this page’s manual context to help answer it.