1. Introduction
This manual provides essential information for the safe and effective operation, maintenance, and troubleshooting of your ARCCAPTAIN XK-LY800H Auto Darkening Welding Helmet. Please read this manual thoroughly before using the helmet to ensure proper function and safety.
The ARCCAPTAIN XK-LY800H is designed for various welding and cutting applications, including STICK, MIG, TIG, and plasma cutting. It features a large viewing area, true color technology, 4 arc sensors, and an integrated LED light for enhanced visibility.
2. Safety Precautions
WARNING: Failure to read, understand, and follow all instructions can result in serious injury, electric shock, or death. Always wear appropriate personal protective equipment (PPE) when welding or performing related tasks.
- Always inspect the helmet before each use for any damage, cracks, or loose parts. Do not use a damaged helmet.
- Ensure the auto-darkening filter (ADF) is clean and free from scratches. Replace scratched or damaged lenses immediately.
- This helmet is designed to protect against harmful UV/IR radiation, sparks, and spatter during welding. It is not suitable for laser welding or overhead welding applications without additional protection.
- Do not immerse the helmet in water or any other liquid.
- Keep the helmet away from heat sources and open flames.
- Ensure proper ventilation in your work area to avoid inhaling welding fumes.
- The helmet's auto-darkening function relies on battery power and solar charging. Ensure the battery is adequately charged before use.
- Do not modify the helmet or its components. Use only genuine ARCCAPTAIN replacement parts.
3. Product Components
The ARCCAPTAIN XK-LY800H welding helmet includes the following components:
- Welding Helmet (1)
- Auto-Darkening Filter (ADF) with solar panels
- Adjustable Headgear
- LED Welding Light (USB-powered)
- Replacement Outer Lenses (3)
- CR2450 Lithium Battery (1, pre-installed or included)
- User Manual (1)

Image: Welding Helmet with included accessories, including replacement lenses and user manual.
4. Setup and Adjustment
4.1 Headgear Adjustment
Proper adjustment of the headgear is crucial for comfort and safety. The headgear allows for adjustments in circumference, angle, and distance from the eyes to the lens.
- Head Size Adjustment: Rotate the knob at the back of the headgear to adjust the circumference until the helmet fits snugly and securely on your head.
- Distance Adjustment (Eye-to-Lens): Use the side knobs to adjust the distance between your eyes and the auto-darkening filter. Ensure a comfortable viewing distance without obstruction.
- Angle Adjustment: Adjust the angle of the helmet's tilt to ensure the viewing area is optimally positioned for your work.
- Comfort Sponge Cushion: Ensure the comfort sponge cushion is properly positioned for maximum comfort during extended use.

Image: Detailed view of the adjustable headgear, highlighting adjustment points for head size, eye-to-lens distance, and helmet angle.
4.2 Installing the LED Welding Light
The LED welding light comes uninstalled. Attach it to the designated slot on top of the helmet. It is USB-powered and offers two brightness levels.
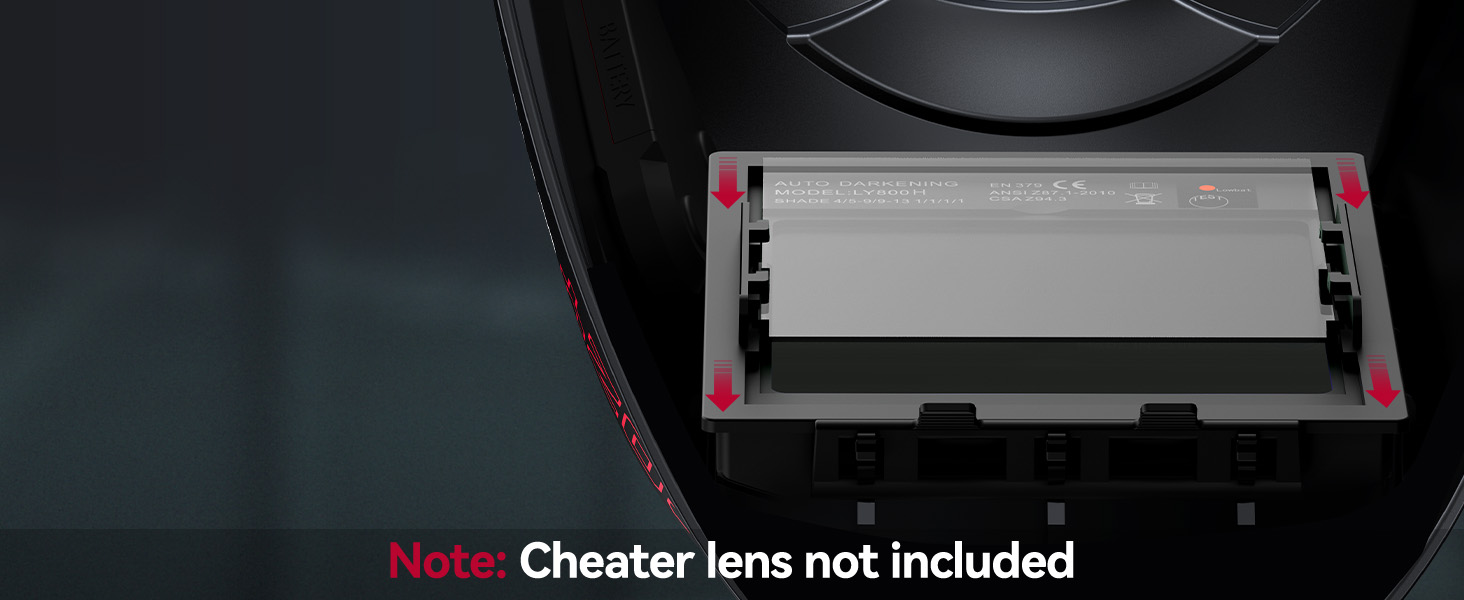
Image: Illustration of the USB charging port and the LED light attachment mechanism on the helmet.
5. Operating Instructions
5.1 Auto-Darkening Filter (ADF)
The helmet features a 1/1/1/1 optical clarity true color ADF with 4 arc sensors for rapid darkening. The filter automatically switches from light to dark in 1/25000 seconds when an arc is detected.

Image: The auto-darkening filter, highlighting the four arc sensors and solar panels.
5.2 Control Settings
The helmet has external controls for adjusting shade, sensitivity, and delay.
- Shade Control: Adjust the dark state level according to your welding process.
- Grind Mode: DIN 4
- Cut Mode: DIN 5-9
- Weld Mode: DIN 9-13
- Sensitivity Control: Adjust the sensitivity to detect the welding arc. Higher sensitivity is suitable for low amperage TIG welding or when the arc is partially obstructed.
- Delay Control: Adjust the time it takes for the lens to return from dark to light state (0.1 to 0.8 seconds). A longer delay is useful for high amperage welding to prevent eye fatigue from afterglow.

Image: Close-up of the helmet's external control knobs for delay, shade, and sensitivity settings.
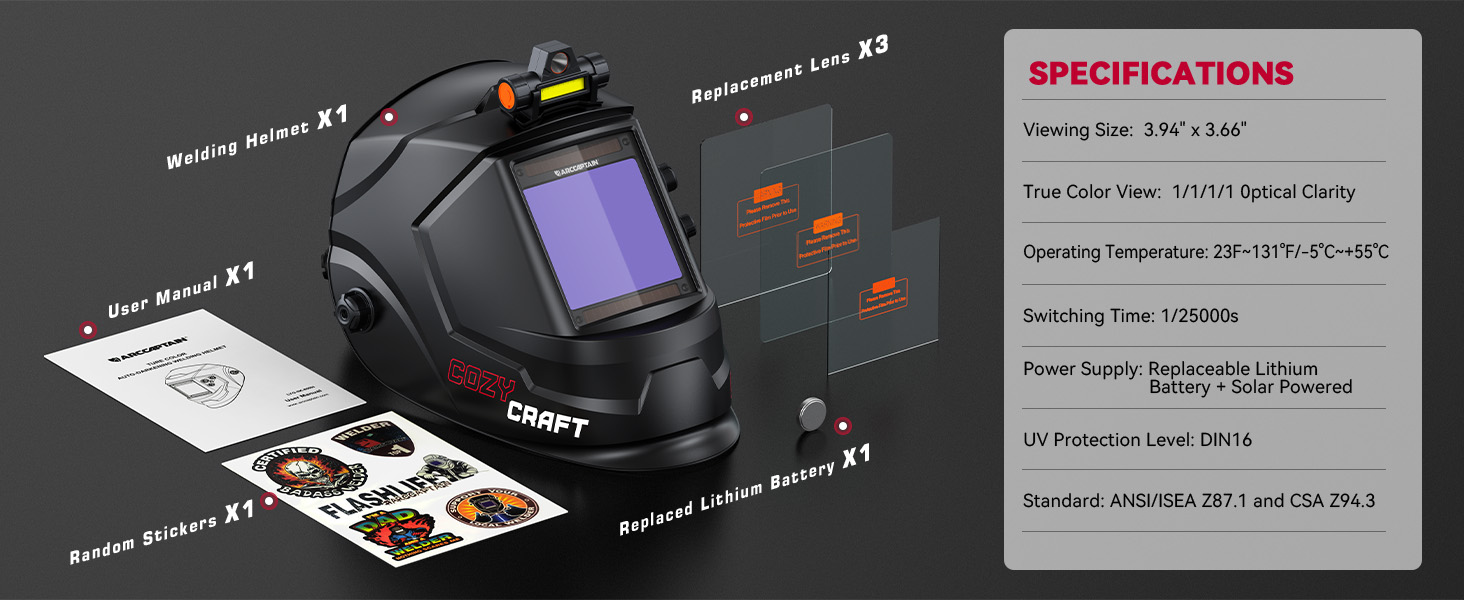
Image: Visual guide for selecting appropriate shade levels for grinding, cutting, and welding modes.
5.3 LED Welding Light Operation
The integrated LED light provides illumination in dark work environments. It has two brightness levels. Press the button on the light to cycle through brightness settings (low, high, off).
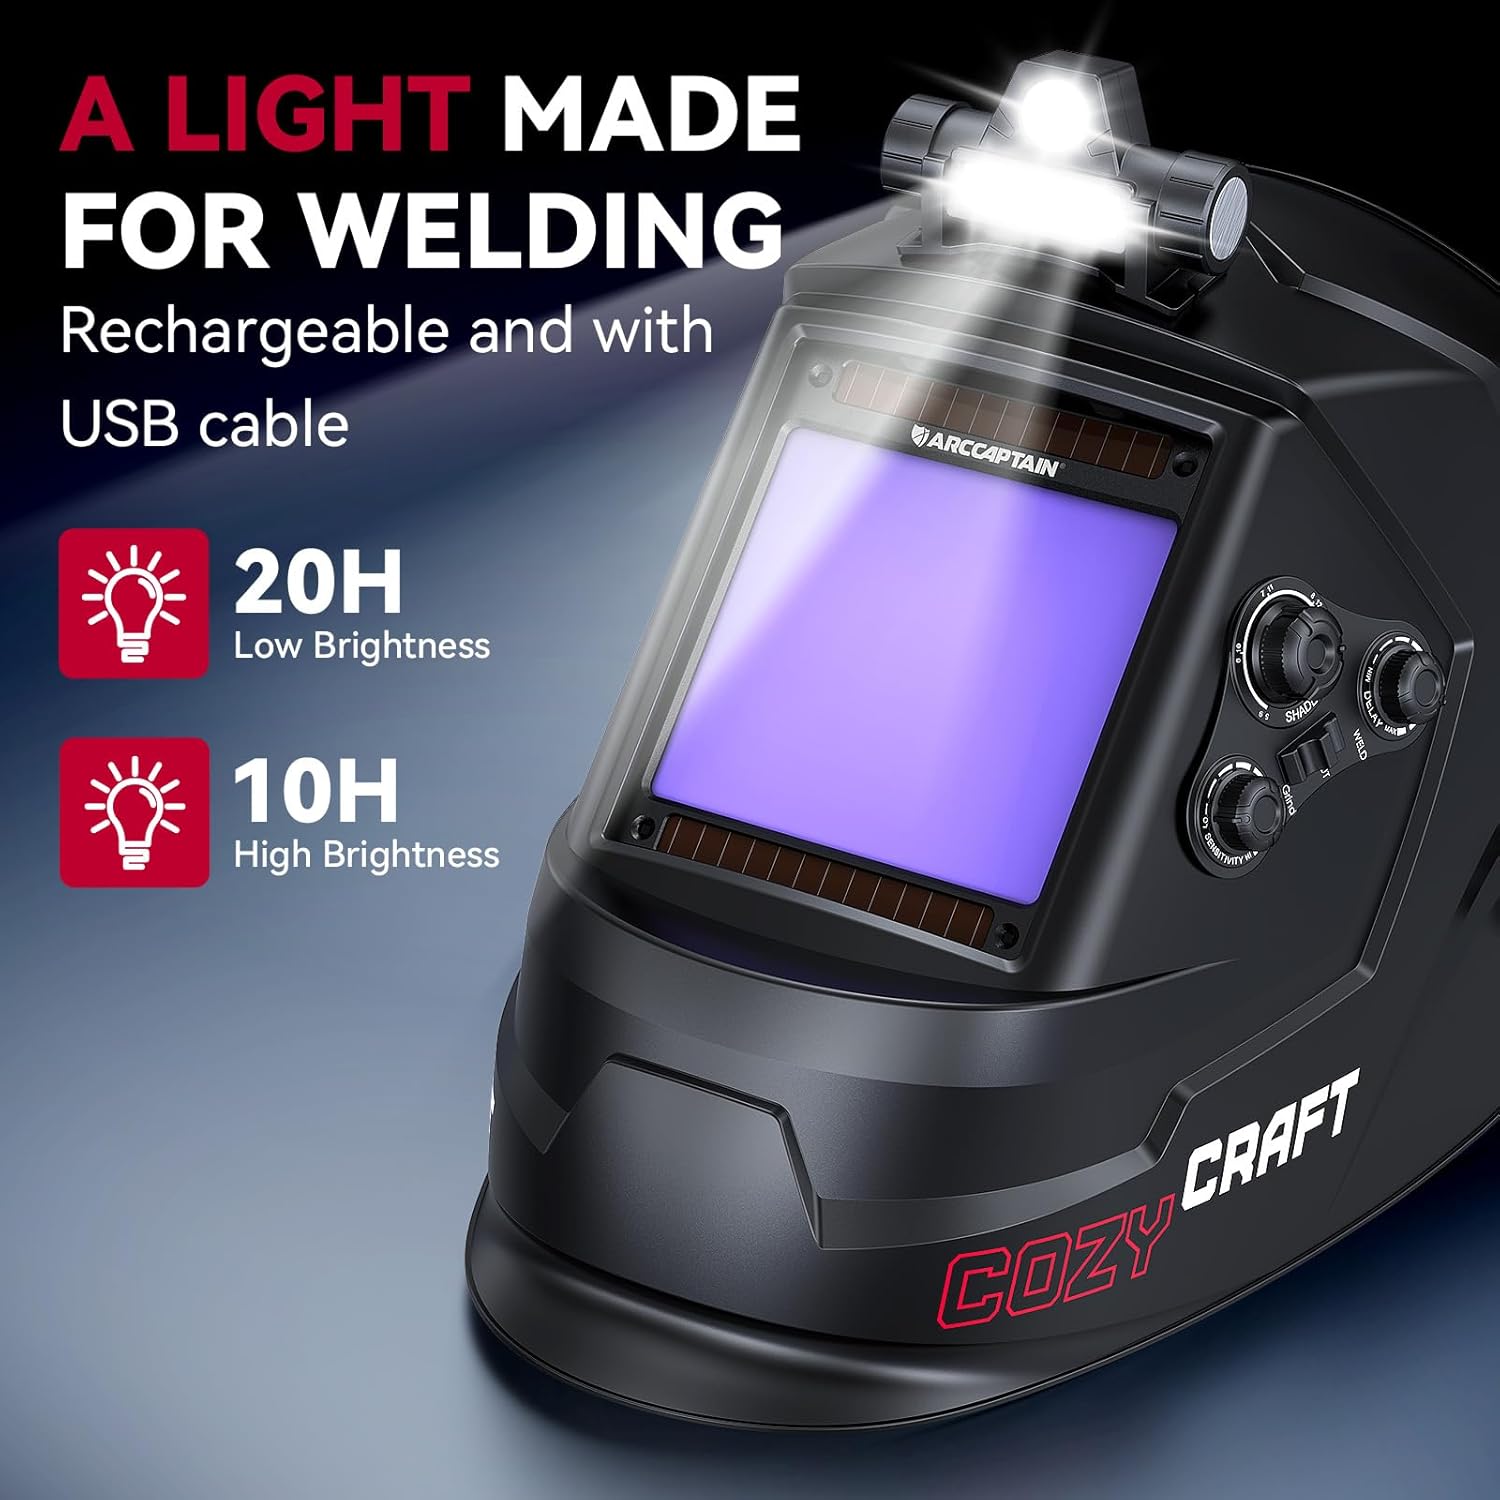
Image: The welding helmet with its LED light active, demonstrating its utility in low-light conditions.
6. Maintenance
6.1 Cleaning the Helmet
- Clean the helmet shell with a mild soap and water solution. Avoid harsh solvents.
- Wipe the auto-darkening filter and protective lenses with a soft, clean cloth. Do not use abrasive materials or cleaners that could scratch the surface.
- Regularly clean the solar panels on the ADF to ensure efficient charging.
6.2 Battery Replacement
The auto-darkening filter is powered by a CR2450 lithium battery, supplemented by solar panels. Replace the battery when the low battery indicator appears or if the auto-darkening function becomes unreliable.
- Locate the battery compartment on the back of the auto-darkening filter.
- Carefully open the compartment and remove the old CR2450 battery.
- Insert a new CR2450 battery, ensuring correct polarity.
- Close the battery compartment securely.

Image: Location of the replaceable CR2450 battery in the auto-darkening filter.
7. Troubleshooting
| Problem | Possible Cause | Solution |
|---|---|---|
| Lens does not darken when welding. |
|
|
| Lens remains dark after welding. |
|
|
| Poor visibility through the lens. |
|
|
| LED light not working. |
|
|
8. Specifications
| Model Name | XK-LY800H |
| Viewing Size | 3.94" x 3.66" |
| Optical Clarity | 1/1/1/1 True Color |
| Arc Sensors | 4 |
| Light State Shade | DIN 4 |
| Dark State Shade | DIN 5-9 / DIN 9-13 (Adjustable) |
| Switching Time | 1/25000s |
| Delay Control | Adjustable (0.1 - 0.8s) |
| Sensitivity Control | Adjustable |
| UV/IR Protection | DIN 16 (Permanent) |
| Power Supply | Solar Powered + 1 x CR2450 Lithium Battery (replaceable) |
| Operating Temperature | -5°C to +55°C (23°F to 131°F) |
| Material | PP (Polypropylene) |
| Item Weight | 230 g (0.51 lbs) |
| Certifications | ANSI Z87.1, CSA Z94.3, DIN EN 379 |
9. Warranty Information
The ARCCAPTAIN XK-LY800H welding helmet comes with a 180-day warranty from the date of purchase. This warranty covers manufacturing defects and material flaws under normal use. It does not cover damage caused by misuse, unauthorized modifications, accidents, or improper maintenance.
For warranty claims or service, please contact ARCCAPTAIN customer support with your proof of purchase.
10. Customer Support
For technical assistance, troubleshooting, or general inquiries regarding your ARCCAPTAIN welding helmet, please visit the official ARCCAPTAIN website or contact their customer service department.
Website: www.arccaptain.com (Please refer to actual product documentation for correct contact information)
11. Instructional Videos
Video 1: Product Overview (0:30)
Description: A brief overview of the ARCCAPTAIN welding helmet's key features and design.
Video 2: Features Demonstration (0:51)
Description: This video demonstrates various features of the welding helmet, including auto-darkening and controls.


