SEAFLO 12V 2.2 GPM 60 PSI 35 Series DC Diaphragm Pump User Manual
Model: SFDP1-022-060-35
1. Introduction
This manual provides essential information for the safe and efficient installation, operation, and maintenance of your SEAFLO 35 Series DC Diaphragm Pump. Please read these instructions thoroughly before installation and use to ensure optimal performance and longevity of the pump.
The SEAFLO 35-Series pump is a continuous-duty, on-demand positive displacement pump designed for moderate water flow and high-pressure applications. It is capable of self-priming and can run dry without damage, making it suitable for various water transfer needs, including marine and RV applications.
2. Safety Instructions
WARNING: Failure to follow these safety instructions could result in personal injury or property damage.
- Always disconnect power before servicing the pump.
- Ensure the power source matches the pump's voltage requirements (12V DC).
- Do not pump flammable liquids or use in explosive atmospheres.
- Protect the pump from freezing temperatures.
- Install a fuse or circuit breaker in the positive (+) lead as close to the power source as possible. Refer to specifications for appropriate fuse size.
- Ensure proper ventilation around the pump.
- Use appropriate thread sealant on all connections to prevent leaks.
3. Package Contents
Verify that all items are present and undamaged:
- 1 x SEAFLO 35 Series DC Diaphragm Pump
- 4 x Quick-Attach Fittings
- 1 x Inlet Strainer/Filter

Image 1: The SEAFLO 35 Series DC Diaphragm Pump shown with its quick-attach fittings and an inlet filter. The pump features an orange housing and a white motor casing.
4. Specifications
| Feature | Value |
|---|---|
| Model Number | SFDP1-022-060-35 |
| Voltage | 12V DC |
| Flow Rate | 2.2 Gallons Per Minute (GPM) |
| Pressure Setting | 60 PSI |
| Self-Priming | Up to 6 vertical feet |
| Run Dry Safe | Yes |
| Leads | 18AWG, 4.5" long |
| Item Weight | 5.16 pounds |
| Dimensions (Package) | 10 x 6 x 5 inches |
5. Installation
5.1 Mounting
- Mount the pump in a dry, well-ventilated area.
- The pump can be mounted in any position. However, mounting with the pump head down is recommended to prevent potential leaks from entering the motor.
- Use the industry-standard mounting pattern to secure the pump firmly to a solid surface.
- Ensure there is sufficient space around the pump for air circulation and future servicing.
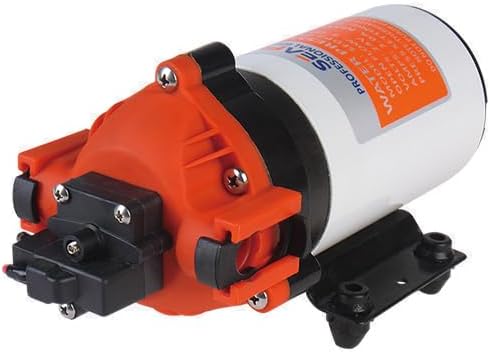
Image 2: Side view of the SEAFLO 35 Series pump, showing the mounting feet and the motor housing. The pump is designed for stable installation.
5.2 Plumbing Connections
- Use flexible hose on both inlet and outlet to minimize vibration and noise.
- Install the provided inlet strainer/filter on the inlet side of the pump to protect it from debris.
- Use the quick-attach fittings for easy and secure connections. Ensure all connections are tight to prevent air leaks, which can affect priming and performance.
- The pump is designed to serve 1 or 2 3/8" (10 mm) outlets.
- Avoid kinks or sharp bends in the hoses.

Image 3: Top-down view of the SEAFLO 35 Series pump, highlighting the inlet filter connected to the pump head and one of the quick-attach fittings. This view demonstrates the connection points.
5.3 Electrical Connections
- Connect the pump to a 12V DC power source.
- The pump has 18AWG, 4.5" long leads. Connect the red wire to the positive (+) terminal and the black wire to the negative (-) terminal of the power source.
- Install an appropriately sized fuse or circuit breaker (refer to pump specifications for recommended amperage) in the positive (+) lead, as close to the battery as possible.
- Ensure all electrical connections are clean, tight, and protected from moisture.
6. Operation
- Once installed, open a faucet or outlet to allow air to escape the system.
- Apply power to the pump. The pump will begin to run and self-prime.
- Allow the pump to run until a steady stream of water flows from the open outlet, indicating that all air has been purged from the system.
- Close the outlet. The pump's built-in pressure switch will automatically shut off the pump once the system pressure reaches 60 PSI.
- The pump will automatically restart when an outlet is opened and the system pressure drops.
7. Maintenance
7.1 General Maintenance
- Regularly inspect all plumbing connections for leaks and tighten as necessary.
- Check electrical connections for corrosion or looseness.
- Clean the inlet strainer/filter periodically to prevent clogging and maintain optimal flow. To clean, disconnect power, remove the filter housing, rinse the screen, and reassemble.
7.2 Winterization
To prevent damage from freezing, the pump and plumbing system must be properly winterized:
- Drain all water from the pump and plumbing system.
- Run non-toxic RV antifreeze through the system until it exits all faucets.
- Alternatively, remove the pump and store it in a warm, dry place.
8. Troubleshooting
| Problem | Possible Cause | Solution |
|---|---|---|
| Pump does not turn on | No power; Blown fuse/tripped breaker; Loose wiring; Faulty pressure switch | Check power supply; Replace fuse/reset breaker; Tighten connections; Contact support |
| Pump runs but no water flows | Air leak on inlet side; Inlet strainer clogged; Low water supply; Pump not primed | Check inlet connections for leaks; Clean strainer; Ensure adequate water supply; Open outlet to allow priming |
| Pump cycles on and off rapidly | Small leak in system; Restricted flow on outlet side; Accumulator tank (if installed) needs air charge | Check all plumbing for leaks; Ensure outlets are fully open; Check accumulator tank pressure |
| Low flow or pressure | Clogged inlet strainer; Kinked hose; Low voltage; Worn pump head | Clean strainer; Straighten hose; Check voltage at pump; Contact support for replacement parts |
9. Warranty and Support
SEAFLO products are manufactured to high-quality standards. For warranty information, technical support, or replacement parts, please contact SEAFLO customer service directly. Keep your purchase receipt as proof of purchase.
For further assistance, visit the official SEAFLO store or contact their customer support channels.

Image 4: The retail packaging for the SEAFLO 35 Series Automatic Demand Diaphragm Pump. The box highlights key features such as corrosion-resistant valves, self-priming, and quick-attach fittings.


