
1. Product Overview
The monTEK Heavy-Duty Single Monitor Arm is designed to provide a stable and flexible mounting solution for a wide range of monitors. Crafted from high-quality steel and aluminum, it features an upgraded gas spring mechanism for smooth, effortless adjustments and long-lasting performance. This monitor arm helps optimize your workspace by elevating your screen and offering versatile positioning options.
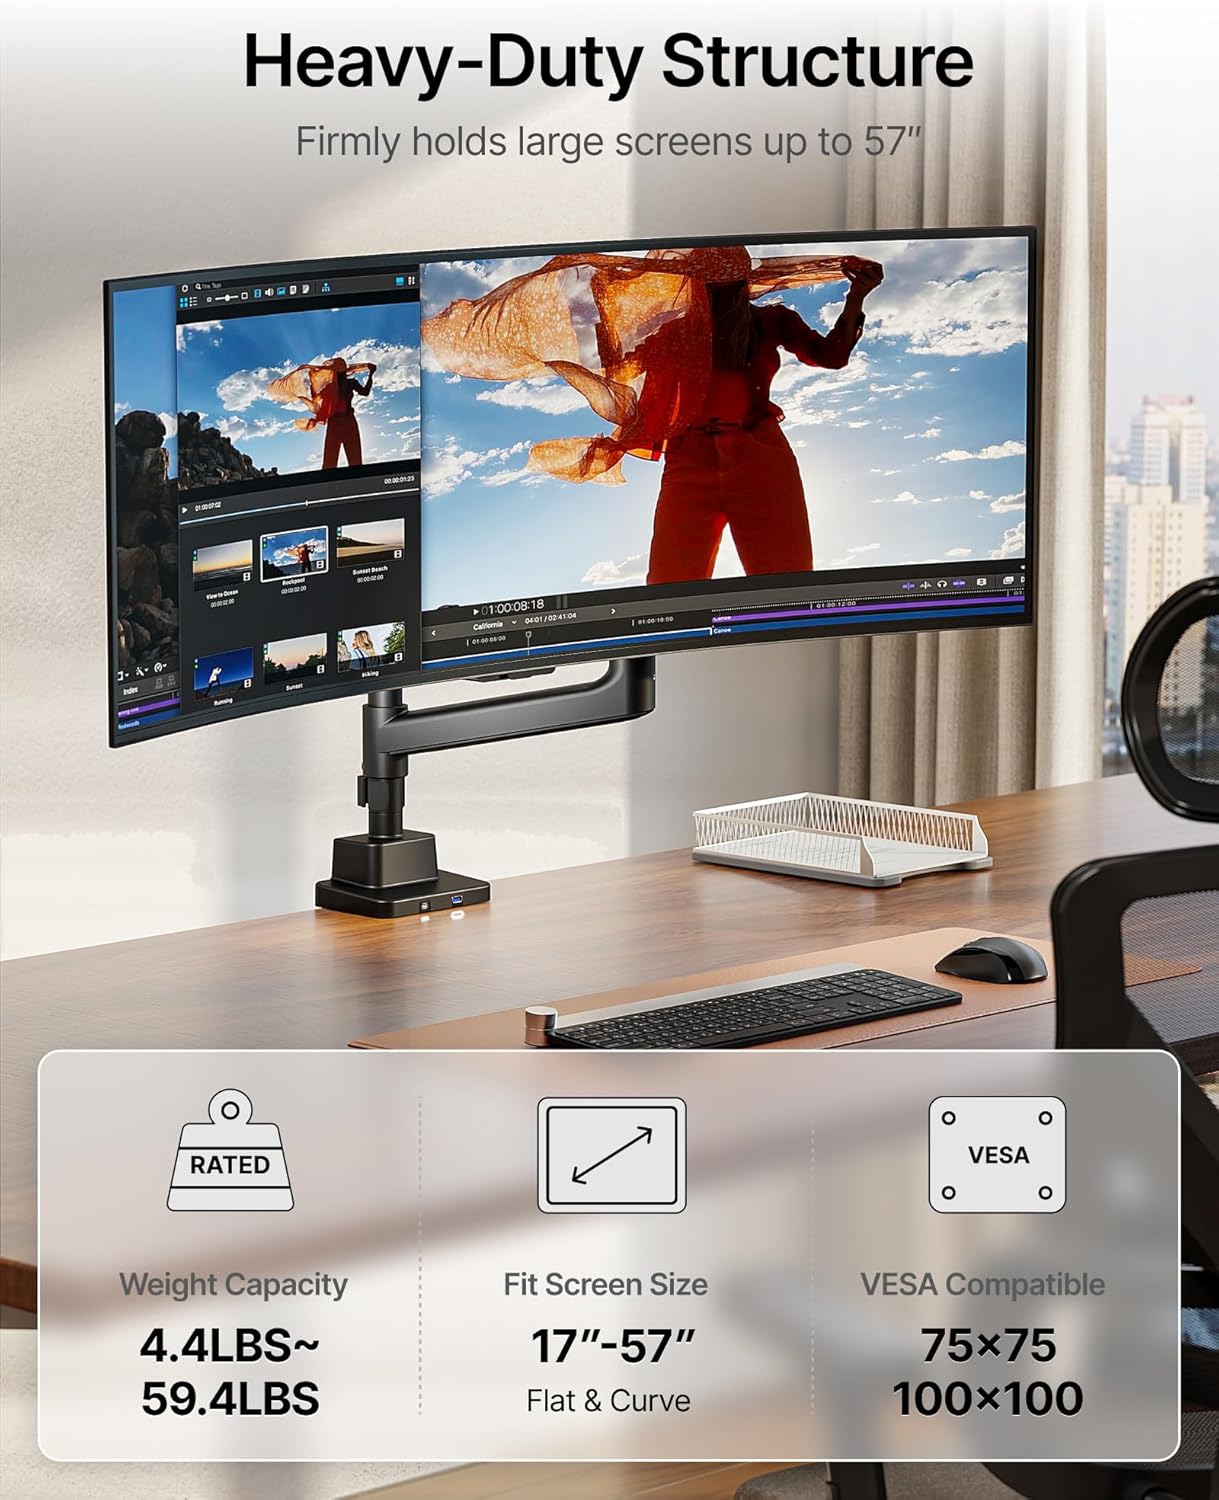
Image 1.1: The monTEK Heavy-Duty Single Monitor Arm securely holding a large ultrawide monitor, showcasing its robust design and space-saving benefits.
Key Features:
- Wide Compatibility: Supports 17" to 57" flat or curved monitors with VESA patterns from 75x75mm to 100x100mm.
- High Weight Capacity: Built with heavy-duty aluminum, it supports monitors weighing from 4.4 lbs up to 59.4 lbs.
- Ergonomic Flexibility: Offers -75° to +75° tilt, ±90° swivel, ±90° rotation, 15.3" pole height adjustment, up to 25.5" arm height range, and 22.2" extension for optimal viewing angles.
- Durable Construction: Crafted from high-quality steel and aluminum with an upgraded gas spring tested over 20,000 times.
- Integrated USB Ports: Features built-in USB-A 3.0 and USB-C ports for convenient device charging and fast data transfer (5Gbps).
- Easy Installation: Supports C-clamp and grommet mounting methods with a quick-release VESA plate.
2. What's in the Box
Please verify that all components are present and undamaged before proceeding with installation.
Video 2.1: An animated overview of the monitor arm components and initial assembly steps.
Components:
- Monitor Arm Assembly (Upper and Lower Arms)
- Desk Clamp Base
- Grommet Mount Components
- VESA Plate (Quick Release)
- USB-A 3.0 Cable
- USB-C Cable
- Cable Management Clips
- Allen Keys (various sizes)
- Mounting Screws and Washers (for VESA and desk attachment)
- Instruction Manual
3. Setup and Installation
Follow these steps carefully to ensure proper and secure installation of your monTEK monitor arm.
Video 3.1: A detailed installation guide for the Single Monitor Desk Mount with USB.
3.1 Choose Your Mounting Method
The monitor arm supports two installation methods: C-clamp and Grommet mounting. Select the method best suited for your desk.
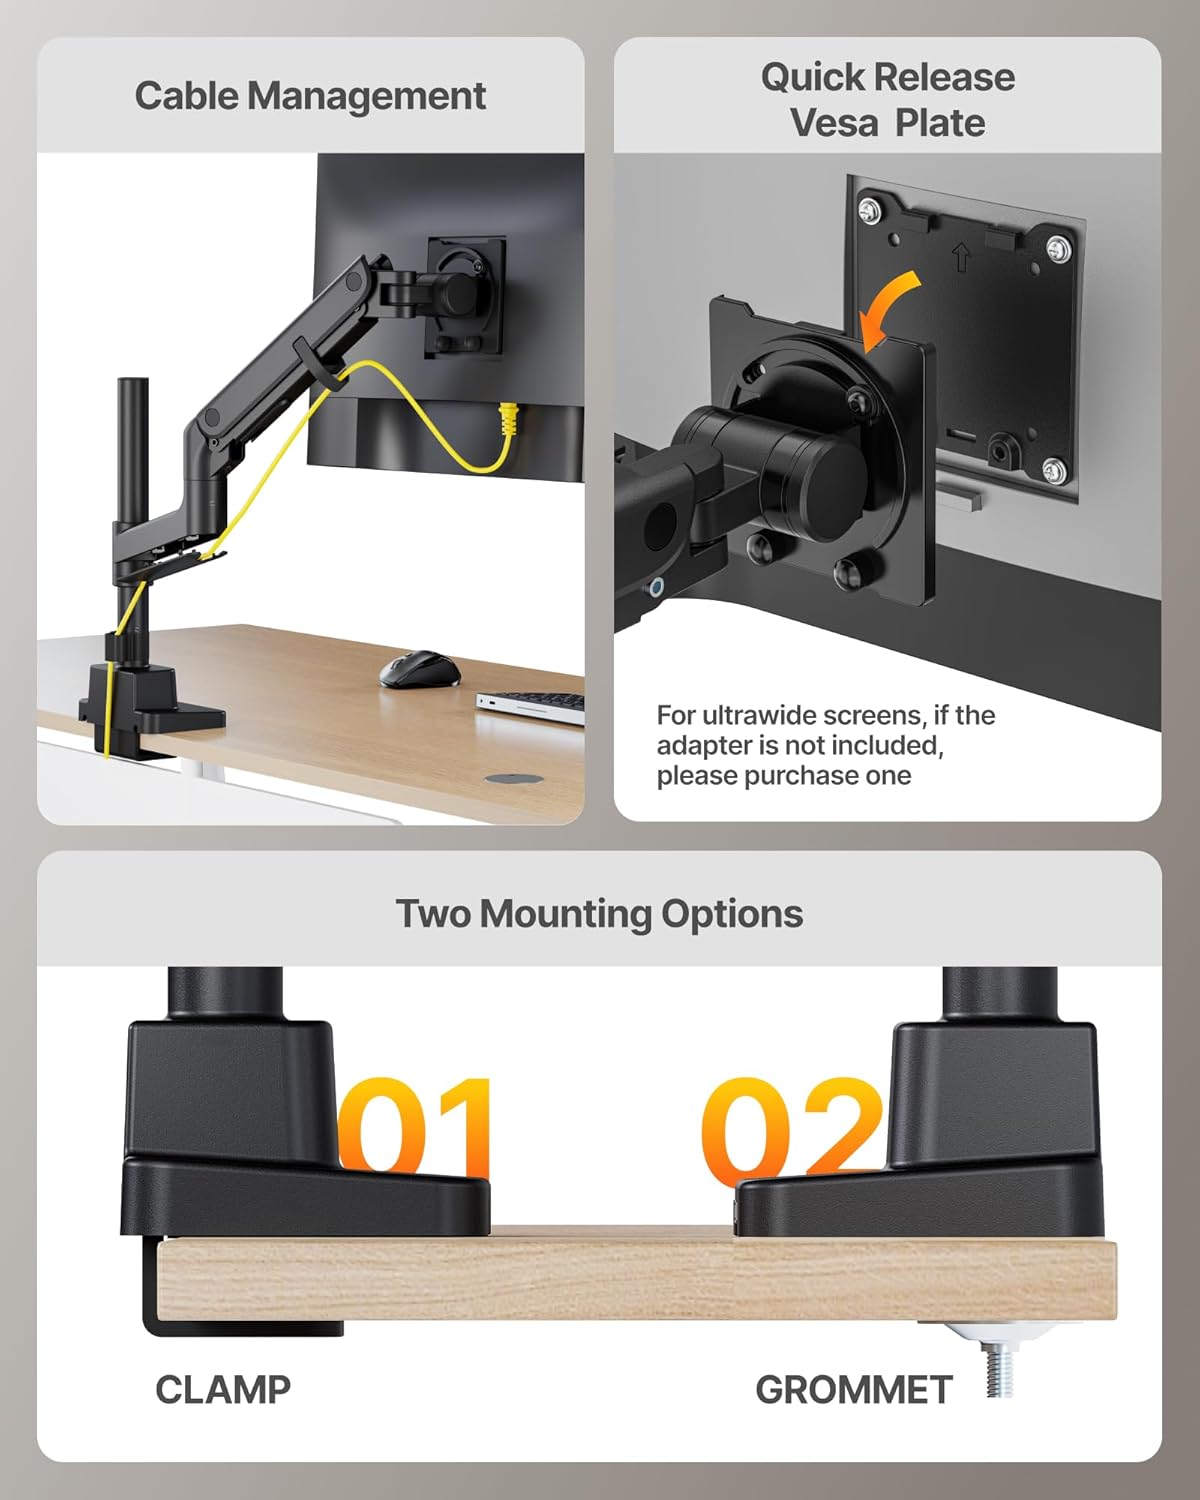
Image 3.1.1: Visual representation of the C-clamp and Grommet mounting options.
C-Clamp Mounting:
- Ensure your desk thickness is between 0.47" and 1.8" (12-45mm).
- Attach the C-clamp base to the edge of your desk and tighten the screw until secure.
Grommet Mounting:
- Ensure your desk thickness is between 0.47" and 2" (12-50mm).
- If your desk has an existing through-hole (Ø10-60mm), use it. Otherwise, drill a 10mm (Ø3/8") hole.
- Insert the grommet mount components through the hole and secure from underneath the desk.
3.2 Attach VESA Plate to Monitor
Before attaching the VESA plate, ensure your monitor has VESA holes (75x75mm or 100x100mm). If your monitor requires an adapter for non-standard VESA patterns or larger sizes (e.g., 300x300mm), please purchase one separately (monTEK VESA Extension Adapter ASIN: B0DFNCPP6SQ).
- Carefully lay your monitor face down on a soft, clean surface.
- Attach the quick-release VESA plate to the back of your monitor using the appropriate screws and washers provided. Ensure the arrow on the VESA plate points upwards.
- Tighten all screws securely.
3.3 Assemble Monitor Arm
- Insert the column into the secured desk base.
- Slide the lower arm onto the column. Adjust its height and secure it with the provided Allen key.
- Slide the upper arm onto the lower arm.
- Carefully slide the monitor (with attached VESA plate) onto the upper arm's VESA head until it clicks into place.
- Secure the monitor to the VESA head using the safety screw.
4. Operating and Adjustments
The monTEK monitor arm offers extensive flexibility to achieve your ideal viewing position.
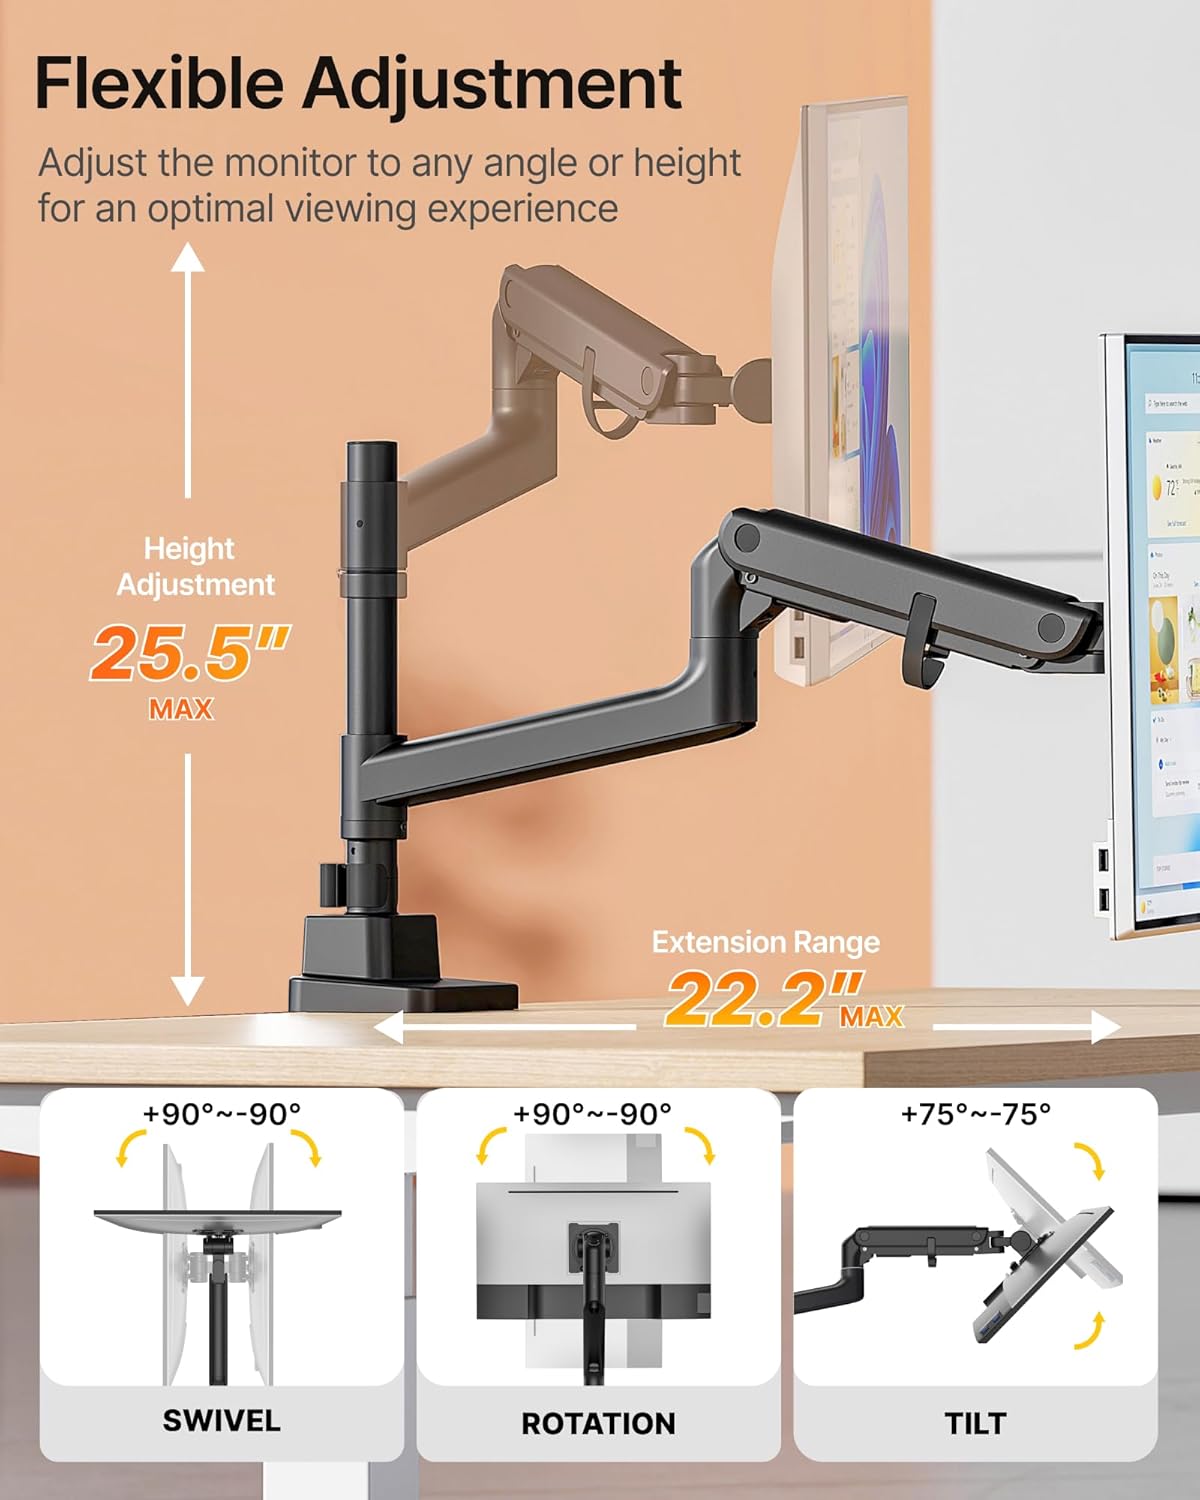
Image 4.1: Illustrates the monitor arm's flexible adjustment capabilities including swivel, rotation, and tilt.
4.1 Adjusting Gas Spring Tension
⚠️ CAUTION: DO NOT adjust tension before screen installation.
The gas spring tension needs to be adjusted according to your monitor's weight to ensure smooth movement and stability. Use the supplied Allen key for adjustment.
Video 4.1.1: Guide on how to adjust the gas spring tension for optimal monitor positioning.
- Keep the arm horizontal before adjusting the tension.
- If the arm drops, turn the adjustment screw in the + direction until it remains in a horizontal position.
- If the arm rises, turn the adjustment screw in the - direction until it remains in a horizontal position.
4.2 Tilt, Swivel, and Rotation
- Tilt: Adjust your monitor from -75° to +75° to reduce glare and optimize viewing comfort.
- Swivel: Swivel the monitor ±90° left or right to share your screen with others or change viewing angles.
- Rotation: Rotate the monitor ±90° for landscape or portrait orientation.
4.3 Height and Extension Adjustment
- Height: The arm offers a pole height adjustment of 15.3" and an arm height range of up to 25.5" to suit sitting or standing positions.
- Extension: Extend the arm up to 22.2" to bring the monitor closer or push it further away.
4.4 Using Integrated USB Ports
The base of the monitor arm includes built-in USB-A 3.0 and USB-C ports for convenient connectivity.
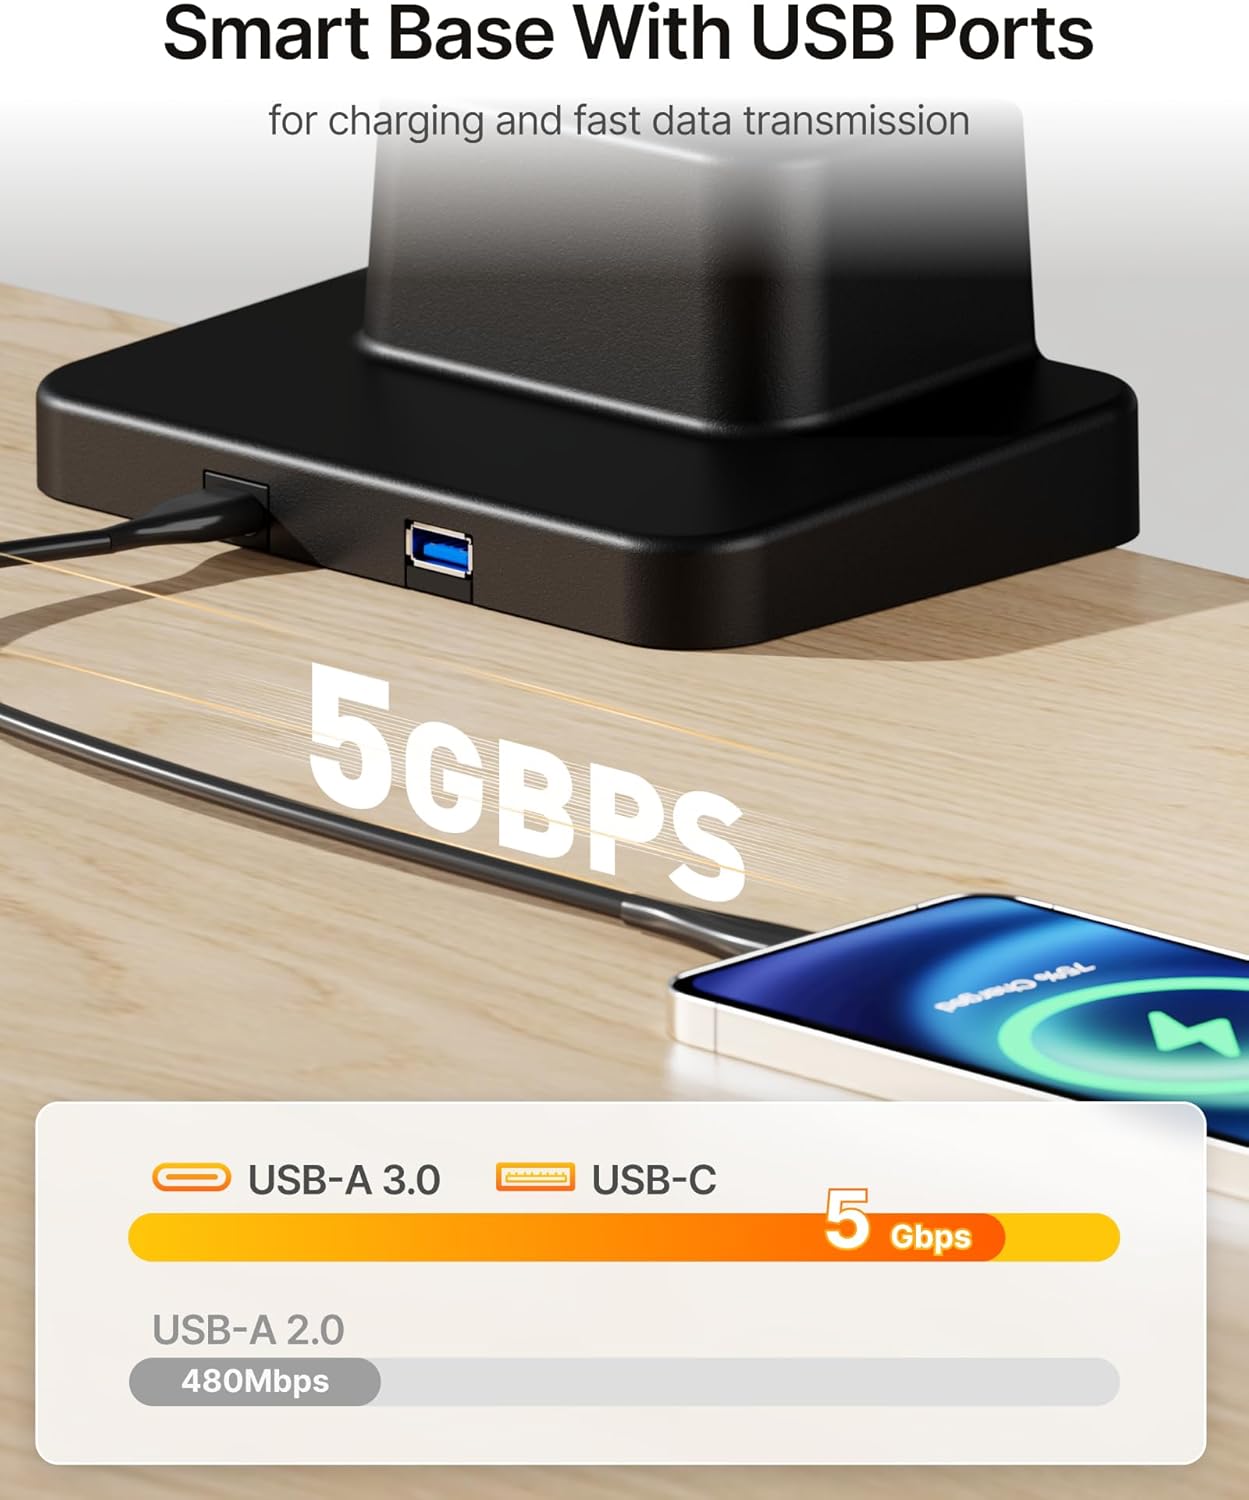
Image 4.4.1: The smart base features USB-A 3.0 and USB-C ports for charging and fast data transfer.
- Connect the provided USB cables from the monitor arm base to your computer's USB ports.
- Use the accessible ports on the arm base to charge devices or transfer data at speeds up to 5Gbps.
5. Cable Management
Maintain a clean and organized workspace using the integrated cable management features.

Image 5.1: Cables neatly routed through the monitor arm's integrated cable clips for a tidy desktop.
- Route your monitor's power and video cables through the designated cable clips along the underside of the arm.
- Ensure cables have enough slack to accommodate full range of motion without tension.
6. Maintenance
Regular maintenance ensures the longevity and optimal performance of your monitor arm.
- Cleaning: Wipe down the arm with a soft, damp cloth. Avoid abrasive cleaners or solvents.
- Tension Check: Periodically check the gas spring tension to ensure it still supports your monitor's weight effectively. Adjust as needed (refer to Section 4.1).
- Screw Tightness: Ensure all mounting screws (VESA plate, clamp/grommet) remain tight. Re-tighten if any looseness is detected.
7. Troubleshooting
If you encounter any issues, refer to the following common problems and solutions.
- Monitor Sags/Drops: The gas spring tension is too low for your monitor's weight. Increase tension by turning the adjustment screw in the '+' direction (refer to Section 4.1).
- Monitor Rises Too Easily: The gas spring tension is too high. Decrease tension by turning the adjustment screw in the '-' direction (refer to Section 4.1).
- Arm is Stiff/Difficult to Move: Check if any pivot points are overtightened. Loosen slightly if necessary. Ensure gas spring tension is correctly set.
- Monitor Wobbles: Ensure all mounting points (desk clamp/grommet, VESA plate) are securely tightened. Verify desk stability.
- USB Ports Not Working: Ensure the USB cables from the arm base are securely connected to your computer's USB ports. Check computer's USB settings.
8. Specifications
| Feature | Specification |
|---|---|
| Brand | monTEK |
| Model Number | MA1001UCPBK |
| Compatible Screen Size | 17" to 57" (Flat & Curved) |
| Weight Capacity | 4.4 lbs - 59.4 lbs |
| VESA Compatibility | 75x75mm, 100x100mm |
| Mounting Type | C-Clamp / Grommet Mounting |
| Desk Thickness (C-Clamp) | 0.47" - 1.8" (12-45mm) |
| Desk Thickness (Grommet) | 0.47" - 2" (12-50mm) |
| Movement Type | Tilt, Articulating, Swivel, Rotate |
| Tilt Angle | -75° to +75° |
| Swivel Angle | ±90° |
| Rotation Angle | ±90° |
| Pole Height Adjustment | 15.3" |
| Arm Height Range | Up to 25.5" |
| Arm Extension | Up to 22.2" |
| Material | Steel, Aluminum, Plastic |
| Integrated Ports | USB-A 3.0, USB-C (5Gbps) |
| Item Weight | 11.66 pounds |
| Product Dimensions | 25 x 22.5 x 5.1 inches |
9. Warranty and Support
For warranty information and customer support, please refer to the contact details provided in your product packaging or visit the official monTEK website.
Manufacturer: monTEK
Date First Available: April 17, 2025