
1. Introduction
This manual provides detailed instructions for the safe and effective operation of your MiLESEEY TNV10 PRO Thermal Monocular. The TNV10 PRO is a handheld thermal imaging device designed for enhanced observation in various environments, offering a 320x240 IR resolution, 50Hz refresh rate, and an 800x600 OLED display. Please read this manual thoroughly before using the device to ensure proper functionality and to prevent damage.
2. Package Contents
Verify that all items listed below are present in your product packaging:
- TNV10 PRO Night Vision Monocular
- Carrying Case
- HDMI Cable
- USB Cable
- User Manual
- Expansion Accessories
- 1/4 Thread Hole Accessories

Image: Contents of the MiLESEEY TNV10 PRO package, including the monocular, cables, case, and accessories.
3. Product Overview
The MiLESEEY TNV10 PRO is designed for ergonomic handling and intuitive control. Familiarize yourself with the device's components and control buttons.
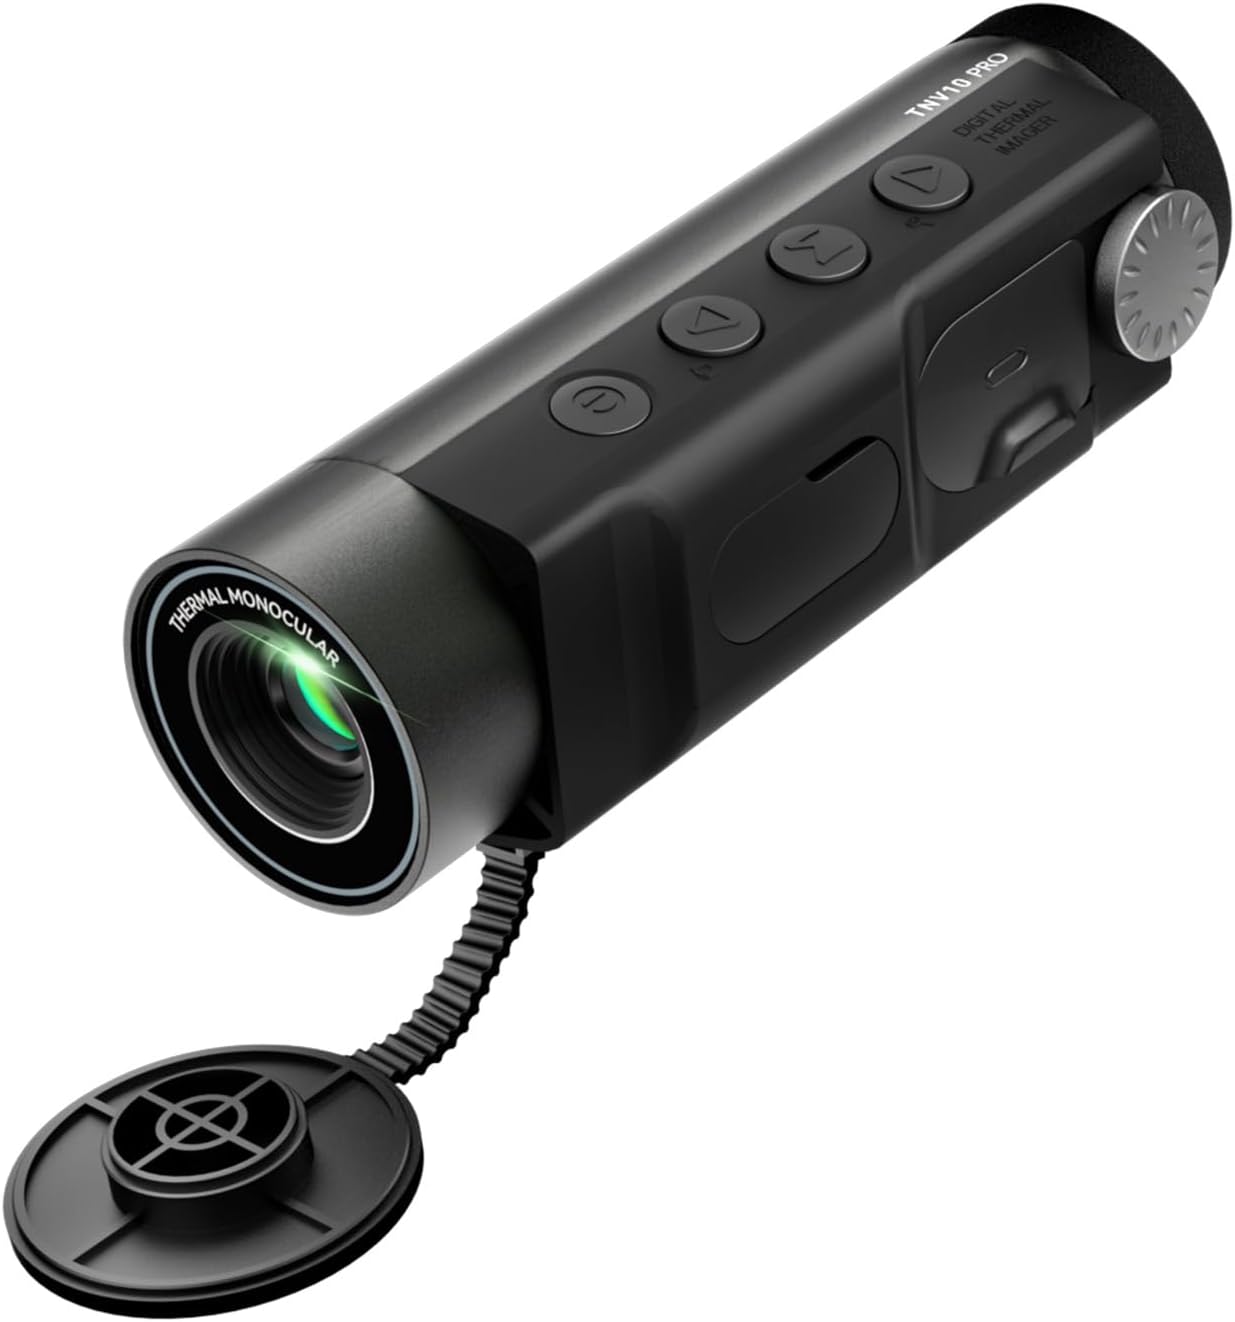
Image: The MiLESEEY TNV10 PRO thermal monocular, showing its compact design and lens cap.
3.1. Components and Controls

Image: Top view of the TNV10 PRO with labels for Power Button, Photograph Button, Mode Button, and Magnification Button.

Image: Exploded view of the TNV10 PRO, highlighting the Objective Lens, Eyepieces, Eyepiece Rotary Knob, Type-C Port, Range Measurement Module Part, Hand-Hold Screen Frame, and Tripod Screw.
- Power Button: Controls device power.
- Photograph Button: Captures images and initiates video recording.
- Mode Button: Cycles through color palettes and accesses the main menu.
- Magnification Button: Adjusts digital zoom level.
- Eyepiece Rotary Knob: Adjusts diopter for clear viewing.
- Objective Lens: The primary lens for thermal image capture.
- Type-C Port: For charging and data transfer.
- Tripod Screw: Standard 1/4-inch thread for mounting on tripods.
4. Getting Started (Setup)
4.1. Charging the Battery
The TNV10 PRO is equipped with a built-in 4500mAh Lithium-ion battery. Before first use, fully charge the device.
- Locate the Type-C port on the device.
- Connect the provided USB cable to the Type-C port and a compatible USB power adapter (not included) or computer USB port.
- The charging indicator will illuminate. Allow approximately 2.5 hours for a full charge.
- Once fully charged, disconnect the cable.
4.2. Powering On/Off
- To Power On: Long-press the Power Button (marked with ① in the diagram) until the display illuminates.
- To Power Off: Long-press the Power Button again until the display shuts down.
4.3. Eyepiece Adjustment
Adjust the eyepiece to achieve a clear image for your vision.
- With the device powered on, look through the eyepiece.
- Rotate the Eyepiece Rotary Knob (located near the eyepiece) until the on-screen display and thermal image appear sharp and in focus.
5. Operating Instructions
5.1. Basic Button Functions

Image: Visual guide to the primary button functions: Power, Eyepiece adjustment, Magnification, Mode, and Photograph/Video.
- Power Button: Long-press to turn the device on or off.
- Magnification Button (▲): Short-press to cycle through available digital magnification levels (e.g., 1x, 2x, 4x).
- Mode Button (M): Short-press to switch between different color palettes. Long-press to access the main menu.
- Photograph Button (▼): Short-press to take a still photograph. Long-press to start or stop video recording.
5.2. Visual Modes (Color Palettes)
The TNV10 PRO offers five distinct color palettes to optimize viewing for different scenarios and preferences. Short-press the Mode Button (M) to cycle through them.
- White Hot: Hot objects appear white, colder objects appear black. Common for general observation.
- Black Hot: Hot objects appear black, colder objects appear white. Often preferred for tracking fast-moving targets.
- Red Hot: Displays heat intensity with shades of red, highlighting hotter areas.
- Iron: A multi-color palette that provides a detailed representation of temperature differences.
- Jungle: Designed to enhance contrast and suppress visual noise from foliage, making targets in dense environments more visible.

Image: Examples of the five color palettes: White Hot, Black Hot, Red Hot, Iron, and Jungle, showing how they render thermal images.

Image: An illustration of the Jungle Mode in use, demonstrating its effectiveness in spotting targets within dense foliage.
5.3. UHD Mode
The upgraded UHD (Ultra High Definition) mode enhances image detail by up to 50% compared to standard thermal imaging. This feature is particularly useful for discerning complex textures like grass, brush, or water, even with low-contrast heat signatures.

Image: A comparison showing the enhanced detail provided by UHD Mode versus standard thermal imaging, particularly in rendering fine environmental textures.
5.4. Hotspot Tracking
Activate Hotspot Tracking to automatically identify and lock onto the hottest point within the viewing frame. This feature aids in faster target detection and observation.
5.5. Display Brightness Adjustment
The TNV10 PRO supports 1-10 levels of brightness adjustment for the OLED display, allowing you to optimize visibility in various lighting conditions.

Image: A visual representation of the 10-level brightness adjustment feature, showing how image clarity changes with different settings.
5.6. Photo and Video Recording
The device allows you to capture still images and record videos of your observations.
- To Take a Photo: Short-press the Photograph Button (▼).
- To Record Video: Long-press the Photograph Button (▼) to start recording. Long-press again to stop recording.
- Videos are recorded at 400x300 resolution in MP4 format.
- The TNV10 PRO includes 32GB of built-in memory, capable of storing hours of footage or thousands of thermal images.

Image: An illustration showing the device's capability to record photos and videos, highlighting the 32GB built-in storage.

Image: A screenshot from a recorded video, demonstrating the 400x300 MP4 capture capability of the TNV10 PRO.
5.7. Menu Navigation
Long-press the Mode Button (M) to access the multi-function menu. Use the Magnification (▲) and Photograph (▼) buttons to navigate through options and the Mode (M) button to select.

Image: A visual representation of the multi-function menu interface, showing options like Brightness, UHD Mode, Calibration, Language, Device Info, Format Storage, Restore Factory Settings, Hotspot Tracking, and Auto Shutdown.
- Brightness: Adjust display brightness (1-10 levels).
- UHD Mode: Toggle UHD image enhancement on/off.
- Calibration: Perform manual calibration if needed for image uniformity.
- Language: Select the desired language for the interface.
- Device Info: View device firmware version and other information.
- Format Storage: Erase all data from the internal 32GB storage. (Caution: This action is irreversible.)
- Restore Factory Settings: Reset all settings to their default values.
- Hotspot Tracking: Enable or disable the hotspot tracking feature.
- Auto Shutdown: Set the device to automatically power off after 30 or 60 minutes of inactivity to conserve battery.
6. Battery Information
The MiLESEEY TNV10 PRO is powered by a high-capacity internal battery designed for extended use.
- Battery Type: 4500mAh Li-ion Battery
- Runtime: Up to 12 hours of continuous operation on a full charge.
- Charging Time: Approximately 2.5 hours via Type-C port.
- Auto Power-Off: Configurable to turn off after 30 or 60 minutes of inactivity to save power.

Image: Graphic highlighting the 12 hours of continuous use provided by the TNV10 PRO's 4500mAh battery.

Image: Detailed information on battery capacity, runtime, auto power-off options, and Type-C fast charging.
7. Maintenance
7.1. Cleaning
- Lens: Use a soft, lint-free cloth specifically designed for optics. Gently wipe the lens surface. Avoid abrasive materials or excessive pressure.
- Body: Wipe the device body with a soft, damp cloth. Do not use harsh chemicals, solvents, or abrasive cleaners.
- Ensure the Type-C port cover is securely closed to prevent dust and moisture ingress.
7.2. Storage
- Store the monocular in its protective carrying case when not in use.
- Keep the device in a cool, dry place, away from direct sunlight and extreme temperatures.
- For long-term storage, ensure the battery is charged to approximately 50% to prolong its lifespan. Recharge every 3-6 months if stored for extended periods.
8. Troubleshooting
If you encounter issues with your MiLESEEY TNV10 PRO, refer to the following common problems and solutions:
| Problem | Possible Cause | Solution |
|---|---|---|
| Device does not power on. | Low battery; device frozen. | Charge the battery. Perform a hard reset by long-pressing the power button for 10-15 seconds. |
| Image is blurry or out of focus. | Eyepiece not adjusted; objective lens dirty. | Adjust the Eyepiece Rotary Knob. Clean the objective lens with a soft, optical-grade cloth. |
| No image or black screen. | Device off; display brightness too low; sensor malfunction. | Ensure device is powered on. Adjust display brightness in the menu. If problem persists, contact support. |
| Buttons are unresponsive. | Software glitch; low battery. | Recharge the battery. Perform a hard reset. |
| Cannot record video/take photos. | Storage full; incorrect operation. | Check available storage in the menu and format if necessary (backup data first). Ensure correct button press duration (short for photo, long for video). |
If the issue persists after attempting these solutions, please contact MiLESEEY customer support for further assistance.
9. Specifications
Key technical specifications for the MiLESEEY TNV10 PRO Thermal Monocular:
| Feature | Specification |
|---|---|
| IR Resolution | 320x240 |
| Infrared Detector | 12μm |
| Refresh Rate | 50Hz |
| Display Type | 800x600 OLED |
| Digital Zoom | Up to 4x |
| Focal Length | 13mm |
| Field of View (FOV) | 13.5° × 10.1° |
| Battery Capacity | 4500mAh Li-ion |
| Operating Time | Up to 12 hours |
| Charging Port | Type-C |
| Internal Storage | 32GB |
| Video Resolution | 400x300 MP4 |
| Ingress Protection | IP65 (Waterproof & Dustproof) |
| Operating Temperature | -20°C to 60°C (-4°F to 140°F) |
| Item Weight | 1.55 pounds (approx. 703g) |
| Package Dimensions | 9.53 x 5.12 x 4.57 inches |

Image: Diagram illustrating the 13mm focal length and 13.5°x10.1° Field of View of the TNV10 PRO's optics.

Image: Visual demonstration of the 50Hz refresh rate, showing clearer capture of moving objects compared to lower refresh rates.

Image: Explanation of the 800x600 OLED display benefits, including true black, zero backlight, and glare-free viewing.

Image: Depiction of the TNV10 PRO's IP65 waterproof and dustproof rating and durable alloy housing.
10. Safety Information
- Do not look directly at strong light sources (e.g., the sun, lasers) through the monocular, as this can damage the sensor and your eyes.
- Keep the device away from extreme heat or cold, and avoid sudden temperature changes.
- Do not attempt to disassemble or modify the device. This will void the warranty and may cause damage.
- Keep out of reach of children.
- Dispose of the device and its battery according to local regulations. Do not dispose of in household waste.
11. Warranty and Support
The MiLESEEY TNV10 PRO Thermal Monocular comes with a manufacturer's warranty. Please refer to the warranty card included in your package or visit the official MiLESEEY website for detailed warranty terms and conditions.
For technical support, service, or inquiries, please contact MiLESEEY customer service through their official channels. Contact information can typically be found on the product packaging, the official website, or within the included documentation.
MiLESEEY Official Store: Visit MiLESEEY Store on Amazon
12. Application Scenarios
The MiLESEEY TNV10 PRO is suitable for a variety of applications:
- Outdoor Exploration: For observing wildlife and navigating in low-light conditions.
- Camping: Enhancing situational awareness around campsites at night.
- Science Observation: For studying animal behavior or environmental heat signatures.
- Search & Rescue: Locating individuals or heat sources in challenging visibility.

Image: Illustrations of various scenarios where the TNV10 PRO can be used, including outdoor exploration, camping, scientific observation, and search & rescue.