1. Important Safety Information
Read all instructions carefully before using the appliance. Keep this manual for future reference. Always follow basic safety precautions to reduce the risk of fire, electric shock, or injury.
- Ensure the refrigerator is properly grounded.
- Do not damage the refrigerant circuit.
- Keep ventilation openings clear of obstruction.
- Do not use mechanical devices or other means to accelerate the defrosting process, other than those recommended by the manufacturer.
- Do not use electrical appliances inside the food storage compartments, unless they are of the type recommended by the manufacturer.
- Unplug the appliance before cleaning or performing maintenance.
2. Setup and Installation
2.1 Unpacking
Carefully remove all packaging materials. Inspect the refrigerator for any damage. Report any damage to your retailer immediately.
2.2 Placement
- Place the refrigerator on a firm, level surface.
- Ensure adequate air circulation around the appliance. Maintain a minimum distance of 10 cm (4 inches) from the back and sides to allow for proper ventilation.
- Avoid direct sunlight and heat sources (e.g., stoves, heaters).
- Do not install in areas where the temperature is likely to fall below 10°C (50°F) or rise above 43°C (110°F).
2.3 Leveling
Adjust the leveling feet at the bottom front of the refrigerator to ensure it is stable and level. This helps reduce vibration and noise.
2.4 Initial Power-On
After placement, wait at least 2-4 hours before plugging in the refrigerator. This allows the refrigerant to settle. Once plugged in, allow the appliance to cool for several hours before loading food.

Image 2.1: Front view of the Midea MDRT645MTE06E refrigerator, showcasing its silver finish and external control panel on the upper door.
3. Operating Instructions
3.1 Exterior Control Panel
The refrigerator features an external control panel for easy adjustment of settings. This panel allows you to monitor and change temperature settings without opening the doors.
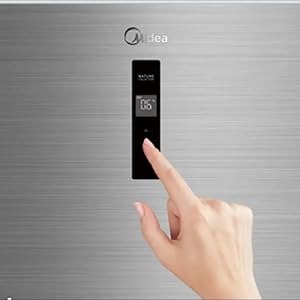
Image 3.1: A close-up view of the refrigerator's exterior control panel, showing digital display and touch buttons for temperature adjustment and quick cooling functions.
- Temperature Adjustment: Use the up/down arrows to set the desired temperature for the refrigerator and freezer compartments.
- Quick Cooling: Activate the quick cooling function with a single touch to rapidly chill newly added items or beverages.
3.2 Inverter Quattro Technology
The Inverter Quattro system optimizes compressor operation, preventing frequent stopping and starting. This results in a more stable internal temperature, rapid cooling capabilities, and enhanced energy efficiency. It contributes to prolonged food freshness and reduced electricity consumption.
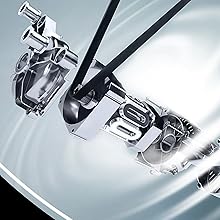
Image 3.2: A diagram illustrating the internal components of the Inverter Quattro compressor, highlighting its advanced mechanism for efficient cooling.
3.3 No Frost System
This refrigerator features a No Frost cooling system, which prevents ice buildup in both the freezer and refrigerator compartments. This technology ensures consistent cooling performance and eliminates the need for manual defrosting.
3.4 Cooling Box
The dedicated Cooling Box drawer maintains a lower temperature than the main refrigerator compartment. This feature is ideal for storing fresh meat and seafood, preserving their quality and texture without fully freezing them.

Image 3.3: A visual representation of the "Cooling Box" label, indicating the specialized drawer for optimal storage of specific food items.
3.5 Active-C Fresh Technology
The Active-C Fresh system incorporates an advanced carbon filter designed to absorb odors and maintain a fresh environment within the refrigerator. This helps preserve the original flavor, shape, and vibrant color of your food items for longer periods.

Image 3.4: A diagram illustrating the Active-C Fresh filter system, showing air flowing through the filter to purify and maintain freshness around produce like bell peppers.
3.6 Multi-Air Flow System
The Multi-Air Flow system ensures even distribution of cold air throughout the refrigerator compartments. This consistent airflow helps maintain stable temperatures, reducing temperature fluctuations and keeping food fresher for longer.
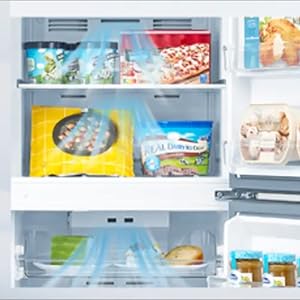
Image 3.5: A diagram illustrating the Multi-Air Flow system, showing cold air circulating around various food items on different shelves within the refrigerator.
3.7 Humidity Control
The refrigerator includes features for humidity control, typically within crisper drawers. This allows you to adjust the humidity level to suit different types of produce, helping to extend their freshness.
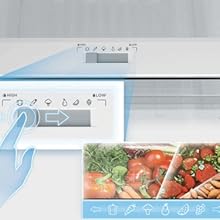
Image 3.6: A close-up of a crisper drawer with a visible slider for humidity control, designed to optimize storage conditions for fruits and vegetables.
4. Maintenance and Cleaning
4.1 General Cleaning
- Always unplug the refrigerator before cleaning.
- Clean the interior with a soft cloth and a solution of mild detergent and warm water. Rinse thoroughly and dry.
- Wipe exterior surfaces with a soft, damp cloth. For stainless steel finishes, use a specialized stainless steel cleaner.
- Clean door gaskets regularly to ensure a tight seal.
4.2 Condenser Coils
Periodically clean the condenser coils located at the back or bottom of the refrigerator. Dust and debris can accumulate, reducing efficiency. Use a vacuum cleaner or a soft brush to remove buildup.
4.3 Active-C Fresh Filter Replacement
The Active-C Fresh filter should be checked periodically and replaced as needed to maintain optimal odor absorption and freshness. Refer to the filter's specific instructions for replacement frequency.
5. Troubleshooting
Before contacting service, review the following common issues and solutions:
| Problem | Possible Cause | Solution |
|---|---|---|
| Refrigerator not cooling | Power cord unplugged; temperature setting too high; door left open; excessive food load. | Check power connection; adjust temperature; ensure door is closed; reduce food load if overfilled. |
| Unusual noises | Appliance not level; items vibrating inside; normal operating sounds (e.g., refrigerant flow). | Level the refrigerator; rearrange items; consult manual for normal sounds. |
| Water on floor | Drain tube clogged; excessive humidity. | Clear drain tube; ensure proper ventilation. |
| Door not closing properly | Door gasket dirty or damaged; refrigerator not level; food items obstructing closure. | Clean or replace gasket; level appliance; rearrange food. |
6. Specifications
Detailed technical specifications for the Midea MDRT645MTE06E Refrigerator:
| Feature | Detail |
|---|---|
| Brand | Midea |
| Model Info | MDRT645MTE06E |
| Product Dimensions (W x D x H) | 691 x 700 x 1880 cm |
| Item Dimensions (D x W x H) | 75D x 74W x 182H centimeters |
| Item Weight | 240 Kilograms |
| Total Capacity | 449 Liters |
| Refrigerator Fresh Food Capacity | 344 Liters |
| Freezer Capacity | 105 Liters |
| Efficiency Rating | A+ (BEE Star Rating: 5 Star) |
| Annual Energy Consumption | 1000 Kilowatt Hours |
| Installation Type | Freestanding |
| Form Factor | Multi-Door (2 Doors) |
| Defrost System | Frost Free |
| Special Features | Frost Free, Inverter Quattro, Cooling Box, Multi-Air Flow, Active-C Fresh, Humidity Control |
| Color | Silver |
| Voltage | 50 Volts |
| Crispers/Drawers | 2 |
| Shelves | 3 |
| Door Hinges | Left |
Image 6.1: Energy efficiency label, indicating the refrigerator's A+ rating, signifying high energy savings.

Image 6.2: A diagram illustrating the refrigerator's Volt Control system, showing its ability to operate within a wide voltage range (115V to 300V) for stable performance.
7. Warranty and Support
The Midea MDRT645MTE06E Refrigerator comes with a comprehensive 10-year warranty. This warranty covers manufacturing defects and ensures peace of mind regarding the appliance's reliability.
For technical support, service requests, or warranty claims, please contact Midea customer service or your authorized dealer. Keep your purchase receipt and model information readily available.
Additional extended warranty options may be available through third-party providers:
- 1-Year Extended Warranty by Salama Care
- 2-Year Extended Warranty by Salama Care
For more information, visit the official Midea website or contact their customer support.


