
1. Important Safeguards
When using electrical appliances, basic safety precautions should always be followed to reduce the risk of fire, electrical shock, and injury to persons.
- Read all instructions before operating the appliance.
- Do not operate the microwave oven if it has a damaged cord or plug, if it is not working properly, or if it has been damaged or dropped.
- Do not attempt to service or repair the appliance yourself. Contact qualified service personnel for examination, repair, or adjustment.
- Ensure the appliance is placed on a level, stable surface, away from heat sources and water.
- Do not heat liquids or other foods in sealed containers as they are liable to explode.
- Do not use corrosive chemicals or vapors in this appliance.
- Always ensure proper ventilation around the microwave oven.
- Never operate the oven when empty.
2. Product Overview
The Nostalgia NRMOPM7PK6A is a 0.7 cubic foot countertop microwave oven designed for convenient heating and cooking. It features a digital control panel, a rotating glass turntable for even heating, and a stylish retro design.

Image: Front view of the Nostalgia Retro Microwave Oven, showcasing the control panel, door handle, and digital display.

Image: The microwave oven with its door open, revealing the interior cavity and the rotating glass turntable with a bowl of popcorn.
3. Setup and Installation
3.1 Unpacking
- Carefully remove all packaging materials from the microwave oven and its accessories.
- Inspect the oven for any damage, such as dents or a misaligned door. Do not operate if damaged.
- Remove any protective film from the cabinet surface.
3.2 Placement
- Place the microwave oven on a flat, stable surface that can support its weight.
- Ensure there is adequate ventilation: at least 3 inches (7.5 cm) of space at the rear, 12 inches (30 cm) at the top, and 3 inches (7.5 cm) on both sides.
- Keep the oven away from televisions, radios, and other electronic devices to prevent interference.
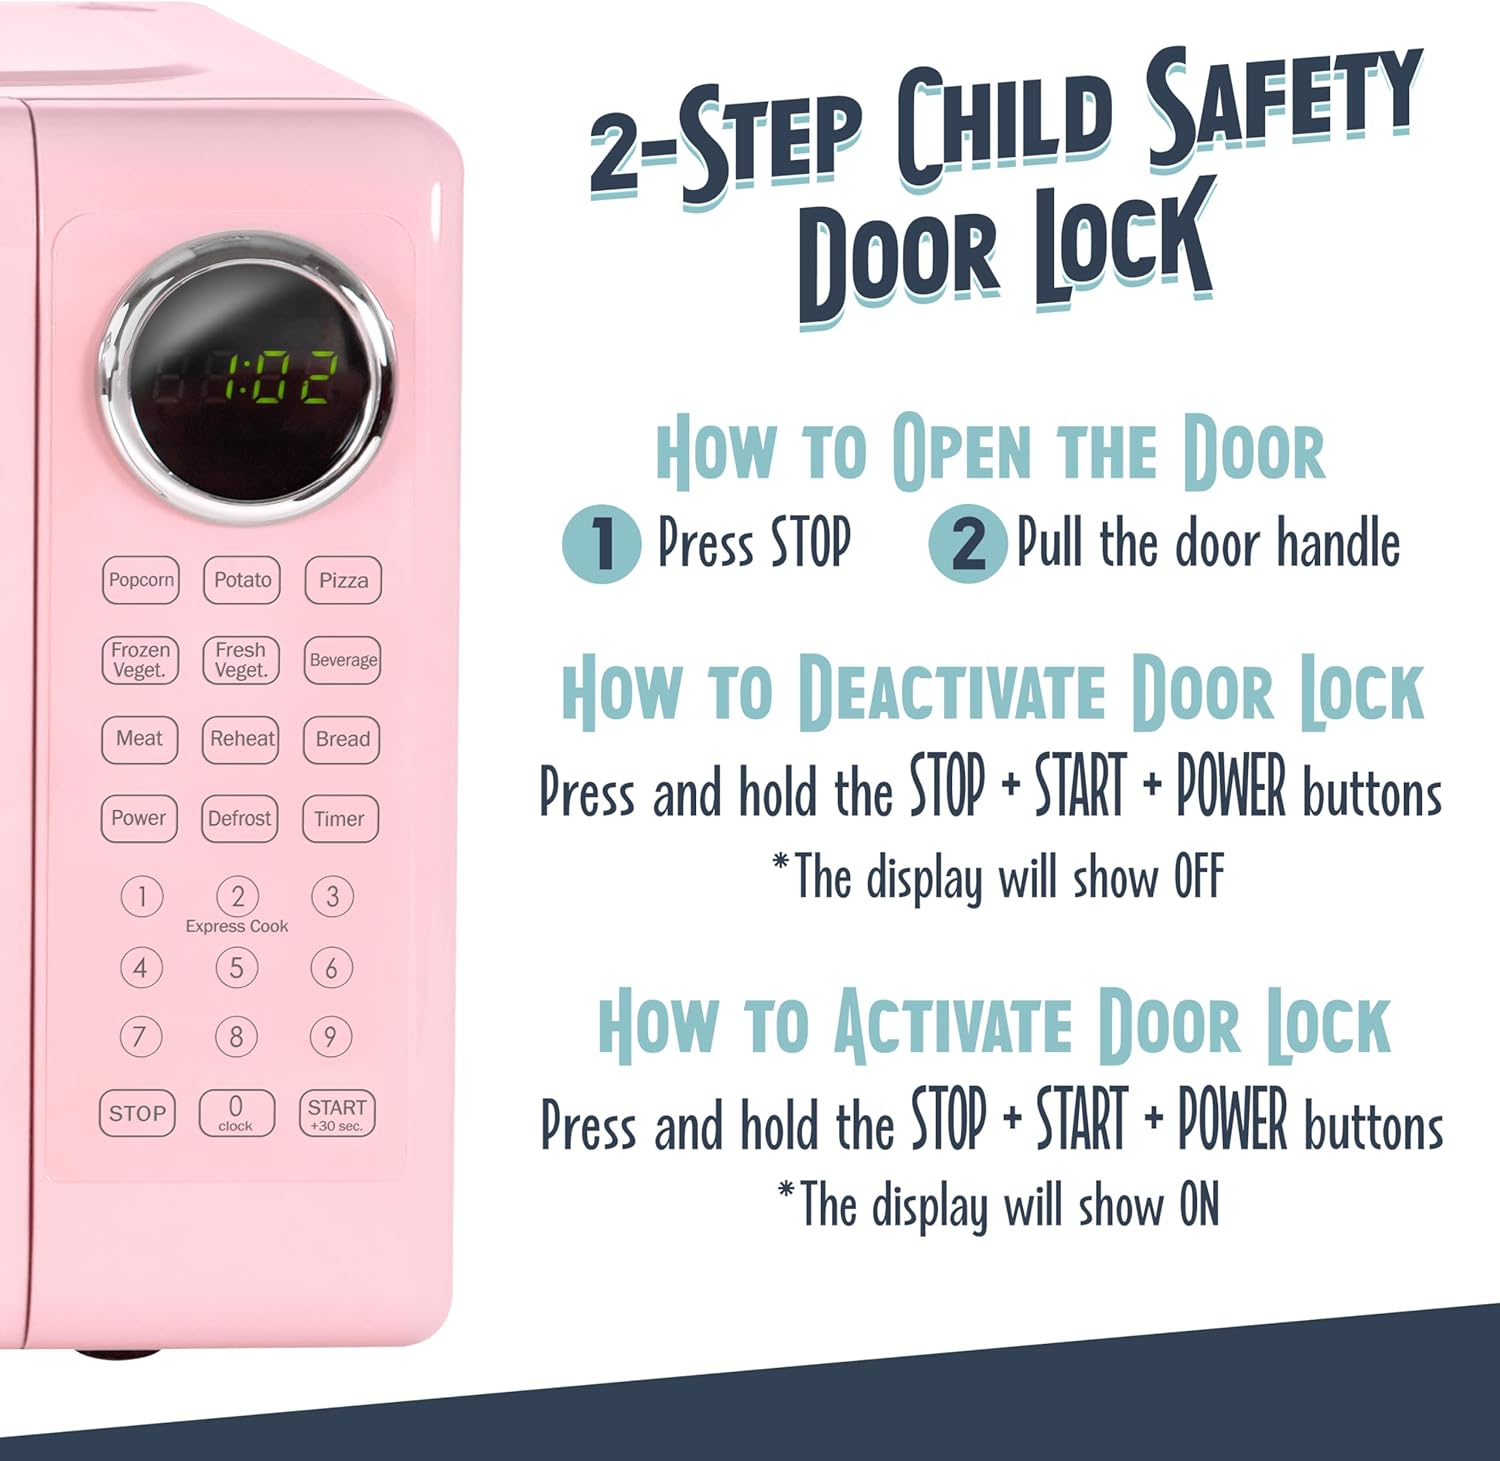
Image: The microwave oven positioned on a kitchen countertop, demonstrating appropriate placement for ventilation.
3.3 Power Connection
- Plug the power cord into a standard 3-prong, 120V AC, 60Hz grounded electrical outlet.
- Do not use an extension cord or adapter.
3.4 Initial Cleaning
- Before first use, wipe the interior and exterior surfaces with a damp cloth.
- Wash the glass turntable and turntable ring in warm, soapy water.
4. Operating Instructions
4.1 Control Panel Functions
The control panel features a digital display and various buttons for setting cooking time, power levels, and special functions.
Image: Detailed view of the microwave's control panel, showing the digital display, number pad, and function buttons such as Popcorn, Potato, Pizza, Defrost, Power, and Start/Stop.
- Digital Display: Shows time of day, cooking time, and program indicators.
- Number Buttons (0-9): Used to enter cooking times or weights.
- Power: Selects microwave power levels (10 levels available).
- Defrost: Initiates defrosting by weight or time.
- Timer: Functions as a kitchen timer.
- Auto Cook Programs: Pre-set programs for common foods (Popcorn, Potato, Pizza, Frozen Veget., Fresh Veget., Beverage, Meat, Reheat, Bread).
- Express Cook: Allows quick start cooking at full power for 30 seconds per press.
- STOP: Cancels a program or clears settings.
- START: Begins cooking or confirms a setting.
4.2 Setting the Clock
- Press the 'Clock' button once.
- Use the number buttons to enter the current time (e.g., 12:30).
- Press 'Clock' again to confirm.
4.3 Microwave Cooking
- Place food in a microwave-safe container on the glass turntable. Close the door.
- Enter the desired cooking time using the number buttons.
- To adjust power level, press 'Power' repeatedly until the desired level is displayed (e.g., P-80 for 80% power). If no power level is selected, it defaults to 100%.
- Press 'START' to begin cooking.
4.4 Express Cooking
For quick heating, simply press the 'Express Cook' button. Each press adds 30 seconds of cooking time at 100% power. You can press it multiple times for longer durations.
4.5 Auto Cook Programs
The microwave features 8 pre-set auto cook programs for convenience:
- Press the desired auto cook button (e.g., 'Popcorn', 'Potato').
- Follow the display prompts to select quantity or weight if applicable.
- Press 'START' to begin.
4.6 Defrosting
The defrost function allows you to defrost food by weight or time.
- Press the 'Defrost' button.
- Enter the weight of the food using the number buttons, or the desired defrost time.
- Press 'START'.
4.7 Child Lock Feature
The microwave includes a child lock to prevent accidental operation.

Image: A hand pressing the 'STOP' button on the control panel, with text indicating how to activate the child lock by pressing and holding 'STOP' for 3 seconds.
- To Activate Control Panel Lock: Press and hold the 'STOP' button for 3 seconds. The display will show 'LOCK' or a lock icon. This disables button functions.
- To Deactivate Control Panel Lock: Press and hold the 'STOP' button for 3 seconds again. The 'LOCK' indicator will disappear.
Additionally, there is a 2-step child safety door lock mechanism.

Image: A graphic illustrating the 2-step child safety door lock. It shows how to open the door (Press STOP, then pull handle) and how to activate/deactivate the door lock by holding STOP + START + POWER buttons.
- To Open the Door: First, press the 'STOP' button, then pull the door handle.
- To Activate Door Lock: Press and hold the 'STOP' + 'START' + 'POWER' buttons simultaneously. The display will show 'ON'.
- To Deactivate Door Lock: Press and hold the 'STOP' + 'START' + 'POWER' buttons simultaneously. The display will show 'OFF'.
5. Maintenance and Cleaning
5.1 Exterior Cleaning
- Wipe the exterior surface with a damp cloth and mild detergent.
- Avoid abrasive cleaners or scouring pads.
5.2 Interior Cleaning
- Clean the interior cavity after each use with a damp cloth.
- For stubborn stains, place a bowl of water with lemon juice inside and microwave for 2-3 minutes, then wipe clean.
5.3 Turntable and Ring
- The glass turntable and turntable ring can be removed for cleaning. Wash them in warm, soapy water or in the dishwasher.
- Ensure they are completely dry before placing them back in the oven.
5.4 Door Seal
- Regularly clean the door seals and adjacent parts with a damp cloth to remove any spills or debris.
- Do not use harsh cleaners that could damage the seals.
6. Troubleshooting
If you experience issues with your microwave oven, refer to the following common problems and solutions:
| Problem | Possible Cause | Solution |
|---|---|---|
| Microwave does not start. | Power cord unplugged; Door not closed properly; Child lock activated; Fuse blown or circuit breaker tripped. | Ensure plug is firmly in outlet; Close door securely; Deactivate child lock (see Section 4.7); Check household fuse/circuit breaker. |
| Food is not cooking evenly. | Food not stirred or rotated; Incorrect power level or cooking time; Turntable not rotating. | Stir or rotate food during cooking; Adjust power level/time; Ensure turntable and ring are correctly placed and clean. |
| Display shows an error message. | Internal malfunction or incorrect operation. | Unplug the microwave for 1 minute, then plug back in. If error persists, contact customer support. |
| Unusual noise during operation. | Turntable or turntable ring not correctly positioned; Foreign object in cavity. | Check and reposition turntable and ring; Remove any foreign objects. |
7. Specifications
Detailed technical specifications for the Nostalgia NRMOPM7PK6A Retro Countertop Microwave Oven:
| Feature | Specification |
|---|---|
| Model Number | NRMOPM7PK6A |
| Capacity | 0.7 Cubic Feet |
| Wattage | 700 Watts |
| Product Dimensions (W x D x H) | 45.72 cm x 35.56 cm x 26.04 cm (18" x 14" x 10.25") |
| Material | Painted Metal |
| Installation Type | Countertop |
| Special Features | Programmable, 10 Power Levels, 8 Auto Cook Programs, Express Cooking, Child Lock |

Image: A visual representation of the microwave oven's dimensions, indicating a width of 18 inches, depth of 14 inches, and height of 10.25 inches.
8. Warranty and Support
Nostalgia products are designed for reliability and performance. For specific warranty details, please refer to the warranty card included with your purchase or visit the official Nostalgia website.
8.1 Customer Support
If you have any questions, require technical assistance, or need to report an issue, please contact Nostalgia customer support through their official website or the contact information provided in your product documentation.
- Online Support: Visit the Nostalgia Store Page for FAQs and contact options.
- Product Registration: Register your product online to receive updates and streamline warranty claims.