1. Introduction
This instruction manual provides detailed guidance for the assembly, operation, and maintenance of your VEIKOU 6'x13' BBQ Grill Gazebo Shelter. Designed with a galvanized steel roof and a natural cedar frame, this gazebo offers a dedicated outdoor cooking space. Please read this manual thoroughly before beginning assembly or use to ensure safe and correct installation and to maximize the product's lifespan.

Image 1.1: The VEIKOU 6'x13' BBQ Grill Gazebo Shelter installed in a backyard.
2. Important Safety Information
WARNING: Failure to follow these safety instructions may result in injury or damage to the product.
- Always ensure the gazebo is securely fastened to a stable foundation before use.
- Assemble and disassemble the gazebo with care, following the provided instructions.
- Keep children and pets away from the gazebo during assembly and disassembly to prevent injury.
- Do not sit or stand on the workstation shelves to avoid product damage and personal injury.
- Exercise caution when handling tools and components during assembly.
- Regularly inspect the gazebo for any loose parts or damage and address them promptly.
3. Components List
Before beginning assembly, verify that all parts are present and undamaged. Refer to the included parts diagram for identification. The product is delivered in four packages.
Key Structural Components:
- Cedar Frame: Constructed from natural cedar wood, providing the main support structure. It is recommended to treat the cedar with water-based stains for enhanced protection and longevity.
- Galvanized Steel Roof: A sturdy, corrosion-resistant, heat-resistant, and UV-resistant roof designed for durability against various weather conditions. Features a sloping design for efficient water drainage.
- Support Posts: Four 4.7-inch wide wood posts provide robust support for the gazebo structure.
- Workstations: Spacious countertops on either side of the gazebo for food preparation and BBQ accessories.
- Crossbeams: Designed to enhance strength, prevent sagging, and improve overall stability.
- Stakes: Included for securing the posts to various ground surfaces such as concrete, cement, wood decks, or lawn.

Image 3.1: Detail of the 100% sturdy natural wood construction.

Image 3.2: Detail of the galvanized steel roof, highlighting its load-bearing capacity, corrosion resistance, heat resistance, and UV protection.
4. Assembly and Setup
Assembly typically requires 2-3 people. Follow the provided step-by-step instructions carefully. It is recommended to dry-fit components where possible before final fastening.
4.1 Pre-Assembly Checks
- Unpack all components and lay them out. Verify against the parts list.
- Inspect all wooden pieces for any damage. Cedar is a soft wood; handle with care to avoid over-torquing screws during assembly.
- For roof panels, peel off any protective film. It is advisable to label each panel before removing the film, as identification marks may be on the film itself.
4.2 Frame Assembly
- Begin by assembling the main support posts and crossbeams. Ensure all connections are secure.
- When attaching components to the main posts, note that some pre-drilled holes may be slightly larger than the supplied screws. If necessary, use slightly larger or longer screws for a more secure fit.
- Attach the workstation shelves. Pay close attention to the orientation of the holes for the shelves, ensuring they face inward as intended.
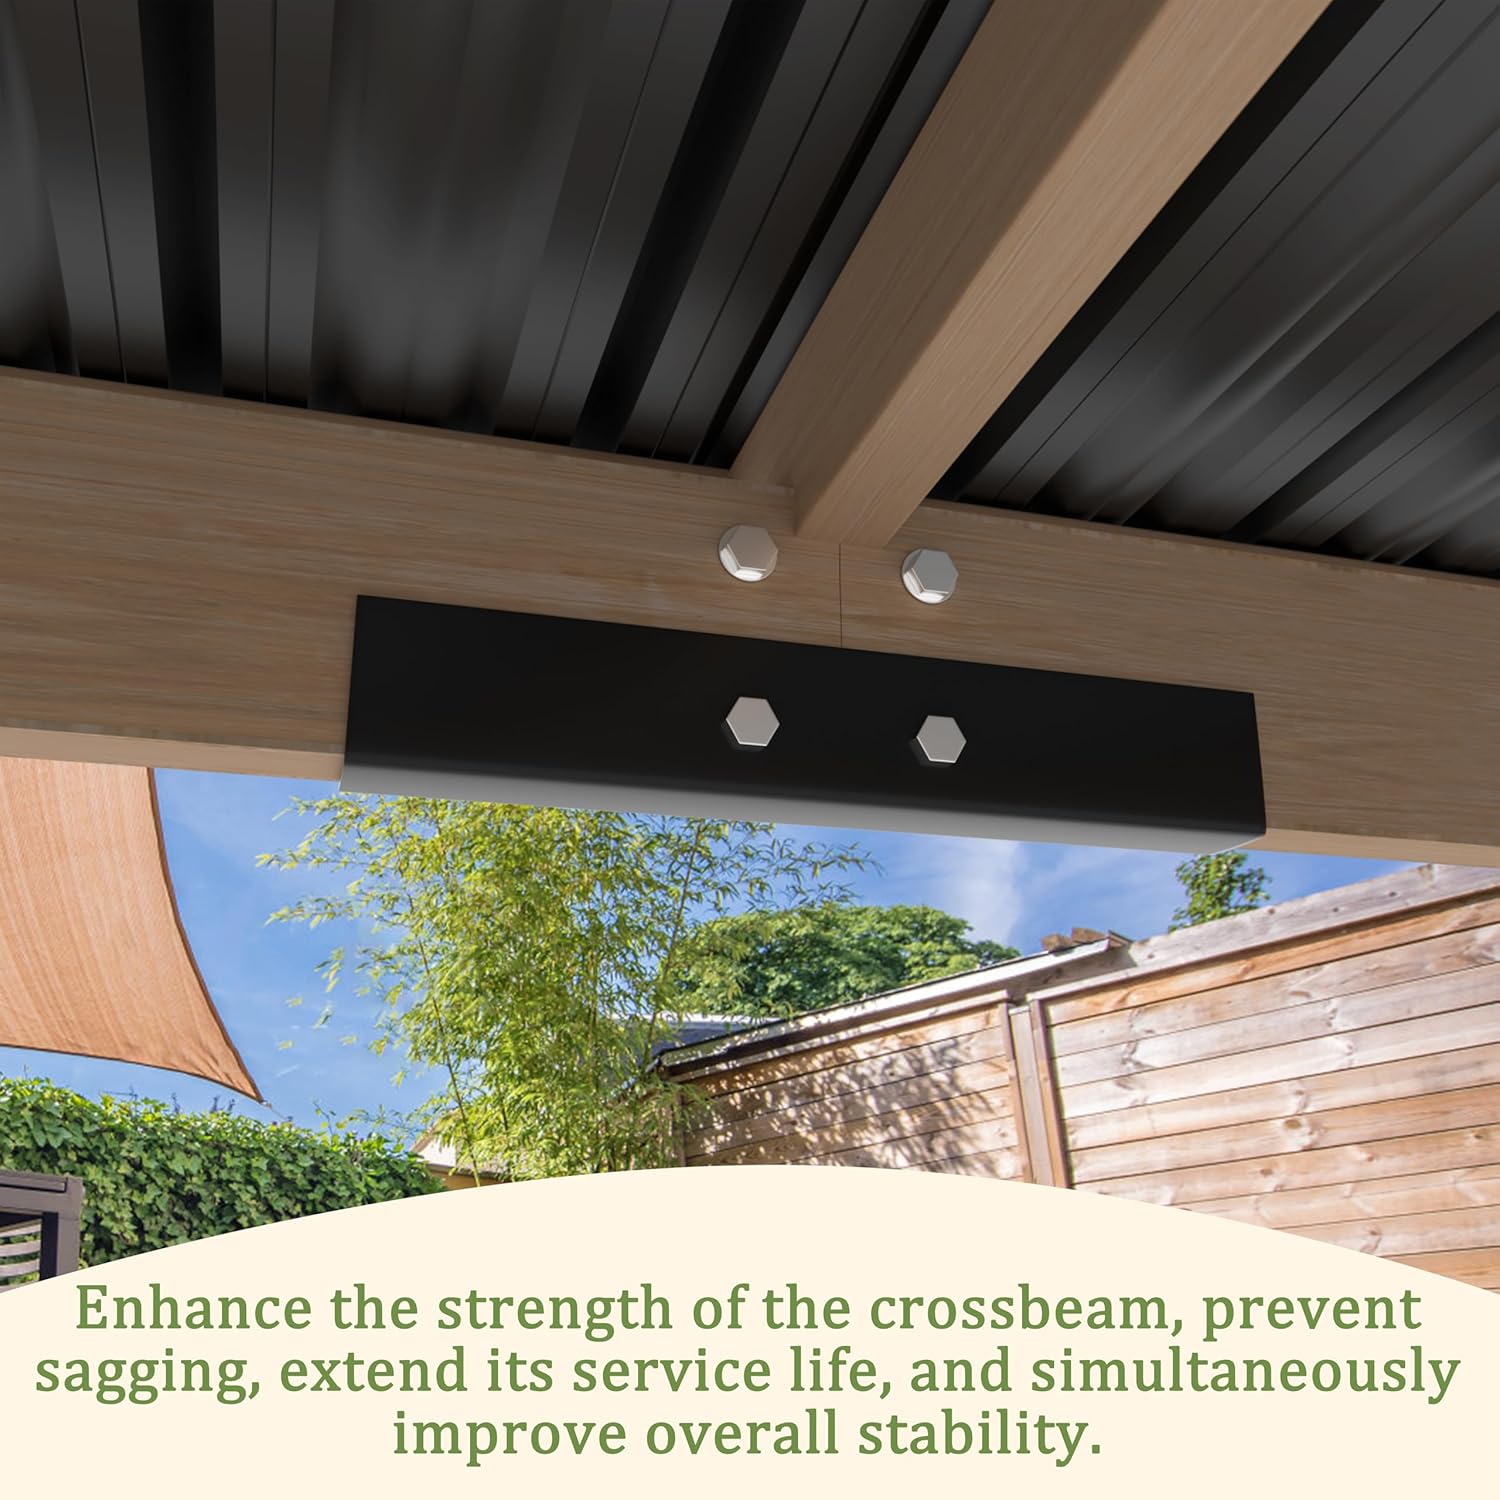
Image 4.1: The updated crossbeam design, engineered for enhanced strength and stability.
4.3 Roof Installation
- Carefully position the galvanized steel roof panels. It is crucial to adjust the alignment of the metal panels with the cedar roof joists to facilitate proper water runoff.
- Secure the roof panels using the provided fasteners. Ensure all screws are tightened appropriately without over-tightening.
4.4 Anchoring the Gazebo
The gazebo must be securely anchored to prevent movement due to wind or other external forces. Stakes are provided for installation on various ground types.
- Applicable Surfaces: Cement, concrete, wood deck, and lawn.
- Note: It is not recommended to install the posts directly on stone or paver surfaces, as these can lift or shift over time.

Image 4.2: Included stakes for securing the gazebo to various ground types.
5. Operating Instructions
5.1 Intended Use
The VEIKOU BBQ Grill Gazebo is designed to provide shelter for outdoor cooking activities, including barbecues and parties. Its open design ensures good ventilation and allows smoke to escape efficiently.

Image 5.1: The gazebo offers protection from sun, rain, and snow.
5.2 Workstation Use
Utilize the wide workstations on either side for convenient placement of food items, tableware, and grilling accessories. These surfaces are designed for utility, not for seating.

Image 5.2: The workstation provides ample space for cooking essentials.
6. Maintenance
6.1 Cedar Frame Care
The natural cedar frame is durable, but for optimal protection and to extend its service life, it is highly recommended to treat the wood with a water-based stain. This will help protect against weathering and maintain its appearance.
6.2 Roof and Metal Components
The galvanized steel roof is corrosion-resistant. Periodically clean the roof and other metal components with a mild soap and water solution. Rinse thoroughly and dry to prevent water spots. Inspect for any signs of rust or damage and address as needed.
6.3 General Inspection
Regularly check all bolts, screws, and connections to ensure they remain tight and secure. Over time, environmental factors can cause components to loosen. Tighten any loose fasteners to maintain the gazebo's structural integrity.
7. Troubleshooting
7.1 Wobbly Structure
- Issue: Gazebo feels unstable or wobbly after assembly.
- Solution: Re-check all connections, especially those involving the main posts and crossbeams. Ensure all screws and bolts are fully tightened. Verify that the gazebo is anchored securely to the ground on a level surface.
7.2 Difficulty with Assembly
- Issue: Parts do not align or fit together easily.
- Solution: Review the assembly instructions carefully. Ensure components are oriented correctly (e.g., workstation shelf holes facing inward). If pre-drilled holes seem too large for supplied screws, consider using slightly larger or longer screws for a more secure fit, especially for the main posts.
7.3 Water Accumulation on Roof
- Issue: Water is pooling on the roof instead of draining.
- Solution: Ensure the roof panels are correctly aligned with the cedar roof joists to facilitate proper water runoff. Verify that the sloping design is maintained and not obstructed.
8. Specifications
| Brand | VEIKOU |
| Model Number | Gazebo (6X13FT) |
| Material | Cedar Wood, Metal (Galvanized Steel Roof) |
| Product Dimensions (Overall) | 156.7"L x 73.2"W x 80.9"H |
| Countertop Size | 49.6"L x 11.2"W |
| Frame Material | Wood (Cedar) |
| Water Resistance Level | Water Resistant |
| Ultraviolet Light Protection | Yes |
| Assembly Required | Yes |
| Packaging | Delivered in four packages |

Image 8.1: Detailed dimensions of the gazebo and its components.
9. Warranty and Support
For warranty information, product support, or to order replacement parts, please refer to the contact information provided at the point of purchase or visit the official VEIKOU website. Keep your purchase receipt as proof of purchase for any warranty claims.


