
1. Introduction
The Cloudpower Paint Thickness Tester is a precision instrument designed for non-destructive measurement of varnish and putty coatings on vehicle surfaces. This device helps identify areas of a vehicle that may have undergone repairs or repainting by indicating the thickness of the applied layers. It operates without batteries or calibration, offering a straightforward and reliable method for assessing paint conditions.
This manual provides instructions for the proper use, care, and understanding of the readings from your paint thickness tester.
2. Product Overview
The Cloudpower Paint Thickness Tester is a compact, pen-shaped device featuring a color-coded scale for easy interpretation of measurements. Its design allows for quick and accurate assessments.

Figure 2.1: Overall view of the Cloudpower Paint Thickness Tester. The device is black with a gold cap and features a clear, color-coded measurement scale.
Key Features:
- Precision Measurement: Accurately measures varnish coatings with a precision of 20 microns.
- Battery-Free Operation: Requires no batteries or external power source.
- No Calibration Needed: Ready for immediate use without prior calibration.
- Dual Measurement Capability: Measures both varnish and putty thickness.
- Color-Coded Scale: Simplifies reading and interpretation of results.
- Durable Construction: Made from aluminum and plastic for longevity.
3. Setup
The Cloudpower Paint Thickness Tester is designed for immediate use. No assembly, battery installation, or initial calibration is required. Simply remove the protective cap (if present) and the device is ready for operation.
4. Operating Instructions
Follow these steps to accurately measure paint thickness on a vehicle surface:
- Prepare the Surface: Ensure the surface to be measured is clean, dry, and free from dirt, dust, or wax that could interfere with the reading.
- Position the Tester: Place the magnetic tip of the tester perpendicular to the vehicle's painted surface. Ensure full contact between the tip and the surface.
- Apply Pressure: Gently press the tester against the surface. The magnetic tip will retract into the pen body.
- Read the Scale: Observe the color and numerical value displayed on the scale at the point where the magnetic tip stops retracting. The scale is marked in microns (µm).
- Repeat Measurements: For best results, take multiple measurements in different areas of the same panel and compare them. This helps identify inconsistencies that may indicate repairs.

Figure 4.1: Demonstrating how to hold and apply the tester to a surface for measurement. The scale is visible, indicating a reading.
5. Understanding Readings (Color-Coded Scale)
The tester features a color-coded scale to simplify the interpretation of paint thickness. Each color corresponds to a general range of thickness, providing an immediate visual indication of the coating condition.
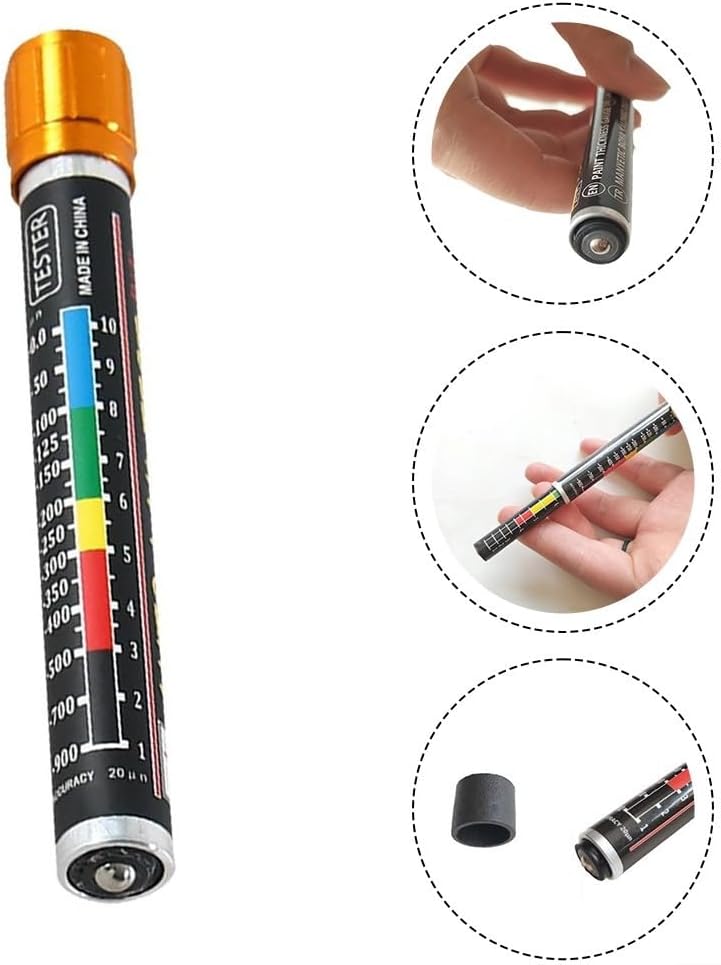
Figure 5.1: Detailed view of the color-coded scale on the tester, highlighting the different measurement ranges.
| Color | Approximate Thickness (µm) | Interpretation |
|---|---|---|
| Blue | 0 - 100 µm | Original varnish layer. This indicates the factory paint finish without significant repairs. |
| Green | 100 - 200 µm | Original varnish layer with a second, thin layer of varnish. May indicate minor touch-ups or a second clear coat. |
| Yellow | 200 - 300 µm | Repaired varnish. This range suggests that the panel has been repainted, possibly due to minor damage. |
| Red | 300 - 500 µm | Varnish with putty. Indicates significant repair work involving body filler (putty) and subsequent repainting. |
| Black | Over 500 µm | Extensive putty and varnish. Suggests major bodywork and multiple layers of filler and paint, often indicative of significant accident damage. |
Note: These ranges are general guidelines. Actual factory paint thickness can vary slightly between manufacturers and models. Always compare readings across different panels of the same vehicle for a comprehensive assessment.
6. Maintenance
To ensure the longevity and accuracy of your Cloudpower Paint Thickness Tester, follow these maintenance guidelines:
- Cleaning: Wipe the device with a soft, dry cloth after each use to remove any dust or residue. Do not use abrasive cleaners or solvents.
- Storage: Store the tester in a clean, dry place, away from extreme temperatures and direct sunlight. Keep the protective cap on the magnetic tip when not in use to prevent damage.
- Avoid Drops: While durable, avoid dropping the device, as this could affect its internal mechanism and accuracy.
7. Troubleshooting
The Cloudpower Paint Thickness Tester is a simple mechanical device with minimal points of failure. If you encounter issues, consider the following:
- Inconsistent Readings:
- Ensure the surface is clean and dry.
- Verify the tester is placed perpendicular to the surface and making full contact.
- Take multiple readings in the same spot to confirm consistency.
- Ensure the surface is magnetic (the tester will not work on non-ferrous materials like aluminum or plastic).
- Tester Not Retracting:
- Check if the magnetic tip is obstructed by debris.
- Confirm the surface is made of a ferrous material (steel, iron) that the magnet can adhere to.
8. Specifications
| Model Number | 39XH1807U3136CC6A985YF7 |
| Measurement Accuracy | ±20 microns (µm) |
| Measurement Range | 0 - 500+ µm (indicated by color scale) |
| Dimensions (L x W x H) | 7.09 x 1.97 x 1.97 inches (approx. 180 x 50 x 50 mm) |
| Item Weight | 1.13 ounces (approx. 32 grams) |
| Material | Aluminum, Plastic |
| Power Source | None (Magnetic-mechanical operation) |
9. Warranty and Support
Information regarding specific warranty terms and customer support for the Cloudpower Paint Thickness Tester is not available in this manual. Please refer to the product packaging or contact the retailer or manufacturer directly for details on warranty coverage and support services.