
1. Introduction
This manual provides detailed instructions for the installation, operation, and maintenance of your GW Security 16 Channel UltraHD 4K NVR Security System. This system includes a 16-channel Network Video Recorder (NVR) and twelve 8MP 4K motorized zoom PoE dome cameras. Please read this manual thoroughly before using the product to ensure proper setup and functionality.
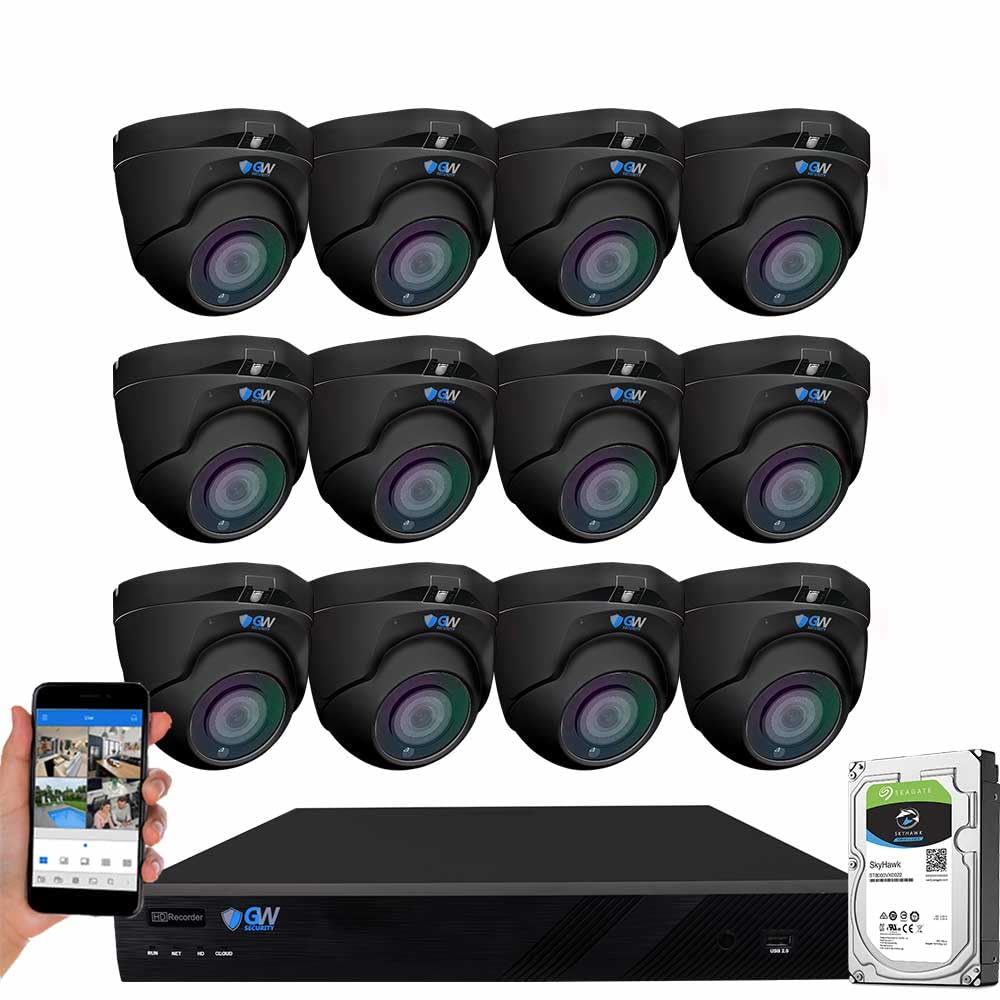
Image 1.1: Overview of the GW Security 16 Channel 4K NVR Security System components.
2. Package Contents
Verify that all items listed below are present in your package. If any items are missing or damaged, please contact customer support.
- 1 x GW42-4216P2: 16-Channel 6K 12MP NVR with 4TB Hard Drive
- 12 x GW808501M: 8MP 2.7-12mm Motorized Zoom Cameras
- 6 x GWCAT100: 100ft Cat5e Cables
- 6 x GWCAT60: 60ft Cat5e Cables
- Power Adapter for NVR
- USB Mouse
- Quick Start Guide

Image 2.1: Illustration of typical package contents.
3. Product Features
The GW Security NVR system offers advanced surveillance capabilities:
- UltraHD 4K Resolution: Capture clear and detailed video with 8-megapixel (3840x2160) cameras.
- Motorized Zoom Lenses: Each camera features a 2.7-13.5mm motorized 5X optical zoom lens, allowing remote adjustment of the viewing angle (135° wide to 20° telephoto).
- Built-in Microphone: Cameras include integrated microphones for audio recording alongside video surveillance.
- Smart AI Detection: Advanced artificial intelligence for human and vehicle detection, reducing false alarms.
- Power over Ethernet (PoE): Simplifies installation by providing power and data through a single Ethernet cable.
- Weatherproof and Vandalproof: IP67 rated for outdoor use and IK10 vandal-resistant housing for durability.
- Night Vision: Equipped with 18 SMD LEDs for up to 100ft (30m) of night vision in total darkness.
- H.265+ Video Compression: Efficient compression technology to save storage space and bandwidth.
- Expandable Storage: NVR supports up to two SATA hard drives, with a pre-installed 4TB HDD and capacity for up to 24TB total.

Image 3.1: Visual comparison of 8MP and 4MP image resolution.

Image 3.2: Illustrates the enhanced detail provided by 8MP 4K resolution.

Image 3.3: Depicts the UltraHD 4K video and audio monitoring capability with a built-in microphone.

Image 3.4: Shows the IP67 weatherproof design of the cameras, suitable for all seasons.
4. Safety Information
Observe the following safety precautions during installation and operation:
- Ensure the power supply voltage is correct for the NVR.
- Do not expose the NVR to liquids or excessive humidity.
- Install the NVR in a well-ventilated area to prevent overheating.
- Handle hard drives with care to avoid data loss.
- For outdoor camera installation, ensure secure mounting to prevent falls.
- Avoid pointing cameras directly at strong light sources, which can affect image quality.
5. Setup
5.1 NVR Initial Setup
- Connect the NVR to a monitor using an HDMI or VGA cable.
- Connect the included USB mouse to the NVR's USB port.
- Connect the NVR to your network router using an Ethernet cable.
- Connect the power adapter to the NVR and plug it into a power outlet. The NVR will power on automatically.
- Follow the on-screen prompts to complete the initial setup wizard, including setting a password and configuring network settings.
5.2 Camera Installation
The cameras use Power over Ethernet (PoE), simplifying wiring.
- Mount each camera in your desired location using the provided mounting hardware. Ensure the mounting surface is strong enough to support the camera.
- Connect one end of the Cat5e Ethernet cable to the camera's PoE port.
- Connect the other end of the Cat5e Ethernet cable to one of the NVR's PoE ports.
- The NVR will automatically detect and power the cameras. The camera video feeds should appear on the connected monitor.

Image 5.1: NVR connections and mobile app setup via QR code.
6. Operation
6.1 Live Viewing
Once cameras are connected, the NVR will display live feeds. Use the mouse to navigate the interface, select specific cameras, or change display layouts.
6.2 Recording
The NVR is pre-configured for continuous recording. You can customize recording schedules and modes (e.g., motion-triggered, continuous) through the NVR's menu: System > Storage > Recording Schedule.
6.3 Playback
To review recorded footage, access the playback function from the NVR's main menu. You can search by date, time, and event type (e.g., motion detection).
Video 6.1: Demonstration of AcuSearch for efficient target finding in recorded footage.
6.4 Remote Access (Mobile App)
Access your security system remotely using the free mobile application. Download the 'GWVIEW' app from your smartphone's app store. Scan the NVR's QR code (found in the NVR's network settings or on the NVR label) to add the device. This allows live viewing, playback, and system management from your phone or tablet.

Image 6.2: Remote access to the security system via various devices.
6.5 Smart AI Detection
The system features advanced AI for human and vehicle detection. This helps in filtering out irrelevant motion events (like swaying trees) and provides more accurate alerts. Configure detection zones and sensitivity in the NVR's AI settings.

Image 6.3: Smart AI detection identifying humans and vehicles.

Image 6.4: Mobile notification for human and vehicle detection.
Video 6.2: Demonstration of Face Recognition, Human, and Vehicle Smart AI Detection features.
6.6 Motorized Zoom
The motorized zoom feature allows you to adjust the camera's field of view remotely. From the NVR interface or mobile app, you can zoom in or out to focus on specific areas without physically accessing the camera.

Image 6.5: Example of 5X motorized zoom focusing on a license plate.

Image 6.6: Visual representation of 5X motorized zoom from wide to telephoto.
7. Maintenance
7.1 Hard Drive Management
The NVR comes with a 4TB hard drive pre-installed. You can expand storage by adding a second SATA hard drive, up to a total of 24TB. Regularly check the hard drive status in the NVR settings to ensure optimal recording performance. Back up important footage using the USB backup feature or cloud storage options (Google Drive, Dropbox).

Image 7.1: NVR storage upgrade capability and H.265+ efficiency.
7.2 Firmware Updates
Periodically check for firmware updates for your NVR and cameras. Updates can provide new features, improve performance, and enhance security. Firmware updates can often be performed directly through the NVR's menu or via the cloud upgrade feature.
7.3 Cleaning
Wipe camera lenses and housings with a soft, damp cloth to remove dust and dirt. Do not use harsh chemicals. Ensure the NVR's ventilation openings are clear of obstructions.
8. Troubleshooting
- No Video Signal: Check all cable connections (Ethernet, HDMI/VGA). Ensure cameras are powered via PoE. Verify NVR is powered on.
- Cannot Access Remotely: Ensure NVR is connected to the internet. Check network settings and port forwarding if necessary. Verify correct app configuration and device addition.
- Poor Image Quality: Clean camera lenses. Adjust camera position or zoom. Check network bandwidth if experiencing lag.
- No Recording: Check hard drive status in NVR settings. Ensure recording schedule is enabled. Verify sufficient storage space.
- False Motion Alerts: Adjust motion detection sensitivity and detection zones in camera settings. Utilize AI human/vehicle detection to minimize false alarms.
For further assistance, refer to the Warranty and Support section.
9. Specifications
| Feature | Specification |
|---|---|
| Model Number | GW16CH8075M12 |
| NVR Channels | 16 Channels |
| Camera Resolution | 8MP 4K (3840x2160) |
| Lens Type | 2.7-13.5mm Motorized 5X Optical Zoom |
| Viewing Angle | 135 degrees (wide) to 20 degrees (telephoto) |
| Night Vision Range | Up to 100 feet (30 meters) |
| Audio | Built-in Microphone |
| Weather Resistance | IP67 Weatherproof |
| Vandal Resistance | IK10 Vandalproof |
| AI Features | Human / Vehicle Smart AI Detection, Face Recognition |
| Video Compression | H.265+ |
| NVR Hard Drive | 4TB Pre-installed, expandable up to 24TB (2 SATA bays) |
| Connectivity | Wired (PoE) |
| Operating System | Linux |
| Compatible Devices | Laptops, Personal Computers, Smartphones, TV, Tablets |
| Frame Rate | 30 fps |
| Recording Mode | Continuous, Motion Detection |
| Hardware Interface | 3.5mm Audio, Ethernet, HDMI, USB 3.0, VGA |
10. Warranty and Support
Your GW Security system comes with a Two-Year Warranty. We also provide Free Lifetime Technical Support from our U.S.-based team.
For technical assistance, please contact us Monday - Friday from 6:00 am to 5:00 pm PST. Our support team can assist with installation questions, camera connection, network configuration, system setup, mobile app setup, remote viewing, system updates, and system maintenance.

Image 10.1: Overview of available technical support services.

