1. Introduction
This manual provides comprehensive instructions for the installation, operation, and maintenance of your Honeywell TH2110U4004/U T4 Pro Programmable Thermostat. This device is designed to offer efficient temperature control for your home or light commercial environment, featuring a large LCD display and programmable settings to optimize comfort and energy savings. Please read this manual thoroughly before installation and use to ensure proper function and safety.
Key Features:
- Advanced Programming: Create custom schedules for heating and cooling.
- Clear LCD Display: Backlit screen shows current temperature, set temperature, system mode, and fan status.
- Enhanced Compatibility: Supports 2 Heat/1 Cool stages for heat pump systems and 1 Heat/1 Cool stages for conventional systems.
- Energy-Saving Technology: Helps reduce energy consumption.
- Modern Design: Compact and sleek white finish.
2. Safety Information
Always turn off power at the circuit breaker or fuse box before beginning installation to prevent electrical shock or damage to the equipment. Installation should be performed by a qualified technician if you are unsure about any steps. Do not short (jumper) the terminals on the gas valve or at the system to test the thermostat. This can damage the thermostat and void the warranty.
- Ensure all wiring complies with local electrical codes and ordinances.
- Do not expose the thermostat to direct water or excessive humidity.
- Keep out of reach of children.
3. Package Contents
Verify that your package contains the following items:
- Honeywell TH2110U4004/U T4 Pro Programmable Thermostat
- Wallplate
- Mounting Hardware (screws and anchors)
- User Guide / Installation Guide
4. Installation
4.1. Turning Off Power
Before beginning installation, ensure the power to your heating/cooling system is turned off at the circuit breaker or fuse box. This is a critical safety step.
4.2. Removing Old Thermostat
- Remove the cover of your old thermostat.
- Take a picture of the wiring connections for future reference.
- Disconnect the wires one by one, labeling each wire with the terminal designation (e.g., R, G, Y, W) as you remove it.
- Unscrew and remove the old thermostat's wallplate.
4.3. Mounting the New Thermostat
- Separate the new thermostat from its wallplate.
- Position the new wallplate against the wall, using the old mounting holes if possible. Use a level to ensure it is straight.
- Mark the new mounting holes if necessary. Drill pilot holes (3/16-inch for drywall, 7/32-inch for plaster) and insert wall anchors.
- Secure the wallplate to the wall using the provided screws.
4.4. Wiring
Connect the wires to the corresponding terminals on the new wallplate. Refer to the picture taken earlier or the wiring diagram provided with your thermostat. Ensure wires are securely fastened.
4.5. Attaching the Thermostat to the Wallplate
Align the thermostat body with the mounted wallplate and gently push until it snaps securely into place.
4.6. Restoring Power
Once the thermostat is securely mounted and wired, turn the power back on at the circuit breaker or fuse box. The thermostat display should illuminate.
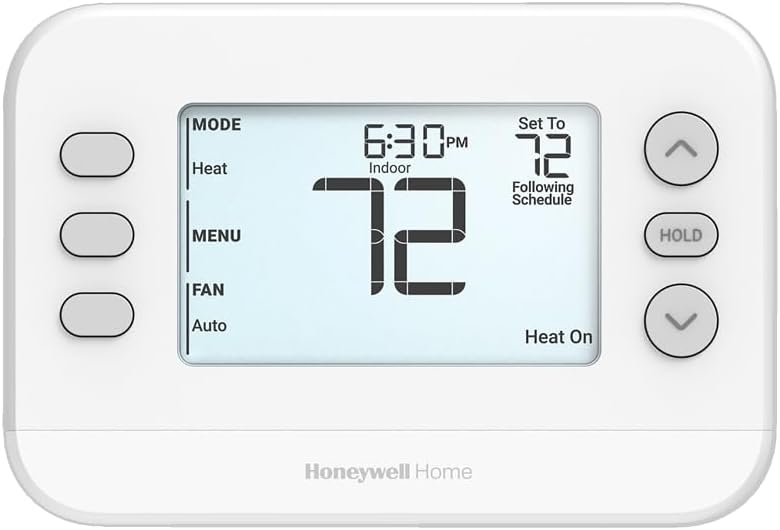
This image displays the Honeywell TH2110U4004/U T4 Pro Programmable Thermostat. The large LCD screen prominently shows the indoor temperature as 72 degrees Fahrenheit, the current time as 6:30 PM, and indicates that the system is in 'Heat On' mode, following a schedule. On the left side of the display are buttons for 'MODE', 'MENU', and 'FAN' settings. On the right, there are up and down arrow buttons for temperature adjustment and a 'HOLD' button. The thermostat has a clean white finish and the 'Honeywell Home' logo is visible at the bottom.
5. Initial Setup and Programming
5.1. Setting Date and Time
- Press the MENU button.
- Use the Up or Down arrows to navigate to the "SET TIME" or "SET DATE" option.
- Press SELECT (or the center button if available) to enter the setting.
- Adjust the values using the Up or Down arrows and confirm each setting.
5.2. Programming a Schedule
The T4 Pro allows for 7-day programming with 4 programmable periods per day (Wake, Away, Home, Sleep).
- Press the MENU button.
- Navigate to "SCHEDULE" and press SELECT.
- Choose the day(s) you wish to program (e.g., "ALL DAYS" or individual days).
- Adjust the start time and temperature for each period (Wake, Away, Home, Sleep) using the Up/Down arrows and SELECT.
- Repeat for all desired periods and days.
- Press RUN SCHEDULE to activate the program.
6. Operation
6.1. System Mode Selection
Press the MODE button to cycle through available system modes:
- Heat: Activates the heating system.
- Cool: Activates the cooling system.
- Off: Turns off both heating and cooling.
- Auto: Automatically switches between heating and cooling as needed (if configured).
- Em Heat: Emergency Heat (for heat pump systems only).
6.2. Fan Operation
Press the FAN button to cycle through fan settings:
- Auto: Fan runs only when heating or cooling system is active.
- On: Fan runs continuously, regardless of heating/cooling system activity.
6.3. Adjusting Temperature
Use the Up or Down arrow buttons to adjust the desired temperature. The new setting will be displayed.
6.4. Hold Function
The HOLD button allows you to temporarily or permanently override the programmed schedule.
- Temporary Hold: Adjust the temperature using the Up/Down arrows. The thermostat will hold this temperature until the next scheduled period begins.
- Permanent Hold: Press the HOLD button. The thermostat will maintain the current temperature indefinitely until HOLD is pressed again or the schedule is resumed.
- To cancel a hold and resume the schedule, press the RUN SCHEDULE button (or press HOLD again).
7. Maintenance
7.1. Cleaning the Thermostat
To clean the thermostat, wipe it with a soft, damp cloth. Do not use abrasive cleaners or solvents. Avoid spraying liquid directly onto the thermostat.
7.2. System Filter Reminder (if applicable)
Your thermostat may have a filter change reminder. When the "FILTER" indicator appears, it's time to check or replace your system's air filter. After changing the filter, reset the reminder in the thermostat's menu settings.
8. Troubleshooting
| Problem | Possible Cause | Solution |
|---|---|---|
| No display or blank screen | No power to the thermostat. | Check the circuit breaker or fuse for your heating/cooling system. Ensure it is ON. Verify wiring connections. |
| Heating/Cooling system not responding | Incorrect system mode selected; wiring issue; system lockout. | Ensure the thermostat is set to "Heat" or "Cool" mode. Check wiring. Wait 5 minutes for system lockout to reset. |
| Temperature reading seems inaccurate | Thermostat location; drafts; internal sensor issue. | Ensure the thermostat is not in direct sunlight or near heat sources/drafts. If problem persists, contact support. |
| Schedule not running | Thermostat is on "Hold" or "Permanent Hold". | Press the RUN SCHEDULE button to resume programmed operation. |
If you encounter issues not listed here, or if the suggested solutions do not resolve the problem, please contact Honeywell customer support.
9. Specifications
- Model Name: TH2110U4004
- Item Model Number: TH2110U4004/U
- Brand: Honeywell
- Controller Type: Hand Control
- Special Feature: Programmable
- Color: White
- Specific Uses For Product: Air Conditioner
- Temperature Control Type: Programmable
- Included Components: Temperature Sensor
- Power Source: Hardwired
- Item Weight: 11.4 ounces
- Voltage: 24 Volts
- Display Type: LCD
- Control Method: App (Note: While listed, primary control is via unit buttons)
- Mounting Type: Wall Mount
- Style: Modern
- UPC: 194159017436
- Product Dimensions: 4.75 x 2.31 x 6.25 inches
10. Warranty and Support
Honeywell products are designed for reliability and durability. For specific warranty information regarding your TH2110U4004/U T4 Pro Programmable Thermostat, please refer to the warranty card included with your product or visit the official Honeywell website.
For technical support, troubleshooting assistance, or to inquire about replacement parts, please contact Honeywell Customer Support. You can typically find contact information on the Honeywell website or within the product packaging.
Online Resources: For additional resources, FAQs, and product registration, visit the Honeywell Store on Amazon or the official Honeywell website.