1. Introduction
The IdeaFormer-3D IR3 V2 is an advanced conveyor belt 3D printer designed for continuous and batch printing. It features an infinite Z-axis for producing exceptionally long parts and a durable metal conveyor belt with PEI coating for excellent adhesion. Equipped with a Klipper system, it offers high-speed printing up to 400mm/s and includes one-click auto-calibration for ease of use. This manual provides essential information for the safe and effective operation of your IR3 V2 printer.

Figure 1.1: The IdeaFormer-3D IR3 V2 Conveyor Belt 3D Printer, showcasing its main structure and conveyor belt.
2. Safety Information
Adhere to the following safety guidelines to prevent injury or damage to the printer:
- Always operate the printer in a well-ventilated area.
- Keep hands clear of moving parts during operation.
- Do not touch the hot nozzle or heated bed during or immediately after printing.
- Ensure the power supply is correctly rated for your region and properly grounded.
- Unplug the printer before performing any maintenance or cleaning.
- Keep the printer away from flammable materials and direct sunlight.
- Supervise children and pets around the printer.
3. Package Contents
Verify that all components are present upon unboxing:
- 1 x IdeaFormer-3D IR3 V2 Conveyor Belt 3D Printer
- Power Cable
- USB Cable
- Filament Holder
- Tool Kit (wrenches, screwdrivers, etc.)
- Spare Nozzle
- Small Roll of Filament (for initial testing)
- User Manual (this document)
Note: The exact contents may vary slightly. Refer to the packing list included with your product.
4. Assembly
The IR3 V2 printer requires minimal assembly. Follow these steps carefully:
- Unpacking: Carefully remove all components from the packaging. Retain the packaging for future transport or storage.
- Gantry Installation: Attach the gantry assembly to the base unit. Ensure it is securely fastened and squared at the correct 45-degree angle. Refer to the included quick start guide for detailed diagrams.
- Filament Holder: Mount the filament holder to the designated position on the printer frame.
- Cable Connections: Connect all necessary cables, including the power cable, motor cables, and sensor cables. Double-check all connections to ensure they are firm and correctly seated. Pay particular attention to the feed sensor cable to avoid issues.
- Initial Inspection: Before powering on, visually inspect the printer for any loose parts or obstructions. Ensure the conveyor belt moves freely.
Tip: Online video tutorials from IdeaFormer-3D may provide additional visual guidance for assembly.
5. Initial Setup
5.1 Power On and Connectivity
- Connect the power cable and turn on the printer using the main power switch.
- The printer's control screen will initialize.
- Connect the printer to your network via Ethernet or Wi-Fi (if supported) to access the Klipper web interface (Fluidd). The IP address will be displayed on the printer's screen or can be found via your router.
5.2 Auto Calibration
The IR3 V2 features a one-click auto-calibration system:

Figure 5.1: Illustration of the auto-calibration process, highlighting auto-leveling and Y-offset strain sensor.
- From the printer's touch screen or the Fluidd web interface, navigate to the calibration menu.
- Select the "Auto Leveling" option. The print head will automatically probe multiple points on the heated bed to determine the optimal Z-offset and bed leveling.
- The Y-offset strain sensor assists in precise calibration, eliminating manual adjustments.
5.3 Software Installation (Slicer)
To prepare 3D models for printing, you will need a slicing software. IdeaFormer-3D recommends IdeaMaker or Cura.
- Download and install the latest version of IdeaMaker or Cura from their official websites.
- Follow the instructions provided by IdeaFormer-3D to import the specific printer profile for the IR3 V2 into your chosen slicer. This profile contains optimized settings for the conveyor belt and printer kinematics.
- Configure your slicer settings according to the filament type you intend to use (e.g., PLA, PETG, ABS, TPU, ASA, PP).
6. Operating the Printer
6.1 Loading Filament
- Place the filament spool onto the filament holder.
- Preheat the nozzle to the recommended temperature for your filament type.
- Feed the filament into the extruder until it is gripped by the gears and begins to exit the nozzle.
6.2 Preparing a Print (Slicing)
- Open your 3D model (.stl, .obj, etc.) in the slicing software.
- Adjust print settings such as layer height, infill, print speed, and support structures as needed. For conveyor belt printing, consider the 45-degree print angle and potential for long or batch prints.
- Slice the model to generate a G-code file.
6.3 Starting a Print
- Transfer the generated G-code file to the printer. This can typically be done via USB drive or by uploading it directly to the Fluidd web interface.
- From the Fluidd interface or the printer's touch screen, select the desired G-code file.
- Initiate the print. The printer will begin heating the bed and nozzle, then start the printing process.

Figure 6.1: Depiction of the infinite Z-axis printing capability, allowing for continuous production of long objects.
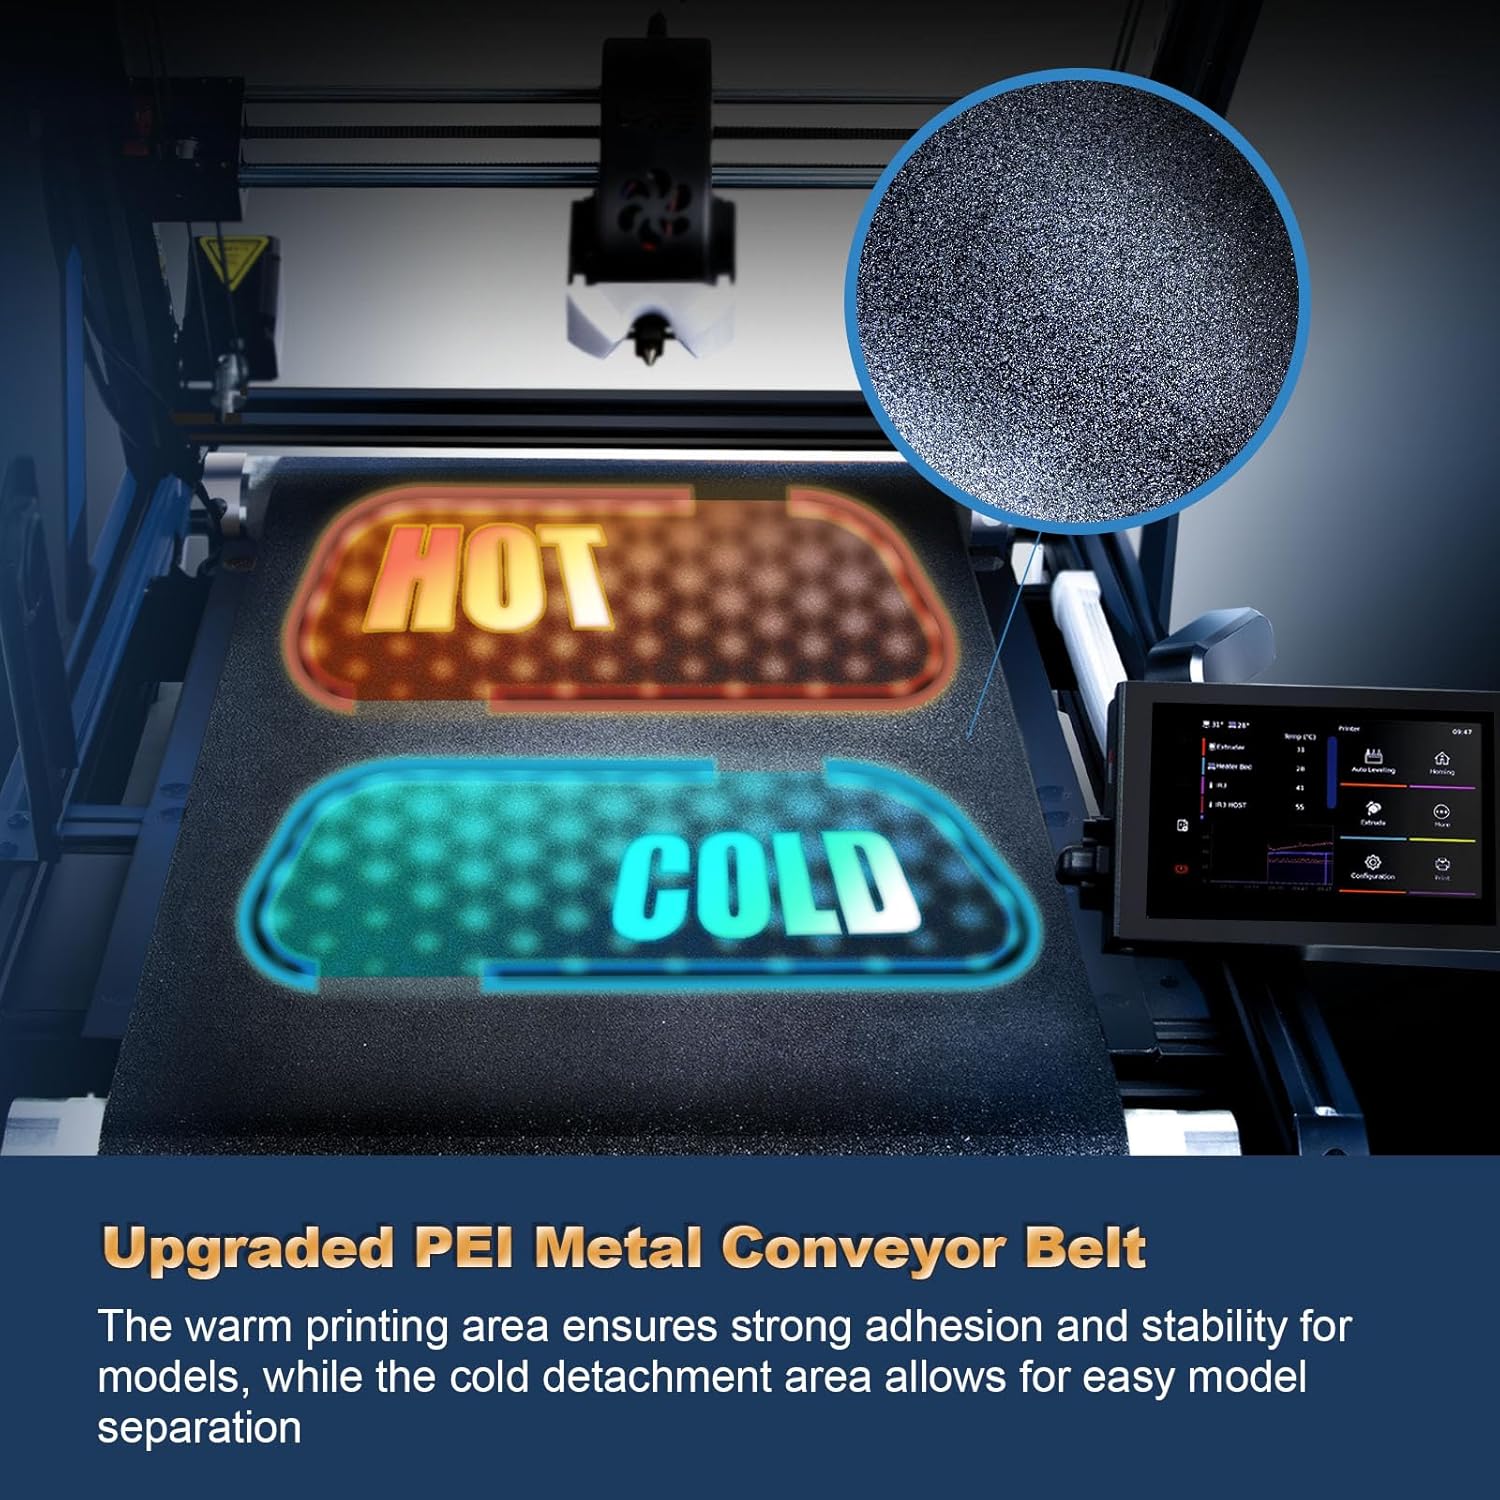
Figure 6.2: Example of batch printing, demonstrating the efficiency of producing multiple small parts consecutively.
6.4 Monitoring and Stopping a Print
- Monitor the print progress via the Fluidd web interface, which may include a camera feed if configured.
- To stop a print, use the "Pause" or "Cancel" option on the printer's screen or Fluidd interface.
- Once a print is complete, parts will typically detach from the conveyor belt as it cools and moves forward.
7. Maintenance
Regular maintenance ensures optimal performance and longevity of your IR3 V2 printer.
7.1 Cleaning
- Conveyor Belt: Regularly clean the PEI-coated metal conveyor belt with isopropyl alcohol to maintain adhesion. Avoid abrasive materials.
- Nozzle: Clean any filament residue from the nozzle using a brass brush while the nozzle is heated. For clogs, perform a cold pull or use a nozzle cleaning needle.
- Extruder: Remove any filament dust or debris from the extruder gears.
- Printer Frame: Wipe down the printer frame and rails with a soft, dry cloth to remove dust.

Figure 7.1: The PEI-coated metal conveyor belt, showing the hot and cold zones for optimal adhesion and detachment.
7.2 Lubrication
- Apply a small amount of lithium grease or appropriate lubricant to the linear rails and lead screws periodically to ensure smooth motion.
7.3 Firmware Updates
- Periodically check the IdeaFormer-3D official website for firmware updates for the Klipper system. Follow their instructions carefully for updating to ensure compatibility and new features.
8. Troubleshooting
This section addresses common issues you might encounter with your IR3 V2 printer.
| Problem | Possible Cause | Solution |
|---|---|---|
| Prints not sticking to belt | Dirty belt surface, incorrect Z-offset, insufficient bed temperature, warped belt. | Clean the belt with isopropyl alcohol. Re-run auto-calibration. Increase bed temperature. Inspect belt for damage. |
| Filament not extruding | Clogged nozzle, tangled filament, incorrect temperature, extruder motor issue. | Clean or replace nozzle. Ensure filament spool is free. Verify nozzle temperature. Check extruder motor connection. |
| Layer shifting | Loose belts, motor skipping steps, excessive print speed, unstable printer. | Check and tighten all belts. Reduce print speed. Ensure printer is on a stable surface. |
| Poor print quality (ghosting, ringing) | Vibrations, high acceleration, loose components. | Ensure printer is stable. Adjust acceleration settings in slicer/Klipper. Check for loose screws. |
| Printer not connecting to network | Incorrect IP address, network configuration issues, cable problem. | Verify IP address. Check network cable/Wi-Fi connection. Restart router and printer. |
For more complex issues, refer to the IdeaFormer-3D support resources or community forums.
9. Specifications
Key technical specifications for the IdeaFormer-3D IR3 V2 Conveyor Belt 3D Printer:
| Parameter | Specification |
|---|---|
| Printing Technology | FDM (Fused Deposition Modeling) |
| Build Volume (X×Y×Z) | 250×250×∞mm (Infinite Z-axis) |
| Max Print Speed | Up to 400mm/s |
| Max Acceleration | 20000mm/s² |
| Nozzle Temperature | Max 300°C |
| Heated Bed Temperature | Max 90°C |
| Filament Diameter | 1.75mm |
| Compatible Filaments | PLA, PETG, ABS, TPU, ASA, PP, etc. |
| Print Platform | PEI metal build surface (Conveyor Belt) |
| Firmware | Klipper |
| Connectivity | USB Drive, Local Network/Internet Network |
| Product Dimensions | 20.47 x 30.71 x 12.6 inches (520 x 780 x 320 mm) |
| Item Weight | 45 pounds (20.4 kg) |
| Operating System Compatibility | Windows, macOS, Linux |
Note: Specifications are subject to change without prior notice.
10. Warranty and Support
10.1 Warranty Information
IdeaFormer-3D products typically come with a manufacturer's warranty covering defects in materials and workmanship. For specific warranty terms and duration, please refer to the warranty card included with your product or visit the official IdeaFormer-3D website. Keep your proof of purchase for warranty claims.
Protection plans are also available for extended coverage. For example, a 4-Year Protection Plan is offered for this product.
10.2 Customer Support
For technical assistance, troubleshooting, or general inquiries, please contact IdeaFormer-3D customer support through their official channels. Support is often available via email or their official website's contact form.
IdeaFormer-3D Official Store: Visit Store
When contacting support, provide your product model (IR3 V2), ASIN (B0DTHRC3LN), and a detailed description of the issue.


