1. Introduction
This manual provides essential information for the AIXTZ 3RZ-FE Engine Rebuild Overhaul Kit. This kit is designed to facilitate a comprehensive engine overhaul, restoring performance and reliability to compatible vehicles. It includes a wide range of components necessary for a complete rebuild.
Important Note: Professional installation is highly recommended for this engine rebuild kit due to the complexity and precision required for proper engine assembly and function.
2. Product Components
The AIXTZ 3RZ-FE Engine Rebuild Overhaul Kit includes the following essential components:
- Engine Kits Component: 1x Engine Crankshaft, 4x Connecting Rods, 1x Pistons & Rings Set, 1x Main & Rod Bearings Set, 4pcs Thrust Washers, 1x Intake & Exhaust Valve Kit, 1x Timing Chain Kit w/ VVT Gear Set, 1x Head Gasket Seals & Head Bolts Set.
- Timing Chain Kit Contains: 1x Timing Chain (106 links), 1x Cam Sprocket (36 teeth), 1x Crank Sprocket (18 teeth), 1x Guide Rail (fixed - straight), 1x Guide Rail (curved), 1x Tensioner, 1x Timing Chain-balance shaft (82 links), 1x Guide Rail-balance shaft (upper rail), 1x Guide Rail-balance shaft (center left rail), 1x Guide Rail-balance shaft (lower rail), 1x Tensioner-balance shaft.
- Head Gasket Seals & Head Bolts Set: Graphite Head Gasket, Valve Cover Gasket, Valve Stem Seals, Intake Manifold Gasket, Exhaust Manifold Gasket, Front Camshaft Seal, O-Rings, Other Small Gaskets, 10x Cylinder Head Bolts.

Figure 2.1: Overview of all components included in the AIXTZ 3RZ-FE Engine Rebuild Overhaul Kit.
3. Compatibility
This engine rebuild kit is compatible with the following vehicle models and engine specifications:
- Fits for 4Runner 2.7L 2694CC l4 DOHC, (16 Valve) Eng. Code "3RZFE" 1996 - 2000
- Fits for T100 2.7L 2694CC l4 DOHC, (16 Valve) Eng. Code "3RZFE" 1994 - 1998
- Fits for Tacoma 2.7L 2694CC l4 DOHC, (16 Valve) Eng. Code "3RZFE" 1995 - 2004
Important: Always confirm the OE NUMBER/MODEL/MAKE/YEAR/VIN before purchasing to ensure compatibility with your specific vehicle. Carefully review the parts shown in the product images to verify they match your requirements.
Replacement OE Part Numbers:
This kit replaces the following original equipment part numbers:
- 13201-79205 / 13201-79466
- 13041-75010 / 11011-75020
- ES72182 / HS9465PT-2 / HS9465PT-3
- 13711-75060 / 13711-75050
- 13715-75050 / 13715-75040
- 13507-75010 / 13506-75020
- 13550-75010 / 13540-75020 / 13563-75010
- 13559-75020 / 13554-75010 / 13562-75010
- 13561-75020 / 13523-75010 / 13597-75010
- 11701-75022-01 / 11701-75022-02 / 11701-75022-03
- CTKTO38 / TK939 / 9-4196S / 9-2645
- 94196S / 3-3SRH106 / 029-0131
4. Setup and Installation Guidelines
The installation of an engine rebuild kit requires specialized knowledge, tools, and experience. It is strongly recommended that this procedure be performed by certified automotive technicians.
General Steps (for professional reference):
- Engine Disassembly: Carefully remove the engine from the vehicle and disassemble it, documenting the position and condition of all components.
- Inspection and Cleaning: Thoroughly inspect all engine block, cylinder head, and other reusable components for wear, cracks, or damage. Clean all parts meticulously.
- Machining (if necessary): Perform necessary machining operations such as cylinder boring/honing, crankshaft grinding, valve seat grinding, and cylinder head resurfacing.
- Component Installation: Install new components from the kit, including crankshaft, connecting rods, pistons, rings, bearings, valves, and gaskets, following manufacturer's torque specifications and assembly procedures.
- Timing System Assembly: Install the timing chain kit components, ensuring correct timing marks alignment.
- Final Assembly: Reassemble the engine, installing all remaining components, seals, and accessories.
- Engine Installation: Reinstall the rebuilt engine into the vehicle.
- Fluid Filling: Fill the engine with appropriate engine oil, coolant, and other necessary fluids.

Figure 4.1: Connecting rods included in the kit.

Figure 4.2: The crankshaft provided in the kit.

Figure 4.3: Head gasket, valve cover gasket, and other seals.

Figure 4.4: Main and rod bearings, along with thrust washers.
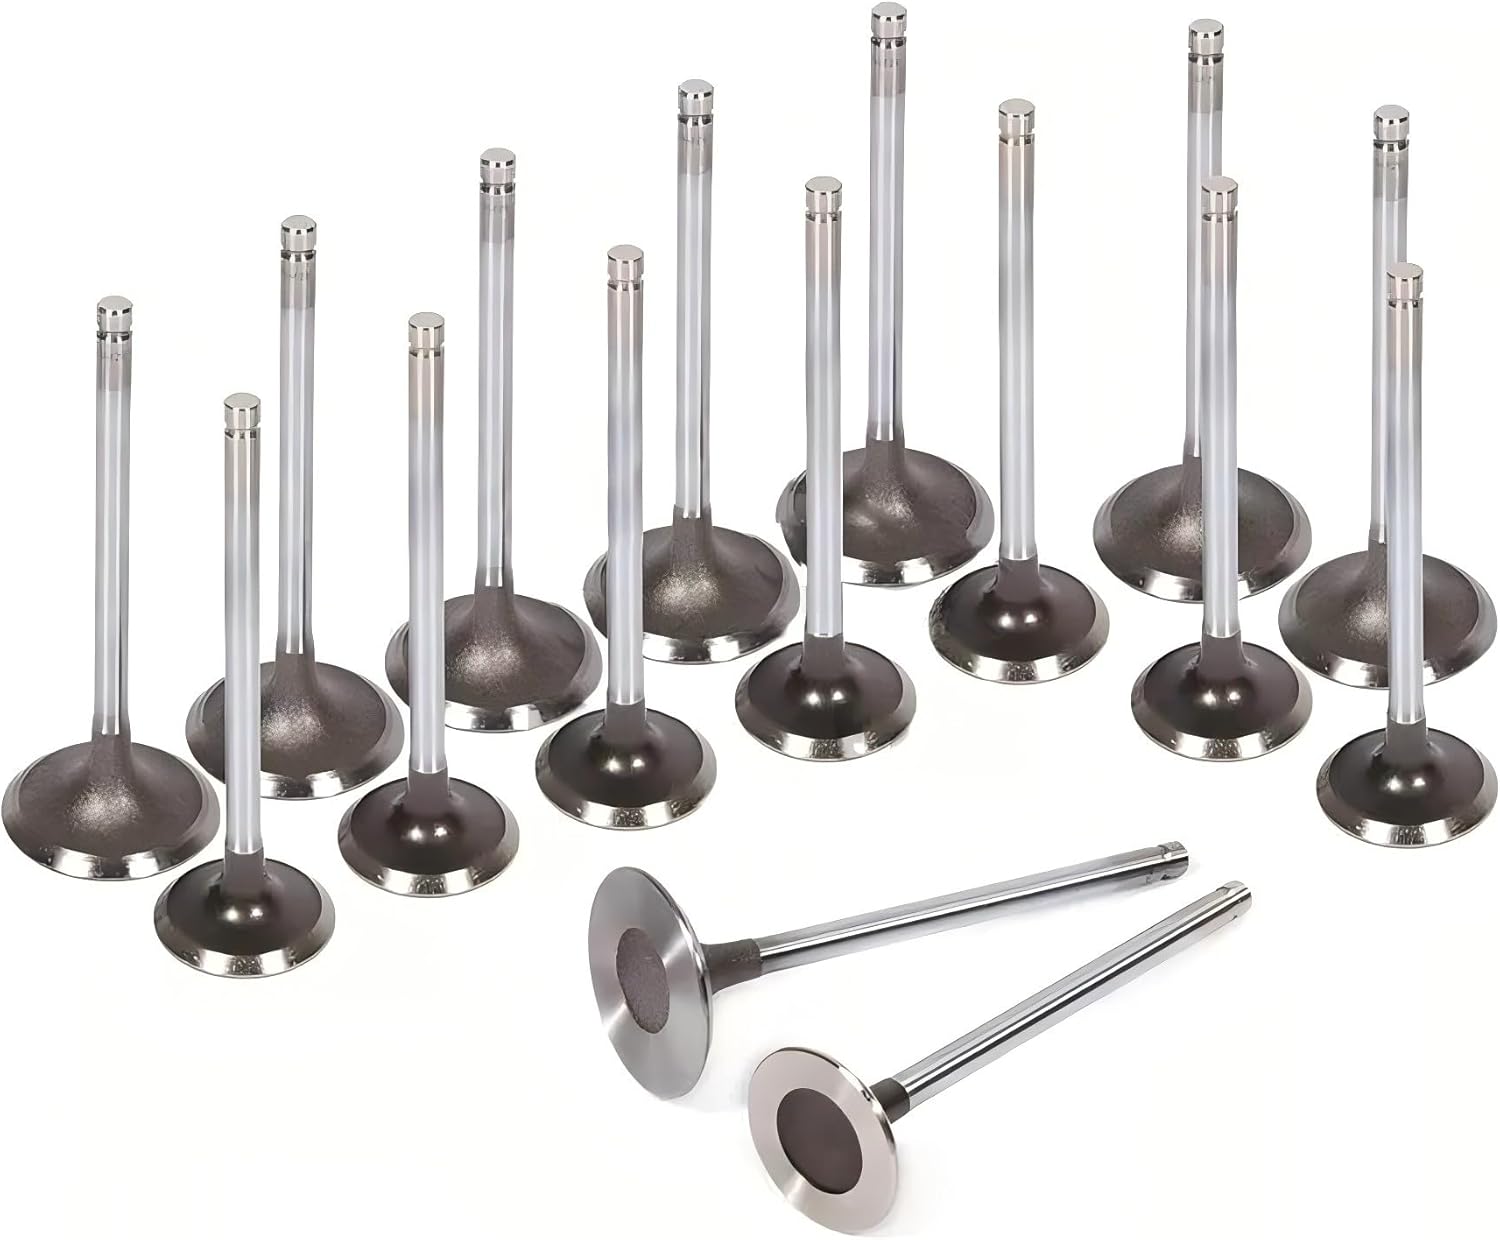
Figure 4.5: Intake and exhaust valves.
5. Operating Guidelines (Post-Rebuild)
After a complete engine rebuild, proper initial operation and break-in procedures are crucial for the longevity and performance of the engine. Consult your vehicle's service manual for specific break-in recommendations.
General Break-in Recommendations:
- Initial Start-up: Ensure proper oil pressure is established immediately upon initial start-up. Monitor for any unusual noises or warning lights.
- Vary RPMs: For the first 500-1000 miles, avoid prolonged periods at a single RPM. Vary engine speed during driving to properly seat piston rings.
- Avoid Heavy Loads: Do not tow, carry heavy loads, or engage in aggressive driving during the break-in period.
- Oil Changes: Perform an initial oil and filter change after the first 500-1000 miles to remove any break-in contaminants.
- Monitor Fluids: Regularly check engine oil and coolant levels during the break-in period.
6. Maintenance
Regular maintenance is vital for the continued optimal performance and lifespan of your rebuilt engine. Adhere to your vehicle manufacturer's recommended maintenance schedule.
Key Maintenance Practices:
- Oil and Filter Changes: Follow the recommended intervals for oil and filter changes using the correct type and viscosity of engine oil.
- Coolant System: Regularly check coolant levels and condition. Flush and replace coolant as per manufacturer guidelines.
- Air Filter: Inspect and replace the engine air filter regularly to ensure proper air intake and prevent contaminants from entering the engine.
- Spark Plugs: Replace spark plugs at recommended intervals to maintain optimal combustion efficiency.
- Belt and Hose Inspection: Periodically inspect all engine belts and hoses for signs of wear, cracks, or leaks.
7. Troubleshooting
While this kit provides high-quality components, issues can arise during or after an engine rebuild. This section offers general troubleshooting advice. For complex issues, consult a professional mechanic.
Common Issues and Potential Causes:
- Engine Not Starting: Check fuel delivery, ignition system, battery charge, and proper engine timing.
- Low Oil Pressure: Verify oil level, oil pump function, and proper bearing clearances.
- Overheating: Inspect coolant levels, radiator, thermostat, water pump, and cooling fan operation.
- Unusual Engine Noises: Could indicate issues with bearings, valvetrain, or piston slap. Requires immediate professional diagnosis.
- Excessive Smoke from Exhaust:
- Blue Smoke: Oil burning, possibly due to improper piston ring seating or valve stem seal issues.
- White Smoke: Coolant burning, indicating a head gasket leak or cracked cylinder head/block.
- Black Smoke: Rich fuel mixture, possibly due to fuel system or sensor issues.
If you encounter any significant issues, especially after a rebuild, it is crucial to seek assistance from a qualified automotive technician to prevent further damage.
8. Specifications
| Attribute | Detail |
|---|---|
| Manufacturer | AIXTZ |
| Brand | Generic |
| Model Name | Engine Kits |
| Item Model Number | 3RZ-FE |
| Exterior Finish | Machined |
| Manufacturer Part Number | 3RZ-FE |
| ASIN | B0DTHMS1F9 |
| Date First Available | January 20, 2025 |
9. Warranty and Support
For any inquiries regarding product suitability, additional information, or after-sales support, please contact the seller directly.
- If you are unsure whether this kit is suitable for your vehicle, or require more information, please provide your Vehicle Identification Number (VIN) when contacting support.
- For after-sales questions or issues, please provide specific instructions and corresponding pictures to facilitate a quicker resolution.
Please refer to the purchase platform or your order details for specific warranty terms and contact information for the seller, RenXinQuan.


