1. Introduction
This manual provides detailed instructions for the installation, setup, and operation of your CAMECHO 9-inch Android 15 Car Radio Stereo. This unit is specifically designed for Hyundai Santa Fe models from 2006 to 2012 (Low-End Version) and offers advanced features including wireless Apple CarPlay, Android Auto, GPS navigation, Bluetooth 5.0, FM/RDS radio, a 32-band equalizer, and support for an AHD backup camera.
Please read this manual thoroughly before installation and use to ensure proper functionality and to maximize your experience with the product.
2. Product Overview
The CAMECHO Car Radio Stereo is an advanced in-dash navigation system featuring a 9-inch touch screen. It runs on Android 15 OS with 4GB RAM and 64GB ROM, ensuring smooth performance. Key features include:
- Wireless Apple CarPlay & Android Auto: Seamless integration with your smartphone for navigation, calls, messages, and music.
- GPS Navigation: Built-in GPS module supporting both online and offline navigation.
- WiFi Connection: Connect to mobile hotspots for internet access and app downloads.
- AHD Backup Camera Support: Includes an IP67 waterproof AHD rear view camera with enhanced night vision.
- Bluetooth 5.0 & FM/RDS Radio: Hands-free calling and wireless audio streaming, plus 18-station presets for FM/RDS radio.
- 32-Band EQ: Customizable audio settings for optimal sound quality.
- Steering Wheel Control: Retains factory steering wheel control functionality.
- Additional Features: 1080P video playback, dual USB ports, adjustable home page app display, phone mirror link, and split-screen function.
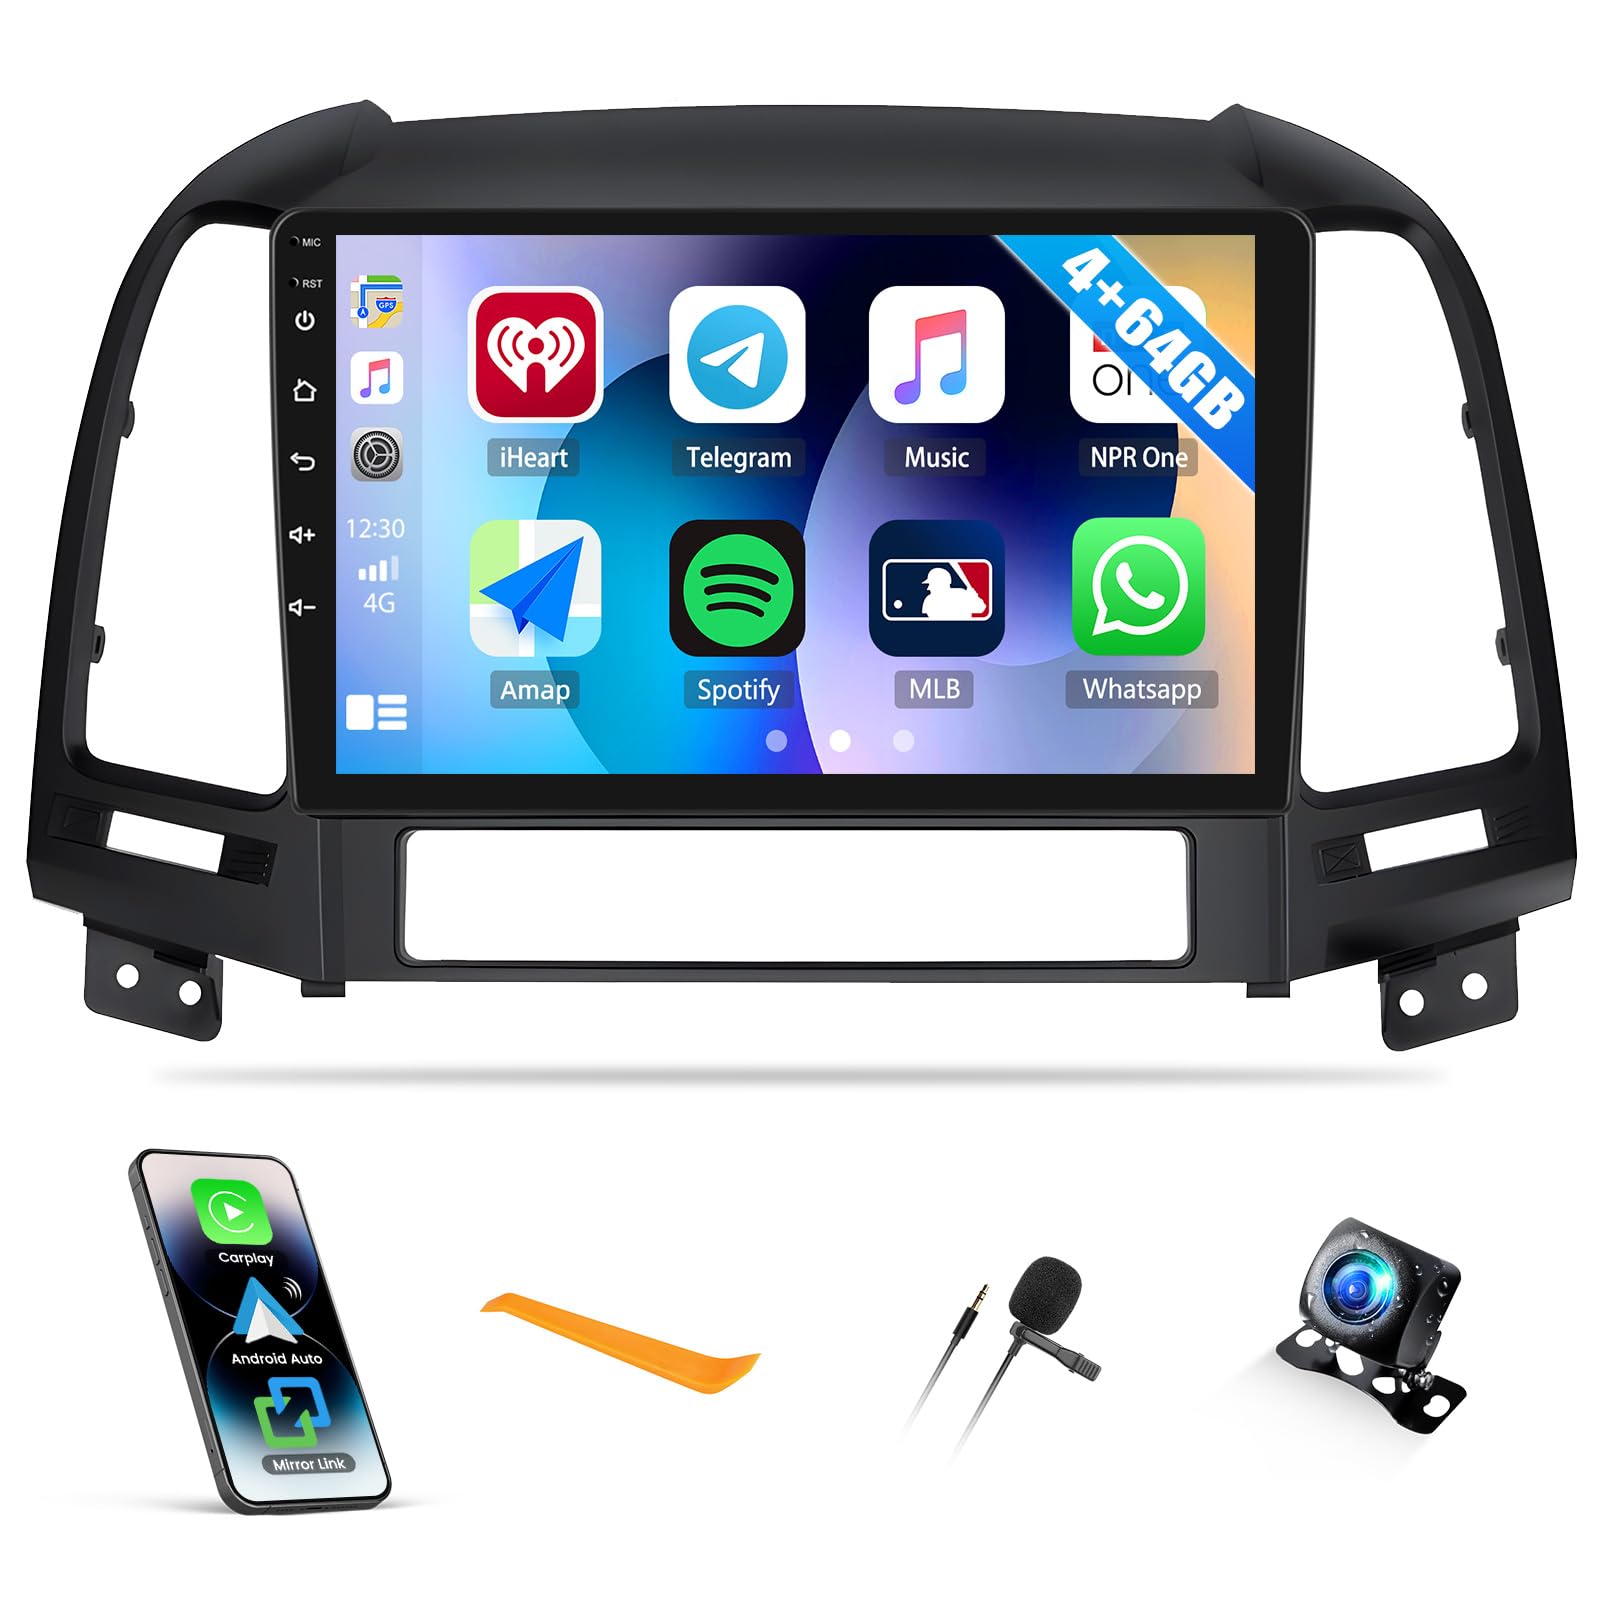
Image: The CAMECHO 9-inch car radio stereo seamlessly integrated into the dashboard of a Hyundai Santa Fe.
3. Installation
Important: Professional installation is highly recommended for car electronics. Ensure the vehicle's power is disconnected before beginning installation.
3.1. Package Contents
Verify that all components are present in the package:
- 1 x Android Head Unit
- 1 x AHD Backup Camera
- 1 x External Microphone
- 1 x GPS Antenna
- 1 x Radio Antenna
- 3 x Power Cables
- 1 x RCA Cable
- 2 x USB Cables
- 1 x Rear Camera Input Cable
- 1 x Accessories Set
- 1 x Installation Tool
- 1 x Instruction Manual (this document)
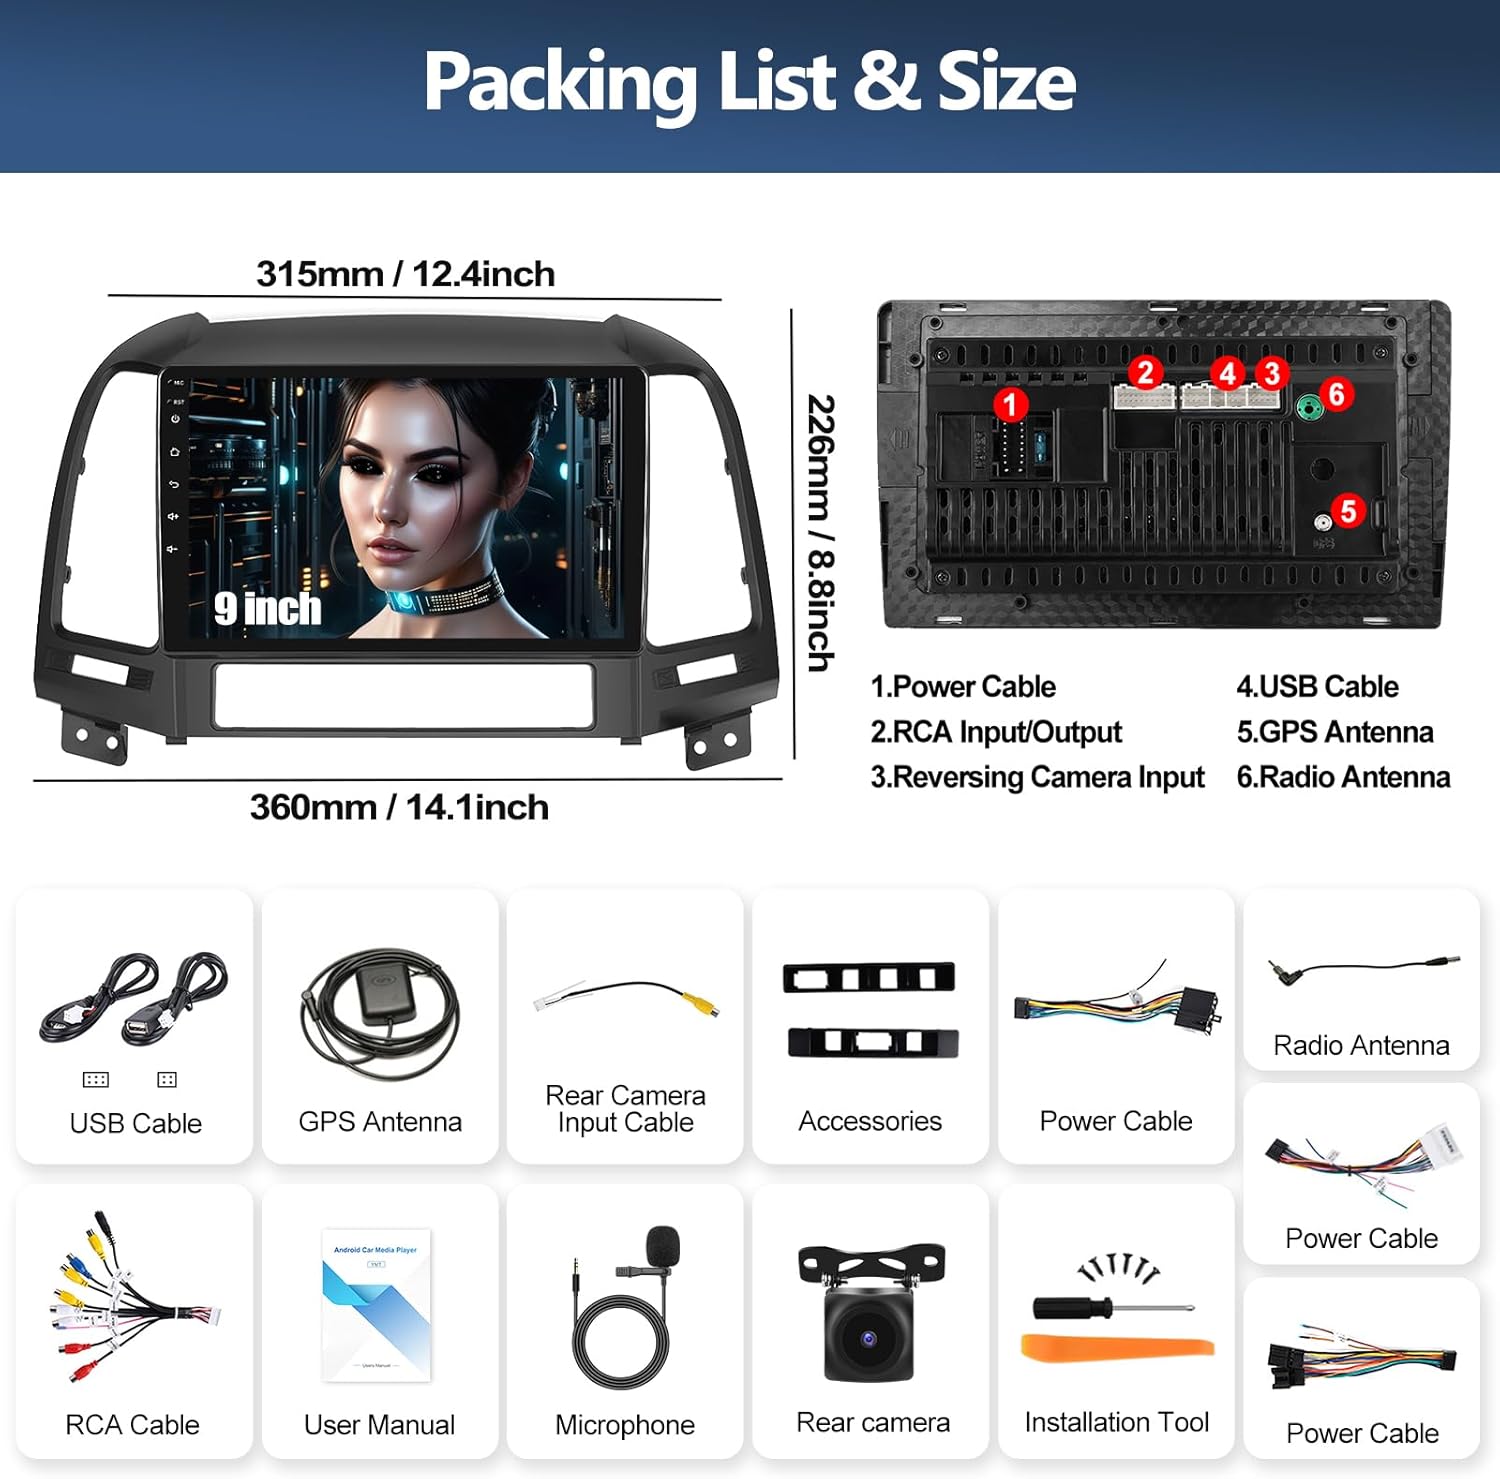
Image: Packing list and dimensions of the CAMECHO car stereo, including the head unit, various cables, antennas, microphone, backup camera, and installation tools.
3.2. Wiring Connections
Connect the cables according to the vehicle's wiring diagram and the provided instructions. Pay close attention to the power, speaker, and accessory connections.
3.3. Reversing Camera Installation
For the AHD backup camera:
- Connect the camera's positive power wire to the positive pole of the car's reversing light.
- Connect the camera's negative power wire to the negative pole of the car's reversing light.
- Connect the pink wire (labeled "reverse / parking sensor control / back in") from the head unit to the power cable.
- Connect the white plug of the rear camera input cable to the main device. This connection is crucial for Bluetooth and WiFi signals, even if the camera is not used.
If the camera does not work after installation, adjust the backup camera resolution in the head unit's settings: Settings > Factory Mode (Password: 8888) > 3 Camera.

Image: Detailed wiring diagram for the reversing camera, showing connections to the head unit and the car's reversing light circuit.
4. Setup
4.1. Wireless Apple CarPlay & Android Auto Connection
To connect your smartphone wirelessly to Apple CarPlay or Android Auto:
- Open the "CPLink" app on the head unit for Apple CarPlay or the "Android Auto" app for Android Auto.
- On your phone, turn on Bluetooth and search for the car radio's Bluetooth name (e.g., "Car1").
- Pair your phone with the car radio. Enter the PIN (usually 0000) if prompted.
- Allow access to contacts and favorite sync.
- After successful pairing, the CarPlay or Android Auto interface will appear on the head unit.
Video: Demonstrates the steps for connecting a smartphone to the CAMECHO car stereo via Wireless Apple CarPlay and Android Auto.

Image: The car stereo display showing the interfaces for Wireless Apple CarPlay and Android Auto, with various phone applications accessible.
5. Operating Instructions
5.1. GPS Navigation & WiFi Connection
The head unit includes a built-in GPS module for navigation. You can use pre-installed maps or download additional navigation apps from the Google Play Store when connected to WiFi.
- Online Navigation: Connect the head unit to your mobile phone's hotspot or another WiFi network to access real-time traffic and online map services.
- Offline Navigation: Download map data for your region to use navigation without an internet connection.
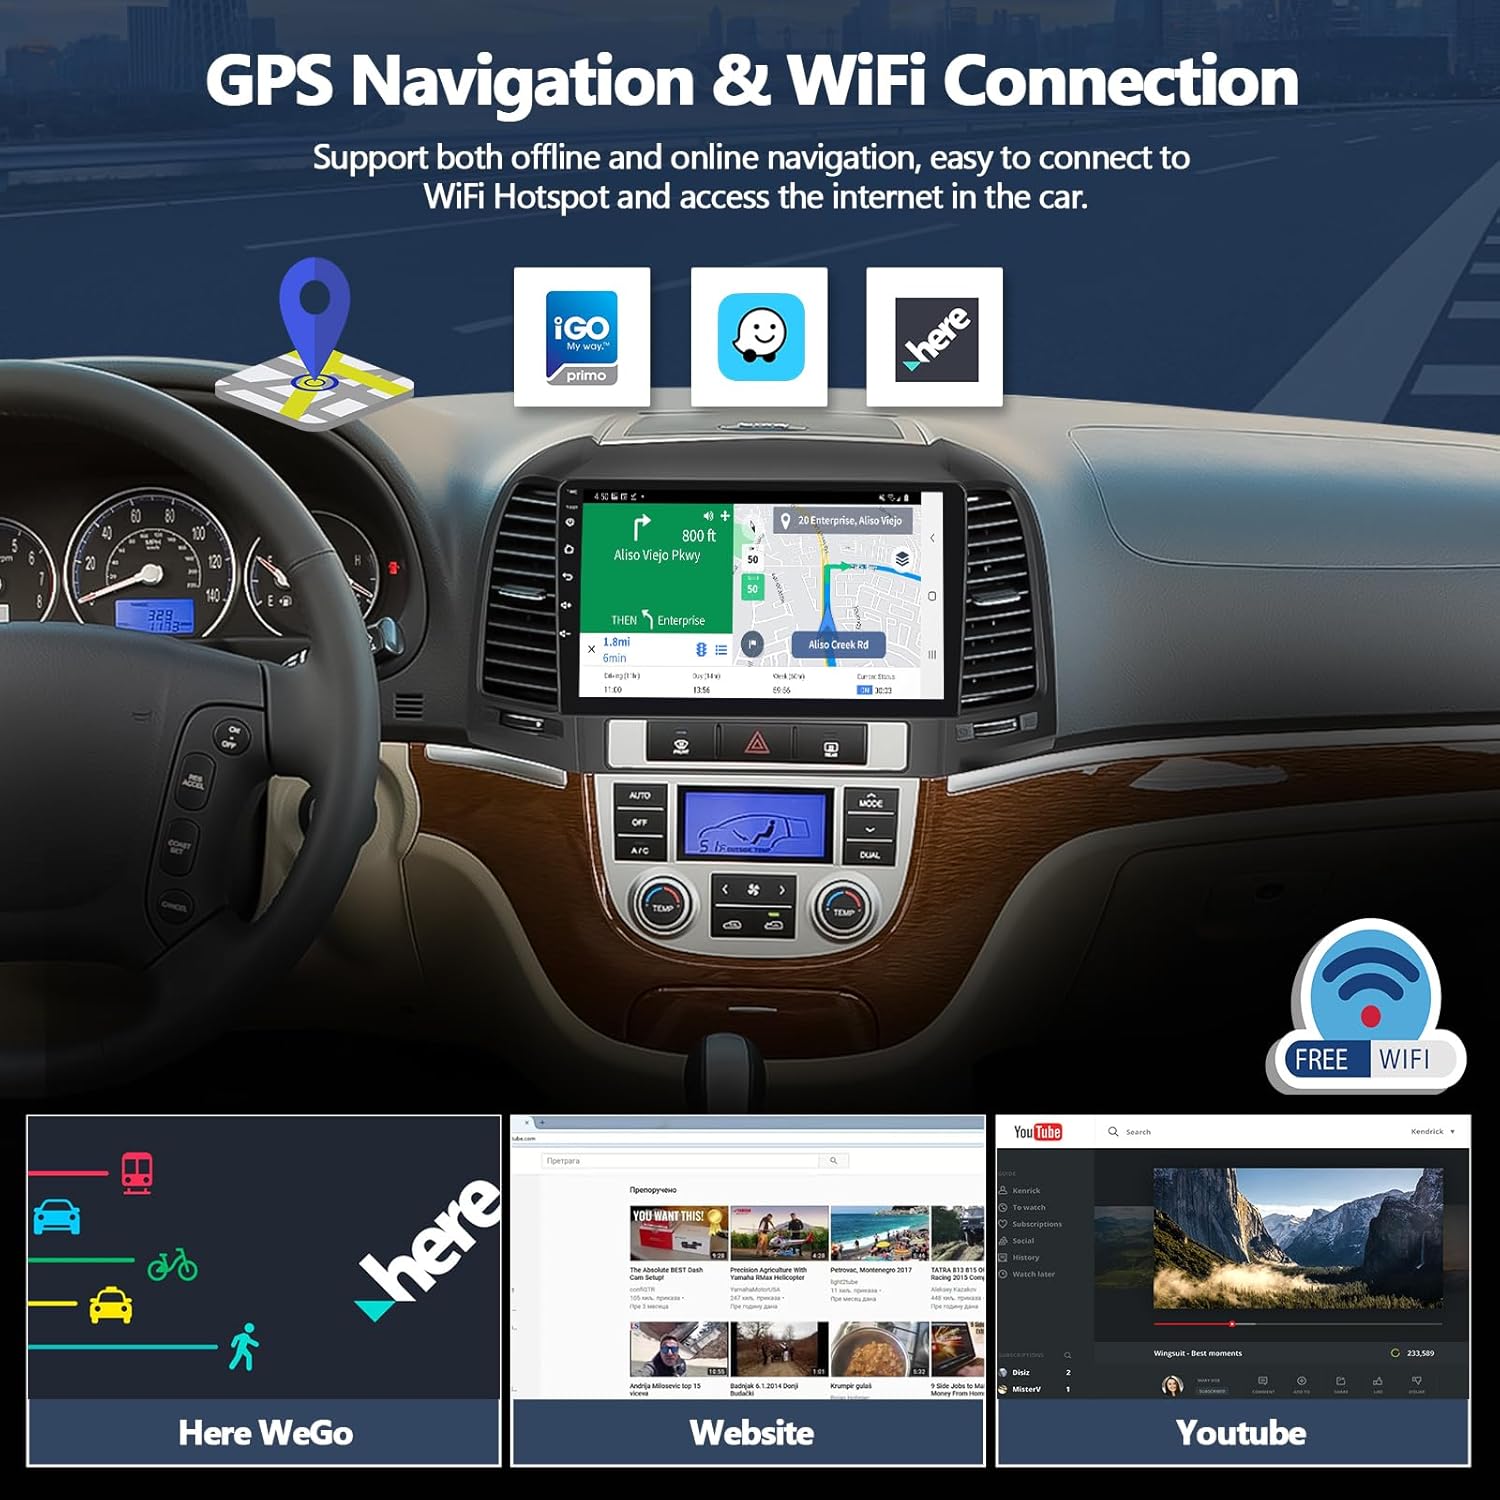
Image: The car stereo displaying GPS navigation with multiple map applications and an indicator for WiFi connectivity.

Image: The car stereo screen showing different navigation applications and route displays.
5.2. Bluetooth 5.0 & FM/RDS Radio
The unit supports Bluetooth 5.0 for stable and fast wireless connections.
- Hands-Free Calling: Pair your phone via Bluetooth to make and receive calls directly from the head unit, enhancing driving safety.
- Audio Streaming: Stream music from your phone or other Bluetooth-enabled devices to the car stereo.
- FM/RDS Radio: Access 18 preset FM/RDS radio stations for live broadcasts. The RDS (Radio Data System) feature displays station information where available.
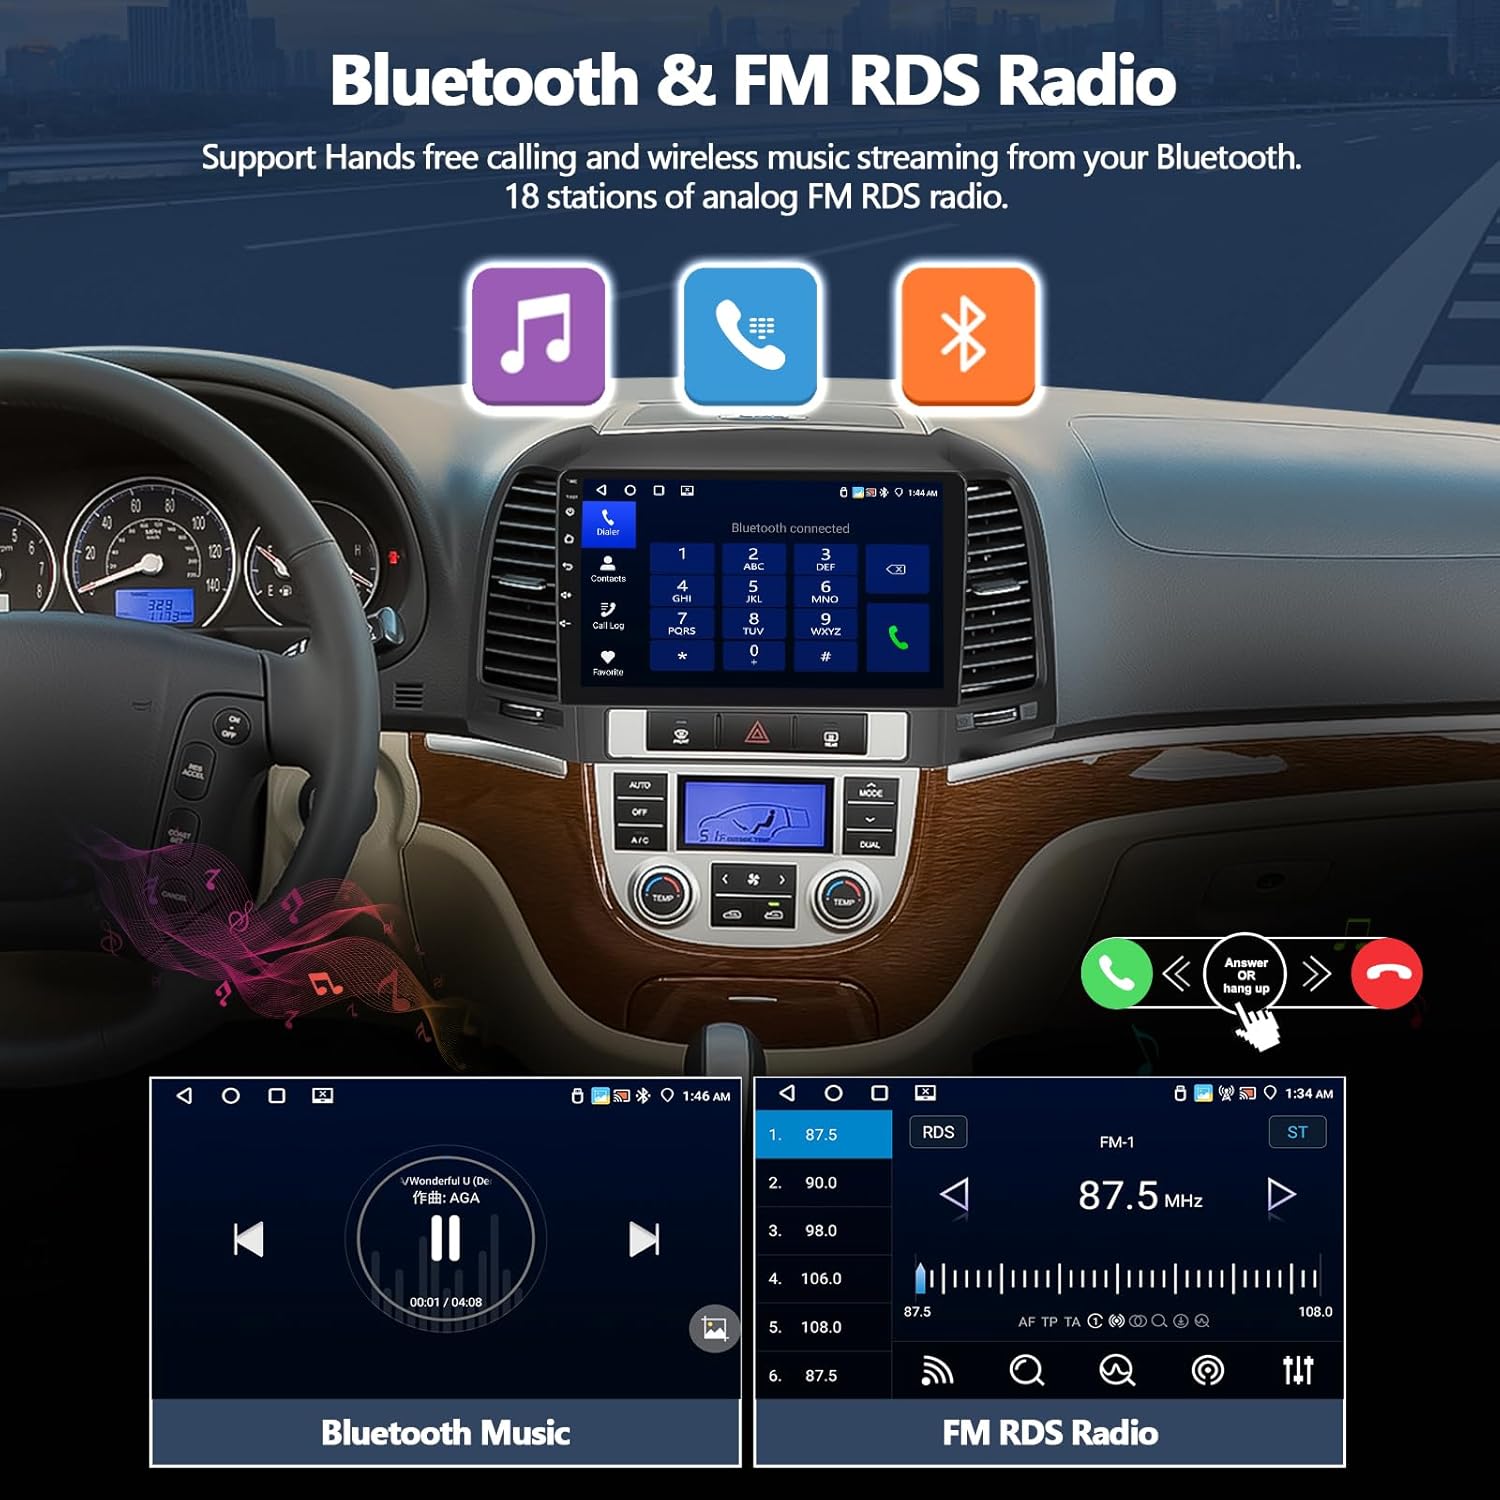
Image: The car stereo interface displaying Bluetooth music playback controls and the FM radio tuner with station presets.
5.3. Backup Camera Functionality
The included AHD backup camera provides a clear view of the area behind your vehicle, automatically activating when the car is in reverse gear.
- HD Resolution: Provides high-definition video feed to the 9-inch screen.
- Night Vision: Enhanced visibility in low-light conditions.
- Waterproof (IP67): Designed to withstand various weather conditions.
- Guide Lines: Adjustable parking guide lines assist with precise maneuvering.

Image: The car stereo screen displaying the rear view from the backup camera, complete with colored parking guide lines for assistance.
5.4. Audio Settings (32-Band EQ)
Customize your audio experience with the built-in 32-band equalizer. Adjust frequency levels to match your preferences for various music genres or to compensate for vehicle acoustics.
- Access the EQ settings from the main menu.
- Adjust individual frequency bands to fine-tune bass, midrange, and treble.
- Select from preset sound modes (e.g., Pop, Rock, Classic, Jazz) or create custom profiles.
- Adjust balance and fader settings to optimize sound distribution within the vehicle.

Image: The car stereo's 32-band equalizer interface, allowing precise adjustment of audio frequencies and sound balance.
5.5. Steering Wheel Control (SWC)
The unit supports retaining your vehicle's factory steering wheel controls. After connecting the power cable, you may need to configure the SWC settings:
- Navigate to the "SWC" app or settings menu on the head unit.
- Follow the on-screen instructions to learn and map your steering wheel buttons to the corresponding functions (e.g., volume up/down, track skip, answer/end call).
- If the learning process fails, repeat the steps.

Image: The steering wheel control learning interface on the car stereo, allowing users to map physical buttons to digital functions.
5.6. Split Screen Function
The split-screen feature allows you to run two applications simultaneously on the 9-inch display. For example, you can have navigation open on one side and music playback on the other.
- To activate split screen, open an application, then press and hold the recent apps button or drag an app to one side of the screen.
- Select a second application to fill the other half of the screen.
Video: Demonstrates the split screen function on the car stereo, showing two applications running concurrently.
5.7. Home Page App Customization
You can customize the home page by selecting and rearranging the applications you want to display for quick access.
- Access the customization options from the home screen or settings.
- Drag and drop app icons to desired positions or add/remove apps from the home page widgets.

Image: The car stereo's home page displaying customizable app icons and widgets, allowing users to personalize their interface.
6. Specifications
| Feature | Detail |
|---|---|
| Item Weight | 2.86 pounds |
| Product Dimensions | 14.2 x 2 x 8.9 inches |
| Display Size | 9 Inches |
| Warranty | 1 YEAR WARRANTY |
| Voice Command | Touchscreen |
| ASIN | B0DTHJ4XR7 |
| Brand | CAMECHO |
| Model Name | RM |
| Vehicle Service Type | Car |
| Special Feature | 32EQ, 4+64GB, Android Auto, Apple CarPlay, Bluetooth |
| Connectivity Technology | Bluetooth |
| Map Type | Worldwide |
| Mounting Type | Dashboard Mount |
7. Troubleshooting
If you encounter issues with your CAMECHO Car Radio Stereo, refer to the following common troubleshooting steps:
- No Power:
- Check all power connections to ensure they are secure.
- Verify the vehicle's fuse for the radio is intact and not blown.
- Ensure the vehicle's battery has sufficient charge.
- No Sound:
- Check speaker wire connections.
- Ensure volume is not muted or set to minimum.
- Verify audio output settings in the EQ/Balance menu.
- Bluetooth/CarPlay/Android Auto Connection Issues:
- Ensure Bluetooth is enabled on both the head unit and your phone.
- Forget the device on your phone and re-pair.
- Restart both the head unit and your phone.
- Ensure the "CPLink" or "Android Auto" app is open on the head unit.
- Backup Camera Not Displaying:
- Check all camera wiring connections, especially the pink reverse trigger wire.
- Verify the white plug of the rear camera input cable is connected to the main device.
- Adjust camera resolution in Settings > Factory Mode (Password: 8888) > 3 Camera.
- Steering Wheel Controls Not Working:
- Ensure the SWC wires are correctly connected.
- Perform the SWC learning process again via the "SWC" app or settings.
8. Warranty and Support
Your CAMECHO Car Radio Stereo comes with a 1-year warranty from the date of purchase, covering manufacturing defects.
For technical assistance, troubleshooting not covered in this manual, or warranty claims, please contact CAMECHO customer support:
Email: CAMECHOVIP@126.com
Please provide your product model (RM / B0DTHJ4XR7) and a detailed description of the issue when contacting support.

Image: A customer support representative ready to assist, with the support email address displayed.


