
1. Safety Information
Please read and understand this entire manual before attempting to assemble, operate, or install the product. Failure to do so could lead to electric shock, fire, or other injuries.
- Ensure all electrical connections comply with local codes, ordinances, and the National Electrical Code (NEC).
- Consult a qualified electrician if you are unfamiliar with electrical wiring.
- Before installation, disconnect power by turning off the circuit breakers at the main fuse box.
- The fan must be mounted with a minimum of 7 feet (2.1 meters) clearance from the trailing edge of the blades to the floor.
- Do not operate the fan if any part is damaged. Contact customer support for replacement parts.
- Do not insert objects into the fan blades while the fan is operating.
2. Package Contents
Verify that all components are present before beginning installation. If any parts are missing or damaged, do not proceed with installation and contact customer support.
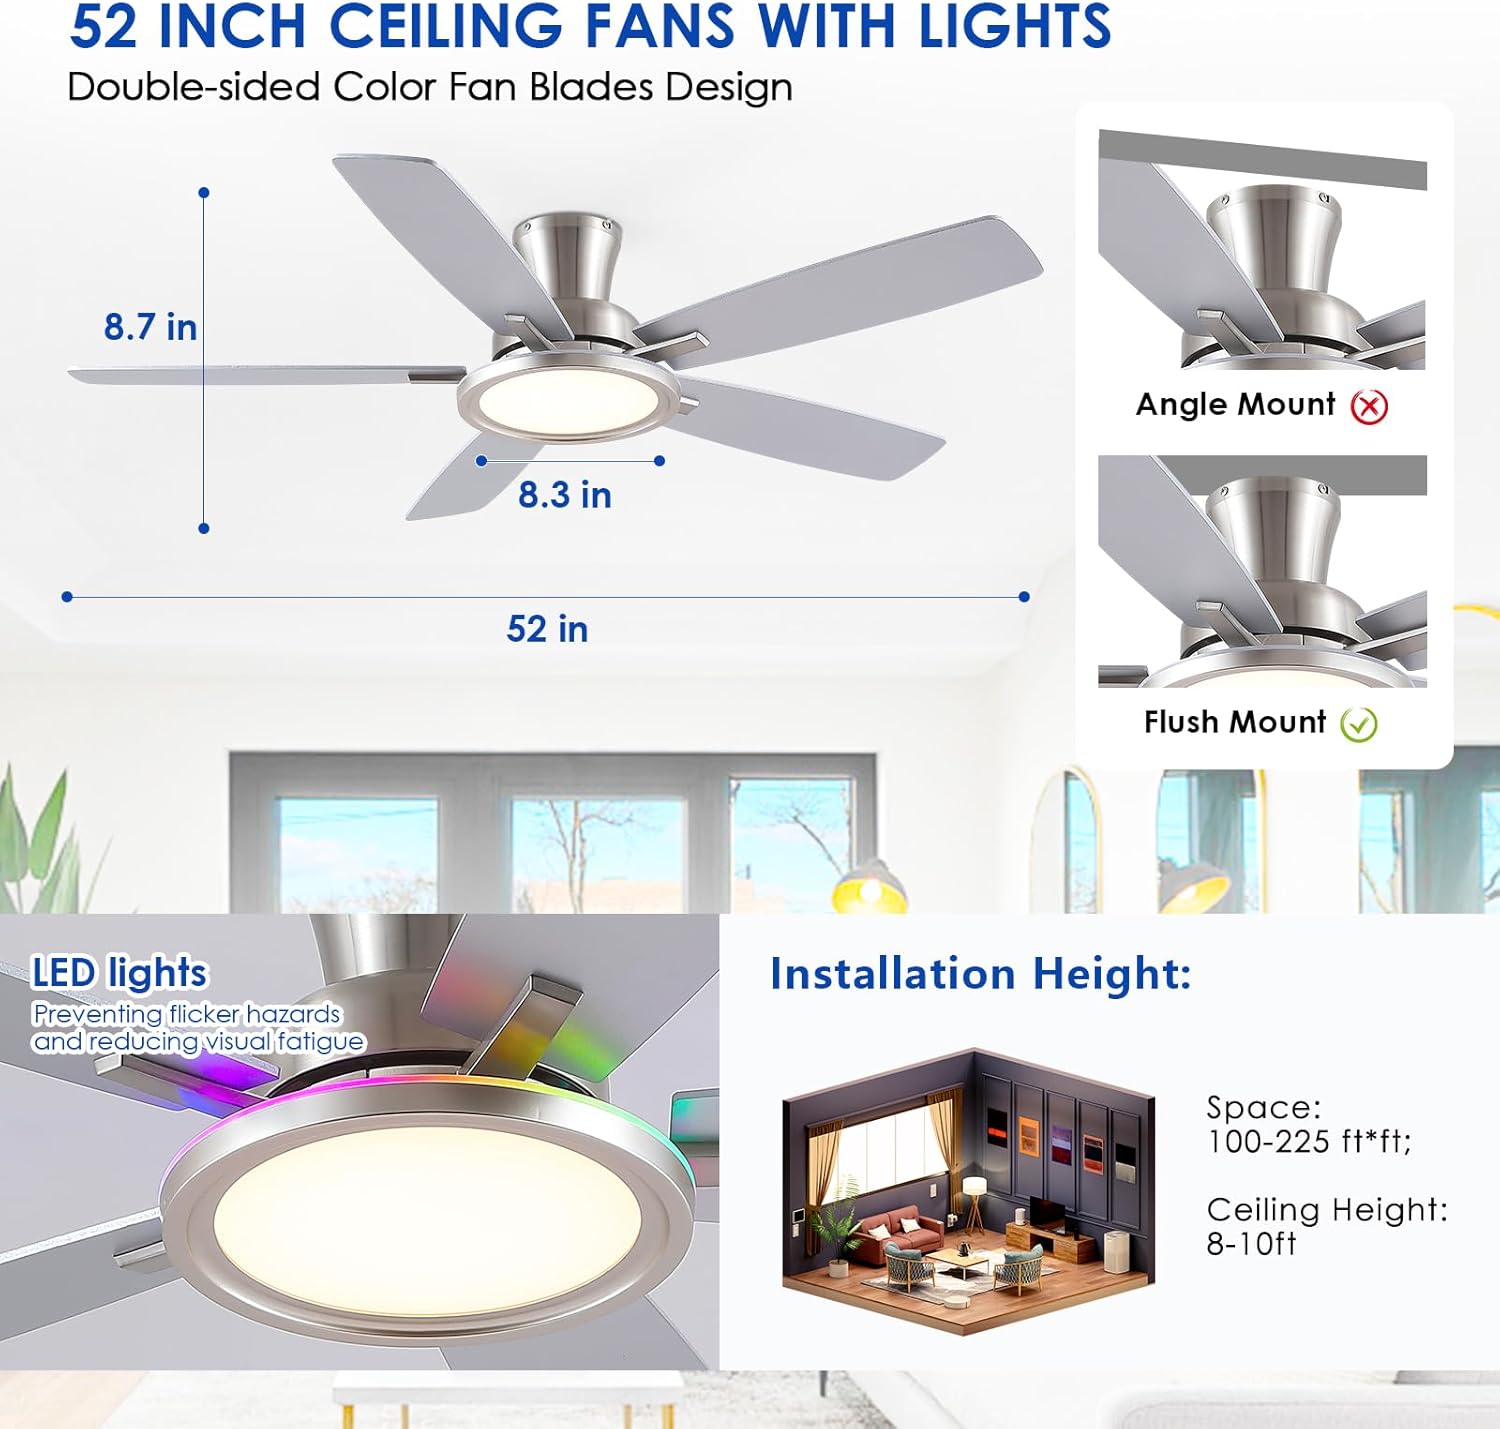
Image: All components of the BYKISTOK 52-inch ceiling fan, including blades, motor housing, light kit, and remote control, are displayed on a carpeted surface.
- Ceiling Fan Motor Assembly
- Fan Blades (5)
- Light Kit with RGB Ring
- Remote Control
- Mounting Bracket
- Hardware Pack (screws, wire nuts, etc.)
- User Manual
3. Specifications
| Brand | BYKISTOK |
| Model Number | B8240-Nickel-52RGB |
| Size | 52 inches |
| Color | Nickel-RGB |
| Motor Type | DC Motor (Reversible) |
| Number of Blades | 5 |
| Number of Speeds | 6 |
| Light Type | LED with RGB Ring |
| Control Method | Remote Control, App Control |
| Wattage | 75 watts |
| Mounting Type | Flush Mount |
| Indoor/Outdoor Usage | Indoor, Covered Outdoor |
4. Installation Instructions
This flush mount ceiling fan is designed for easy installation. Refer to the detailed video for visual guidance.
Video: Detailed installation guide for the BYKISTOK ceiling fan. This video demonstrates the step-by-step process of assembling and mounting the fan, including wiring connections and blade attachment.
Pre-Installation Steps:
- Turn off Power: Before starting, ensure power is disconnected at the circuit breaker to prevent electrical shock.
- Mounting Location: Select a location that can support the fan's weight and allows for proper blade clearance.
- Secure Mounting Bracket: Attach the mounting bracket to the ceiling junction box using appropriate screws.
Assembly and Wiring:
- Attach Blades: Securely attach the fan blades to the motor housing.
- Wire Connections: Connect the fan's electrical wires to the household wiring according to the provided wiring diagram in the manual. Ensure all connections are secure with wire nuts.
- Mount Fan: Carefully lift the fan assembly and attach it to the mounting bracket.
- Install Light Kit: Connect the light kit wiring and secure the light panel to the fan.

Image: A diagram illustrating the 52-inch diameter of the fan and its flush mount installation, highlighting the compact design suitable for various ceiling heights.
5. Operating Instructions
Your BYKISTOK ceiling fan can be controlled via the included remote or a dedicated smartphone application.
Remote Control Functions:

Image: A detailed view of the remote control, showing buttons for light ON/OFF, color temperature adjustment, brightness adjustment, fan speed (1-6), reverse function, and timer settings.
- Power ON/OFF: Press the power button to turn the fan and light on or off.
- Fan Speed: Use buttons 1-6 to adjust the fan speed.
- Light Control: Turn the light on/off, adjust brightness, and change color temperature (warm, neutral, white).
- RGB Light: Activate and cycle through RGB color modes.
- Reversible Motor: Press the F/R button to switch between summer (downward airflow) and winter (upward airflow) modes. Allow 5-8 seconds for the fan to stop and reverse direction.
- Timer: Set a 2-hour timer for automatic shutdown.
App Control:
Download the designated smartphone application (refer to the manual for QR code or app store details) to control the fan and light functions from your mobile device. The app offers similar controls to the remote, including dimming, 3-color temperature settings, and RGB light management.
Light Features:

Image: The fan's integrated LED light demonstrating its dimmable functionality and three color temperature options: warm light, neutral light, and white light.
- Dimmable LED: Adjust light brightness from 10% to 100%.
- 3 Color Temperatures: Switch between warm, neutral, and white light.
- RGB Ring: The side RGB ring offers multiple color modes for ambient lighting.
- Memory Function: The light retains its last setting if turned off for 10 seconds or more. If turned on again within 10 seconds, the color temperature will cycle.

Image: An illustration depicting the reversible motor function, showing downward airflow for cooling in summer and upward airflow for circulating warm air in winter.
6. Maintenance
Regular maintenance ensures optimal performance and longevity of your ceiling fan.
- Cleaning: Use a soft, damp cloth to clean the fan blades and motor housing. Do not use abrasive cleaners or solvents.
- Blade Inspection: Periodically check that all blade screws are tight. Loose screws can cause wobbling and noise.
- Light Cover: Ensure the light cover is securely fastened.
- No Lubrication Needed: The motor is permanently lubricated and does not require oiling.
7. Troubleshooting
If you encounter issues with your fan, refer to the following common problems and solutions:
| Problem | Possible Cause | Solution |
|---|---|---|
| Fan does not start | No power to the fan; Loose wire connections; Remote control not paired. | Check circuit breaker; Verify all wire connections are secure; Pair remote control (see remote instructions). |
| Fan wobbles | Loose blade screws; Improperly balanced blades; Loose mounting bracket. | Tighten all blade screws; Use a balancing kit (not included) to balance blades; Ensure mounting bracket is securely fastened. |
| Light does not work | Loose wire connection; Faulty LED driver. | Check light kit wiring connections; Contact customer support for assistance. |
| Remote control not working | Dead batteries; Remote not paired; Obstruction between remote and receiver. | Replace batteries; Re-pair remote control; Ensure clear line of sight to the fan. |
| Fan is noisy | Loose screws; Motor hum; Blades hitting an obstruction. | Tighten all screws; Ensure fan is properly installed and balanced; Check for any obstructions. |
8. Warranty and Support
BYKISTOK provides a 1-year service for quality-related replacements. For any questions or issues regarding your ceiling fan, please contact our service team.
- Warranty Period: 1 year for quality-related replacements.
- Customer Support: For assistance, please refer to the contact information provided in your product packaging or on the seller's Amazon store page. Our team aims to respond within 24 hours.