
Introduction
Thank you for choosing the CGOLDENWALL Automatic Heavy Duty Electric Stapler, Model JH-80. This manual provides essential information for the safe and efficient operation, maintenance, and troubleshooting of your stapler. Please read these instructions carefully before use and retain them for future reference.
Setup
Unpacking and Initial Inspection
Carefully remove the stapler from its packaging. Inspect the unit for any signs of damage. Ensure all components are present:
- CGOLDENWALL Automatic Electric Stapler (Model JH-80)
- Pre-installed staple cartridge (2000 staples)
- Additional box of 4000 staples
- Power adapter
Loading Staples
The stapler comes with a pre-installed cartridge. To load or replace staples:
- Press the handle to flip the body of the stapler open.
- Pull out the existing staple cartridge.
- If replacing, push the clips inward on both sides of the cartridge to open it and remove old staples. Load new staples into the cartridge, ensuring they are correctly oriented.
- Insert the loaded staple cartridge back into the machine.
- Press the body back down until you hear a click, securing it in place.

Image: The 5000-capacity staple cartridge, minimizing frequent refills. Includes steps for loading staples.

Image: Step-by-step guide for loading the staple cartridge and connecting the power.
Power Connection
Connect the power adapter to the stapler and then plug it into a standard electrical outlet. The stapler is now ready for use.
Operating Instructions
Automatic Stapling
The CGOLDENWALL Electric Stapler features intelligent sensing. Simply insert the paper into the binding area, and the stapler will automatically detect the paper and engage to staple it quickly and efficiently. No manual pressing is required.
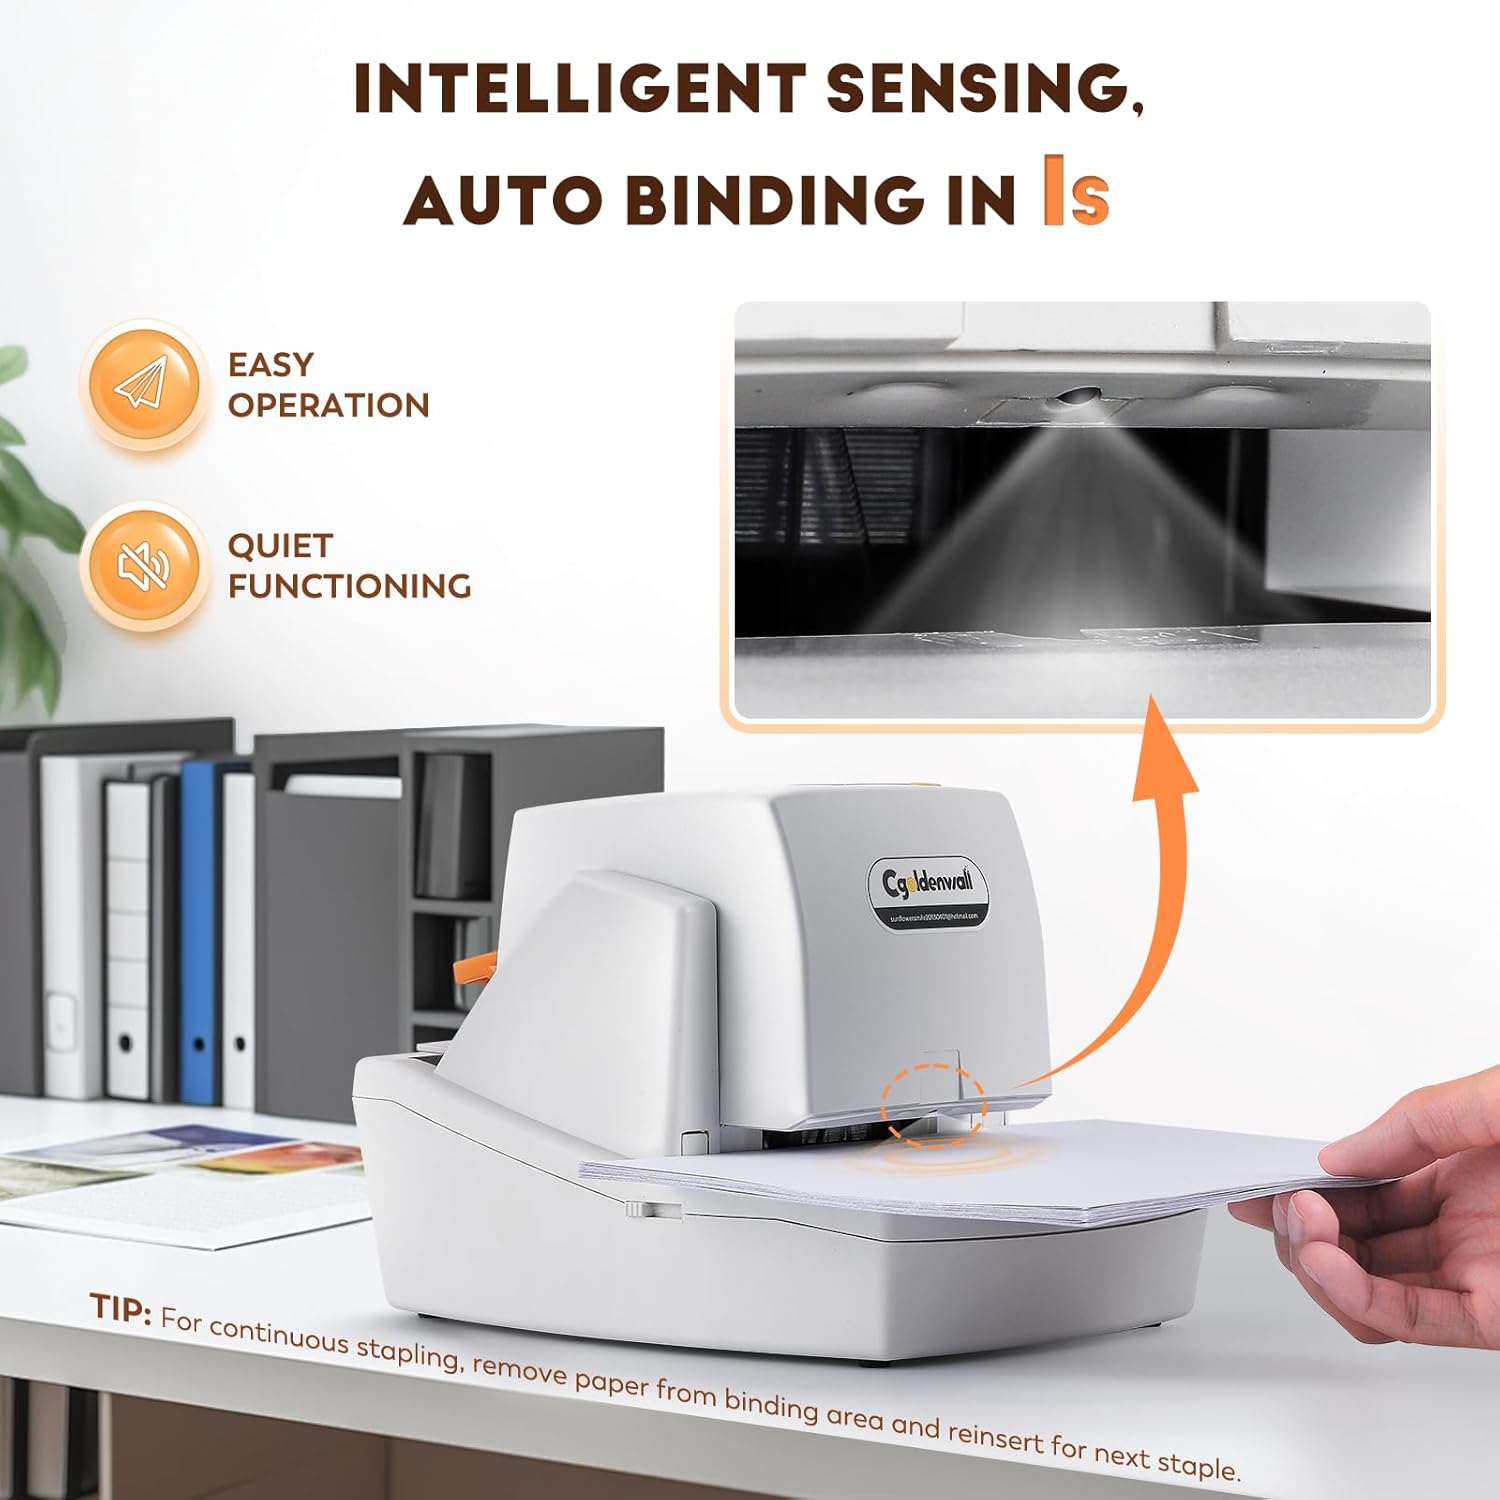
Image: The stapler's intelligent sensing feature for automatic binding.

Image: Auto-sensing and quick binding in action, highlighting effortless and efficient operation.
Adjusting Stapling Speed
The stapler offers three speed settings to match your workflow. Use the speed adjustment button to cycle through the options:
- Green Light: Low Speed (approximately 0.5 seconds per staple)
- Blue Light: Middle Speed (approximately 0.3 seconds per staple)
- Red Light: High Speed (approximately 0.1 seconds per staple)
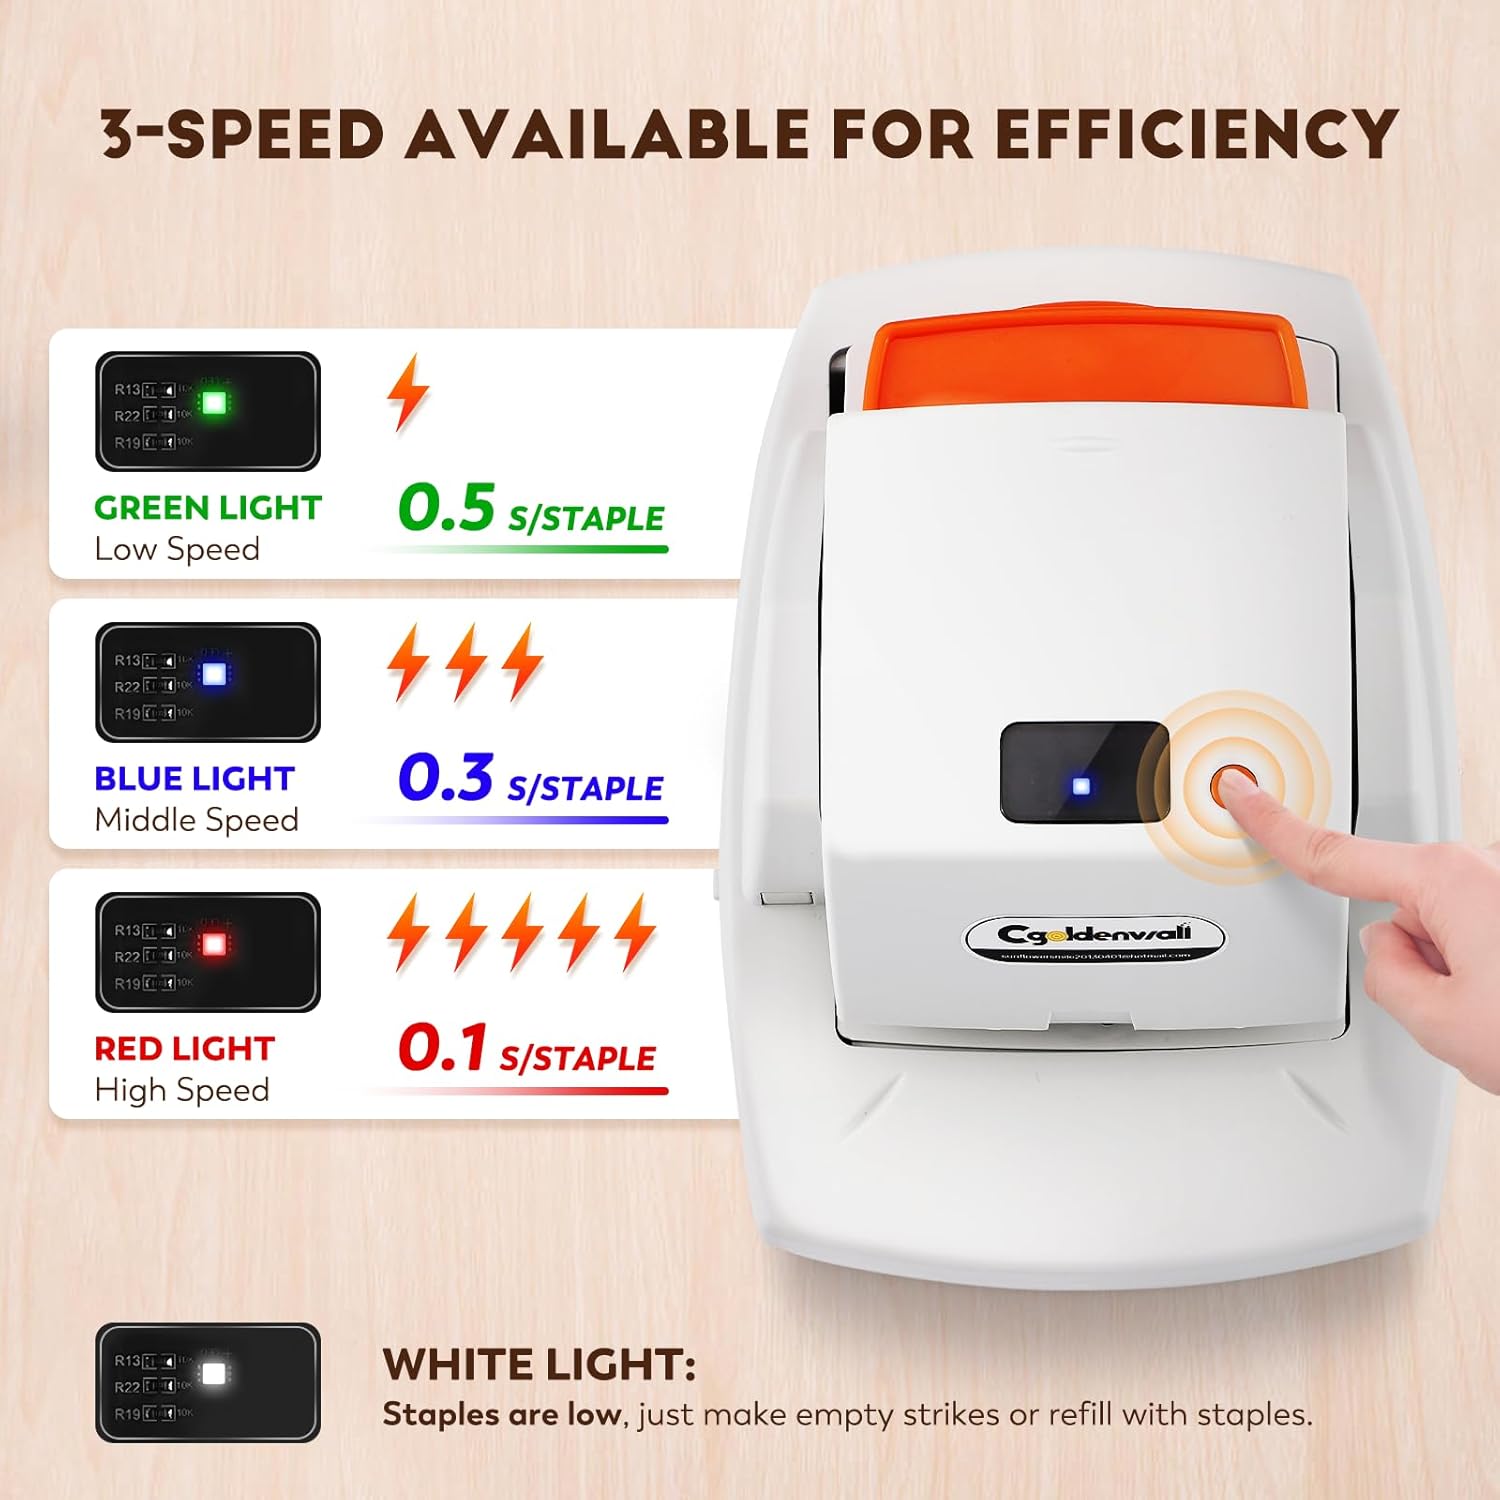
Image: Visual representation of the three available speed settings and their indicator lights.

Image: Flexible speed switching with indicator lights for low, middle, and high speeds.
Adjusting Stapling Margin (Depth)
The stapler features 4 adjustable paper feed depths, ranging from 1mm to 10mm. This allows for both corner stapling and edge stapling. Adjust the margin slider located on the side of the stapler to your desired depth.

Image: The adjustable margin slider for setting stapling depth from 1mm to 10mm.

Image: Four-position adjustment for stapling depth to meet various needs.

Image: Examples of corner and edge binding capabilities.
Flat Clinch Technology
This stapler utilizes advanced flat clinch technology, which folds staple legs flat against the paper. This design offers several benefits:
- Saves up to 30% of filing space by eliminating staple bumps.
- Keeps sheets tightly and neatly stacked.
- Prevents injuries and ensures paper remains intact during staple removal.

Image: Comparison of traditional clinch versus advanced flat clinch, demonstrating space savings.

Image: Benefits of flat clinch technology, including jam-free operation and neat stacking.
High-Capacity Binding
The stapler is designed for high-volume tasks, capable of stapling up to 75 sheets of 65g paper or 70 sheets of 70g paper. Ensure you use appropriate paper thickness for optimal binding effectiveness.
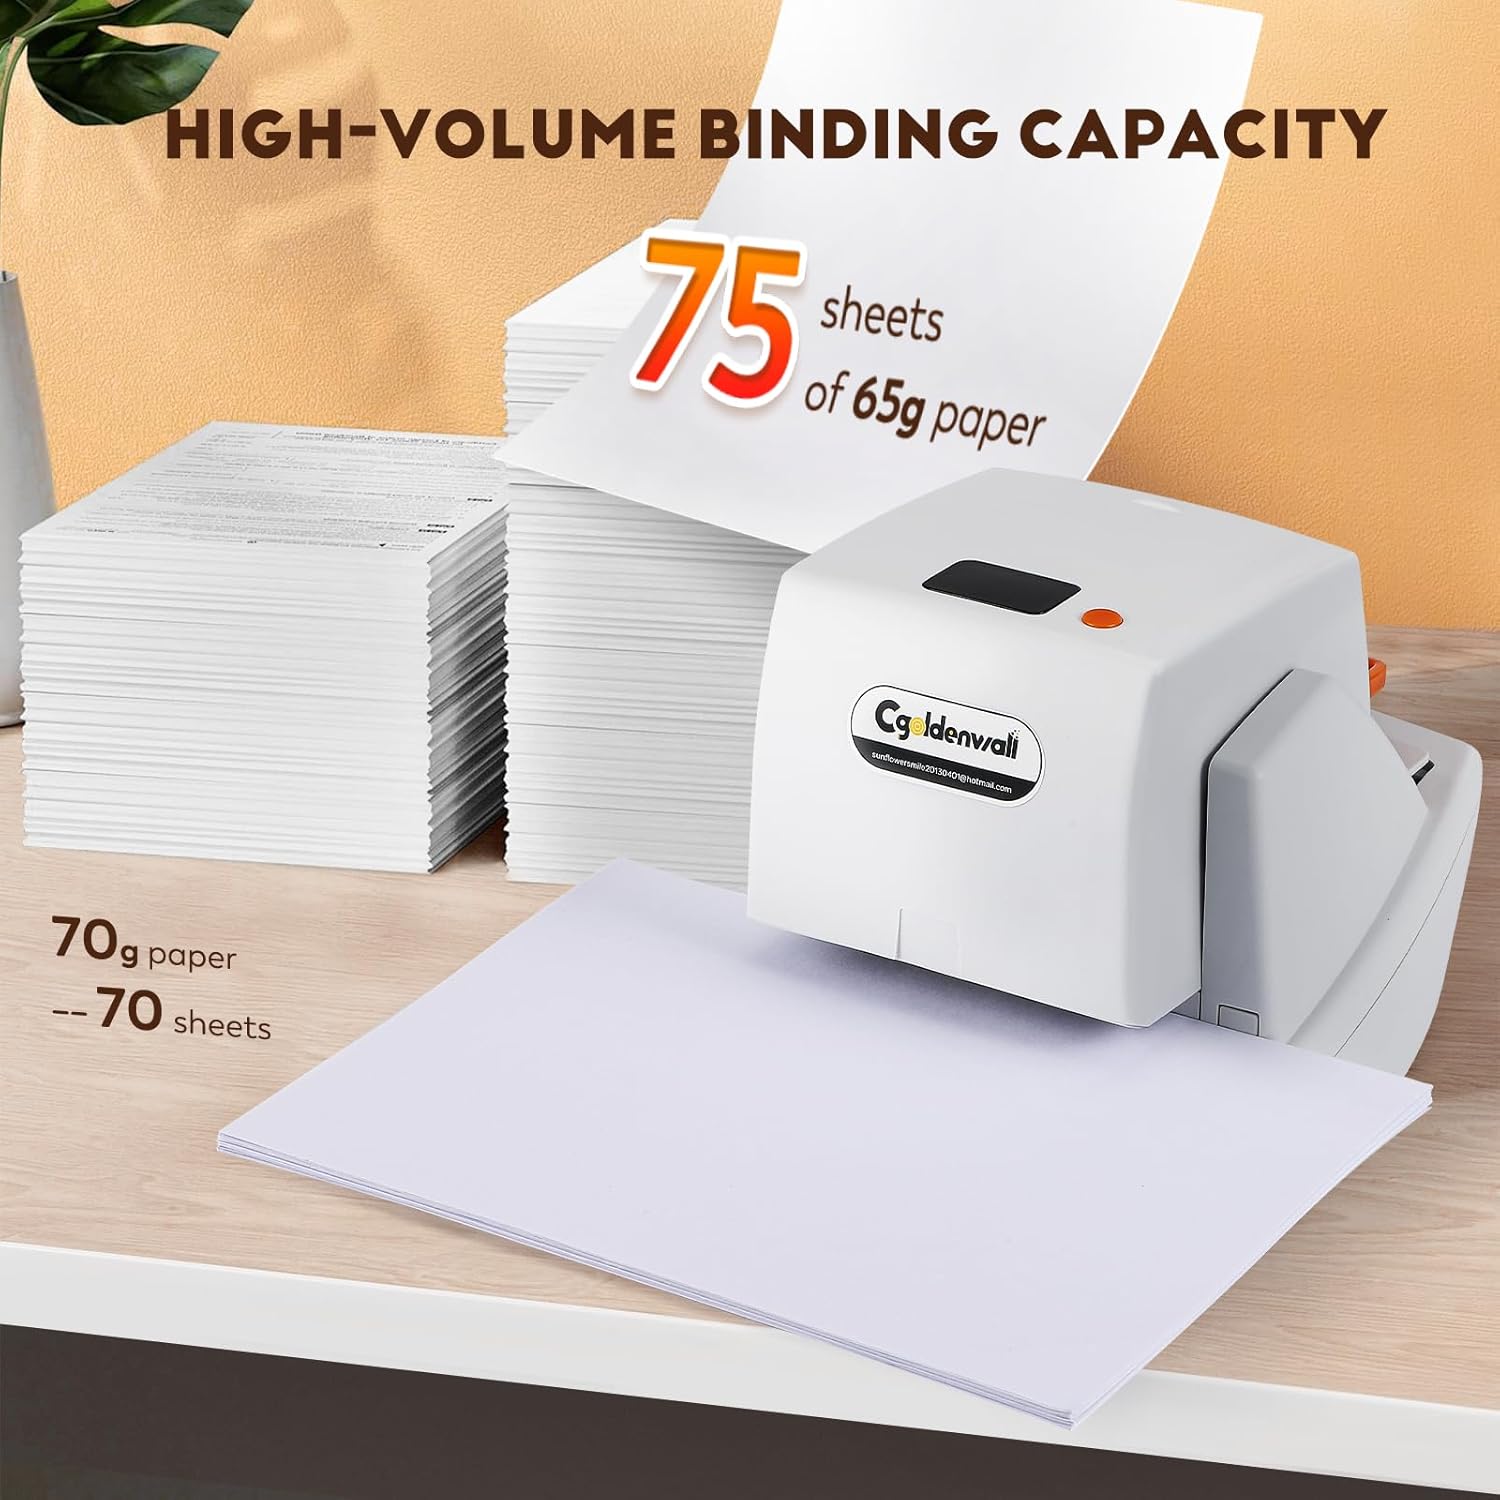
Image: The stapler's capacity to bind up to 75 sheets of 65g paper.

Image: Highlighting the stapler's capacity for up to 75 sheets, ideal for bulk tasks.
Operation Video
Video: An overview of the CGOLDENWALL Automatic Heavy Duty Electric Stapler in operation, demonstrating its features and ease of use.
Maintenance
Staple Refill
The stapler uses a large-capacity cartridge that holds up to 5000 staples, minimizing the need for frequent refills. When staples run low, refer to the "Loading Staples" section under Setup for instructions on refilling the cartridge.

Image: The large-capacity staple cartridge and additional staples provided.
Waste Staples Export
The stapler is designed with a waste staples export feature to manage discarded staple pieces. Periodically check and clear this area to ensure smooth operation.

Image: Underside of the stapler, indicating the waste staples export points and anti-slip pads for stability.
Troubleshooting
Common Issues and Solutions
- Stapler not engaging: Ensure the power adapter is securely connected and the stapler is turned on. Check if the paper is inserted correctly into the sensing area.
- Staples not feeding: Verify that the staple cartridge is properly loaded and contains staples. The white light indicator will illuminate if staples are low.
- Staple jams: The stapler features a jam-free design. If a jam occurs, carefully open the stapler body, remove the cartridge, and clear any obstructed staples. Ensure you are using the correct staple size and not exceeding the maximum sheet capacity.
- White Light Indicator: A white light indicates that staples are low. Perform empty strikes or refill the staple cartridge.
Image: The white light indicator signals low staple levels.
Troubleshooting Video
Video: A detailed guide on troubleshooting common issues with the electric stapler, including staple jams and loading problems.
Specifications
| Feature | Specification |
|---|---|
| Brand | CGOLDENWALL |
| Model Number | JH-80 |
| Operation Mode | Automatic |
| Stapling Capacity | Up to 75 sheets (65g paper) / 70 sheets (70g paper) |
| Staple Cartridge Capacity | 5000 staples |
| Adjustable Stapling Depth | 1-10mm |
| Speed Settings | 3 (Low, Middle, High) |
| Clinch Type | Flat Clinch |
| Color | Black |
| Item Weight | 2.15 kg |
Warranty and Support
Warranty Information
This CGOLDENWALL Electric Stapler comes with a 1-year warranty from the date of purchase. This warranty covers manufacturing defects and malfunctions under normal use. Please retain your proof of purchase for warranty claims.
Technical Support
CGOLDENWALL provides lifetime technical support for this product. If you encounter any issues or have questions not covered in this manual, please contact our customer service team. For replacement staples and cartridges, please contact us for purchase.
For support, please visit the CGOLDENWALL Store on Amazon or refer to the contact information provided with your product packaging.