Hisense HV673A65
Hisense HV673A65 Integrated Dishwasher User Manual
Model: HV673A65
Introduction
This user manual provides comprehensive instructions for the installation, operation, and maintenance of your Hisense HV673A65 Integrated Dishwasher. Please read this manual carefully before using the appliance to ensure safe and efficient operation. Keep this manual for future reference.

Image: Front view of the Hisense HV673A65 Integrated Dishwasher with the door open, showcasing the interior racks and control panel.
Safety Information
Always follow basic safety precautions when using electrical appliances to reduce the risk of fire, electric shock, and injury to persons.
- Read all instructions before using the dishwasher.
- Connect the appliance to a properly grounded outlet only.
- Do not operate the dishwasher if it has a damaged power cord or plug.
- Keep children away from the dishwasher, especially when the door is open.
- Use only detergents and rinse aids specifically designed for dishwashers.
Product Features
The Hisense HV673A65 dishwasher is equipped with several advanced features for optimal cleaning and user convenience:
- 16 Place Settings Capacity: Accommodates a large volume of dishes.
- Automatic Drying: Door opens automatically at the end of the cycle for complete drying.
- Automatic Programs: Efficient programs for various soil levels, optimizing energy and water consumption.
- Third Basket: Dedicated compartment for cutlery and small utensils.
- Sliding Door: Allows the decorative panel to slide upwards for seamless integration without cutting the plinth.
- Interior LED Lighting: Provides clear visibility inside the dishwasher.
- Status Light: Elegant illumination indicating the program status.
- Inverter Technology: For efficient and quiet operation.
- Touch Control: Intuitive control panel.
- Delayed Start: Schedule wash cycles at your convenience.
- Quick Wash 15': Fast cycle for lightly soiled items.
- Eco Program: Energy-saving wash cycle.

Image: Visual representation of the main features including Automatic Drying, Auto Program, 3rd Basket, Sliding Door, Status Light, and Interior LED Lighting.
Installation and Setup
Dimensions and Placement
Ensure adequate space for installation. The dishwasher dimensions are approximately 81.6 cm (Height) x 59.8 cm (Width) x 55.5 cm (Depth).

Image: Technical drawing illustrating the dimensions of the Hisense HV673A65 dishwasher and recommended cabinet niche dimensions for integration.

Image: Detailed table and diagrams showing various niche dimensions and plinth heights for fixed and sliding door installations.
Electrical Connection
The appliance requires a 220 Volt power supply. Ensure the electrical outlet is properly grounded and meets local electrical codes.
Water Supply and Drainage
Connect the water inlet hose to a cold water supply with a minimum pressure of 0.04 MPa and a maximum of 1 MPa. Ensure the drain hose is properly connected to a suitable drainage system, preventing kinks or blockages.
Sliding Door Integration
The sliding door mechanism allows for flexible integration with kitchen cabinetry. The decorative panel slides upwards, eliminating the need for a plinth cut-out. This design is ideal for modern kitchen aesthetics.
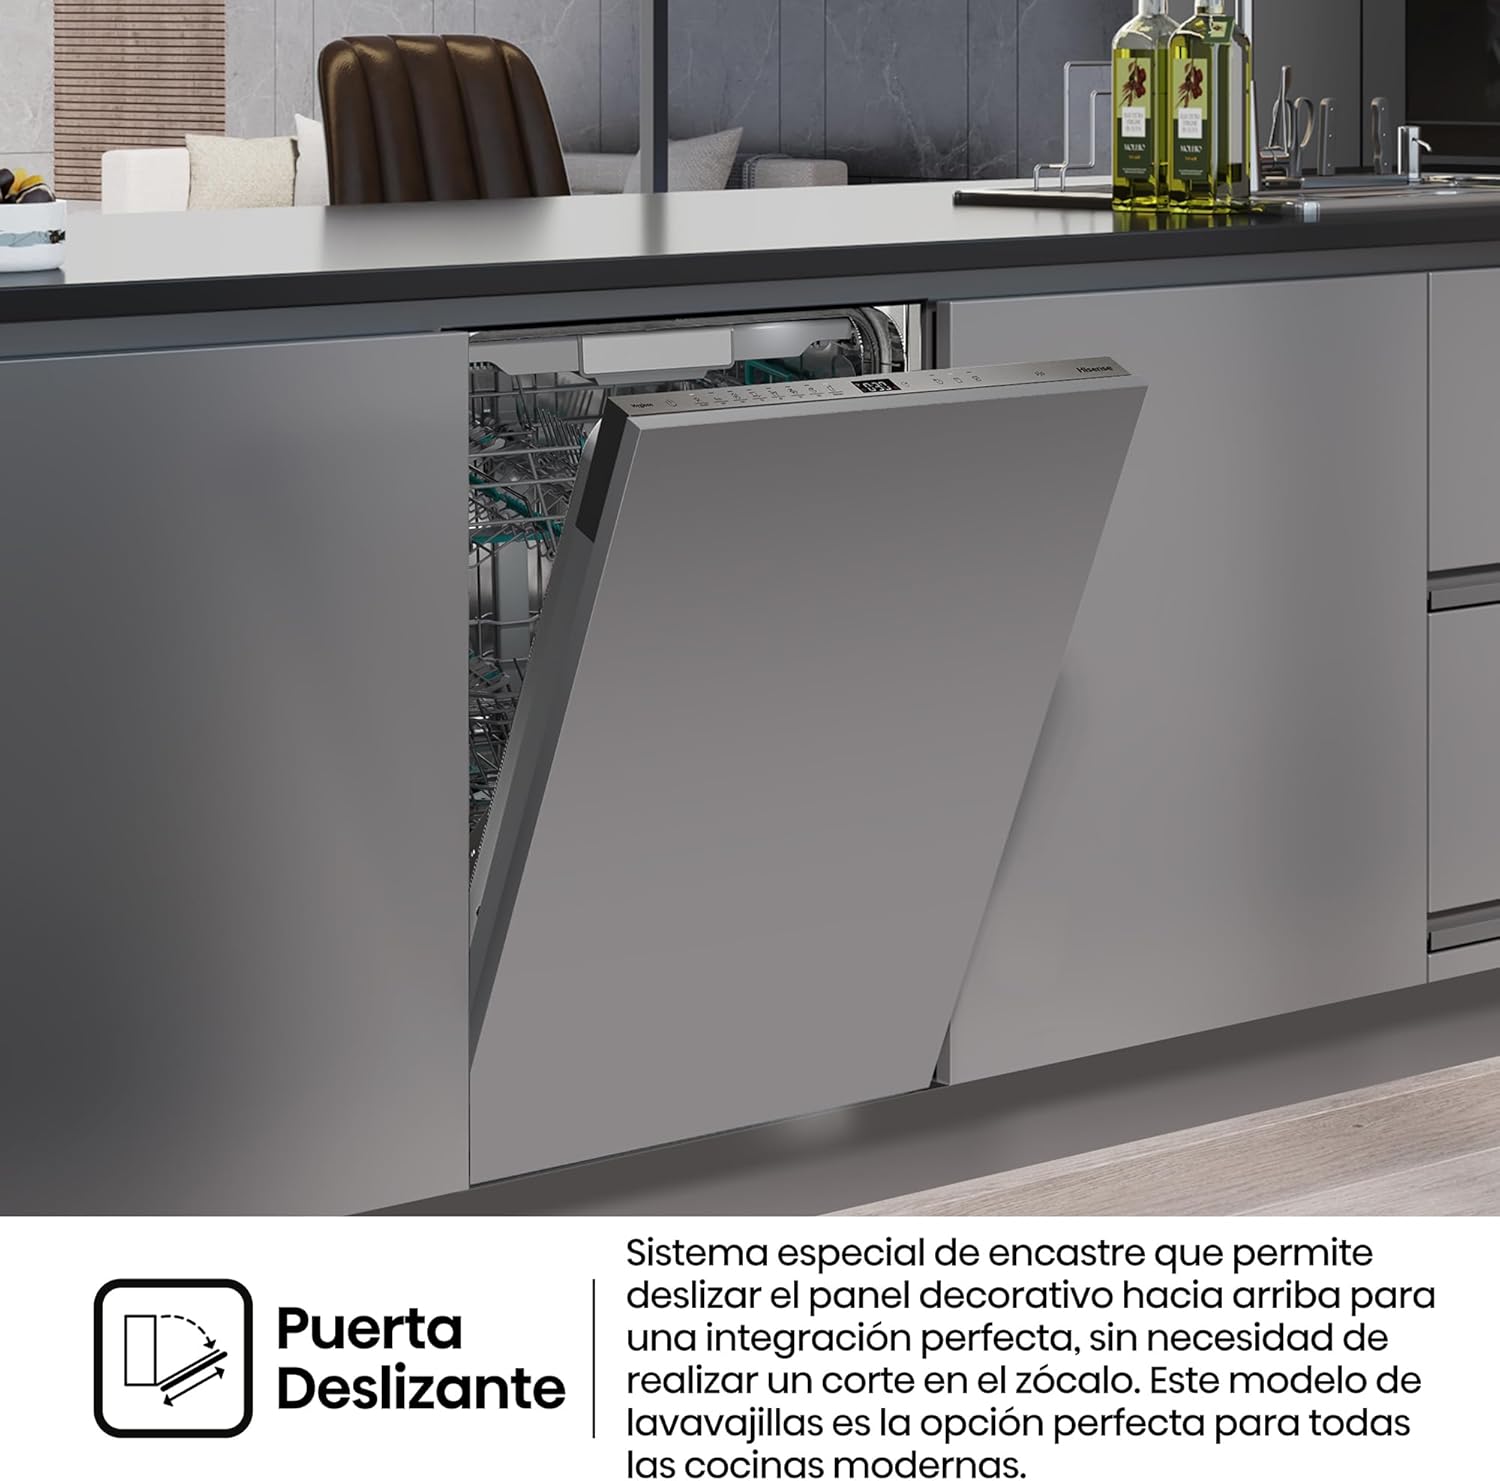
Image: Illustration demonstrating the sliding door system, where the cabinet panel moves vertically to allow the dishwasher door to open without interfering with the plinth.
Operating Instructions
Loading the Dishwasher
Proper loading ensures optimal cleaning results. Scrape off large food particles before loading. Place larger items in the lower basket and smaller, delicate items in the upper basket. Utilize the third basket for cutlery and small utensils.

Image: Close-up view of the third basket designed for cutlery and small kitchen tools, showing its adjustable sections for flexible loading.
Adding Detergent and Rinse Aid
Fill the detergent dispenser with the appropriate amount of dishwasher detergent. Check the rinse aid indicator and refill as needed to ensure streak-free drying.

Image: A composite image showing the touch control panel with digital display, the interior baskets, and a close-up of the detergent and rinse aid dispenser.
Selecting a Program
Use the touch control panel to select the desired wash program. Refer to the program table in the full manual for detailed information on each program (e.g., Auto, Eco, Quick Wash 15').
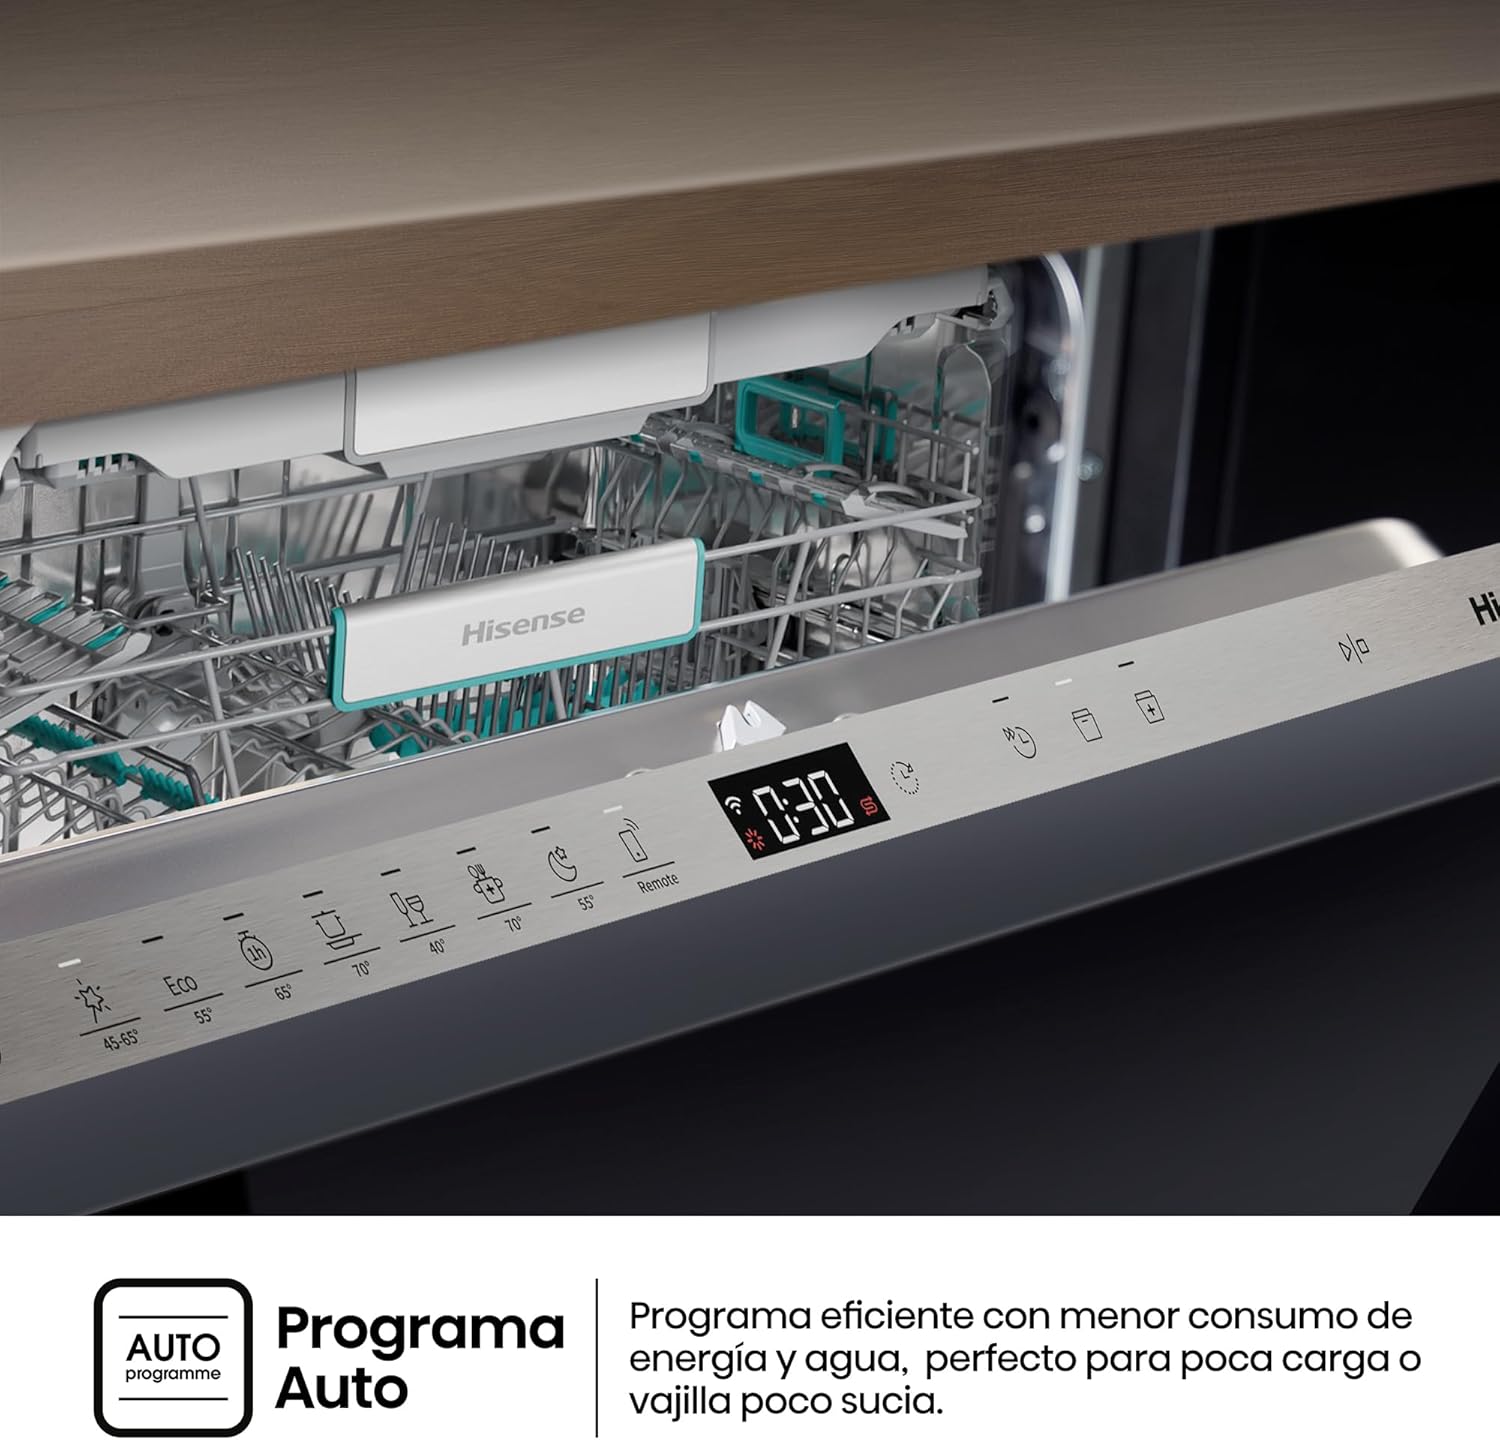
Image: A graphic explaining the "Auto Program" feature, which efficiently adjusts water and energy consumption based on the load's soil level.
Starting and Monitoring
Press the Start button to begin the cycle. The Status Light on the floor indicates the current program status. The interior LED lighting provides visibility during loading and unloading.

Image: A view of the dishwasher integrated into a kitchen, showing the elegant floor projection of the Status Light, which indicates the operational state of the appliance.

Image: A close-up of the dishwasher interior, highlighting the LED lighting that illuminates the racks and dishes for improved visibility.
Automatic Door Opening and Drying
At the end of the wash cycle, the dishwasher door will automatically open to facilitate natural drying and improve drying performance.

Image: A graphic illustrating the automatic door opening feature, showing warm air escaping and fresh air entering to enhance the drying process.
Maintenance
Cleaning the Filters
Regularly clean the filter system to prevent blockages and ensure efficient operation. Remove the filters, rinse them under running water, and reassemble.
Cleaning the Spray Arms
Check the spray arm nozzles for any blockages and clean them if necessary to ensure proper water distribution.

Image: A close-up view of the lower spray arm inside the dishwasher, showing the nozzles responsible for water distribution during the wash cycle.
Exterior Cleaning
Wipe the exterior surfaces with a soft, damp cloth. Do not use abrasive cleaners or solvents.
Salt and Rinse Aid Refill
Monitor the salt and rinse aid indicators and refill as needed to maintain optimal performance and prevent limescale buildup.
Troubleshooting
If your dishwasher is not operating correctly, consult the following common issues before contacting service.
| Problem | Possible Cause | Solution |
|---|---|---|
| Dishwasher does not start | Power supply issue, door not closed properly, program not selected. | Check power connection, ensure door is latched, select a program and press start. |
| Dishes not clean | Improper loading, clogged spray arms, insufficient detergent, clogged filters. | Reload dishes correctly, clean spray arms, add more detergent, clean filters. |
| Water not draining | Clogged drain hose, clogged filter, drain pump issue. | Check and clear drain hose, clean filters, contact service if pump is faulty. |
| Excessive noise | Dishes interfering with spray arms, foreign object in pump, improper installation. | Rearrange dishes, check for foreign objects, ensure proper leveling. |
Specifications
| Feature | Detail |
|---|---|
| Model Number | HV673A65 |
| Dimensions (H x W x D) | 81.6 cm x 59.8 cm x 55.5 cm |
| Weight | 33 kg |
| Capacity | 16 Place Settings |
| Energy Efficiency Class | A |
| Noise Level | 38 dB |
| Voltage | 220 Volts |
| Control Type | Touch Control |
| Special Features | Automatic Drying, Third Basket, Sliding Door, Interior LED Lighting, Status Light, Inverter Technology, Total AquaStop |
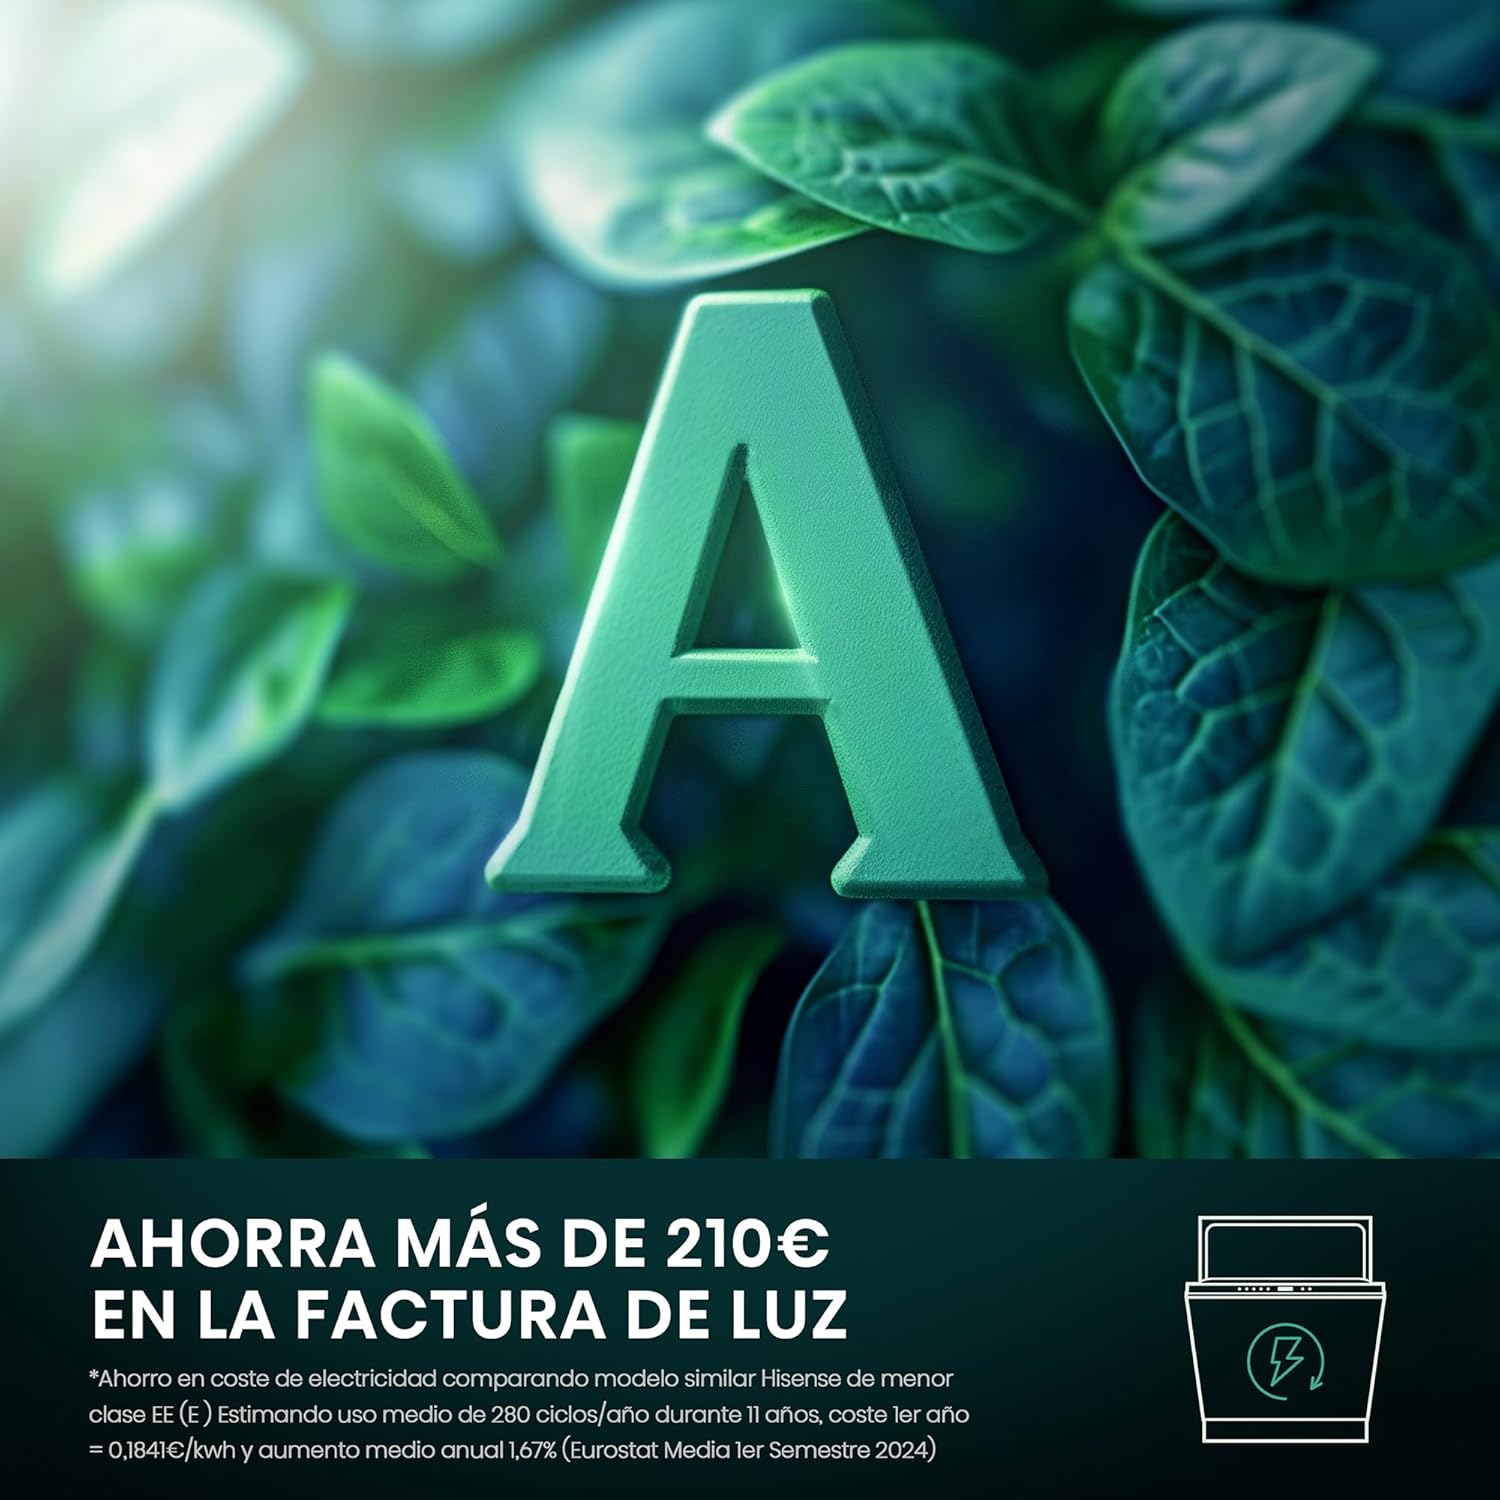
Image: A visual representation highlighting the dishwasher's Class A energy efficiency, indicating significant energy savings.
Warranty and Support
Your Hisense HV673A65 Integrated Dishwasher comes with a standard manufacturer's warranty. Please refer to the warranty card included with your purchase for specific terms and conditions.
For technical support, service requests, or to purchase genuine spare parts, please contact Hisense customer service. Contact details can be found on the Hisense official website or in the documentation provided with your appliance.
The product includes a user manual. For further assistance, please visit the official Hisense website or contact their customer support.
Note: The "Manual del usuario" is listed as a component included in the box.