
1. Introduction
This user manual provides detailed instructions for the setup, operation, maintenance, and troubleshooting of your MAONO PD300X+BA92 Dynamic Microphone Kit. Designed for vocal recording, content creation, and home studio use, this kit offers professional-grade audio quality and versatile connectivity.
Key features of your MAONO PD300X+BA92 Dynamic Microphone Kit include:
- Ultra-high-definition 192kHz/24bit sampling rate for crystal clear audio.
- Robust dynamic microphone structure with multi-dimensional noise reduction technology.
- USB/XLR dual interface for seamless connection to various devices.
- 4 preset modes for effortless setting adjustments.
- MAONO Link software for professional audio settings, including limiters, compressors, and high-pass filters.
- 5-level noise reduction system with shock-absorbing diaphragm and high-porosity foam filter.

2. Setup Guide
2.1 Package Contents
Before beginning setup, ensure all components are present:
- MAONO PD300X Dynamic Microphone
- Heavy Duty Microphone Boom Arm (BA92)
- Shock Mount
- Pop Filter (Foam Windscreen)
- USB-C to USB-A Cable
- XLR Cable (optional, for XLR connection)
- Desk Clamp
2.2 Assembling the Boom Arm and Microphone
- Attach the Desk Clamp: Secure the desk clamp to the edge of your desk. Ensure it is tightened firmly for stability.

Figure 2: The robust C-clamp design provides enhanced stability with increased contact area, screw lock structure, and non-slip silicone pad. - Insert the Boom Arm: Insert the base of the boom arm into the hole on the desk clamp. Tighten the screw on the clamp to secure the arm.

Figure 3: The boom arm offers an excellent range of motion with 360-degree rotation at multiple joints and adjustable angles for optimal microphone positioning. - Attach the Shock Mount: Screw the shock mount onto the threaded end of the boom arm.

Figure 4: The high-quality metal shock mount effectively filters noise from desktop vibrations, ensuring cleaner audio recordings. - Mount the Microphone: Carefully place the MAONO PD300X microphone into the shock mount. Ensure it is securely held.

Figure 5: The microphone features a shock mount and a flocked pop filter foam for effective noise cancellation and plosive sound reduction. - Attach the Pop Filter: Slide the foam windscreen (pop filter) over the microphone head. This helps to reduce plosive sounds (like 'p' and 'b' sounds).

Figure 6: The thick, soft flocked foam windscreen provides excellent elasticity and resilience, effectively filtering out plosive sounds for pure sound quality.
2.3 Connecting the Microphone
The MAONO PD300X offers both USB and XLR connectivity options.
- USB Connection (Plug & Play):
For direct connection to a computer or compatible device, use the provided USB-C to USB-A cable. Plug the USB-C end into the microphone and the USB-A end into your device's USB port.
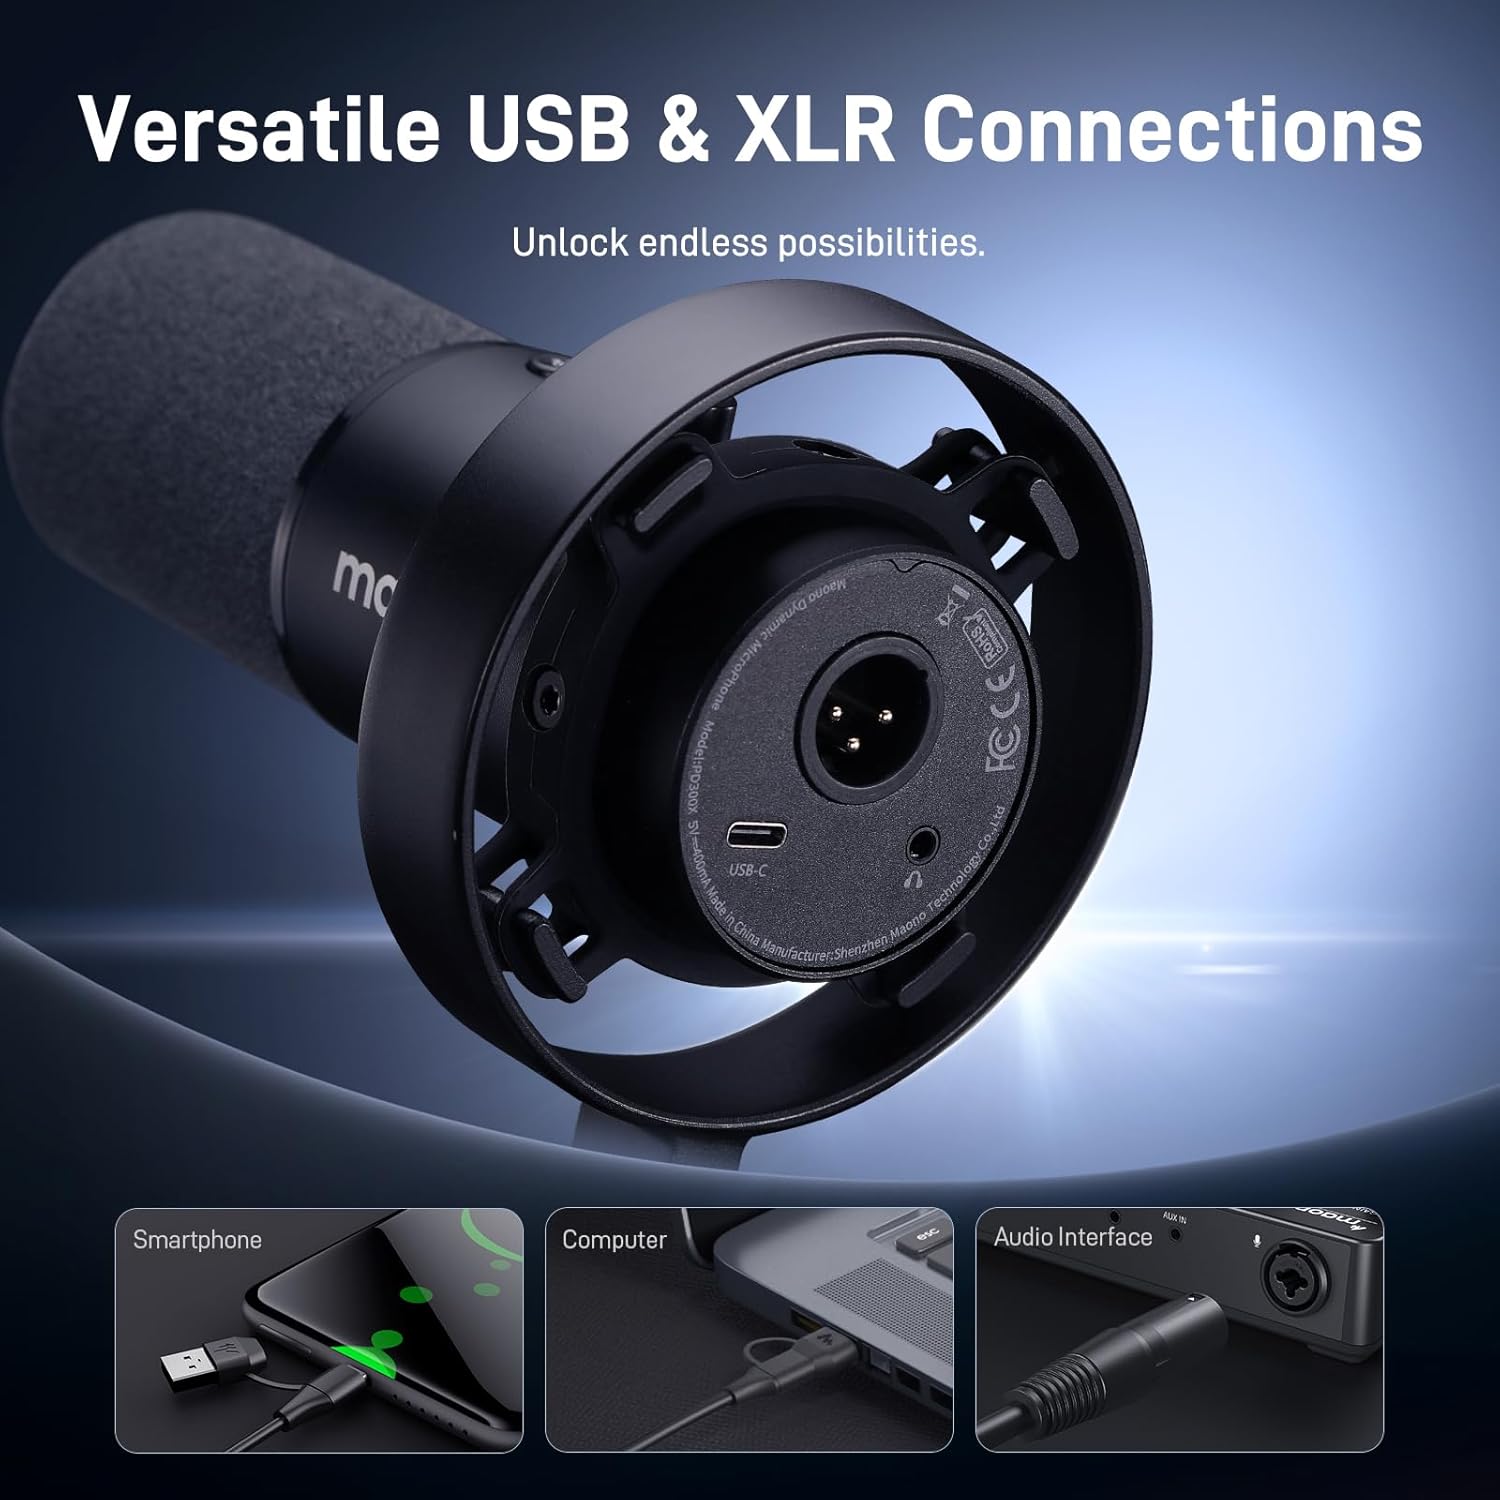
Figure 7: The microphone features both USB-C and XLR ports for versatile connectivity with smartphones, computers, and audio interfaces. - XLR Connection (Professional Setup):
For connection to an audio interface, mixer, or other professional audio equipment, use an XLR cable (not included in all kits). Plug one end of the XLR cable into the microphone's XLR port and the other end into your audio device's XLR input.
3. Operating Instructions
3.1 Microphone Controls
The MAONO PD300X features intuitive on-microphone controls:
- 3-in-1 Smart Knob: This multi-function knob controls Microphone Gain, Headphone Volume, and Monitor Mix.
- Rotate left/right for Mic Gain adjustment.
- Rotate left/right for Headphone Volume adjustment.
- Short press to switch between Mic Gain, Headphone Volume, and Monitor Mix modes.
- Multi-Function Mute Button:
- Short press to mute/unmute the microphone.
- Press and hold for >2 seconds to access custom functions (e.g., Noise Gate, Mic Monitor, PC Monitor, Headphone).


3.2 MAONO Link Software
For advanced control and customization, download and install the MAONO Link software from the official MAONO website. This software unlocks the full potential of your PD300X microphone.
- Visual Graphic EQ Panel: Adjust frequency response to tailor your sound.
- Limiters & Compressors: Control dynamic range for consistent audio levels.
- High-Pass Filters: Reduce unwanted low-frequency noise.
- Noise Reduction: Utilize the 5-level noise reduction system for clearer recordings.

Figure 10: The Maono Link software features smart noise reduction, capable of minimizing steady-state sounds like keyboard clicks and air conditioning noise. - 4 Preset Modes: Quickly switch between optimized settings for Podcast, Recording, Gaming, and Streaming.

Figure 11: One-click access to professional settings configured by audio engineers, including Podcast, Recording, Gaming, and Streaming modes.

3.3 0-Delay Monitoring
Connect your headphones to the 3.5mm jack on the microphone for real-time, zero-latency monitoring of your audio. This allows you to hear your voice exactly as it's being recorded, ensuring optimal performance.

4. Maintenance
Proper maintenance ensures the longevity and optimal performance of your microphone kit.
- Cleaning: Use a soft, dry cloth to wipe down the microphone and boom arm. Avoid using harsh chemicals or abrasive materials.
- Storage: When not in use, store the microphone kit in a clean, dry place away from extreme temperatures and humidity.
- Cable Care: Avoid sharp bends or kinks in the cables. Store them neatly to prevent damage.
- Pop Filter: The foam windscreen can be gently hand-washed with mild soap and water if it becomes dirty. Allow it to air dry completely before reattaching.
5. Troubleshooting
If you encounter issues with your MAONO PD300X+BA92 Dynamic Microphone Kit, refer to the following common problems and solutions:
| Problem | Possible Cause | Solution |
|---|---|---|
| No sound from microphone (USB) | Microphone not selected as input device; cable issue; mute activated. |
|
| No sound from microphone (XLR) | XLR cable issue; audio interface not powered/configured correctly; phantom power not enabled (if required by interface). |
|
| Distorted or low sound | Gain too high/low; microphone too far/close; software settings. |
|
| MAONO Link software not recognizing microphone | Driver issue; software not updated; connection problem. |
|
6. Specifications
| Feature | Detail |
|---|---|
| Model | PD300X (Microphone) + BA92 (Boom Arm) |
| Microphone Type | Dynamic |
| Connectivity | USB-C, XLR |
| Sampling Rate | Up to 192kHz/24bit |
| Controls | 3-in-1 Smart Knob (Gain, Headphone Volume, Monitor Mix), Mute Button |
| Software Compatibility | MAONO Link (for advanced settings) |
| Noise Reduction | 5-Level System, Smart Noise Reduction via Software |
| Boom Arm Material | Aerospace Grade Aluminum |
| Boom Arm Clamp Type | Unique C-Clamp with increased contact area, screw lock, non-slip silicone pad |
| First Available | January 16, 2025 |
| ASIN | B0DT67H5PF |
7. Warranty and Support
MAONO products are designed for reliability and performance. For specific warranty details, please refer to the warranty card included with your product or visit the official MAONO website. Most products come with a standard manufacturer's warranty covering defects in materials and workmanship.
For technical support, product inquiries, or warranty claims, please contact MAONO customer service through their official website or the contact information provided in your product packaging. Keep your purchase receipt as proof of purchase for warranty services.
Online Resources:
- Official MAONO Website: www.maono.com
- MAONO Store on Amazon: Visit MAONO Store