
Introduction
This manual provides comprehensive instructions for the setup, operation, and maintenance of your SniperView TC32 Cellular Trail Camera. Designed for hunting, wildlife monitoring, and outdoor security, this camera offers advanced features such as 4G LTE connectivity, FHD live streaming, 360° pan-tilt functionality, and solar power. Please read this manual thoroughly before using the camera to ensure optimal performance and longevity.
For additional support or inquiries, please refer to the support section at the end of this manual.
Safety Information
- Do not expose the camera to extreme temperatures or direct sunlight for prolonged periods.
- Ensure all ports and covers are securely closed to maintain waterproof integrity.
- Use only the specified power sources and accessories.
- Keep the camera out of reach of children and pets.
- Do not attempt to disassemble or modify the camera, as this will void the warranty.
- Dispose of batteries responsibly according to local regulations.
What's in the Box
Verify that all the following components are included in your package:
- SniperView TC32 Trail Camera
- Solar Panel
- USB Cable
- Mounting Strap
- Suction Cup Mount
- Built-in SIM Card (non-removable)
- User Manual (this document)
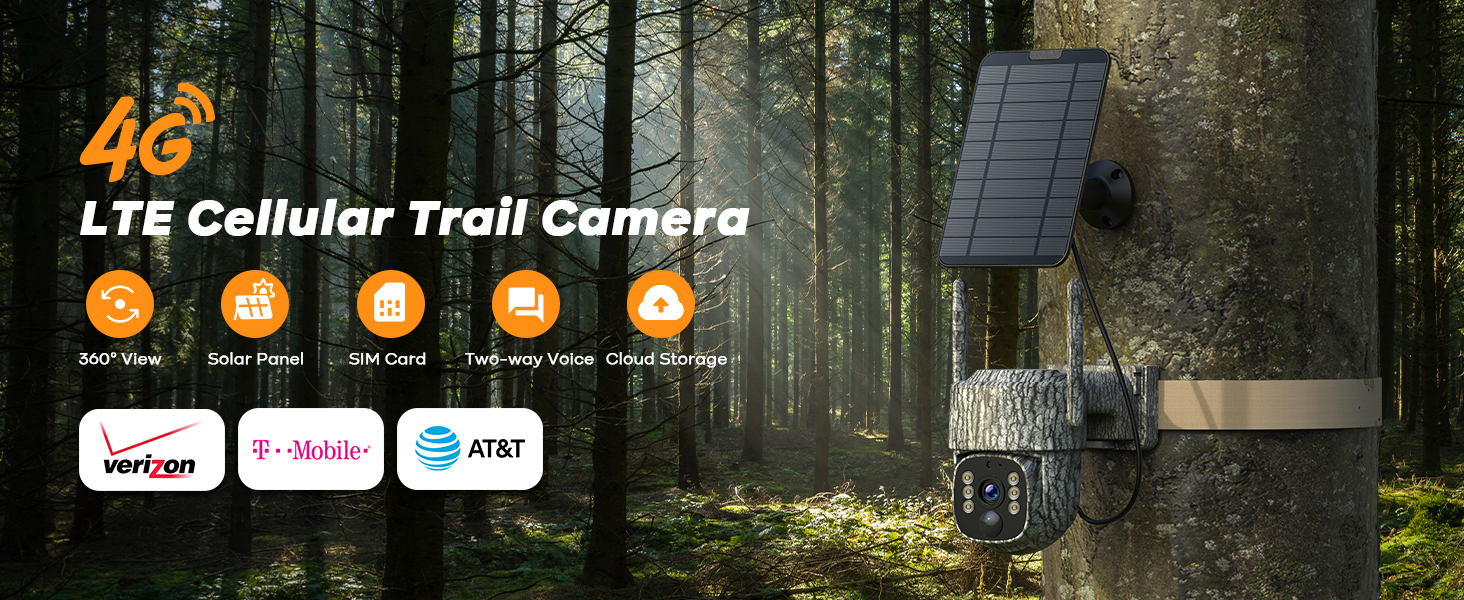
Image: The SniperView TC32 Cellular Trail Camera, showing its main unit and solar panel, indicating its 4G LTE capabilities, 360° view, built-in SIM card, two-way voice, and cloud storage features.
Product Overview and Features
The SniperView TC32 is a state-of-the-art cellular trail camera designed for robust outdoor performance. Key features include:
- 360° Full Coverage Monitoring: Pan 355° and tilt 90° for comprehensive area surveillance.
- FHD Live Streaming: View high-definition video directly on your smartphone via the app, no Wi-Fi required.
- 4G LTE Connectivity: Built-in SIM card compatible with Verizon, AT&T, and T-Mobile for reliable data transmission.
- Solar-Powered & Long-Lasting Battery: Integrated solar panel and 7800mAh rechargeable lithium battery ensure continuous operation.
- Instant Motion Alerts: Advanced PIR motion sensor triggers immediate notifications to your phone.
- Two-Way Audio Communication: Speak and listen remotely through the camera.
- Dual Lighting Modes: Switch between infrared (IR) for discreet night vision and white light for color night vision.
- Cloud Storage & Local Storage: Option to store footage on the cloud or a memory card (not included).

Image: Front view of the SniperView TC32 Cellular Trail Camera, showcasing its lens, IR LEDs, and solar panel connection.

Image: The trail camera mounted on a tree, illustrating its 355° pan and 90° tilt capabilities for nearly 360° coverage, with a smartphone displaying a live view of a bear.

Image: Close-up of the camera's internal components, highlighting the built-in SIM card slot and indicating compatibility with Verizon, T-Mobile, and AT&T networks, emphasizing no Wi-Fi is needed.

Image: The camera mounted on a tree, with a smartphone showing a live FHD video stream of deer, demonstrating the live streaming capability over a 4G network.

Image: The camera and its solar panel mounted on a wooden wall, illustrating the integrated 7800mAh lithium battery and solar charging for extended operation.

Image: The camera in a natural setting, with icons representing cloud storage and 300MB of free data, highlighting the complimentary data and cloud storage offer for the first month.

Image: A deer in a field with a target overlay, and a smartphone displaying "Activity detected" notifications, illustrating the PIR motion detection and alert feature.

Image: A person on a tree communicating with someone via the camera, demonstrating the real-time two-way voice transmission feature.
Setup Guide
1. Charging the Battery
Before first use, fully charge the built-in 7800mAh lithium battery using the provided USB cable. Connect the USB cable to the camera's charging port and a standard USB power adapter (not included). The charging indicator will show the status.
2. Inserting a Memory Card (Optional)
While the camera supports cloud storage, you can also use a memory card for local storage. Insert a compatible MicroSD card (up to 128GB, Class 10 or higher recommended) into the designated slot. Ensure the card is inserted correctly until it clicks into place. The memory card is not included.

Image: A detailed view of the camera's side, showing the non-removable Nano SIM card built-in, the slot for an optional memory card, and the reset button.
3. Downloading the App
Search for the official SniperView app on your smartphone's app store (iOS or Android) and install it. Follow the on-screen instructions to create an account and log in.
4. Pairing the Camera with the App
- Open the SniperView app and tap "Add Device" or the "+" icon.
- Scan the QR code located on the camera or its packaging.
- Follow the app's prompts to complete the pairing process. Ensure your phone has a stable internet connection during this step.
- Once paired, the camera will connect to the 4G network automatically using its built-in SIM card.
5. Mounting the Camera
Choose a suitable location for mounting the camera, considering factors like desired viewing angle, sunlight exposure for the solar panel, and cellular signal strength. The camera can be mounted using the included strap or screw mount.
- Strap Attachment: Thread the mounting strap through the camera's strap slots and secure it around a tree or pole.
- Screw Mount: Use the provided suction cup mount or other suitable hardware to attach the camera to a flat surface like a wall.
Adjust the solar panel's position to maximize sunlight exposure throughout the day for optimal charging.
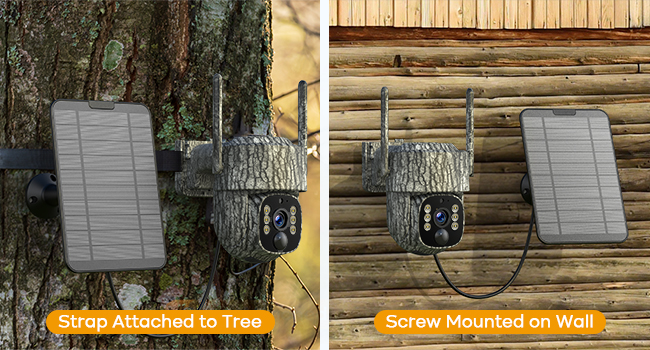
Image: Two mounting methods for the camera: one showing it strapped to a tree, and the other showing it screw-mounted on a wall, both with the solar panel connected.
Operating Instructions
1. Live View and Pan-Tilt Control
Open the SniperView app and select your camera from the device list. You will see a live video feed. Use the on-screen controls to pan the camera horizontally (355°) and tilt it vertically (90°) to adjust your viewing angle.
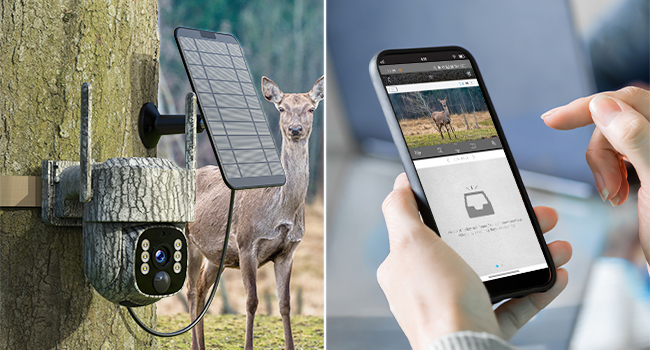
Image: The camera mounted on a tree next to a deer, with a hand holding a smartphone displaying the live view from the camera, demonstrating remote monitoring.
2. Motion Detection and Alerts
The camera's advanced PIR sensor detects motion and sends instant alerts to your smartphone. You can customize alert sensitivity and set specific alert times within the app settings.
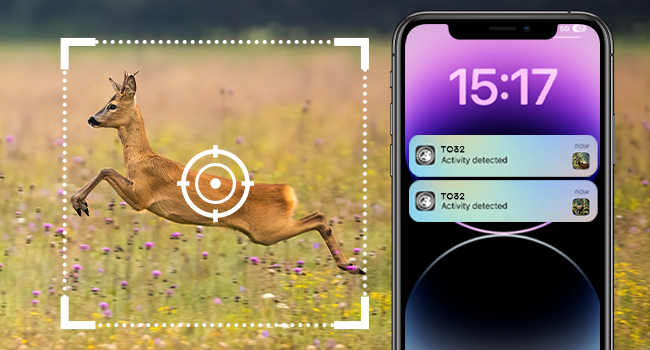
Image: A deer in motion with a target overlay, and a smartphone displaying "Activity detected" notifications, illustrating the instant motion alert feature.
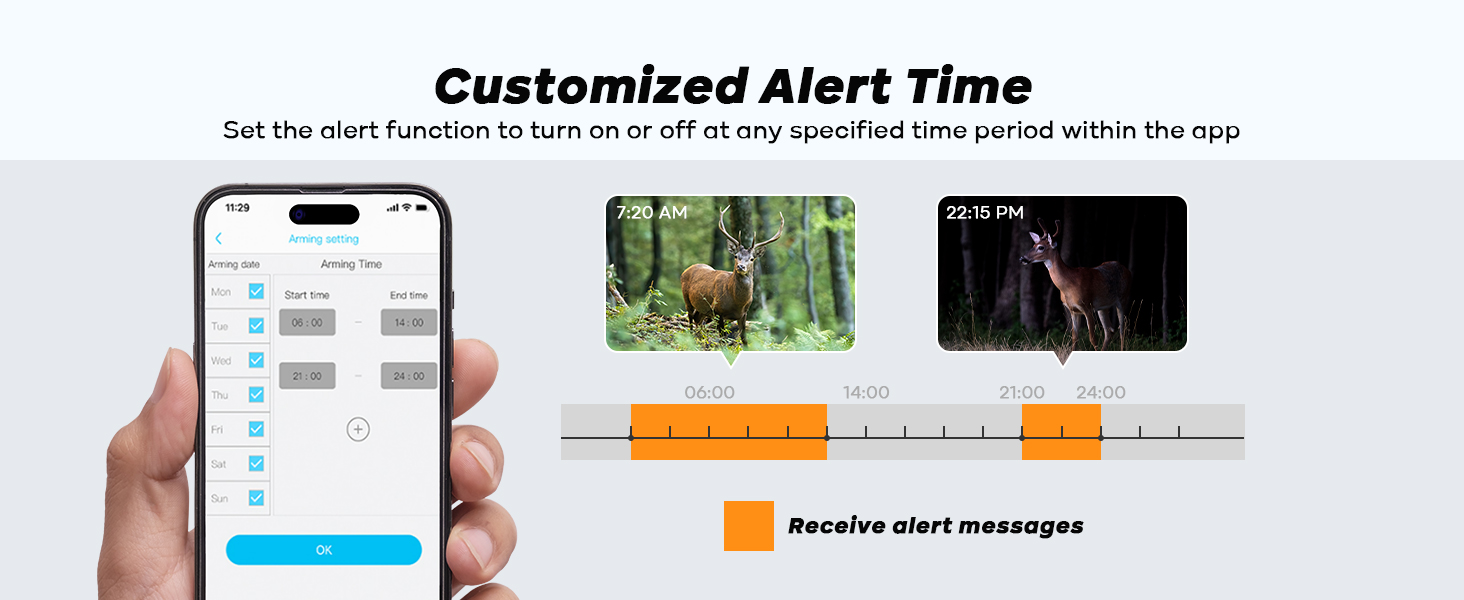
Image: A smartphone screen showing app settings for customizing alert times, with a timeline indicating active alert periods, allowing users to set specific times for receiving notifications.
3. Two-Way Audio
From the live view in the app, tap the microphone icon to speak through the camera's speaker. Tap the speaker icon to listen to audio from the camera's surroundings.
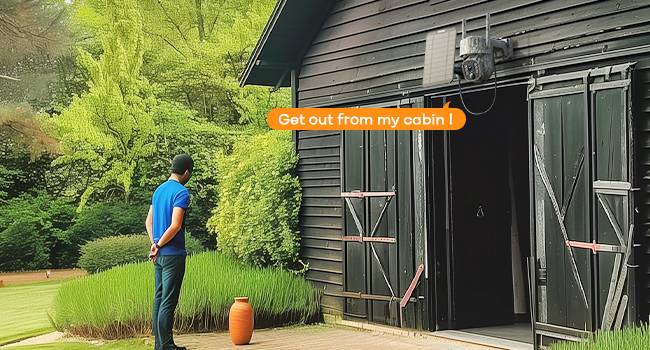
Image: A person on a tree communicating with someone via the camera, demonstrating the real-time two-way voice transmission feature.
4. Night Vision Modes
The camera supports two night vision modes: infrared (IR) and white light. You can switch between these modes directly from the app to suit your monitoring needs. Infrared provides discreet black and white footage, while white light illuminates the area for color night vision.
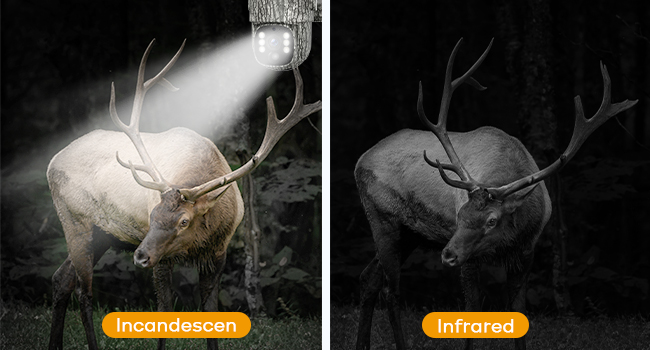
Image: A split image showing the camera's dual lighting modes: one side depicts an incandescent light illuminating a deer at night for color vision, and the other side shows infrared night vision for discreet monitoring.
5. Data Plans and Cloud Storage
The camera comes with a built-in SIM card and offers 300MB of free data and cloud storage for the first month. After this period, you can renew your data package directly within the app. Various data plans are available, ranging from monthly to yearly subscriptions.
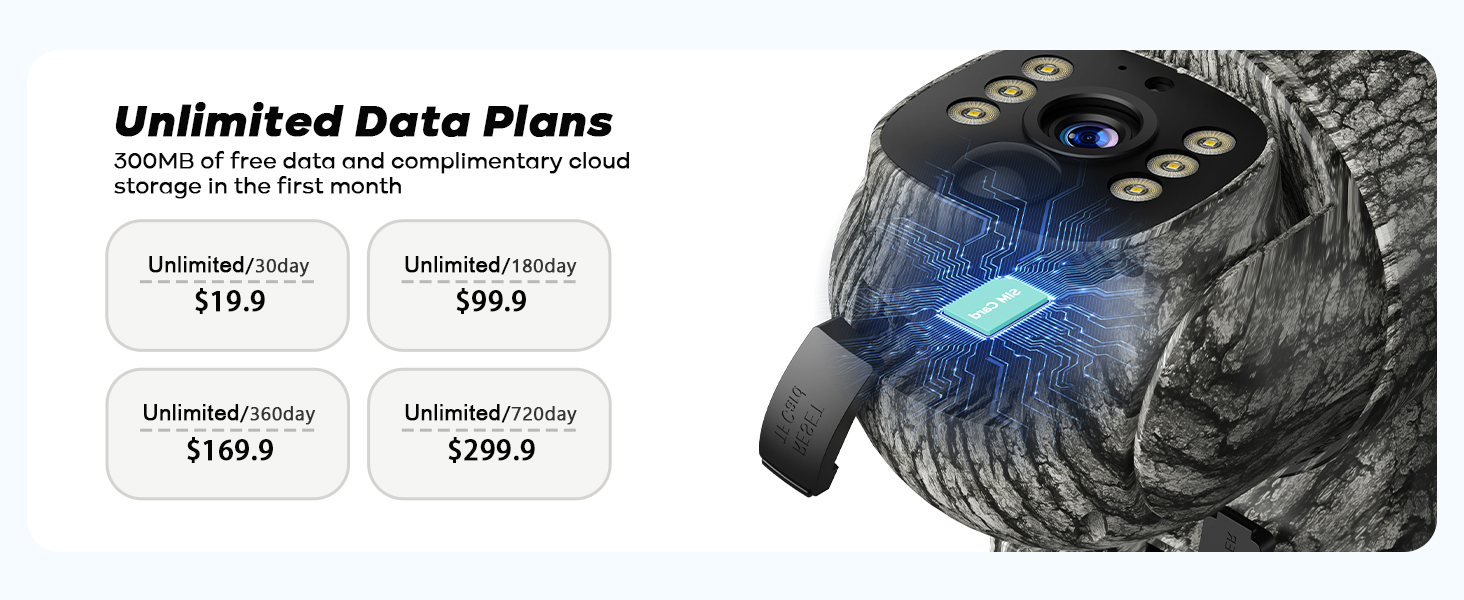
Image: A graphic displaying various unlimited data plan options for the camera, including monthly, 180-day, 360-day, and 720-day subscriptions, alongside an image of the camera's internal chip.
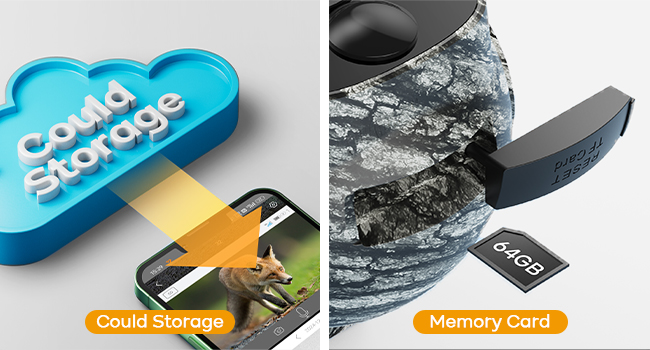
Image: A split image illustrating storage options: one side shows cloud storage with data flowing to a smartphone, and the other side shows a memory card being inserted into the camera, indicating local storage.
Maintenance
- Cleaning: Use a soft, damp cloth to clean the camera lens and solar panel. Do not use abrasive cleaners or solvents.
- Battery Care: The built-in lithium battery is designed for long life. Ensure the solar panel is clean and receives adequate sunlight for continuous charging. Avoid fully depleting the battery frequently.
- Firmware Updates: Check the app regularly for firmware updates to ensure your camera has the latest features and performance improvements.
- Storage: If storing the camera for an extended period, ensure the battery is partially charged (around 50%) and store it in a cool, dry place.
Troubleshooting
| Problem | Possible Cause | Solution |
|---|---|---|
| Camera not powering on. | Low battery; power button not pressed. | Charge the battery fully. Press and hold the power button for a few seconds. |
| No live view or connectivity. | Poor cellular signal; data plan expired; app issue. | Relocate camera to an area with better signal. Check data plan status in app. Restart app/camera. |
| Motion alerts not received. | Motion detection off; sensitivity too low; app notifications disabled. | Enable motion detection in app. Increase sensitivity. Check phone's notification settings for the app. |
| Poor image/video quality. | Dirty lens; low light conditions; camera too far from subject. | Clean the lens. Ensure adequate lighting or use night vision. Adjust camera placement. |
| Solar panel not charging. | Panel obstructed; insufficient sunlight; dirty panel. | Ensure panel is in direct sunlight. Clear any obstructions. Clean the solar panel surface. |
Specifications
| Feature | Detail |
|---|---|
| Model Name | TC32 Trail Camera |
| Brand | SniperView |
| Connectivity Technology | Cellular (4G LTE) |
| Video Capture Resolution | 1080p (FHD) |
| Viewing Angle | 90 Degrees (Lens), 355° Pan, 90° Tilt |
| Night Vision Range | 33 Feet |
| Power Source | Battery Powered (7800mAh Lithium, included) with Solar Panel |
| Water Resistance Level | Waterproof |
| Supported Memory Card | MicroSD up to 128 GB (not included) |
| Control Method | App |
| Item Dimensions (L x W x H) | 6.3 x 5.1 x 8.6 inches |
| Item Weight | 1.96 pounds |
| Included Components | Trail camera, Solar Panel, USB cable, Strap, Suction Cup, SIM Card |
Warranty and Support
For warranty information and technical support, please refer to the official SniperView website or contact their customer service directly. Details are typically available on the product packaging or the brand's official online presence.
Online Support: Visit the SniperView Store on Amazon for product information and potential support links.
Please retain your purchase receipt for warranty claims.