
1. Introduction
This manual provides essential information for the installation, operation, and maintenance of your Powallon 48V 750W Hub Motor E-Bike Conversion Kit. This kit is designed to transform compatible mountain or road bikes into electric bicycles, offering pedal-assist and throttle-controlled power. Please read this manual thoroughly before installation and use to ensure safe and correct operation.
2. Safety Information
Always prioritize safety when operating an electric bicycle. Failure to follow safety guidelines can result in serious injury or damage to the product.
- Wear a helmet and appropriate safety gear at all times.
- Perform a pre-ride inspection before each use, checking brakes, tire pressure, and all connections.
- Understand and obey all local traffic laws and regulations for electric bicycles.
- Do not operate the e-bike under the influence of alcohol or drugs.
- Avoid riding in adverse weather conditions or on slippery surfaces.
- Ensure all electrical connections are secure and waterproofed where necessary.
- Keep hands and feet clear of moving parts, especially the motor and chain.
3. Package Contents
The Powallon 48V 750W Hub Motor E-Bike Conversion Kit typically includes the following components:
- 48V 750W Brushless Hub Motor (integrated into a 26-inch rear wheel)
- Dz40 LCD Display
- Pedal Assist System (PAS) Sensor
- Thumb Throttle
- Controller (Model HH1173)
- Wiring Harness
- Brake Levers (may vary by kit version)
- Mounting Hardware and Zip Ties

Image 1: Overview of the Powallon 48V 750W Hub Motor E-Bike Conversion Kit components.
4. Key Features
- Powerful 48V 750W Brushless Motor: Offers exceptional power and torque for various riding conditions.
- 26-Inch Rear Wheel: Durable, high-quality construction for long-term use.
- Pedal Assist System (PAS): Enables smooth motor engagement as you pedal, providing a natural biking feel.
- Thumb Throttle: Provides convenient and responsive instant acceleration.
- Dz40 LCD Display: Clear and easy-to-read screen showing speed, battery level, PAS level, and distance.
5. Compatibility
This conversion kit is designed for specific bicycle configurations. Please verify your bike's compatibility before installation.
- Wheel Size: Compatible with 26-inch bicycles.
- Rear Dropout Spacing: Requires a rear dropout spacing of 138mm (5.43 inches). The axle length is approximately 199.9mm (7.87 inches).
- Cassette Compatibility: Designed to fit 7 to 10-speed cassettes.
- Brake Style: Compatible with mechanical disc brakes. Not compatible with rim V-brakes.

Image 2: Illustration of required rear dropout spacing (138mm) and axle length for compatibility with 7 to 10-speed cassettes.

Image 3: Visual guide for brake system compatibility, showing mechanical disc brakes as compatible and rim V-brakes as incompatible.
The kit is suitable for various bike types including Mountain Bikes, Commuter Bikes, Cruiser Bikes, Hybrid Bikes, and Gravel Bikes, provided they meet the above specifications.

Image 4: Examples of bicycle types that are compatible with the conversion kit.
6. Setup and Installation
Installation of an e-bike conversion kit requires mechanical aptitude. If you are unsure about any step, it is recommended to seek professional assistance from a qualified bicycle mechanic.
6.1. Pre-Installation Checks
- Ensure your bike's frame and components are in good condition.
- Verify compatibility (wheel size, dropout spacing, brake type).
- Gather all necessary tools (e.g., wrenches, hex keys, cable cutters, zip ties).
6.2. Installation Steps (General Guide)
- Remove Existing Rear Wheel: Carefully remove your bike's original rear wheel.
- Install Hub Motor Wheel: Insert the new hub motor wheel into the rear dropouts, ensuring it is centered and secured with axle nuts.
- Install Cassette: Transfer your existing cassette onto the new hub motor wheel or install a new compatible cassette.
- Mount Controller: Secure the controller (Model HH1173) to the bike frame, typically near the battery or under the seat, ensuring it is protected from elements.
- Install Dz40 Display: Mount the Dz40 display on your handlebars (22.2mm holder) in a position that is easily visible and accessible.
- Install PAS Sensor: Attach the Pedal Assist System sensor to the bottom bracket area, ensuring the magnet disc is correctly aligned.
- Install Thumb Throttle: Mount the thumb throttle on the handlebars, typically on the left side, within easy reach.
- Connect Wiring: Carefully connect all components to the controller using the provided wiring harness. Ensure all connectors are fully seated and secured. Pay attention to color-coded or labeled connectors.
- Secure Cables: Route and secure all cables neatly along the bike frame using zip ties, ensuring they do not interfere with moving parts or steering.
- Install Battery: Connect your 48V e-bike battery (not included in this kit) to the controller.
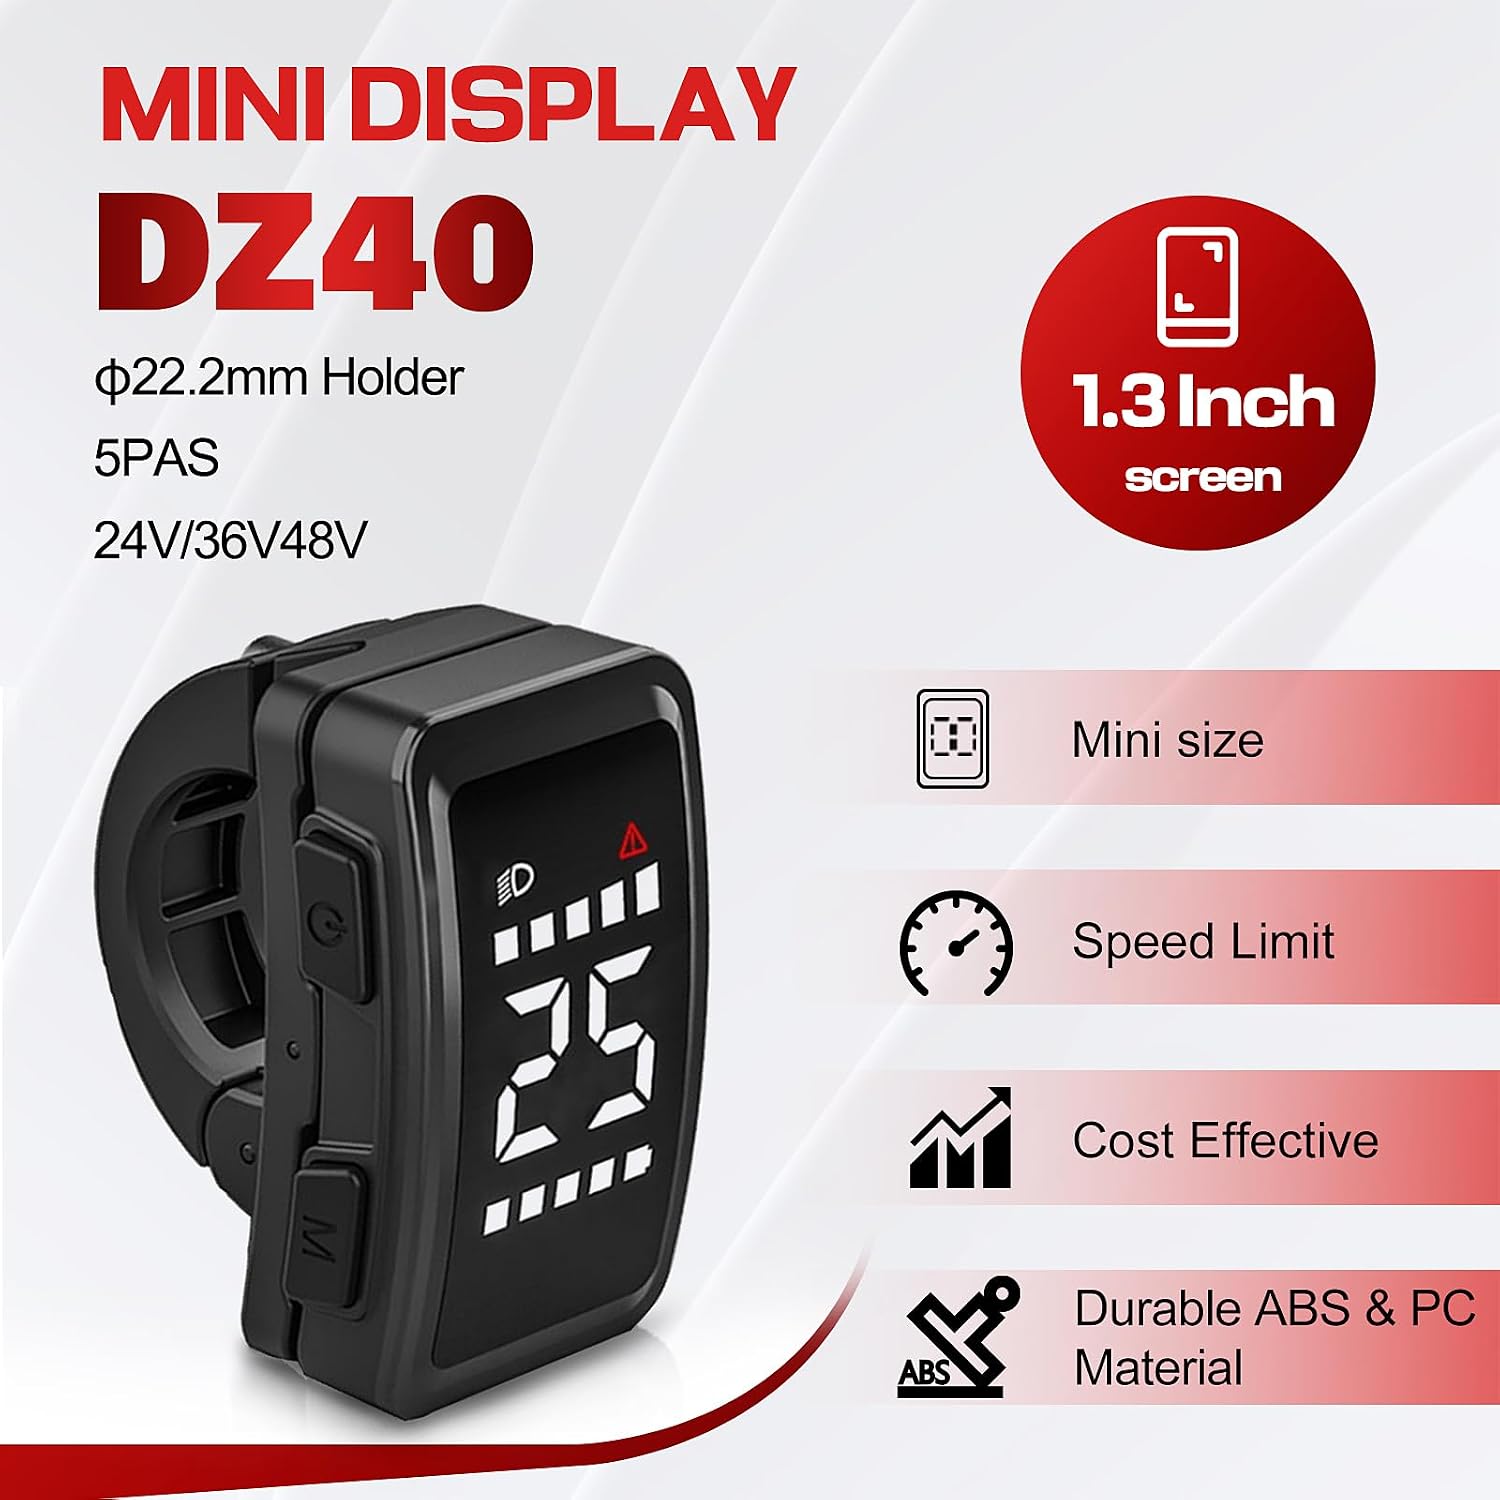
Image 5: Details of the Dz40 Mini Display, showing its compact size, 1.3-inch screen, and 22.2mm holder.

Image 6: The HH1173 Controller for the brushless motor, showing its dimensions and key specifications.
7. Operating Instructions
Familiarize yourself with the operation of your e-bike before riding.
7.1. Dz40 Display Operation
The Dz40 display provides essential riding information and control over the e-bike system.
- Power On/Off: Press and hold the power button on the display to turn the system on or off.
- Information Display: The screen shows current speed, battery level, Pedal Assist System (PAS) level, and distance traveled.
- PAS Level Adjustment: Use the '+' and '-' buttons to cycle through the 0-5 PAS levels. Level 0 provides no motor assistance, while Level 5 provides maximum assistance.
- Headlight Control: The display may include a button to control integrated headlights (if connected).
7.2. Pedal Assist System (PAS)
The PAS sensor detects your pedaling motion and automatically engages the motor to provide assistance. The level of assistance depends on the selected PAS level on the display.
7.3. Thumb Throttle
The thumb throttle provides on-demand power without pedaling. Gently press the throttle to accelerate. Release the throttle to disengage motor power. Use with caution, especially when starting.
8. Maintenance
Regular maintenance ensures the longevity and safe operation of your e-bike conversion kit.
- Cleanliness: Keep the motor, controller, and display clean. Avoid using high-pressure water jets directly on electrical components.
- Electrical Connections: Periodically check all electrical connections for tightness and corrosion. Ensure they are properly sealed.
- Wiring: Inspect wiring for any signs of wear, fraying, or damage. Replace damaged wires immediately.
- Brakes: Regularly check brake pads and rotors for wear. Ensure brakes are functioning correctly for safe stopping.
- Tires: Maintain correct tire pressure as specified by your bicycle manufacturer.
- General Bike Maintenance: Continue to perform regular maintenance on your bicycle's mechanical components (chain, gears, bearings, etc.) as you would with a standard bike.
9. Troubleshooting
This section addresses common issues you might encounter.
- No Power to Display:
- Check battery connection and charge level.
- Ensure all display and controller connections are secure.
- Motor Not Assisting:
- Verify PAS level is set above 0 on the display.
- Check PAS sensor alignment and connection.
- Ensure brake levers (if equipped with motor cut-off) are not engaged.
- Throttle Not Working:
- Check throttle connection to the controller.
- Ensure the system is powered on.
- Unusual Noises from Motor:
- Stop riding immediately.
- Inspect the motor for any obstructions or loose components.
- Contact customer support if the issue persists.
10. Specifications
| Component | Specification |
|---|---|
| Motor Type | 48V 750W Brushless Hub Motor (BAFANG G0900) |
| Wheel Size | 26 Inches |
| Rear Dropout Spacing | 138mm |
| Axle Length | 199.9mm |
| Cassette Compatibility | 7-10 Speeds |
| Brake Style Compatibility | Disc Brake |
| Controller Model | HH1173 |
| Controller Voltage | 48V |
| Controller Undervoltage Protection | 39±1V |
| Controller Current Limiting | 25±1A |
| Display Model | Dz40 LCD Display |
| Display Screen Size | 1.3 Inches (LED) |
| Display Mounting Size | Φ22.2mm Holder |
| PAS Levels | 0-5 |
| Special Features | Digital Display, Pedal Assist, Thumb Throttle |
| Material | Aluminum (motor housing) |

Image 7: Detailed specifications for the Dz40 display, including screen size, type, and PAS levels.
11. Warranty and Support
11.1. Warranty Information
This Powallon E-Bike Conversion Kit comes with a 1 Year Limited Warranty from the date of purchase. This warranty covers manufacturing defects in materials and workmanship. It does not cover damage resulting from misuse, neglect, accidents, unauthorized modifications, or normal wear and tear. Please retain your proof of purchase for warranty claims.
11.2. Customer Support
For technical assistance, troubleshooting not covered in this manual, or warranty inquiries, please contact Powallon customer support. Refer to your purchase documentation or the retailer's website for specific contact details.