
1. Introduction
This manual provides detailed instructions for the safe and effective use of your RESUXI 7-in-1 Electric Hair Removal Kit. Please read this manual thoroughly before first use and retain it for future reference. This versatile device is designed for various hair removal and skin care needs, featuring multiple interchangeable heads.
2. Safety Information
- Always keep the device away from water while charging.
- Exercise caution when using the device in low light conditions to prevent skin irritation or injury.
- Adhere strictly to the cleaning instructions to maintain hygiene and prevent bacterial growth.
- Do not operate the device while it is connected to a charging source.
- This appliance is not intended for use by persons (including children) with reduced physical, sensory or mental capabilities, or lack of experience and knowledge, unless they have been given supervision or instruction concerning use of the appliance by a person responsible for their safety.
3. Package Contents
Your RESUXI 7-in-1 Electric Hair Removal Kit includes the main device and the following attachments:
- Main Device Handle
- Epilator Head
- Shaver Head
- Bikini Trimmer Head
- Facial Razor Head
- Body Brush Head
- Facial Massager Head
- Foot Callus Remover Head
- USB Charging Cable
- Cleaning Brush
- Charging Stand

Image: The complete RESUXI 7-in-1 Electric Hair Removal Kit, showcasing the main device, charging stand, and all interchangeable heads including epilator, shaver, bikini trimmer, facial razor, body brush, facial massager, and foot callus remover.
Video: An overview of the RESUXI 7-in-1 Hair Removal Kit, demonstrating the main unit and its various interchangeable heads, along with features like the travel lock and cleaning process.
4. Setup and Charging
4.1 Initial Charge
Before first use, fully charge the device. Connect the USB charging cable to the charging port at the bottom of the device or place it on the charging stand. Connect the other end of the USB cable to a compatible USB power source (e.g., PC, power bank, or power adapter).
The LCD display will show the battery level and charging status. A full charge takes approximately 1.5 hours and provides up to 100 minutes of operation.

Image: The RESUXI device held in hand, displaying the LCD screen with battery percentage and charging indicator, alongside icons illustrating various USB charging methods (PC, power bank, power adapter, laptop).

Image: An illustration highlighting the USB fast charging feature, showing the device connected to a laptop via USB, with text indicating 1.5 hours charging time for 100 minutes running time.
4.2 Attaching and Detaching Heads
To attach a head, align the head with the main device body and press firmly until it clicks into place. To detach, press the detachable cutter head button located on the side of the device and gently pull the head off.
5. Operating Instructions
5.1 Power On/Off and Speed Settings
Press the power button to turn the device on. The LCD display will illuminate. Press the power button again to cycle between the two available speed modes (5300 RPM and 6300 RPM), allowing you to select the optimal speed for different body areas and hair types.
5.2 Travel Lock
To activate the travel lock, press and hold the power button for 3 seconds. The device will lock, preventing accidental activation during travel. To unlock, press and hold the power button for another 3 seconds.
5.3 Using the Epilator Head
The epilator head features advanced micro-grip tweezer technology designed to remove hair from the root for long-lasting smoothness. Hold the device at a 90-degree angle to your skin and move it slowly against the direction of hair growth. The built-in LED light assists in identifying fine hairs.
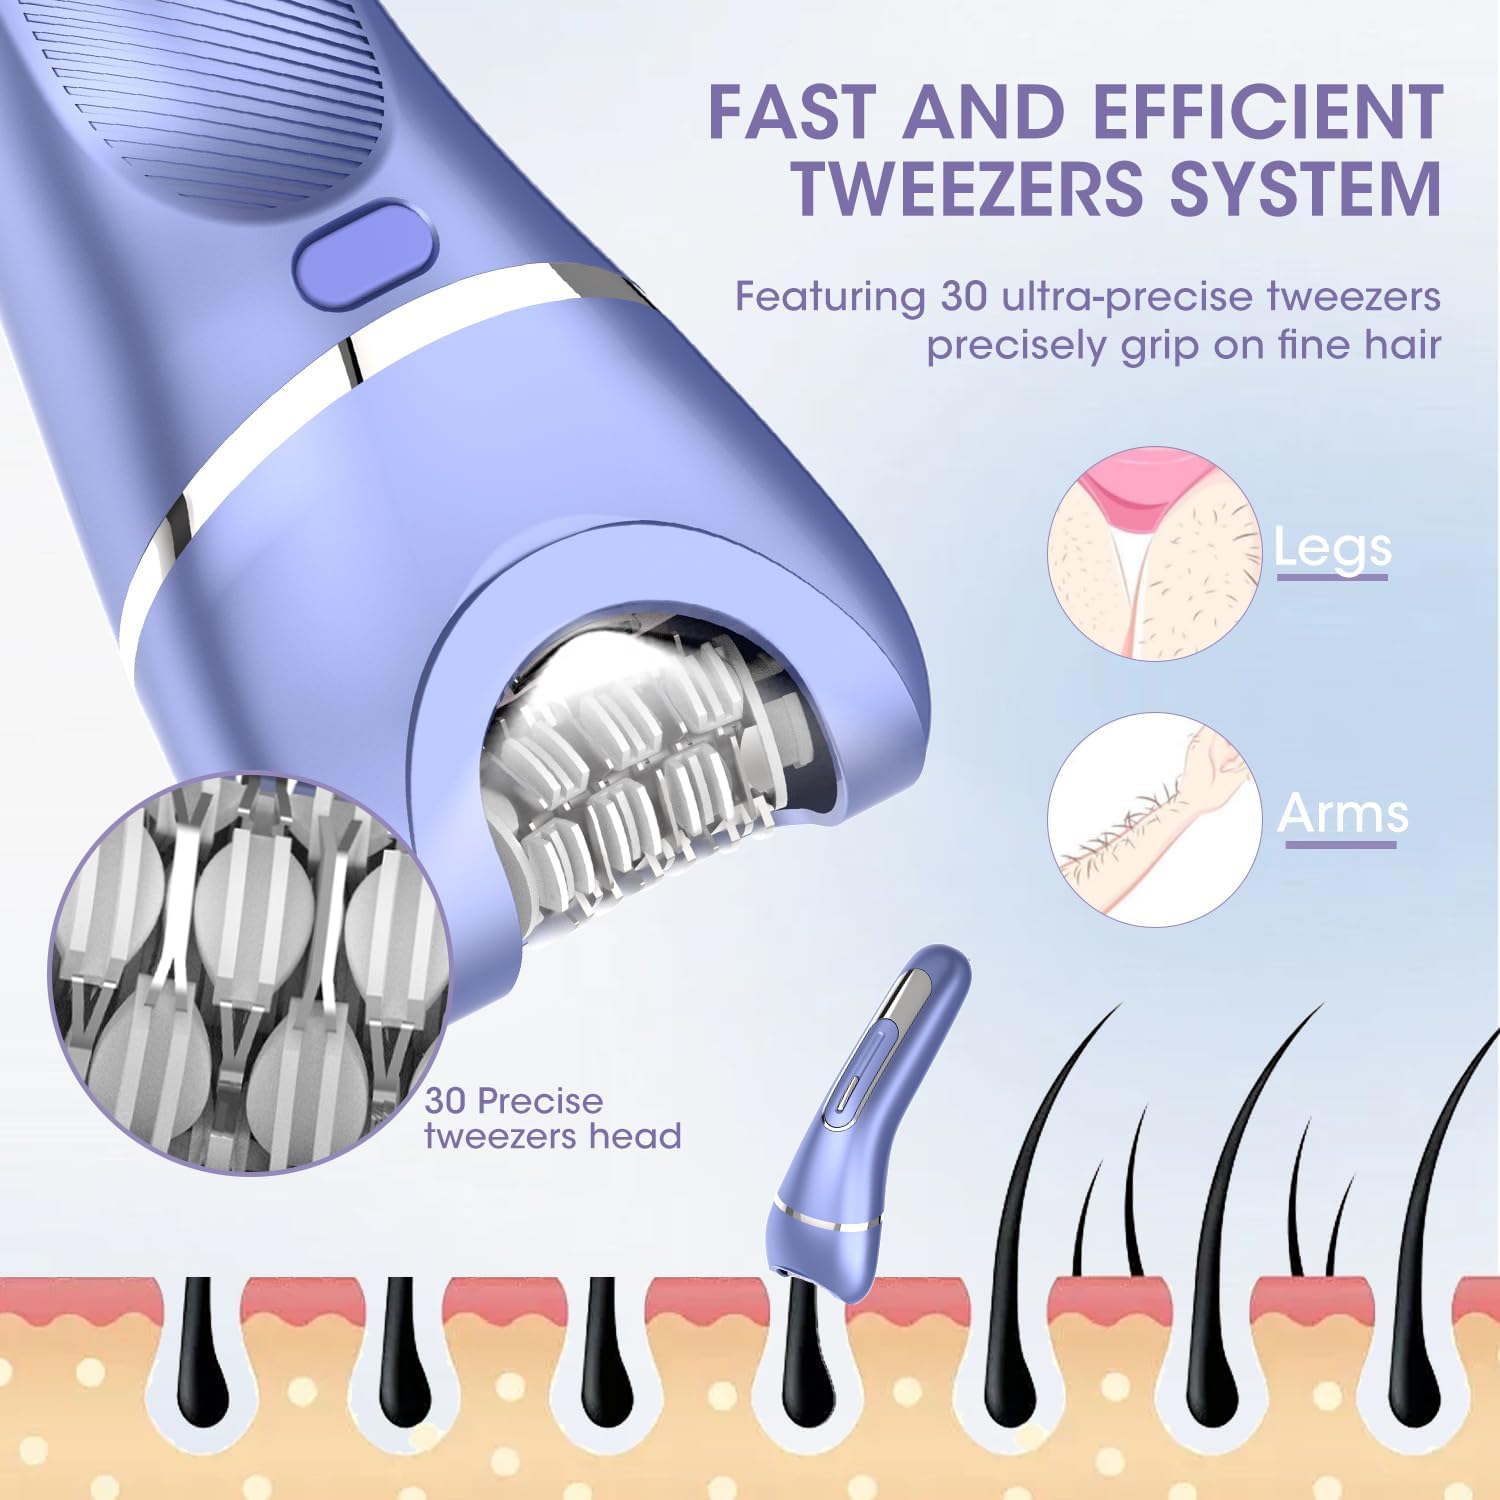
Image: A close-up view of the epilator head, highlighting the 30 precise tweezers designed for efficient hair removal from the root.

Image: A visual guide illustrating the recommended use of each attachment for different body areas, including the epilator head for arms and legs.
5.4 Using the Shaver Head
The shaver head is equipped with a 3-in-one high-efficiency and safety blade system, including a 3D floating foil blade, curved blade, and straight blade for a close and comfortable shave. Use for general body hair removal on legs, arms, and underarms.

Image: A detailed view of the shaver head, showing its internal structure with a 3D floating foil blade, curved blade, and straight blade for effective hair removal.

Image: An illustration detailing the different blade types within the shaver head: curved side blade for body, arms, and legs; foil middle blade for cutting short hair; and straight side blade for underarm and bikini areas.
5.5 Using the Bikini Trimmer Head
Attach the bikini trimmer head for precise trimming in sensitive areas. Move the trimmer gently over the desired area to achieve the preferred length.
5.6 Using the Facial Razor Head
The facial razor head is designed for delicate facial hair removal. Use it to trim hair on the lower forehead, cheeks, and around the lips. Hold the device at a slight angle and move it gently against the direction of hair growth.

Image: The facial trimmer head, illustrating its use for trimming hair in specific facial areas such as the V-area (upper lip), I-area (cheeks), and O-area (chin).
5.7 Using the Body Brush Head
The body brush head is suitable for exfoliating the skin, helping to prevent ingrown hairs and improve skin texture. Use with your favorite body wash in the shower for a refreshing cleanse.
5.8 Using the Facial Massager Head
Attach the facial massager head to gently massage your face, promoting relaxation and improving circulation. Use on clean skin.
5.9 Using the Foot Callus Remover Head
The foot callus remover head is designed to gently remove rough, dry skin from your feet. Use on dry skin for best results, moving the head over callused areas until smooth.
5.10 Wet and Dry Use (IPX7 Waterproof)
The device is IPX7 waterproof, allowing for both wet and dry operation. You can use it in the shower or bath for added convenience and comfort. This also facilitates easy cleaning.

Image: A collage demonstrating the IPX7 waterproof feature, showing the device being used for underarm hair removal in a dry setting and a collection of heads submerged in water, indicating suitability for wet use.

Image: The RESUXI device and its heads partially submerged in water, emphasizing its IPX7 waterproof rating for convenient cleaning.

Image: A woman enjoying a bath with the RESUXI device, illustrating its wet use capability and the convenience it offers for bathing routines.
6. Maintenance and Cleaning
Regular cleaning ensures optimal performance and hygiene. After each use, detach the head and use the provided cleaning brush to remove any trapped hairs. For waterproof heads, you can rinse them under running water. Ensure the device is completely dry before reattaching heads or storing.
Do not use abrasive cleaners or harsh chemicals on any part of the device.
7. Troubleshooting
- Device not turning on: Ensure the device is fully charged. Check if the travel lock is activated (unlock by holding the power button for 3 seconds).
- Reduced performance: Clean the attachment head thoroughly. Ensure the head is correctly attached.
- Skin irritation: Ensure your skin is clean and dry (or wet, depending on preference) before use. Use the appropriate speed setting. If irritation persists, discontinue use.
- Charging issues: Verify the USB cable is securely connected to both the device and the power source. Try a different USB port or adapter.
8. Specifications
| Feature | Specification |
|---|---|
| Model Name | 7-in-1 Hair Removal Kit |
| Item Model Number | 227 |
| Brand | RESUXI |
| Power Source | Battery Powered |
| Batteries | 1 AA battery required (included) |
| Charging Time | Approx. 1.5 hours |
| Running Time | Approx. 100 minutes |
| Waterproof Rating | IPX7 |
| Special Features | Cordless, Detachable Head, Fast Charging, Travel Lock, Waterproof, LCD Display, Built-in LED Light, 2 Adjustable Speeds |
| Product Dimensions | 8 x 2.5 x 0.1 inches |
| Item Weight | 12 ounces |
9. Warranty and Support
For warranty information and customer support, please refer to the product packaging or contact RESUXI customer service directly. You can also visit the official RESUXI store for more information and assistance.