
1. Introduction
This manual provides comprehensive instructions for the safe and efficient operation, setup, and maintenance of your QIXZOCV P1.86 Splicable LED Display Screen. Please read this manual thoroughly before using the product and retain it for future reference.
The QIXZOCV P1.86 LED Display is an 80-inch GOB LED wall designed for professional digital signage applications. It features an ultra-fine P1.86 pixel pitch for high-resolution visuals, a robust 'Glue On Board' (GOB) coating for durability, and a splicable, foldable design for portability and flexible installation. Content management is facilitated via WiFi, USB, or HDMI.
2. Safety Information
- Power Supply: Use only the specified power adapter. Ensure the power outlet matches the voltage requirements.
- Ventilation: Do not block ventilation openings. Ensure adequate airflow around the display to prevent overheating.
- Handling: The unit is heavy (approximately 94.8 lbs or 43 kg). Always use appropriate lifting techniques and, if necessary, team lift when moving the display, especially when removing it from the flight case.
- Environment: Avoid exposing the display to extreme temperatures, direct sunlight, high humidity, or dusty environments. While the GOB coating offers protection against moisture and dust, it is designed for indoor and protected outdoor event use, not continuous outdoor exposure.
- Cleaning: Disconnect power before cleaning. Use a soft, dry cloth. Do not use liquid cleaners or aerosol sprays.
- Repairs: Do not attempt to repair the display yourself. Refer all servicing to qualified personnel.
- Cables: Ensure all cables are securely connected and routed to prevent tripping hazards or accidental disconnections.
3. Package Contents
Verify that all items are present and in good condition upon unpacking.
- QIXZOCV P1.86 Splicable LED Display Screen (1 Panel)
- Robust Flight Case for transport
- Power Cable
- User Manual (this document)
- Accessories for assembly and connectivity (e.g., HDMI cable, USB cable, tools if required)
4. Product Overview
4.1 Key Features
- High-Definition Display: P1.86 pixel pitch with 344 x 1032 dots resolution, providing an 80-inch clear visual experience.
- GOB Technology: 'Glue On Board' coating for enhanced durability, protecting against dust, moisture, and impacts.
- Portable & Foldable Design: Floor-standing construction with included flight case for easy transport, quick setup, and disassembly.
- Seamless Splicing: Multiple screens can be combined to create larger display surfaces.
- Multiple Connectivity Options: Supports WiFi, USB, and HDMI inputs for content management.
- Powerful Control Functions: Timer function, screen sharing, and a user-friendly publishing system for content updates.
- Wide Viewing Angle: 178° full viewing angle ensures optimal visibility from various positions.
4.2 Component Identification
Refer to the images below for visual identification of the display's components and dimensions.

Image 4.2.1: Front, side, and rear views of the QIXZOCV P1.86 LED Display Screen, illustrating its dimensions (80-inch diagonal, 25.45in width, 80.61in height, 1.52in thickness) and highlighting the GOB (Glue On Board) process for moistureproof, waterproof, and shockproof protection.

Image 4.2.2: Illustration of the portable and foldable design of the QIXZOCV P1.86 LED Display. It shows the adjustable wheel height for convenient splicing, stable bottom support, and industrial wheels for mobility.
5. Setup Instructions
5.1 Unpacking and Placement
- Unpack: Carefully remove the LED display from its flight case. Due to its weight, a team lift is recommended.
- Positioning: Place the display on a stable, level surface. Ensure sufficient space for ventilation around the unit.
- Mobility: The display is equipped with industrial wheels. Ensure the wheels are properly adjusted and locked once the desired position is achieved.
5.2 Connecting Power
- Connect the provided power cable to the power input port on the display.
- Plug the other end of the power cable into a grounded electrical outlet.
- Ensure the power switch on the display (if present) is in the OFF position before connecting to power.
5.3 Input Connections (Plug and Play)
The display supports various input methods for content playback.

Image 5.3.1: The QIXZOCV P1.86 LED Display supports USB and HDMI inputs. Content can be played directly from a USB disk with automatic loop playback after startup. Wireless connectivity via WiFi is also available.
- USB Input: Insert a USB disk containing your media files into the USB port. The display will automatically detect and play content in a loop.
- HDMI Input: Connect an HDMI cable from your source device (e.g., laptop, media player) to the HDMI input port on the display. Select the HDMI input source via the display's control interface.
- WiFi Connectivity: For wireless content management and control, connect the display to a local Wi-Fi network. Refer to the "Operating Instructions" section for details on network setup.
5.4 Splicing Multiple Panels
For larger display areas, multiple QIXZOCV P1.86 panels can be seamlessly combined.
- Align the panels side-by-side, ensuring the adjustable wheels are at the correct height for a flush fit.
- Use the provided connection mechanisms (e.g., locking latches, alignment pins) to secure the panels together.
- Connect the data and power cables between the spliced panels as per the system diagram (not provided in this manual, refer to supplementary documentation if available).
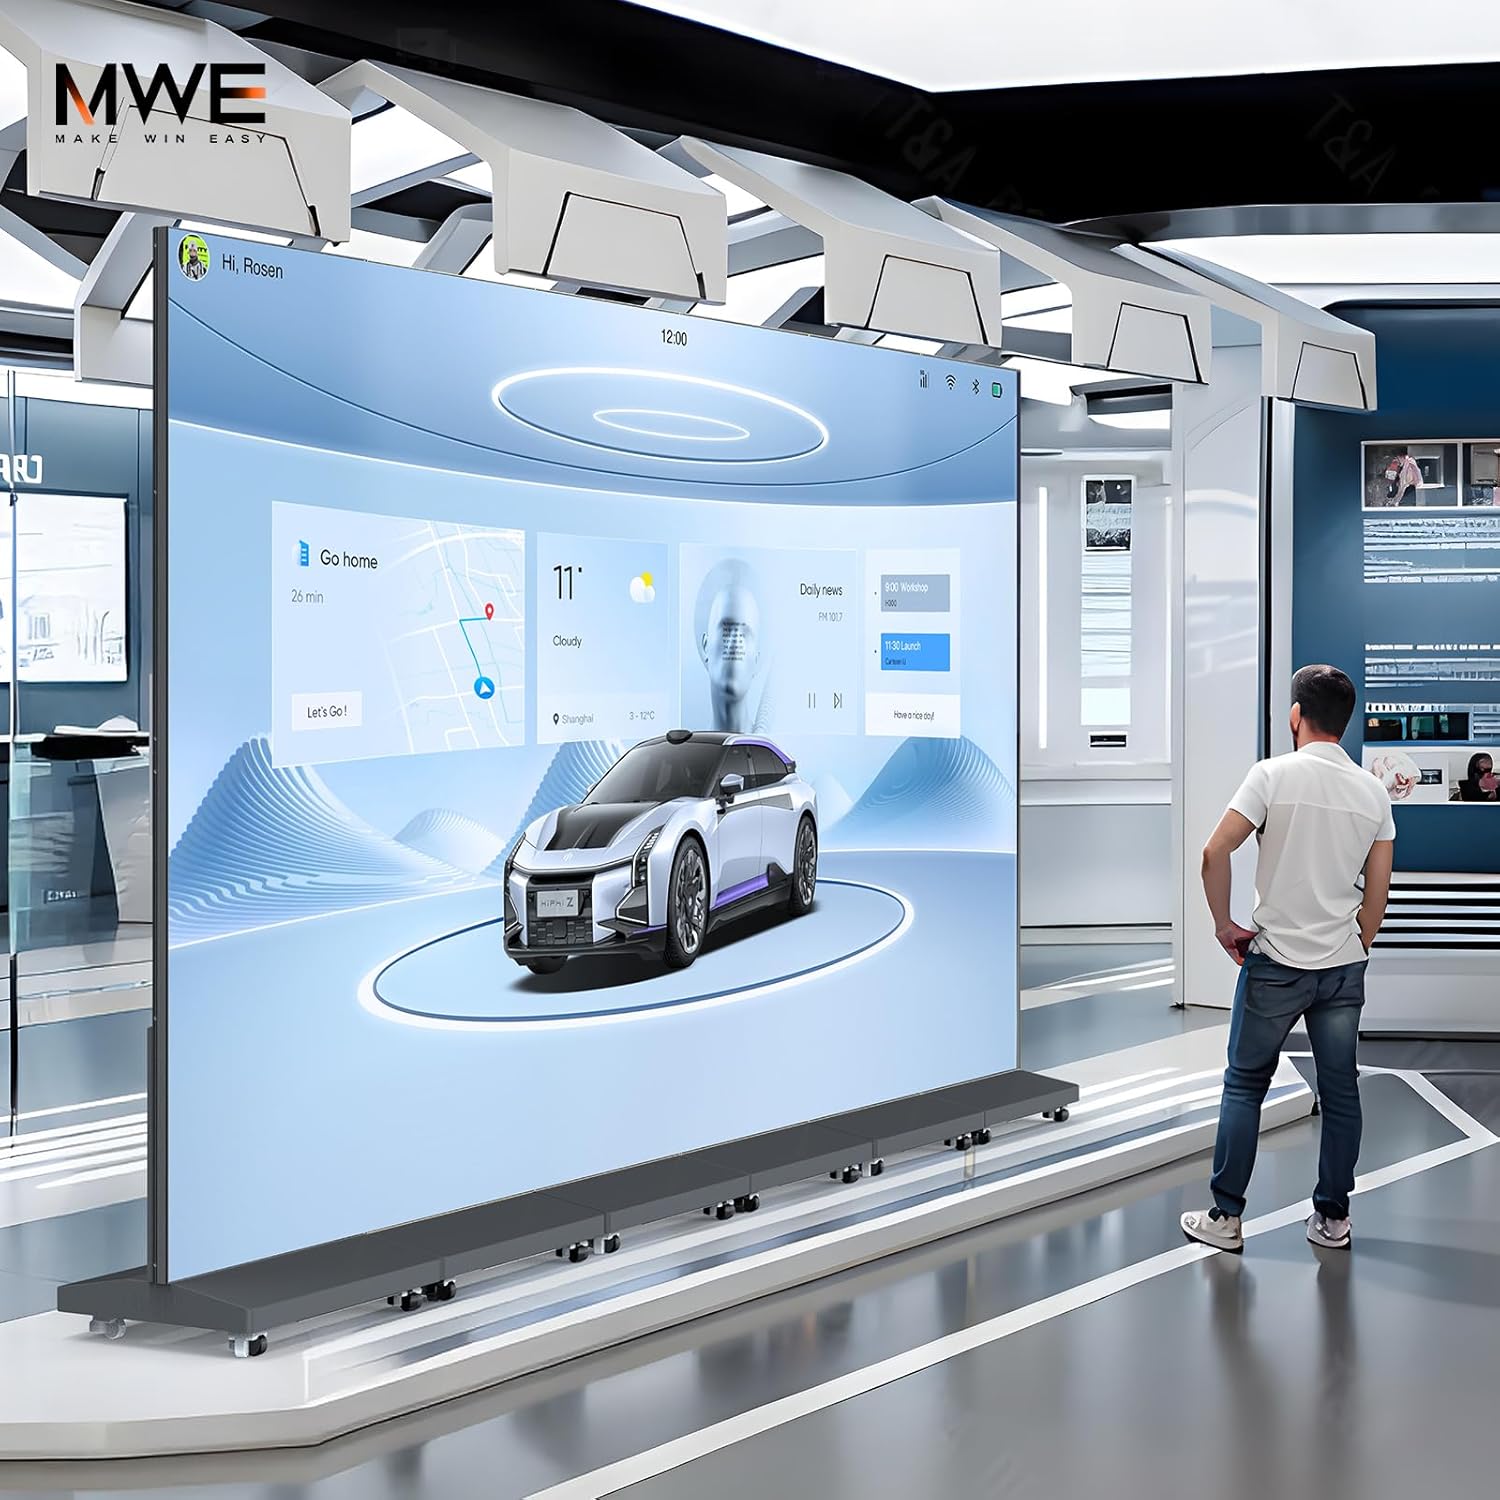
Image 5.4.1: An example of multiple QIXZOCV P1.86 LED Display panels seamlessly spliced together to form a larger video wall, demonstrating its scalability for various event and advertising needs.
6. Operating Instructions
6.1 Powering On/Off
- Power On: Flip the main power switch to the ON position. The display will initiate its startup sequence.
- Power Off: Flip the main power switch to the OFF position. Allow the display to shut down completely before disconnecting power.
6.2 Content Management System
The QIXZOCV P1.86 LED Display utilizes a user-friendly publishing system for content management.
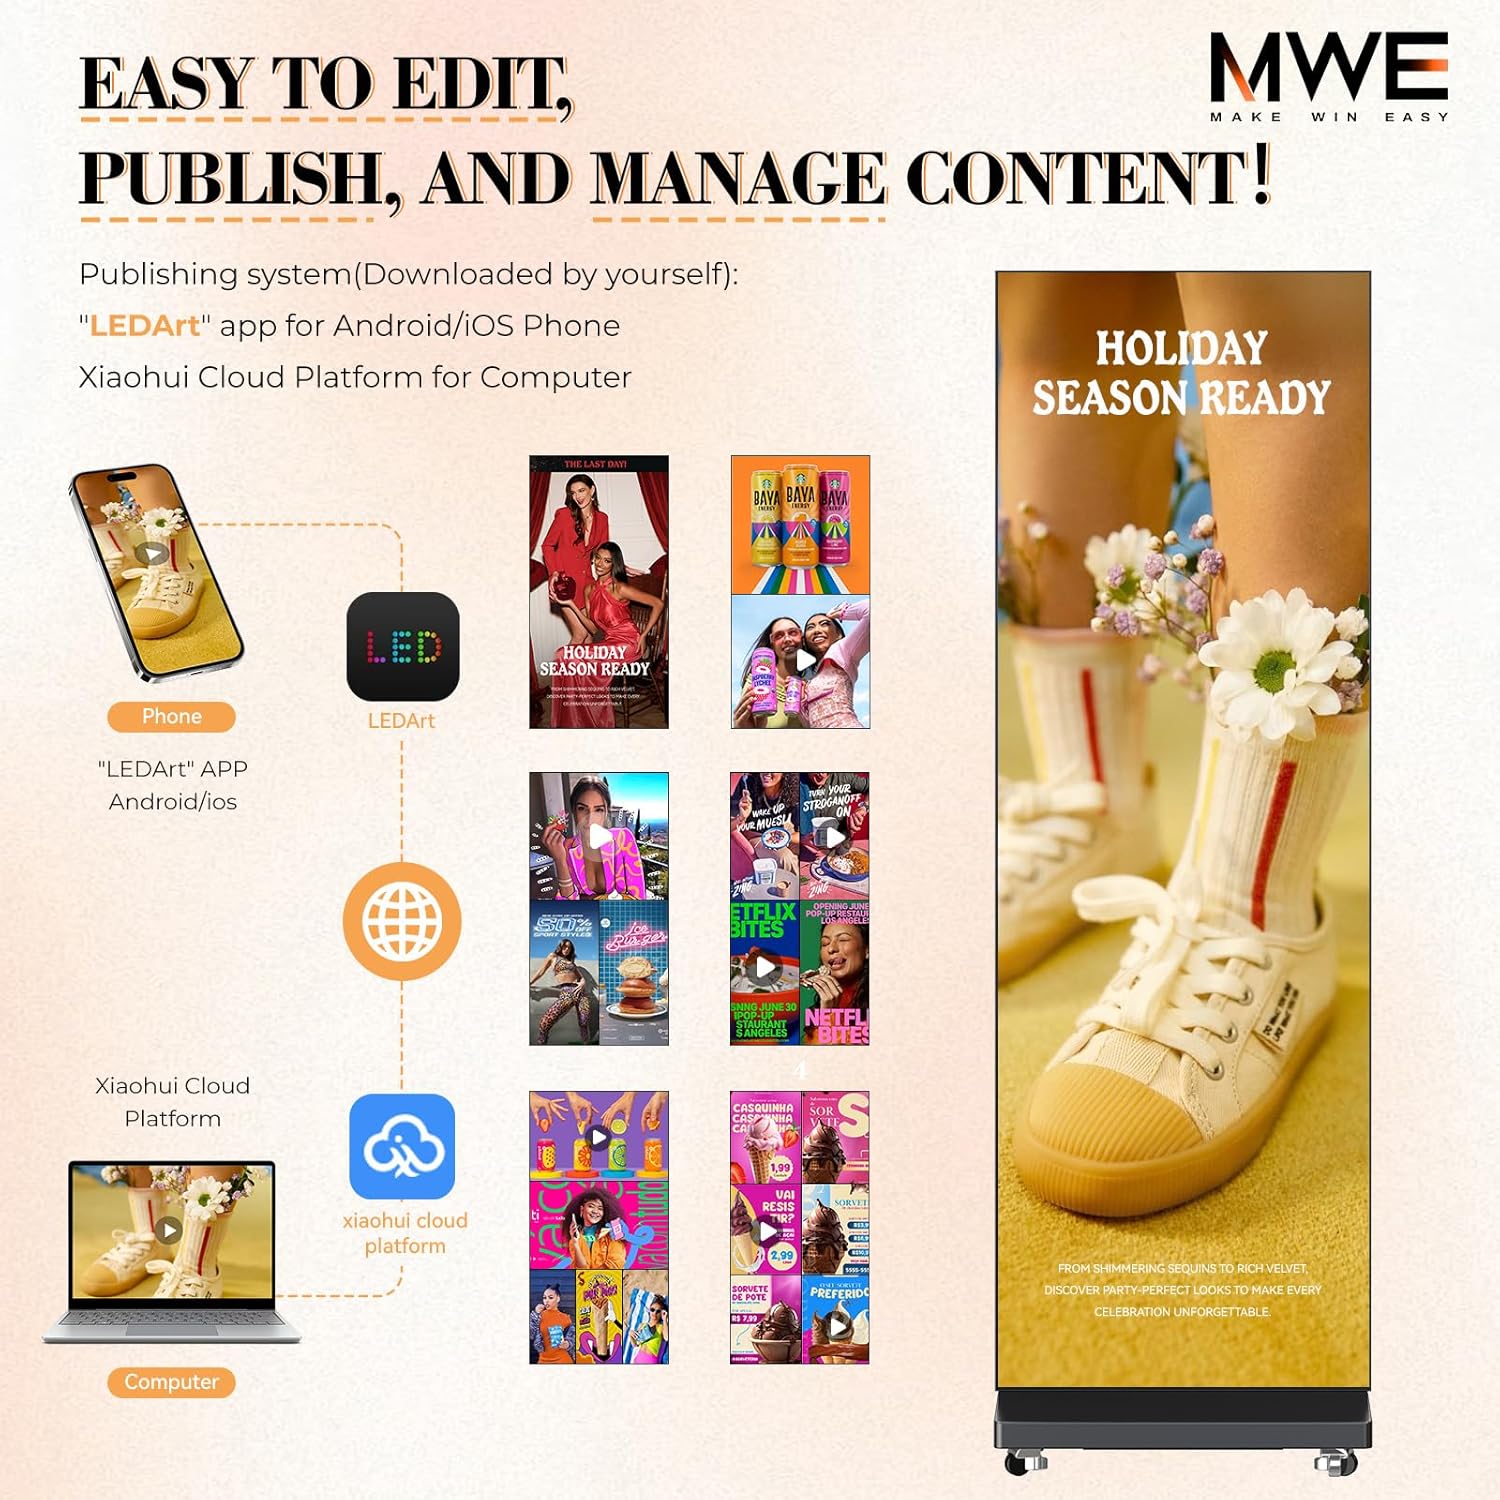
Image 6.2.1: Overview of the content management system for the QIXZOCV P1.86 LED Display. Content can be edited, published, and managed using the "LEDArt" app for Android/iOS phones or the Xiaohui Cloud Platform for computers.
- LEDArt App (Android/iOS): Download the "LEDArt" application from your device's app store. Connect your phone to the display's WiFi network (or directly via USB if supported by the app) to upload and manage content.
- Xiaohui Cloud Platform (Computer): Access the Xiaohui Cloud Platform via a web browser on your computer. Connect your computer to the display's network (Ethernet or WiFi) to utilize the platform for advanced content scheduling and management.
- USB Playback: As described in the setup section, simply insert a USB drive with media files for automatic loop playback.
6.3 Split Screen Playback
The display supports intelligent split-screen functionality, allowing for the simultaneous playback of multiple images and videos in customizable layouts.

Image 6.3.1: The QIXZOCV P1.86 LED Display demonstrating intelligent split-screen playback, showing various customizable layouts for displaying multiple images and videos simultaneously.
- Access the split-screen settings through the LEDArt app or Xiaohui Cloud Platform.
- Select a desired layout or create a custom one.
- Assign different media files to each section of the split screen.
6.4 Timer Function
Utilize the timer function to automatically power the display on and off at scheduled times, conserving energy.
- Configure schedules via the LEDArt app or Xiaohui Cloud Platform.
- Set specific power-on and power-off times for daily or weekly operation.
7. Maintenance
7.1 Cleaning the Display
- Always disconnect the power cable before cleaning.
- Use a soft, lint-free, dry cloth to gently wipe the screen surface.
- For stubborn marks, lightly dampen the cloth with water (do not spray directly onto the screen) and wipe carefully. Avoid using harsh chemicals, alcohol, or abrasive cleaners.
- Clean the exterior casing with a dry or slightly damp cloth.
7.2 Storage
- When not in use, store the display in its robust flight case to protect it from physical damage, dust, and moisture.
- Store in a cool, dry environment, away from direct sunlight and extreme temperatures.
7.3 Software Updates
- Periodically check for software or firmware updates for the LEDArt app and Xiaohui Cloud Platform to ensure optimal performance and access to new features.
- Follow the instructions provided by the software for safe updating procedures.
8. Troubleshooting
| Problem | Possible Cause | Solution |
|---|---|---|
| Display does not power on. | No power, loose power cable, power switch off. |
|
| No image displayed. | Incorrect input source, loose video cable, no content on USB. |
|
| Image is distorted or flickering. | Loose connection, incompatible resolution, faulty cable. |
|
| Cannot connect to WiFi. | Incorrect password, out of range, network issue. |
|
| Content not updating via app/platform. | Network connectivity issues, incorrect publishing settings. |
|
9. Specifications
| Feature | Detail |
|---|---|
| Brand | QIXZOCV |
| Model Number | MWE-ES18BFS01 |
| Screen Size | 80 Inches |
| Pixel Pitch | P1.86 mm |
| Resolution | 344 x 1032 Pixels (for single panel) |
| Max Display Resolution | 1920 x 1080 Pixels (FHD 1080p, likely for scaled content or multiple panels) |
| Aspect Ratio | 32:9 |
| Refresh Rate | 60 Hz |
| Response Time | 5 milliseconds |
| Display Type | LED (GOB Technology) |
| Connectivity Technology | Ethernet, HDMI, Wi-Fi |
| Hardware Connectivity | HDMI, USB (2 total USB ports) |
| Product Dimensions (D x W x H) | 65 x 90 x 110 cm (25.6 x 35.4 x 43.3 inches) |
| Item Weight | 94.8 Pounds (approx. 43 kg) |
| Battery | 1 C battery - included |
10. Warranty and Support
10.1 Manufacturer's Warranty
The QIXZOCV P1.86 Splicable LED Display Screen comes with a 3-year manufacturer's warranty. This warranty covers defects in materials and workmanship under normal use. Please retain your proof of purchase for warranty claims.
Additionally, a 30-day refund/replacement policy may apply as per the retailer's terms of sale.
10.2 Customer Support
For technical assistance, troubleshooting beyond this manual, or warranty inquiries, please contact QIXZOCV customer support.
- Contact Information: Refer to the contact details provided with your product packaging or visit the official QIXZOCV website.
- When contacting support, please have your model number (MWE-ES18BFS01) and purchase date ready.
Note: Availability of spare parts information is currently unavailable. Software updates are not guaranteed beyond a certain period; please check the manufacturer's website for the latest information.